
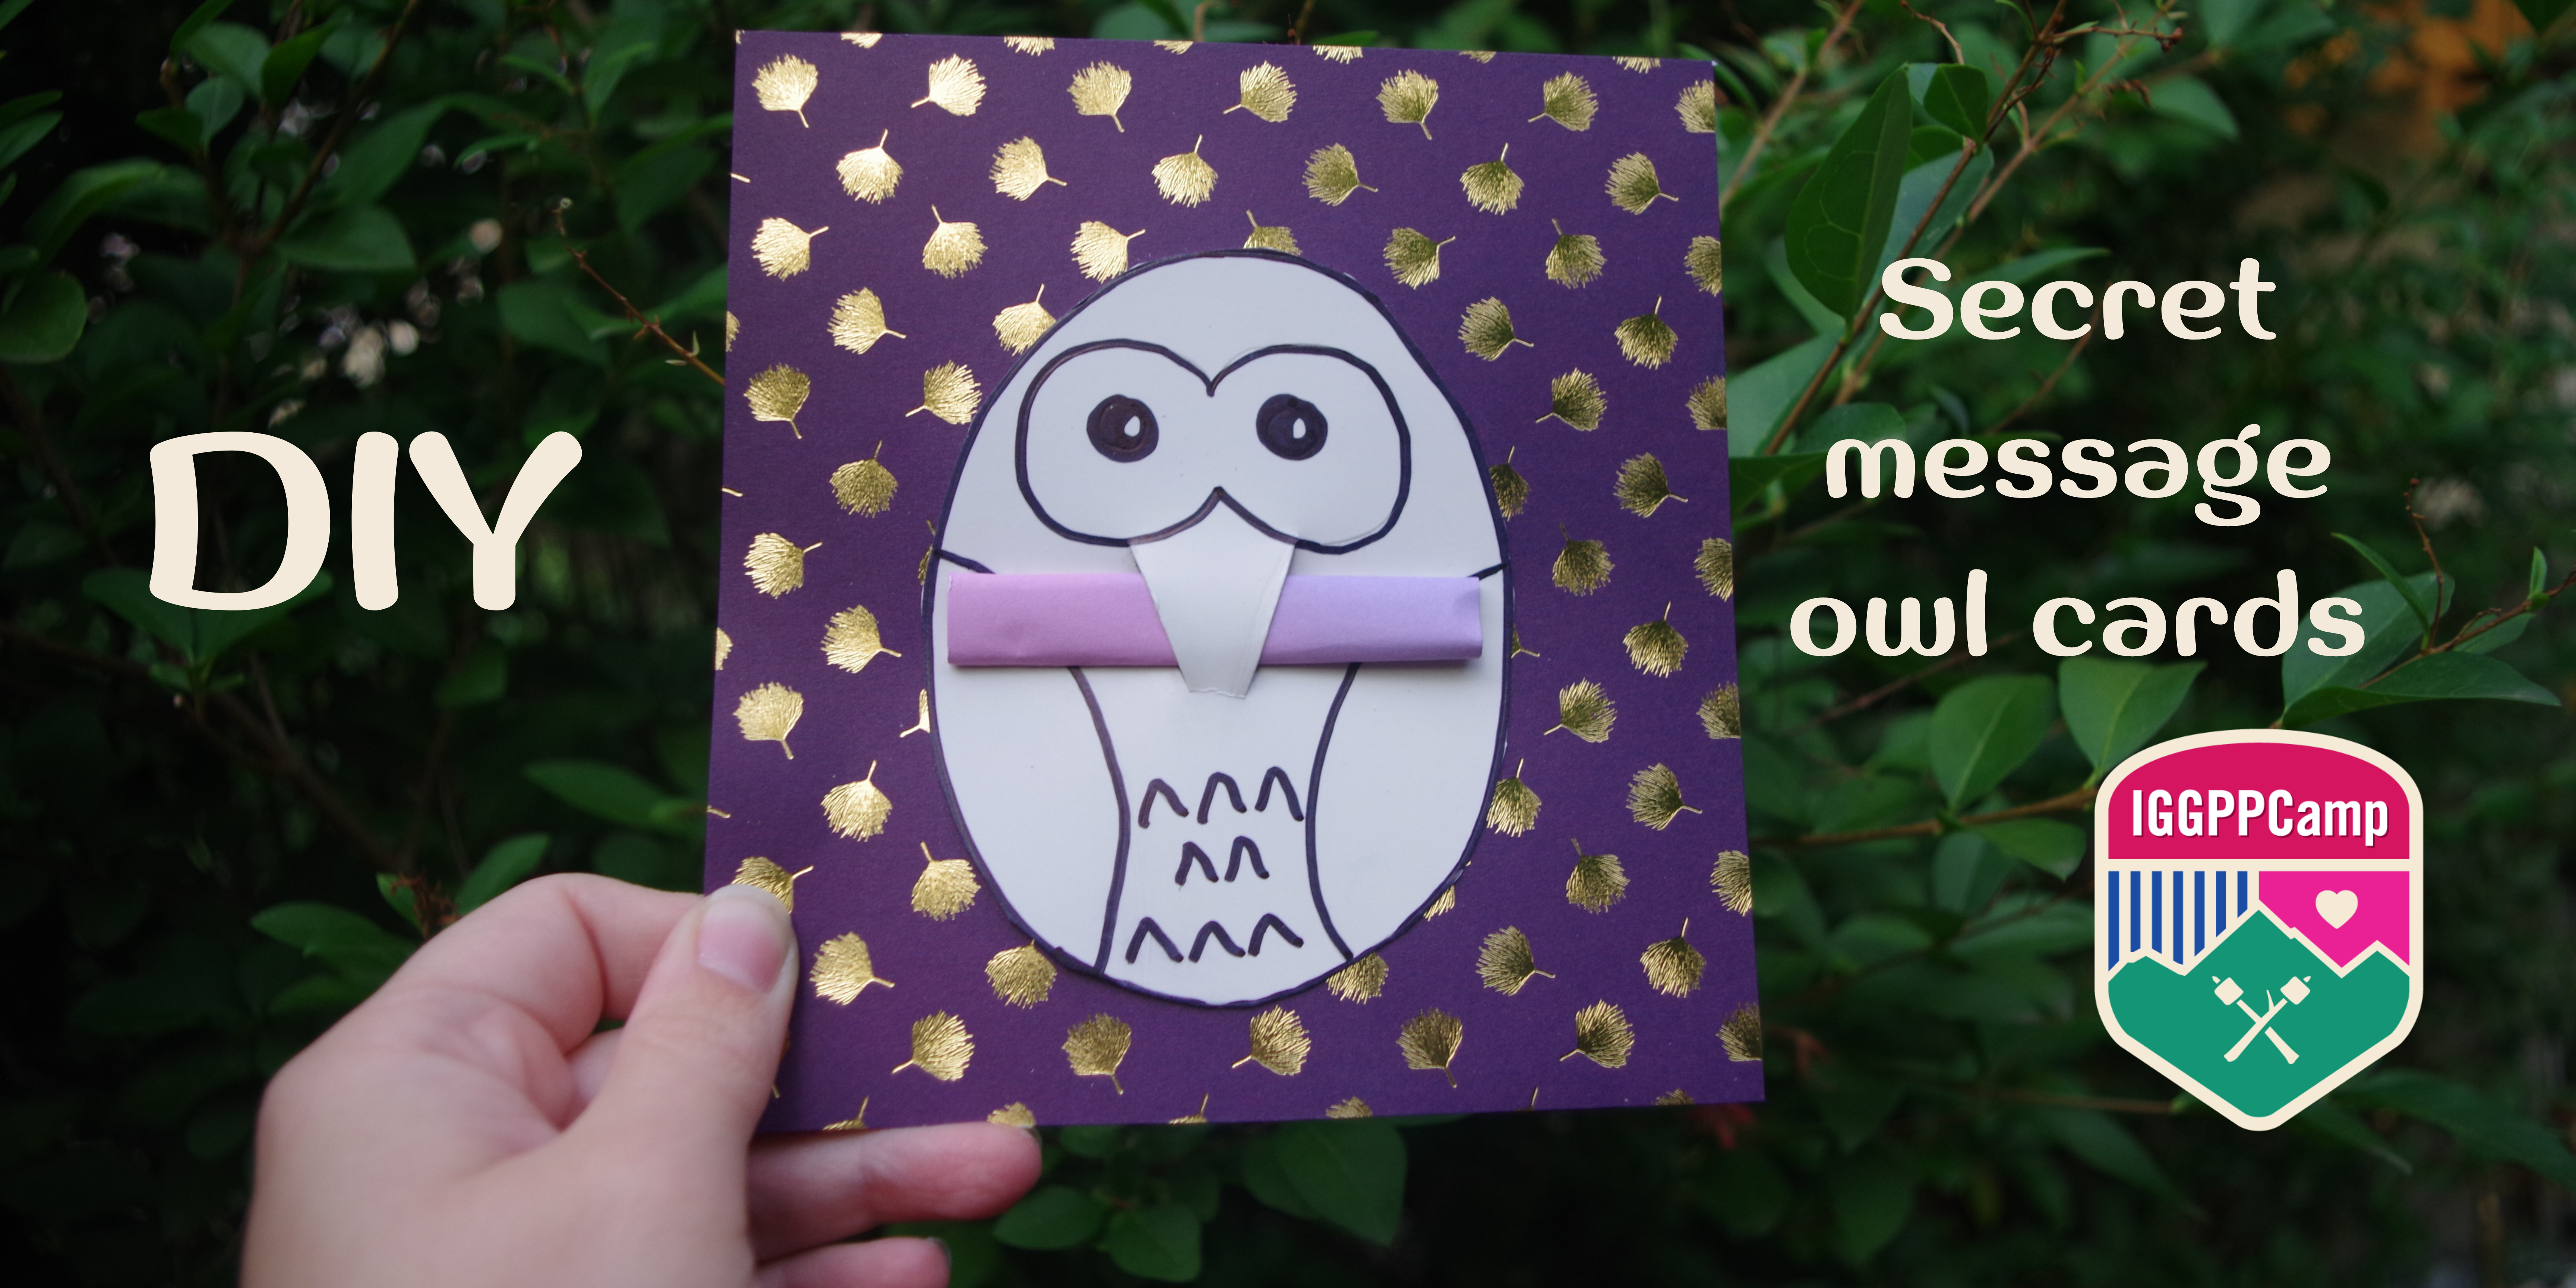
Let’s create a card in the shape of an owl which will carry your messages secretly in her beak. How cute, right? This Do It Yourself is very easy. I’ll only be showing you one way to create this card… Feel free to get super creative starting from here!
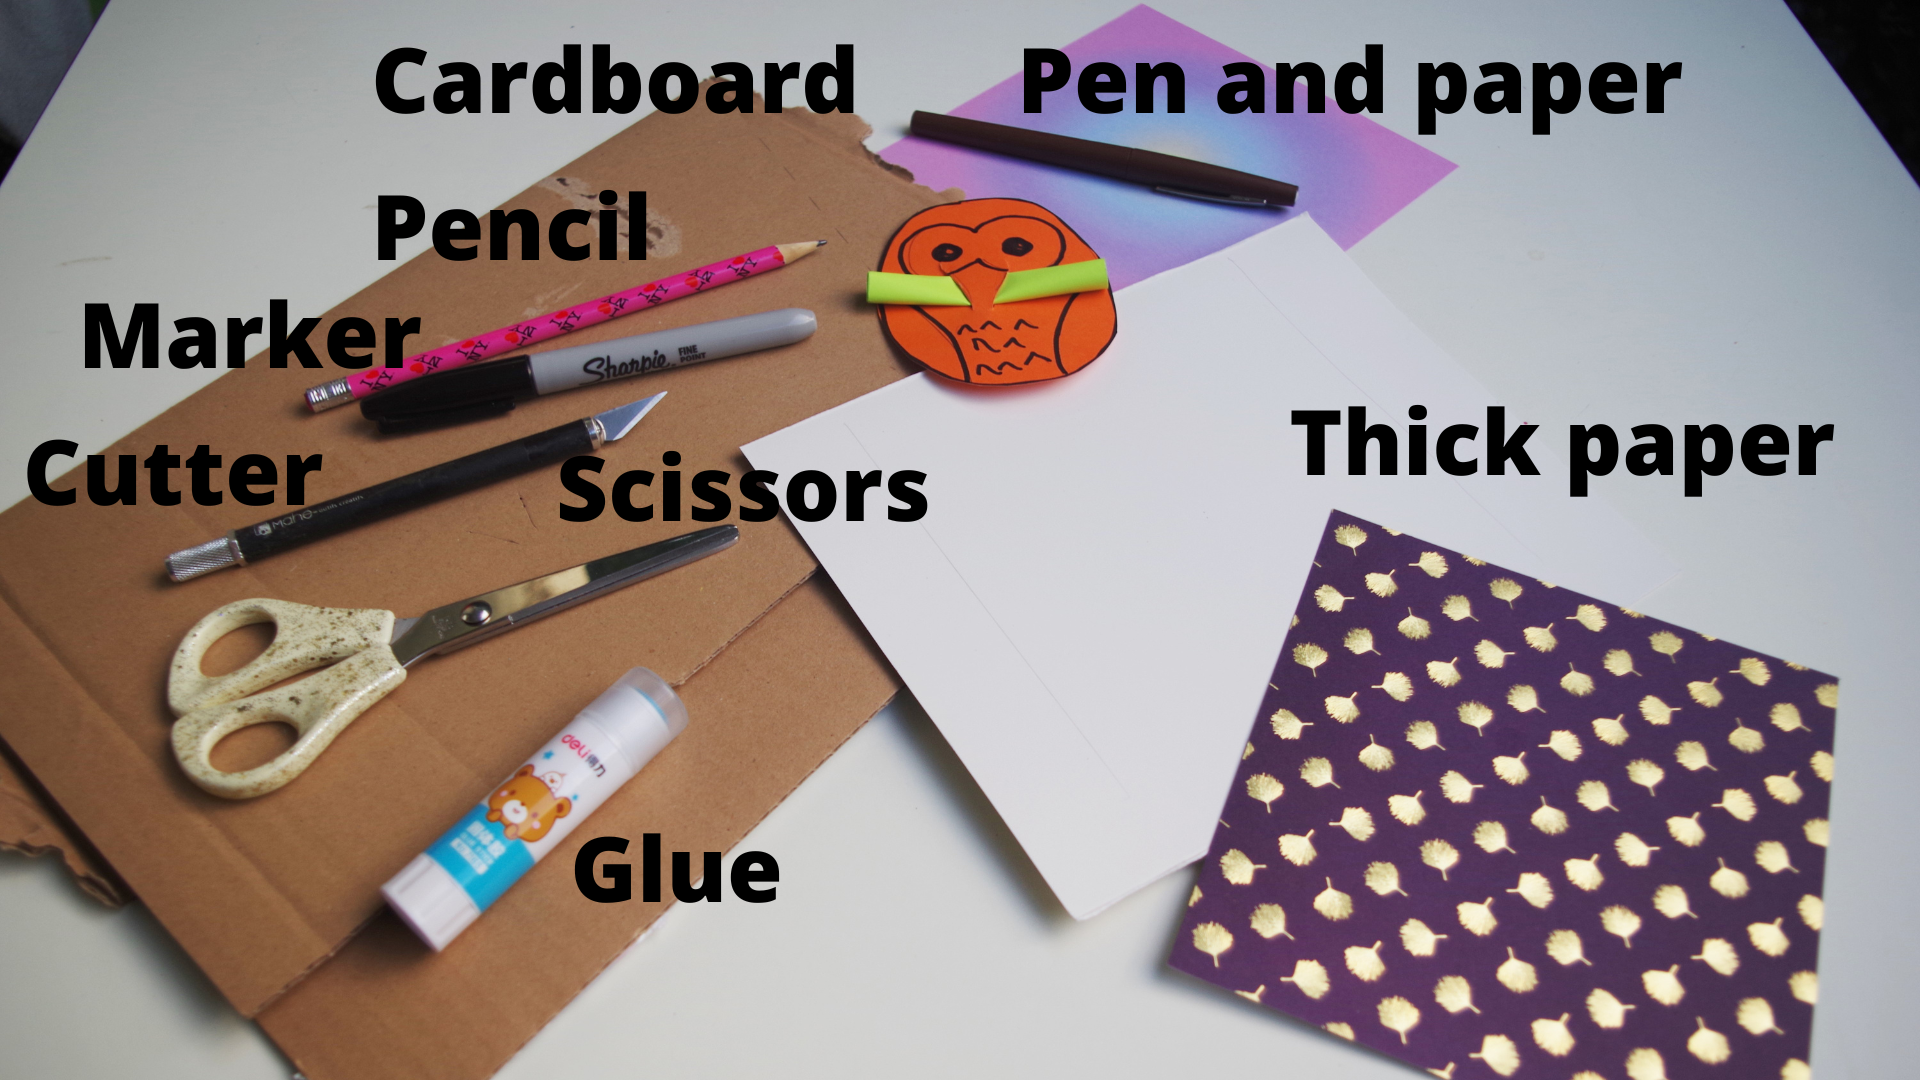
Supplies:
- at least 1 sheet of thick paper (white or colored)
- a pencil Black or dark felt pen
- Scissors
- Cutter (optional but recommended) and a piece of cardboard leftover to protect your table
- Paper and pen to write a little note
- Optional : printer (if needed, but the design is simple to draw)
- a pencil
- glue
- a post-it
- colorful markers/coloring pencils
Custom Cards: Secret Message Owl Instructions:
The first step will either be to print the model or to draw it in your own way on paper (not too thin if possible). Here is the link to the model but I suggest to give a try to the drawing because it’s very easy. I will show you!
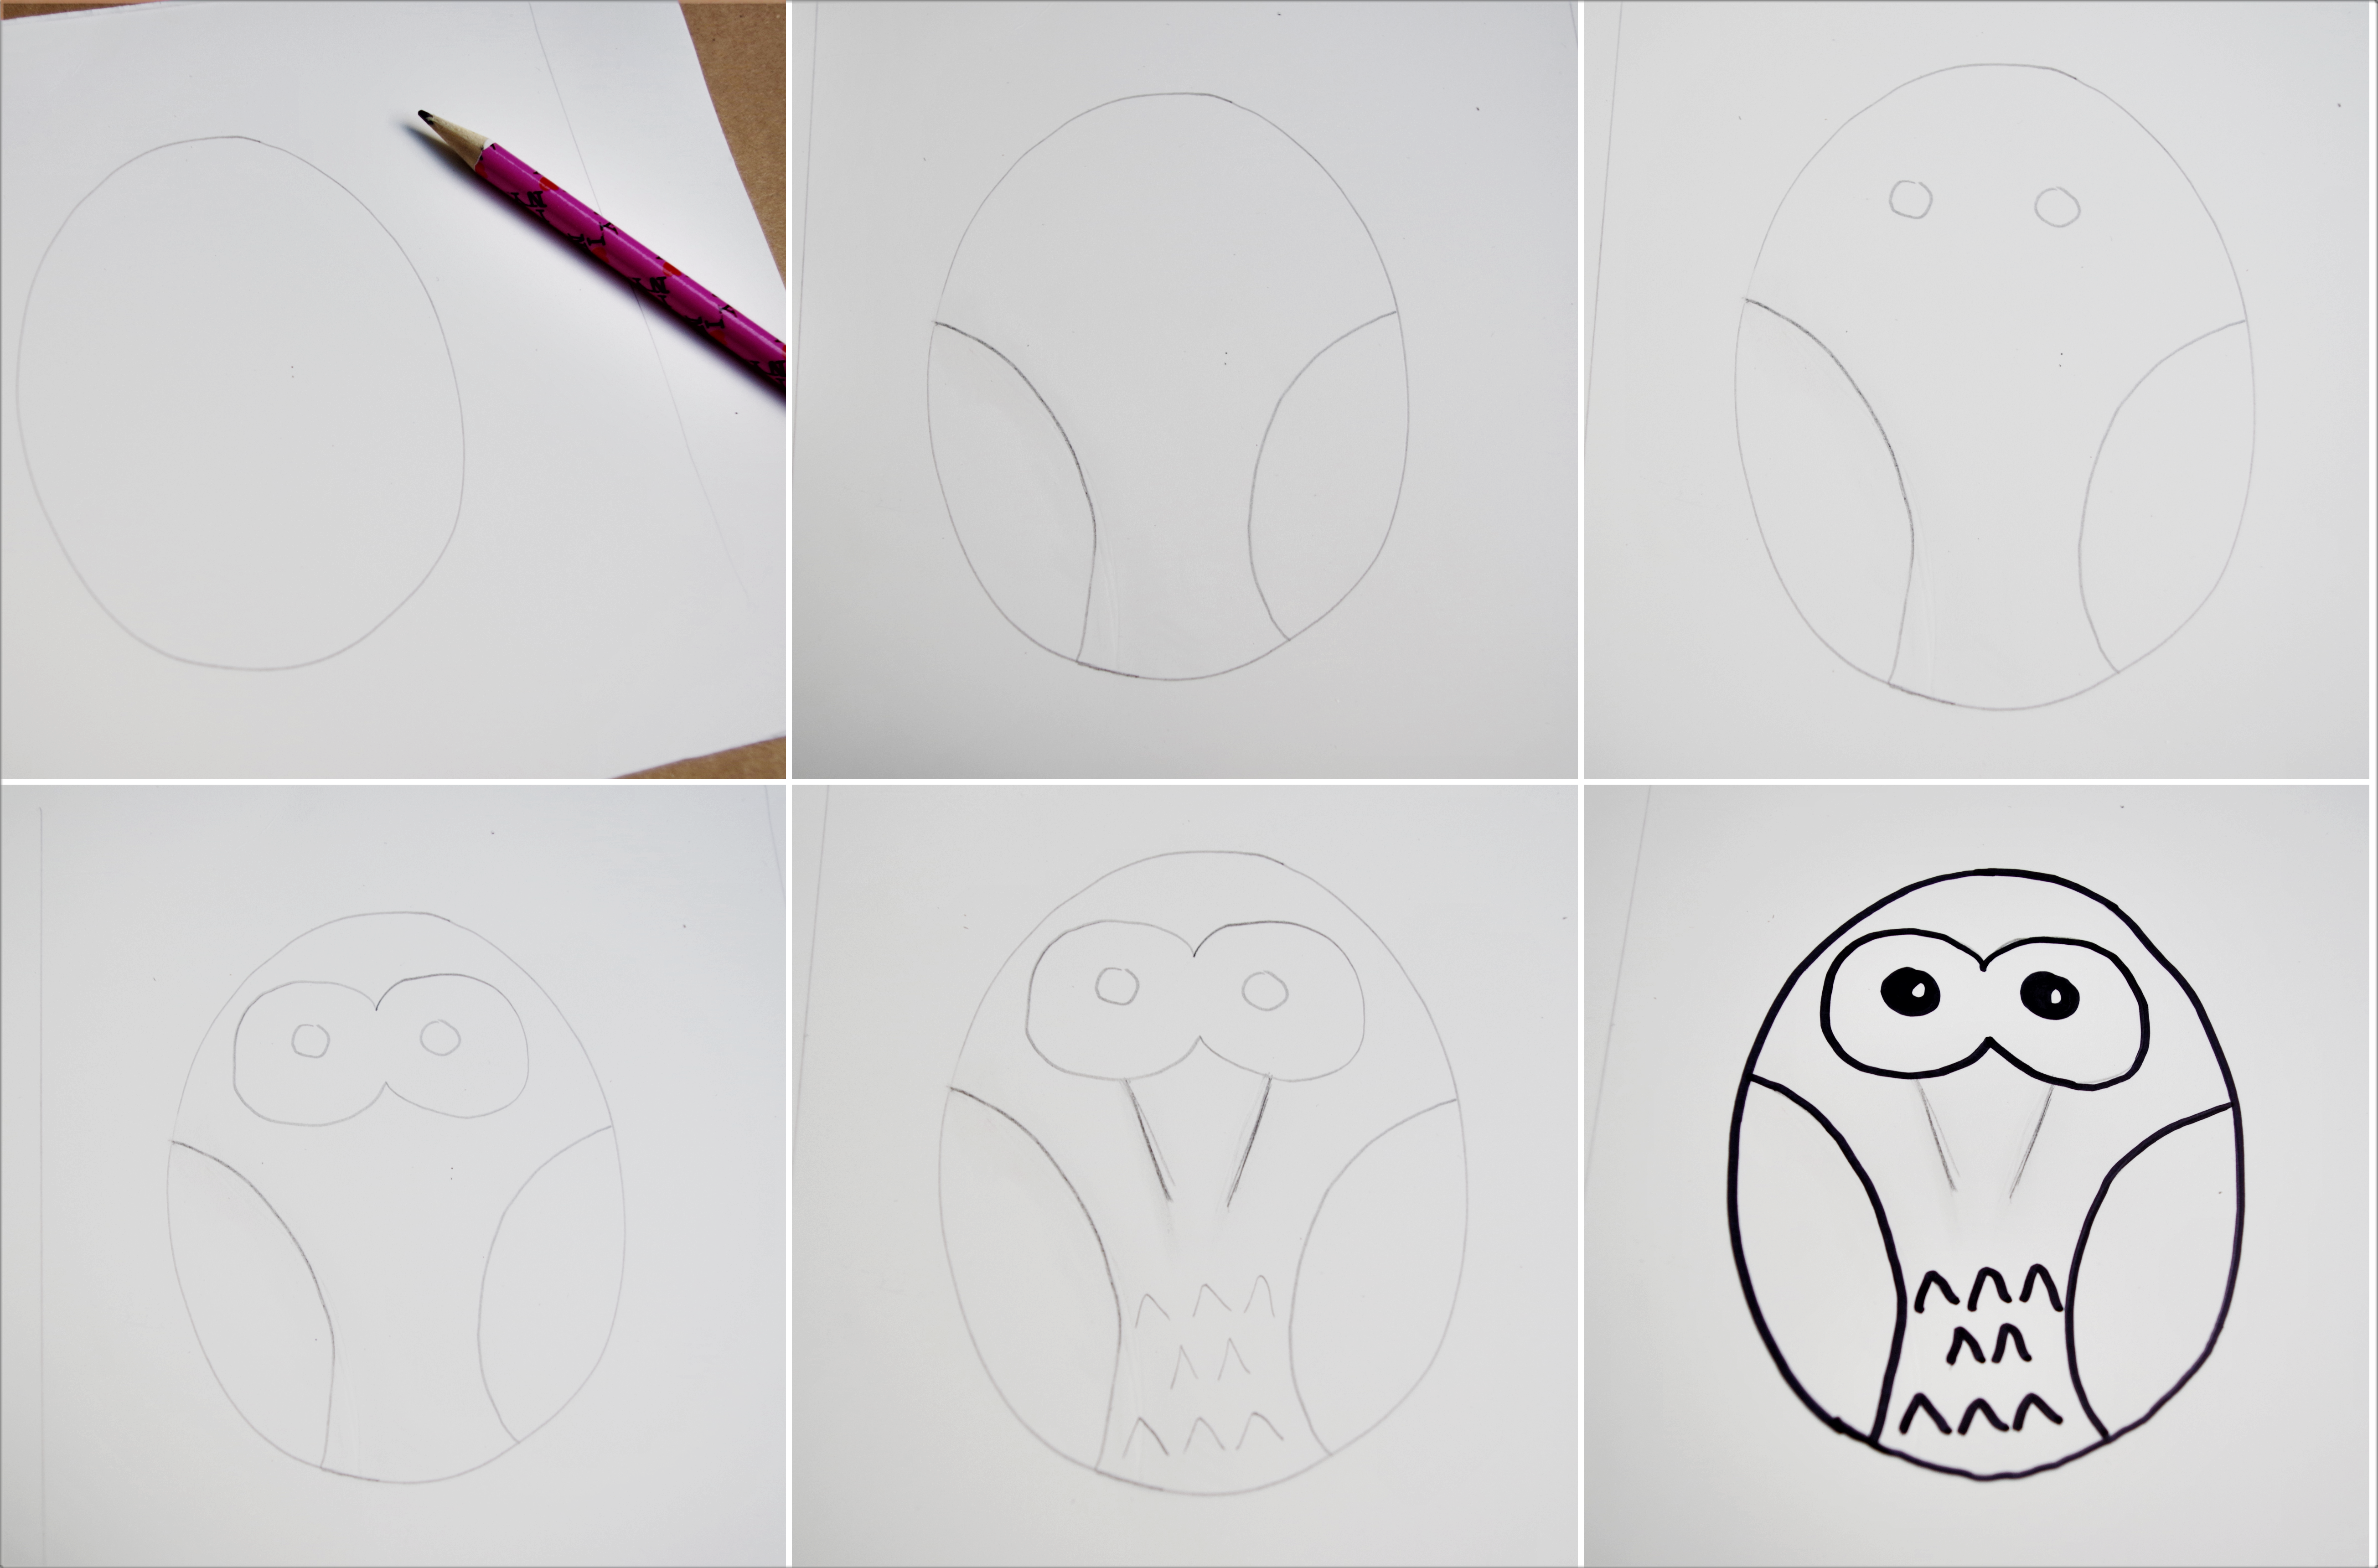
Start the drawing with the pencil. I suggest to draw the shape of an egg: it doesn’t have to be regular or even symmetrical, but you can use stencils to help you if you’re not sure how to draw free handed.
Then you will draw the wings as some almond shapes, then two round eyes. To draw the mask, you can grow two bigger round shapes around the eyes and erase where they meet.
You will draw two lines for the beak that need to be at least 1 cm each, and they mustn’t join at the tip of the beak. You must leave room between them because those will be the slits where the messages will be slid.
Now is the time to get creative! Decorate your owl with feathers, colors, glitter, anything you want. Just don’t forget that you’ll have to cut the slits, so don’t put anything on them.
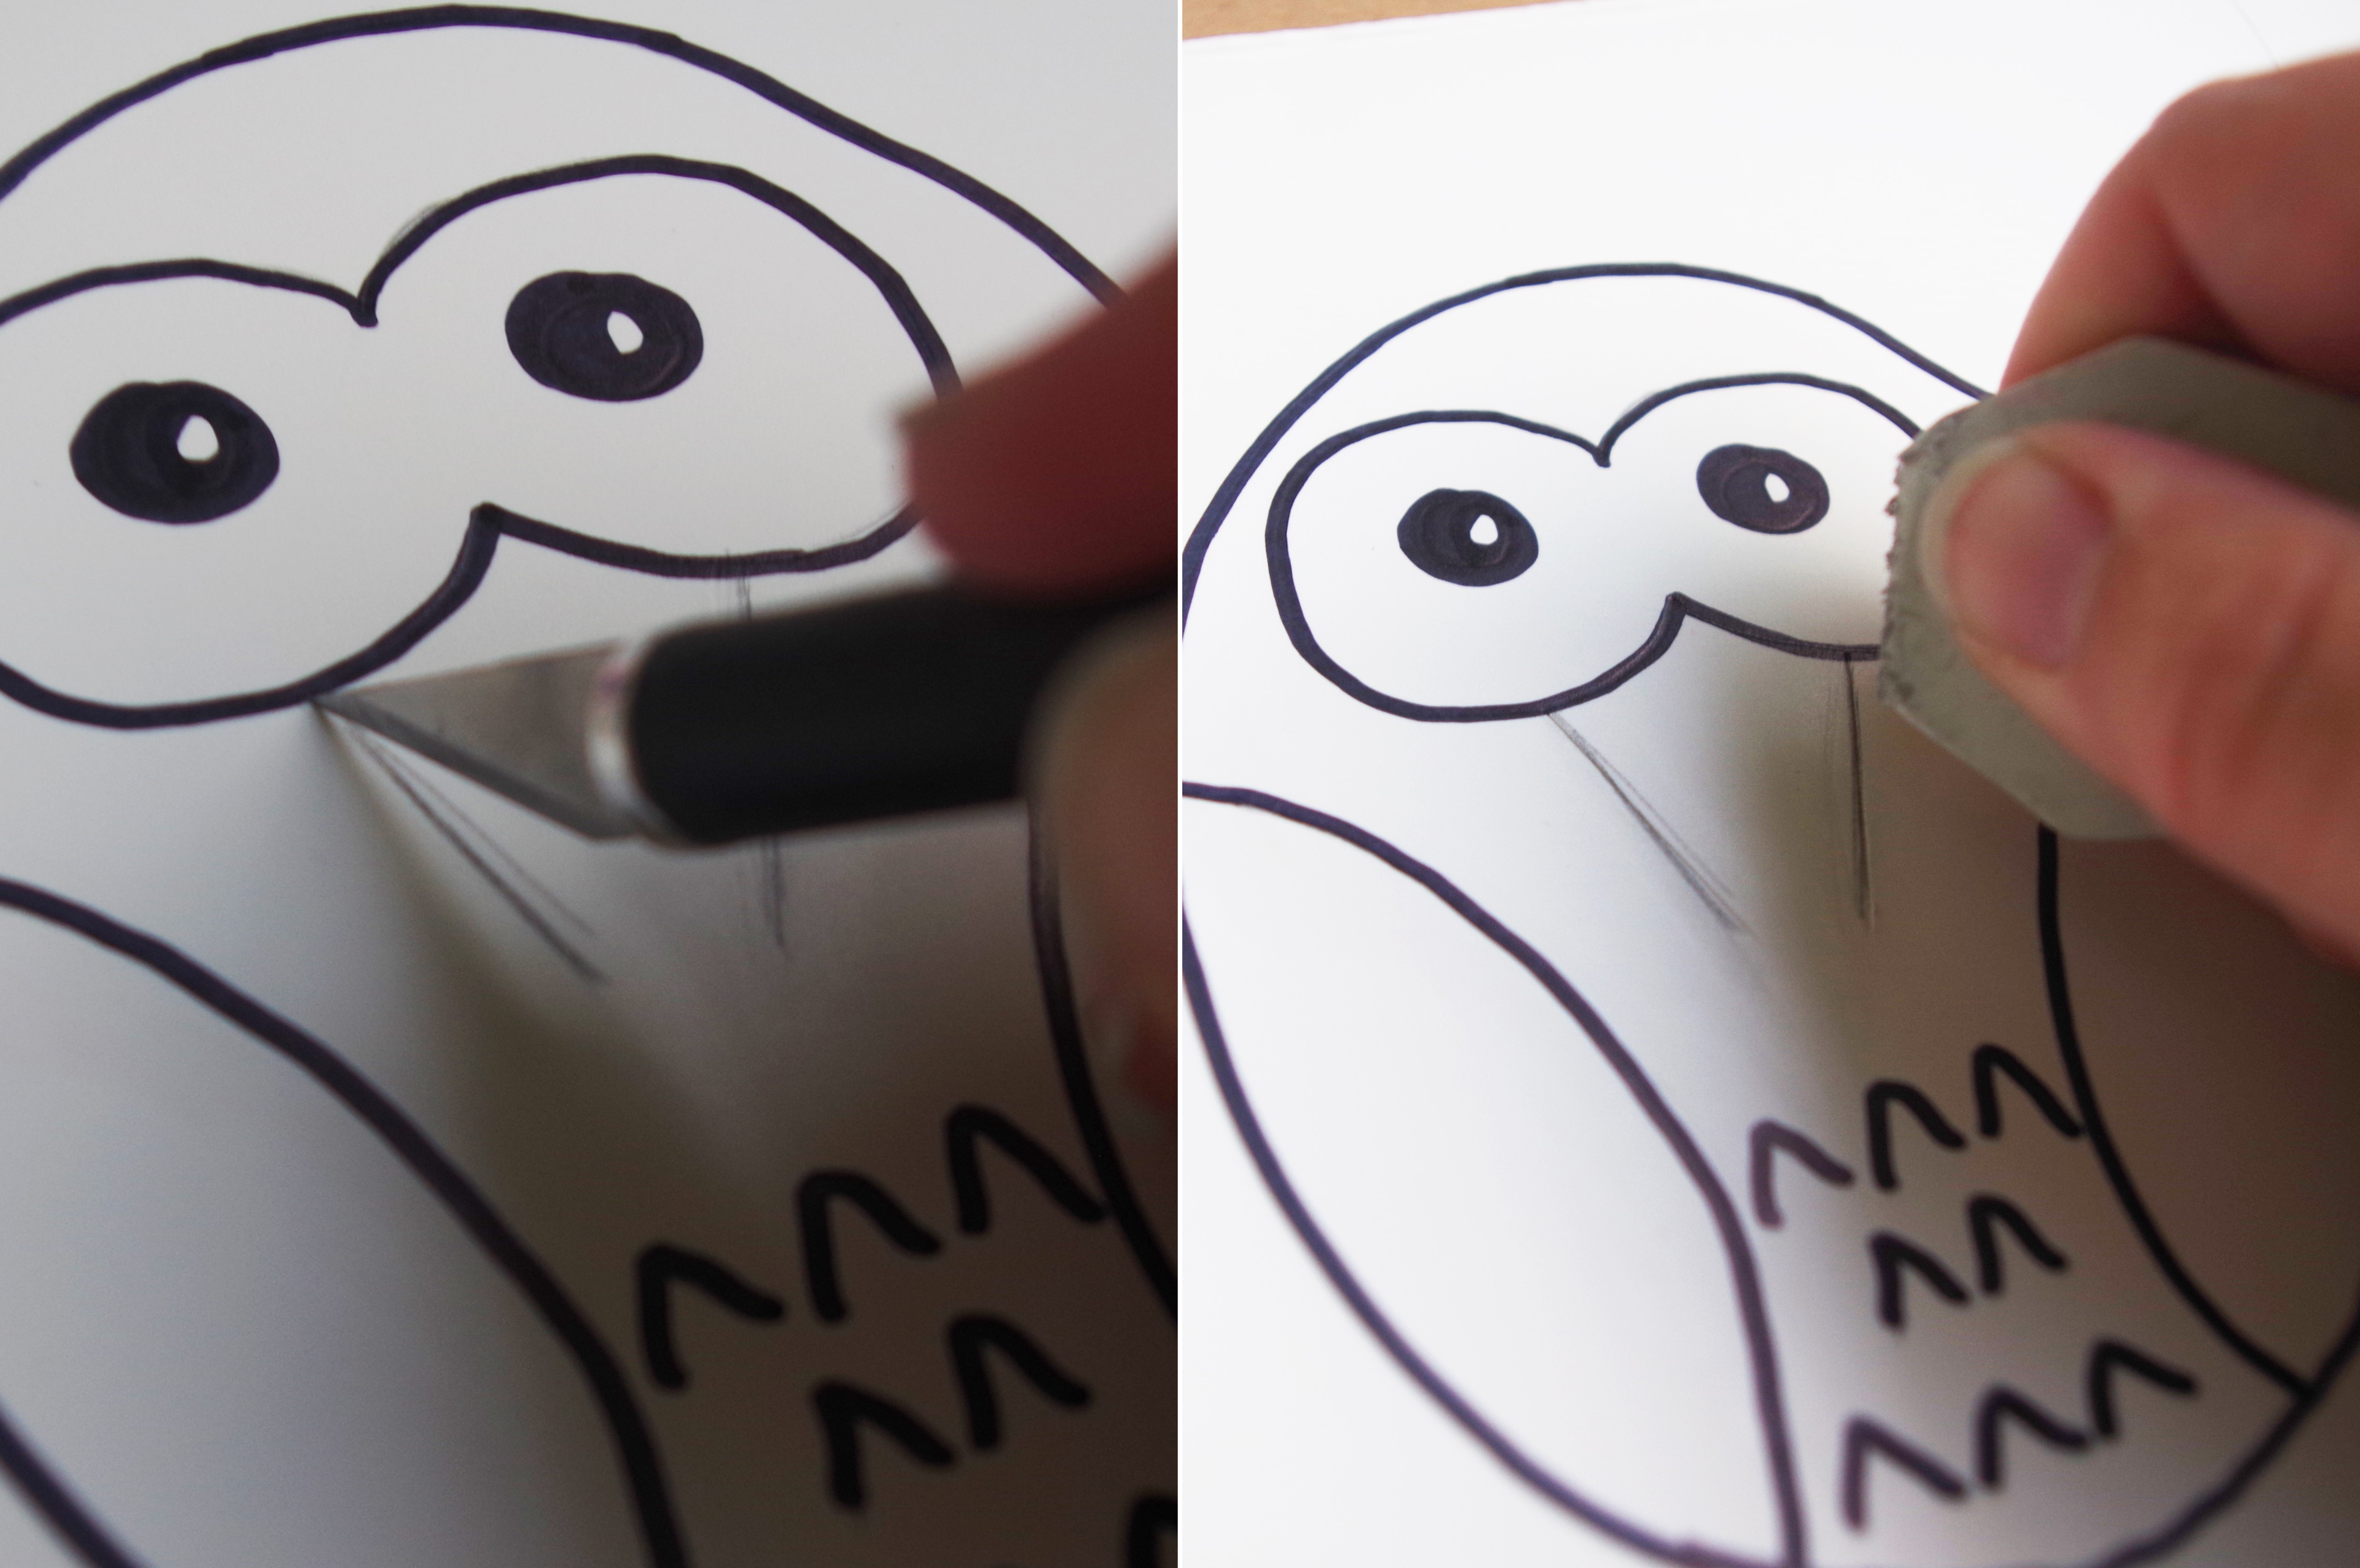
Once the decoration is done, place your paper on a large piece of cardboard, large enough so you can use a cutter and don’t ruin your table. Carefully cut the slits and make sure they’re long enough so you will be able to slide the message in the beak, and that the tip is large enough to not tear out while doing so. Then don’t forget to erase the pencil marks!
You can stop here and just use the original paper as a card… Or you can cut the owl and use it by itself / glued on a card.
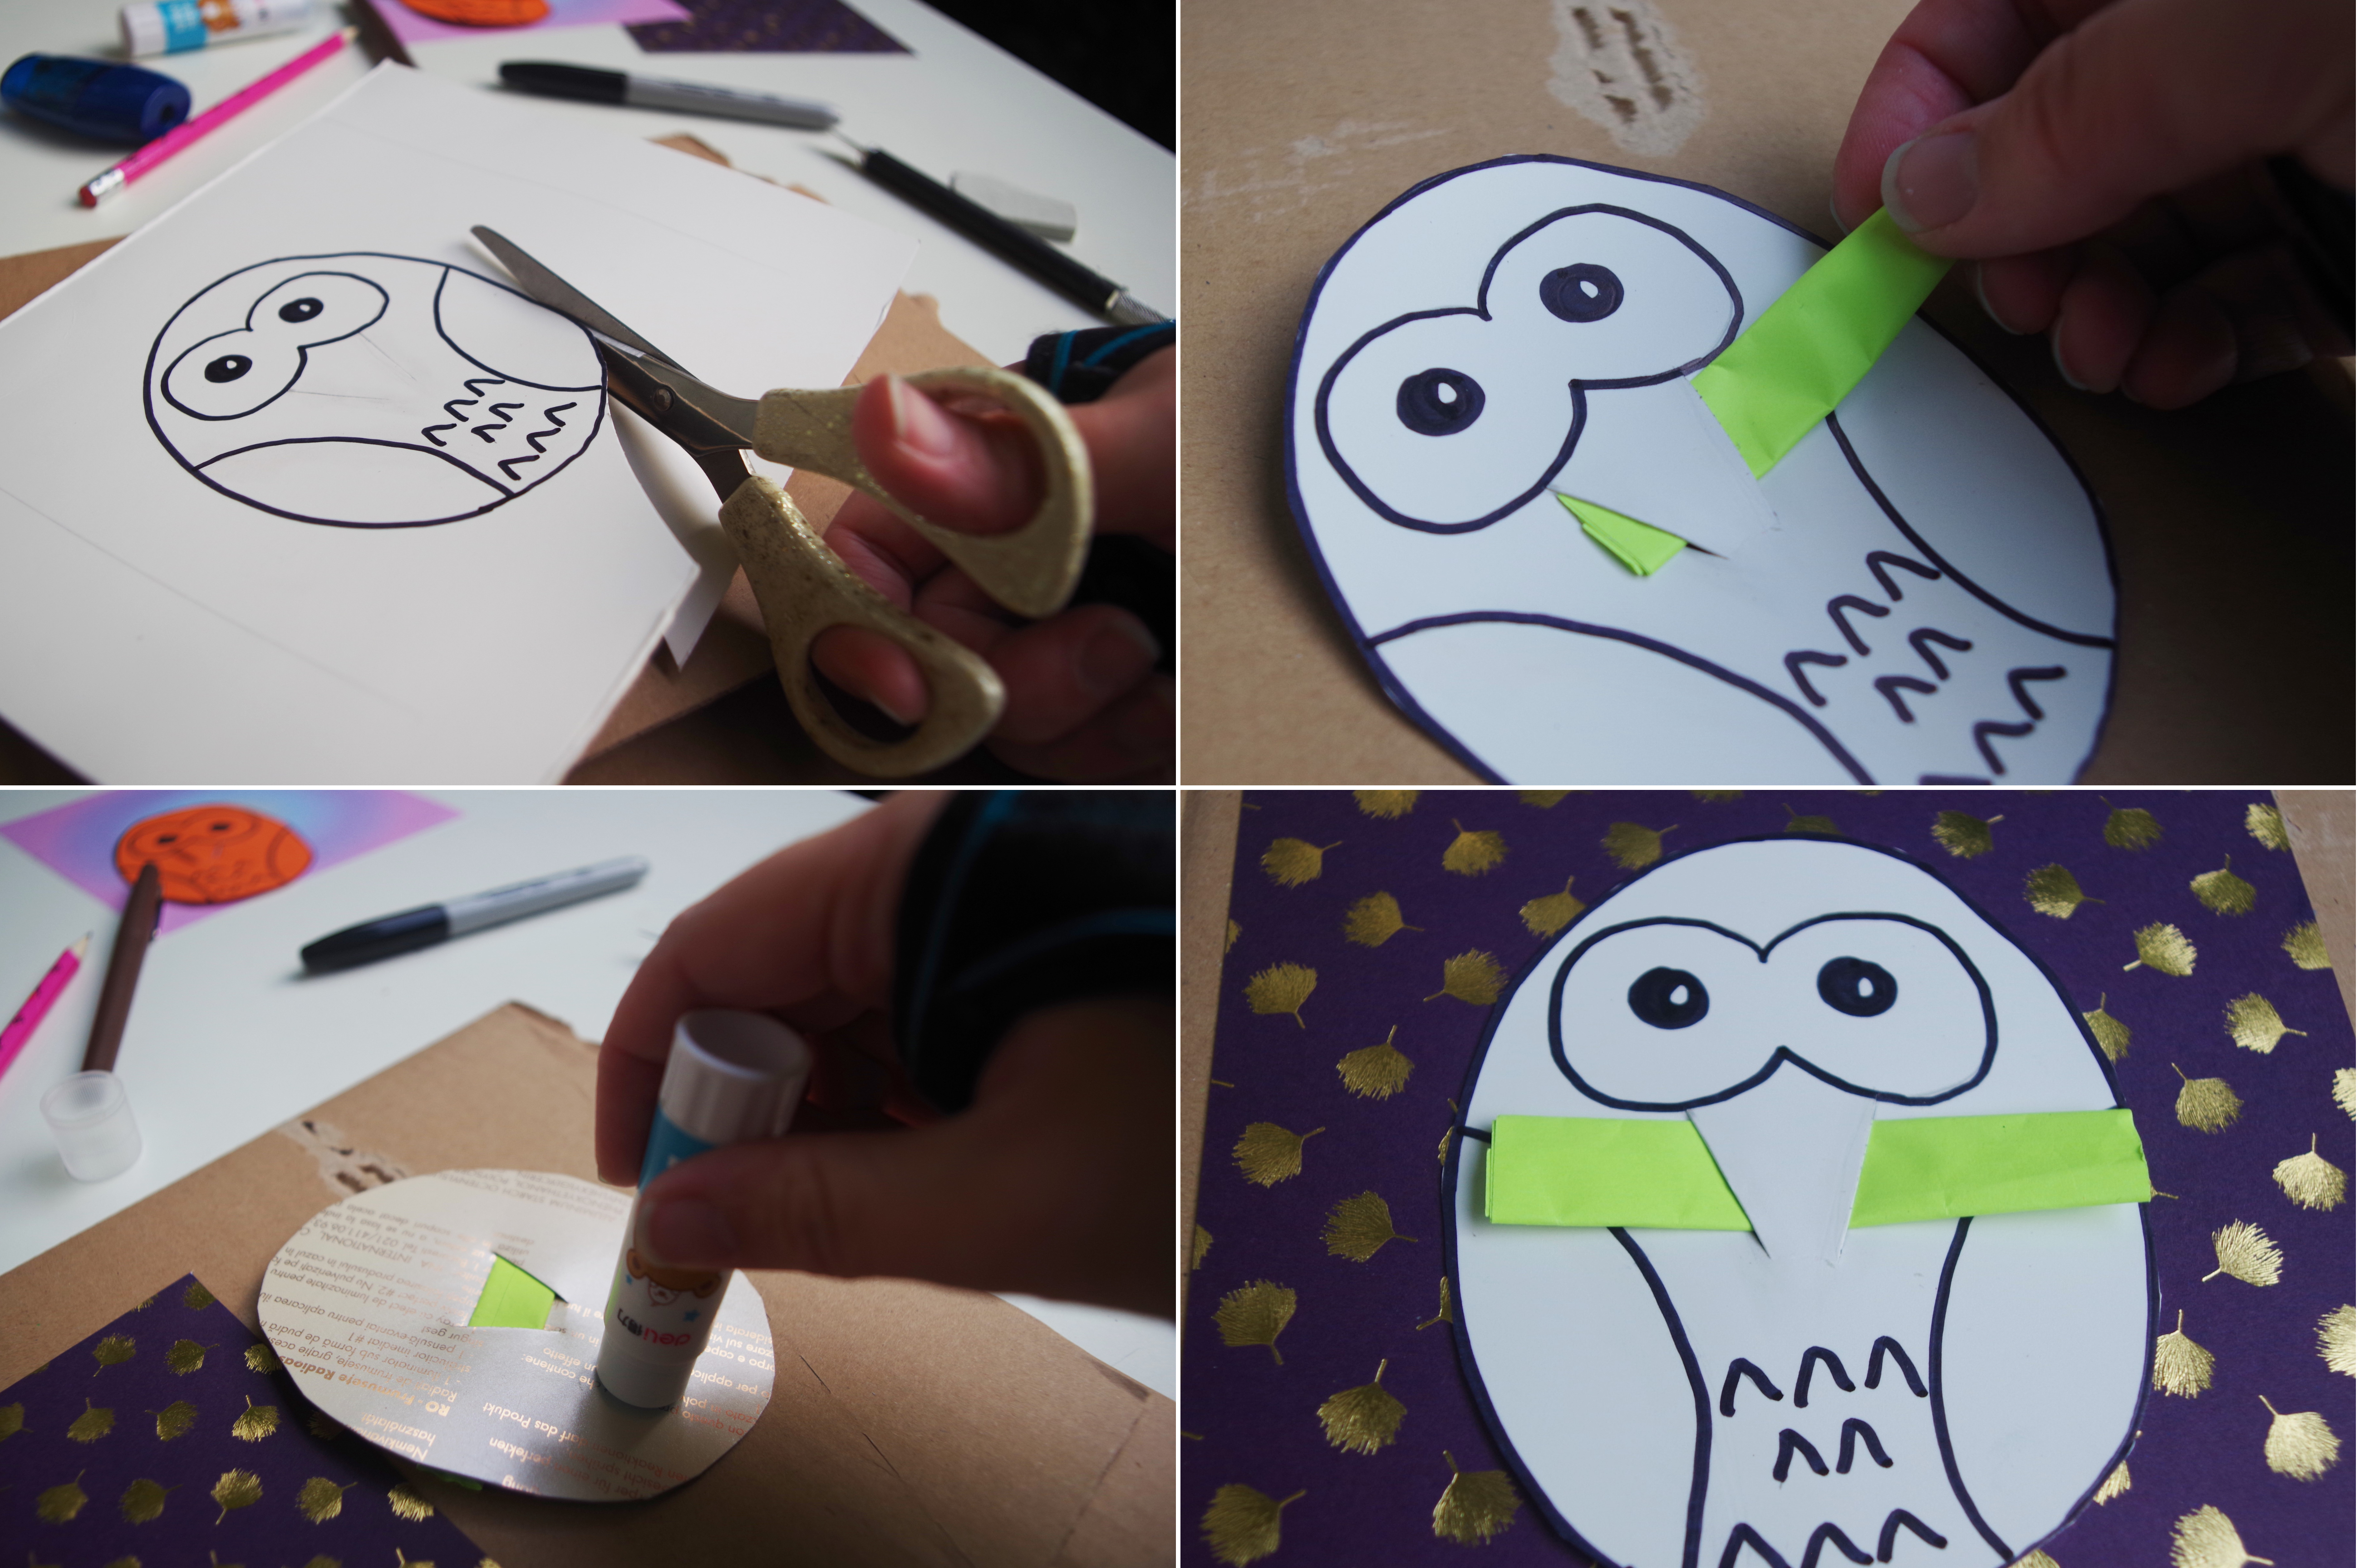
Use a rolled post-it to “test” your owl by sliding it into the beak. If you want to glue your owl on a card, leave it so you make sure that you won’t glue the beak!
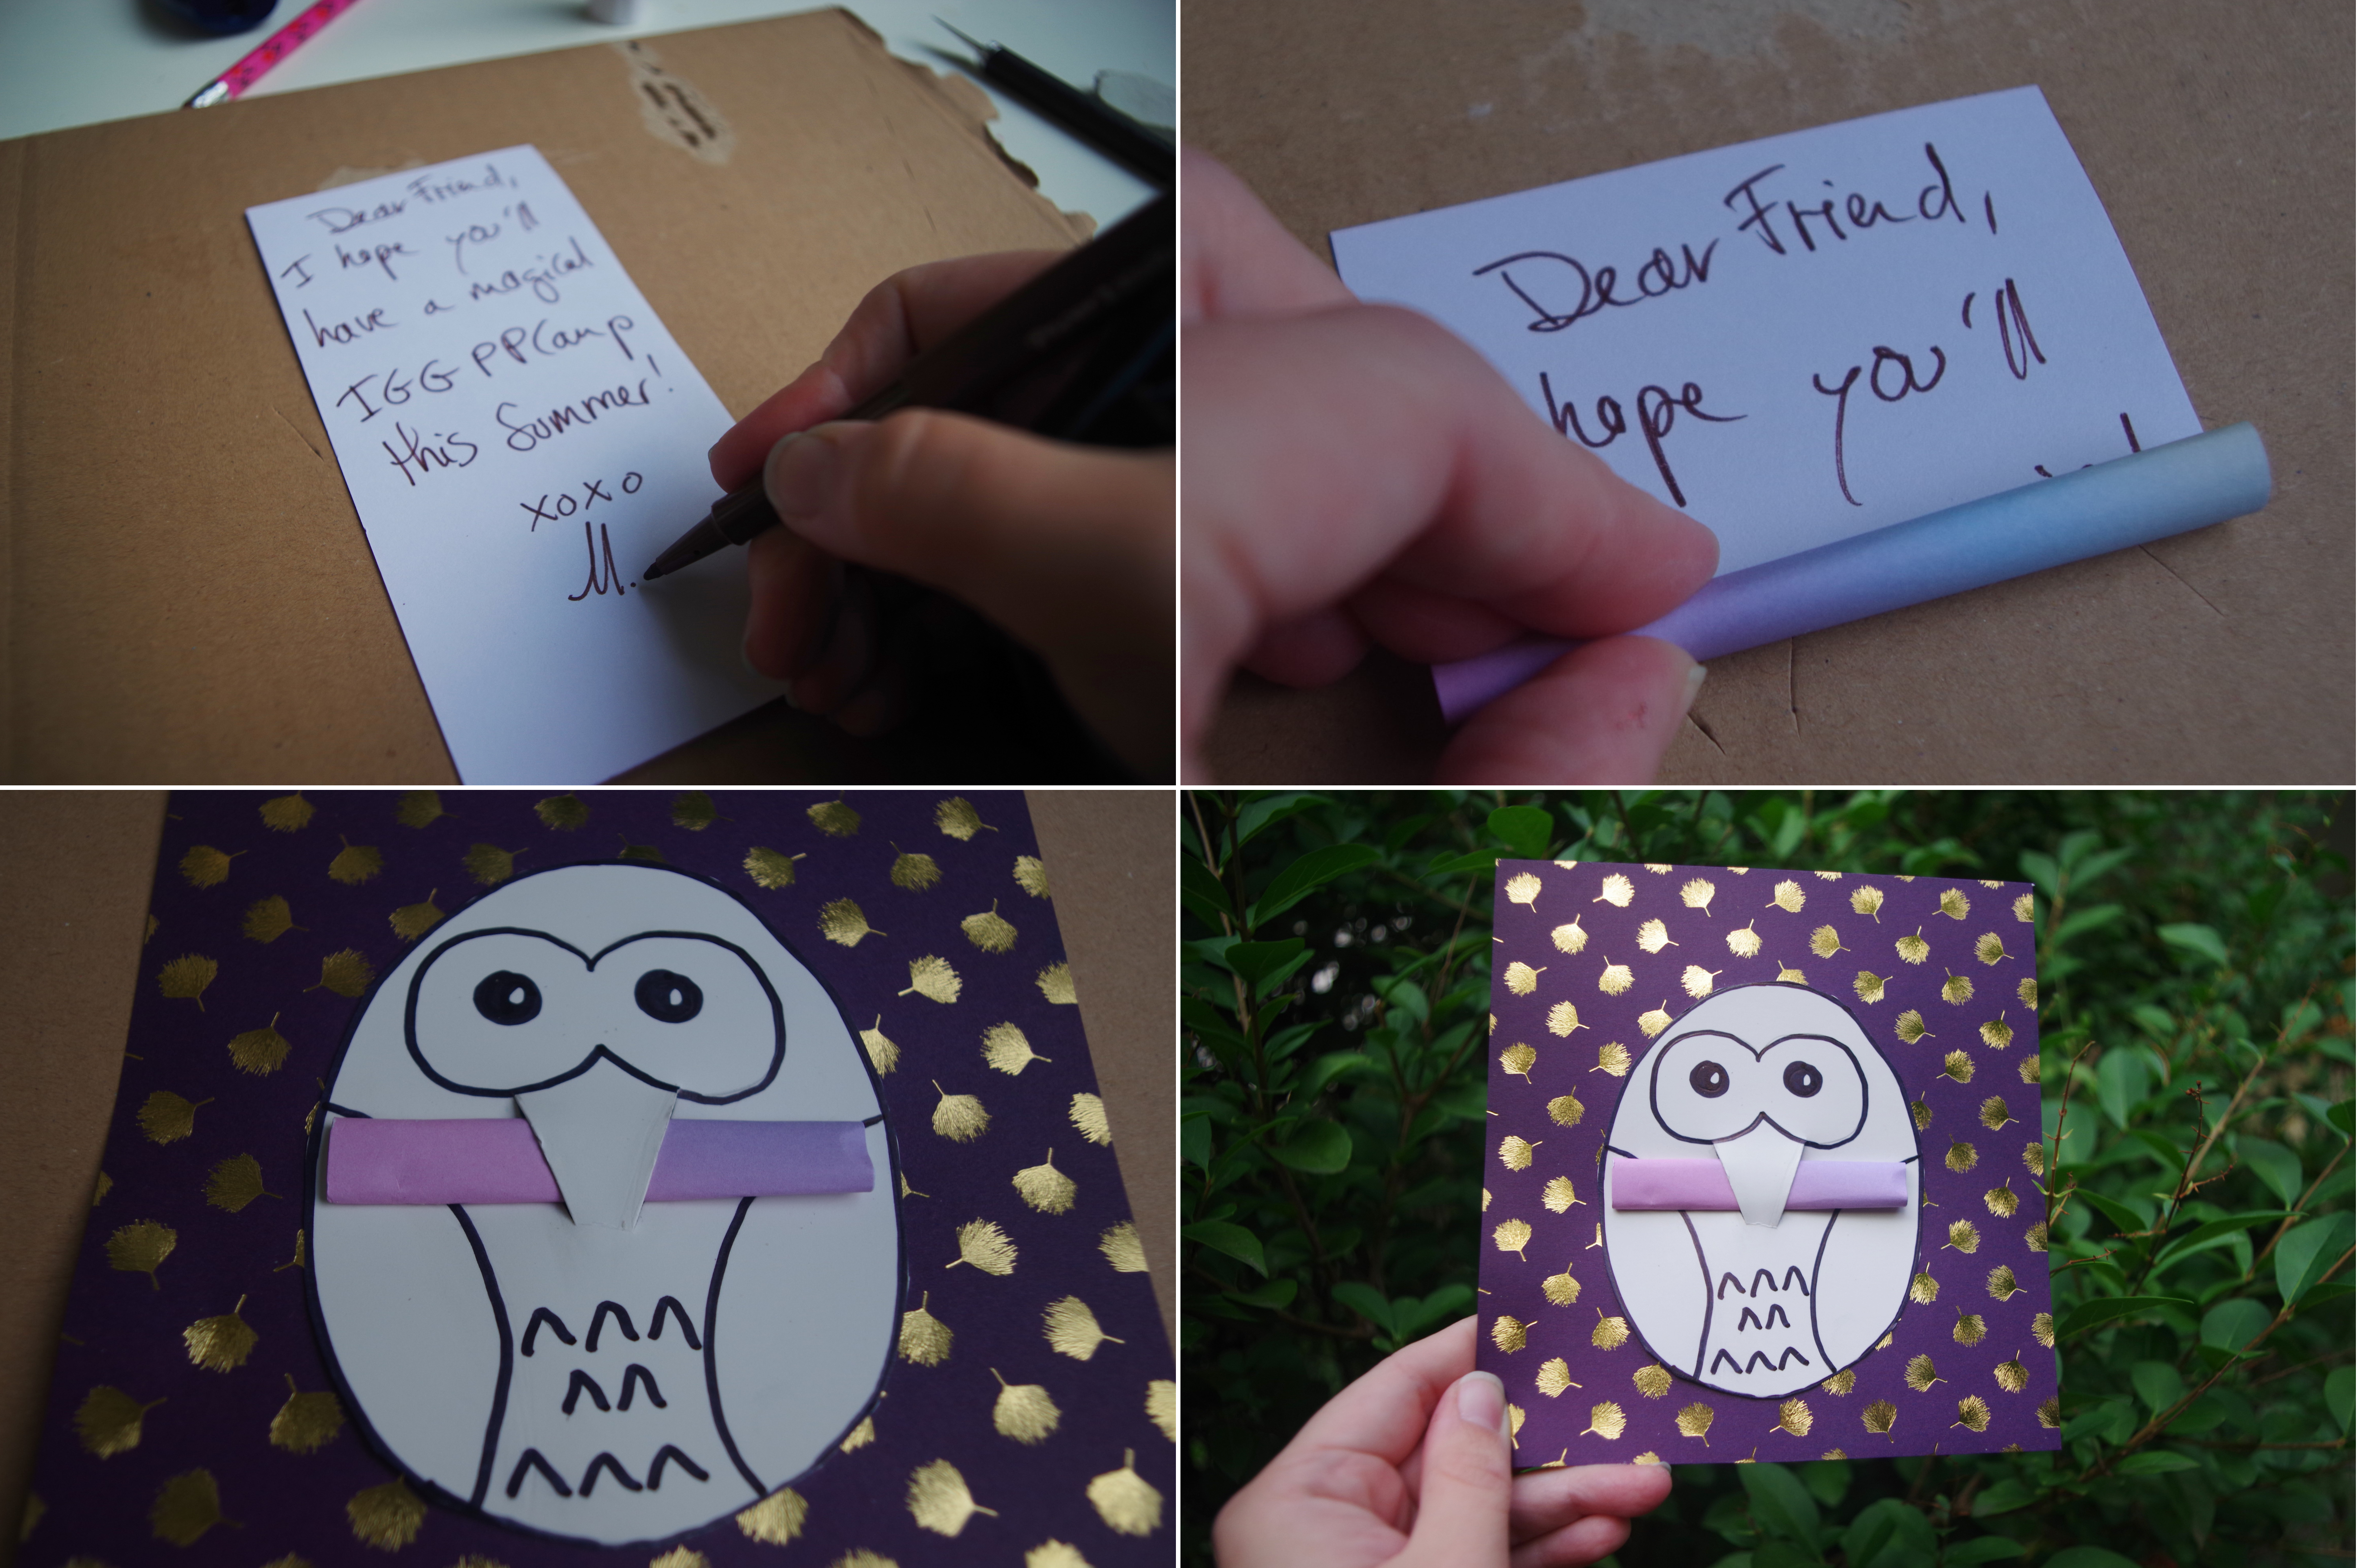
Once your card is ready to use ( let the glue dry!), you can write your secret message on a paper note, then roll it and slide it in the beak of your messenger owl!
Contributed by Mathilde aka Camper Belette
Mathilde lives in France, where she never went to “colonie de vacances” but had a lot of adventures in the woods on her own. She is waiting all year long for IGGPPC Summer Camp, because it’s her favourite time of the year! She loves cinema, science-fiction, crafting, Disney, stargazing and meeting new friends! You can find her on Twitter @EiTHELEEN.

Leave A Comment
You must be logged in to post a comment.