
Like to build things out of paper? Miss playing with dolls? Have a story you want to tell? You can do all three with a tiny paper theater! The instructions may seem long, but once you start putting it together, you’ll see just how easy it is. Later you can even add even more characters or more scenery, and create a tiny play for every season!
A couple notes before we begin:
- be careful to adapt your markers/paint/etc. to the type of cardboard you’ll use. Mine was a bit too thin for the Posca ink markers I used, hence why it’s pretty crooked.
- if you want to be able to pack the theater down neatly afterwards, you can use Blu-tack or something similar instead of glue. It could also help you visualize the whole thing better before actually decorating it.
Paper Theater Supplies:
- 2 sheets of thick white paper (A4 sized)
- cardboard or cardstock, 20 cm long, to cut thin (1 cm) strips into (a strip for each character)
- glue or double-sided tape (or any equivalent, permanent or not)
- scissors cutter or scalpel
- pencil
- pens, markers, or colored pencils
- ruler
- optional: a printer to print the template
Paper Theater Instructions:
Either trace or print the template (CLICK TO DOWNLOAD PDF) on thick white paper or cardstock. The picture below will give you the dimensions in centimeters, and show you which part ends up being what.
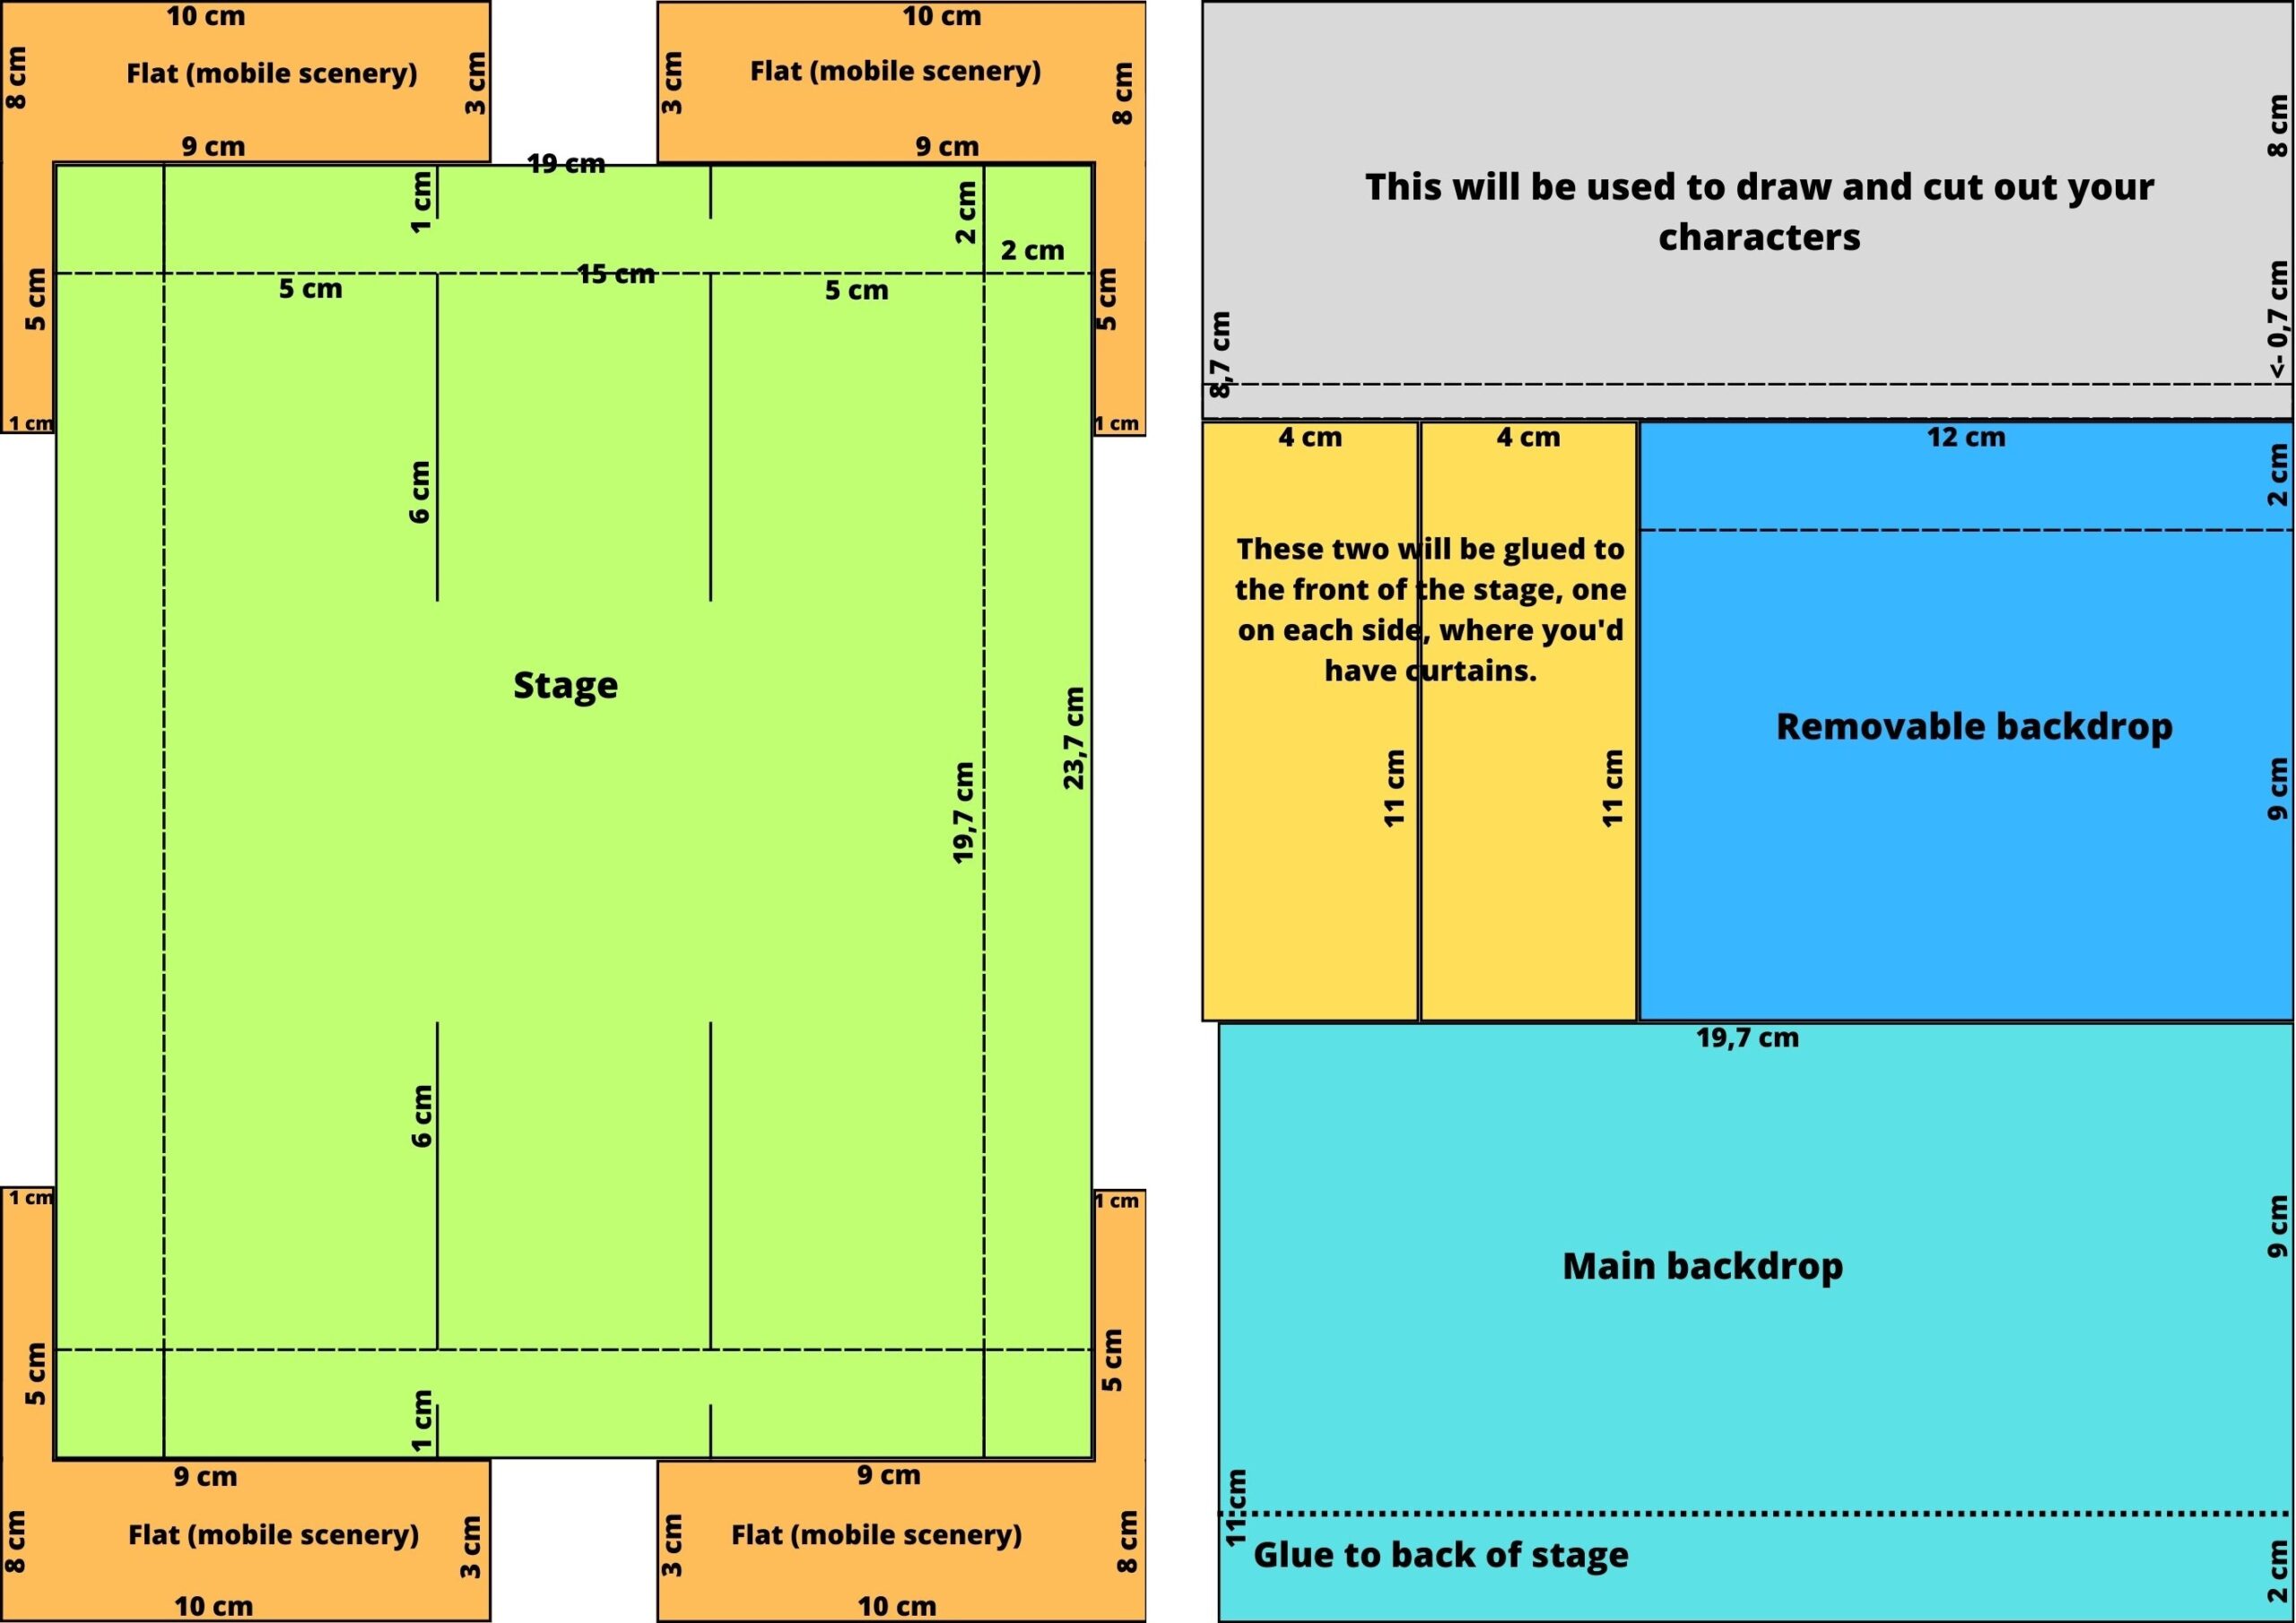
Cut along the solid lines, and don’t forget the slits on the “stage” (I recommend making them a tiny bit wider, as you’ll slide other pieces through them). Now you have all the pieces you need.
First, we’ll build the stage. You will need the biggest rectangle and the two 4×11 rectangles (yellow on the first picture). These two will be the walls on either side of the stage and will always be visible. You can draw curtains on them, brick walls, or something more exotic! As for the stage, you can color it or leave it blank. Once you’ve decorated them as you like, take the biggest rectangle and fold along the dashed lines, then glue the corners so your stage can stand, like this:
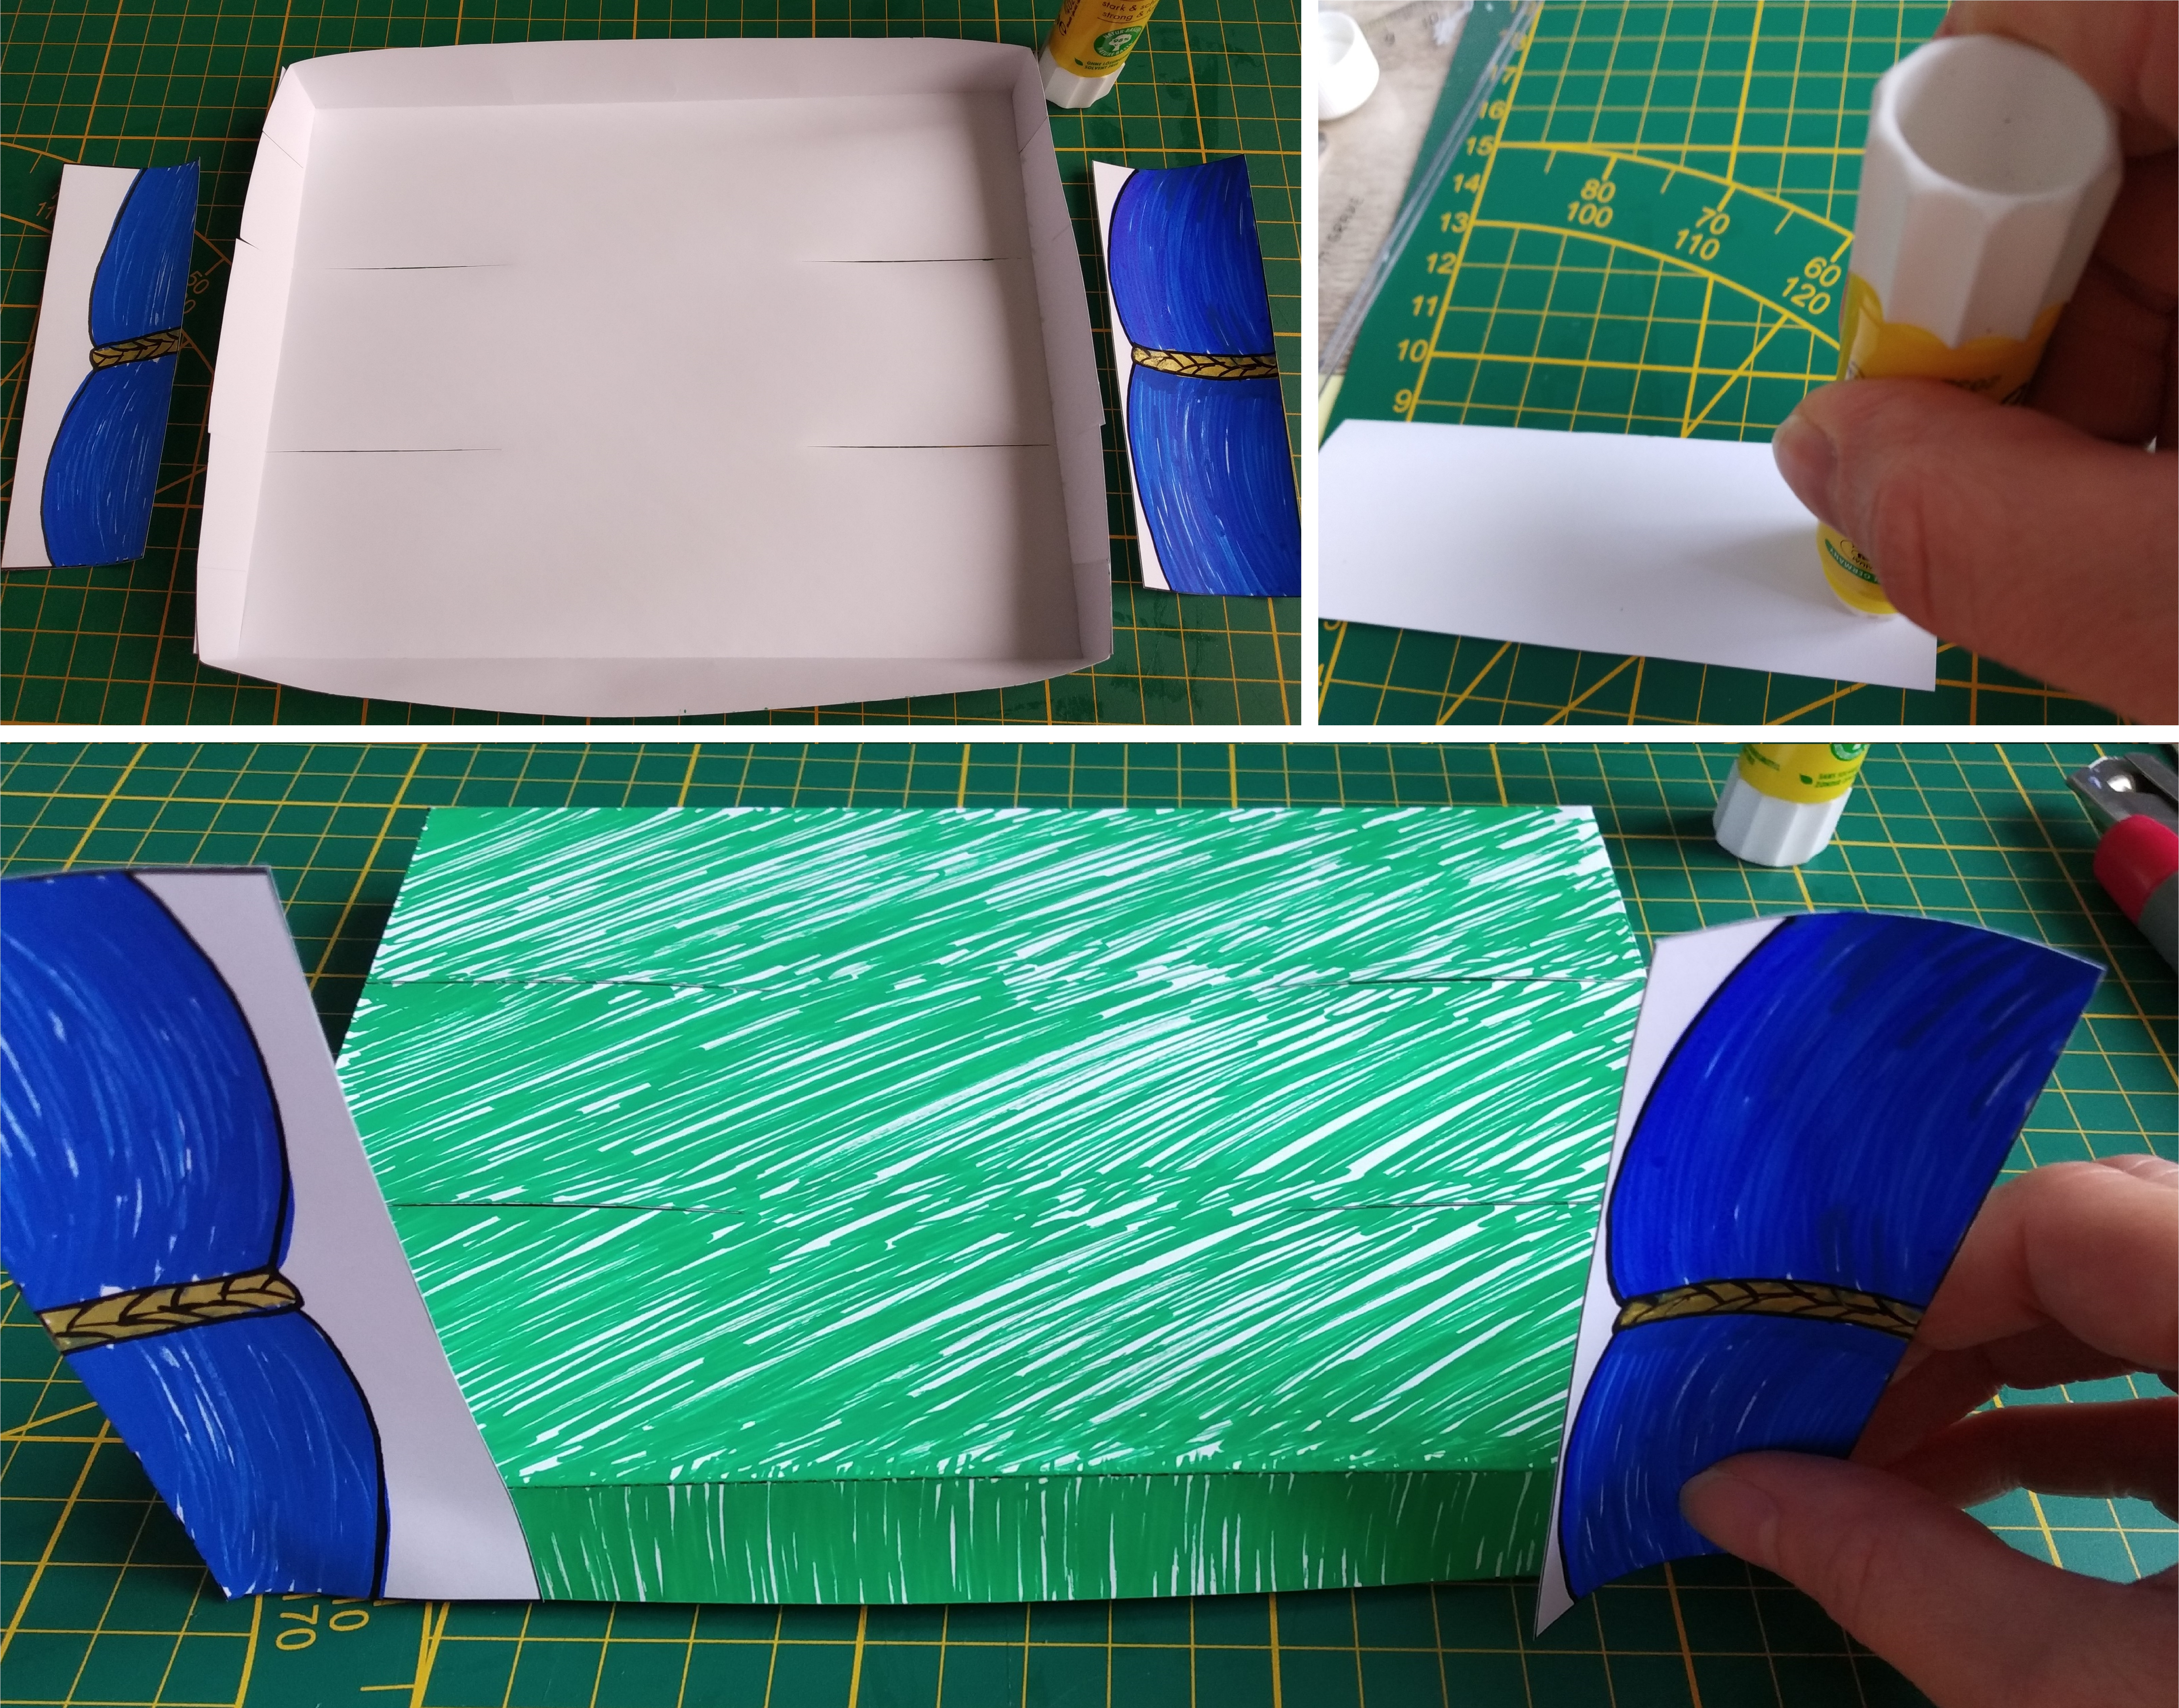
Then, glue the bottom part of the two “walls” to the front of the stage on either side, like in the picture.
To finish the stage, we add the main backdrop. It’s the light blue rectangle, with the dotted line. Once you’ve drawn the scenery you want, glue it to the back of your stage, putting the glue below the line. Your stage is taking shape!
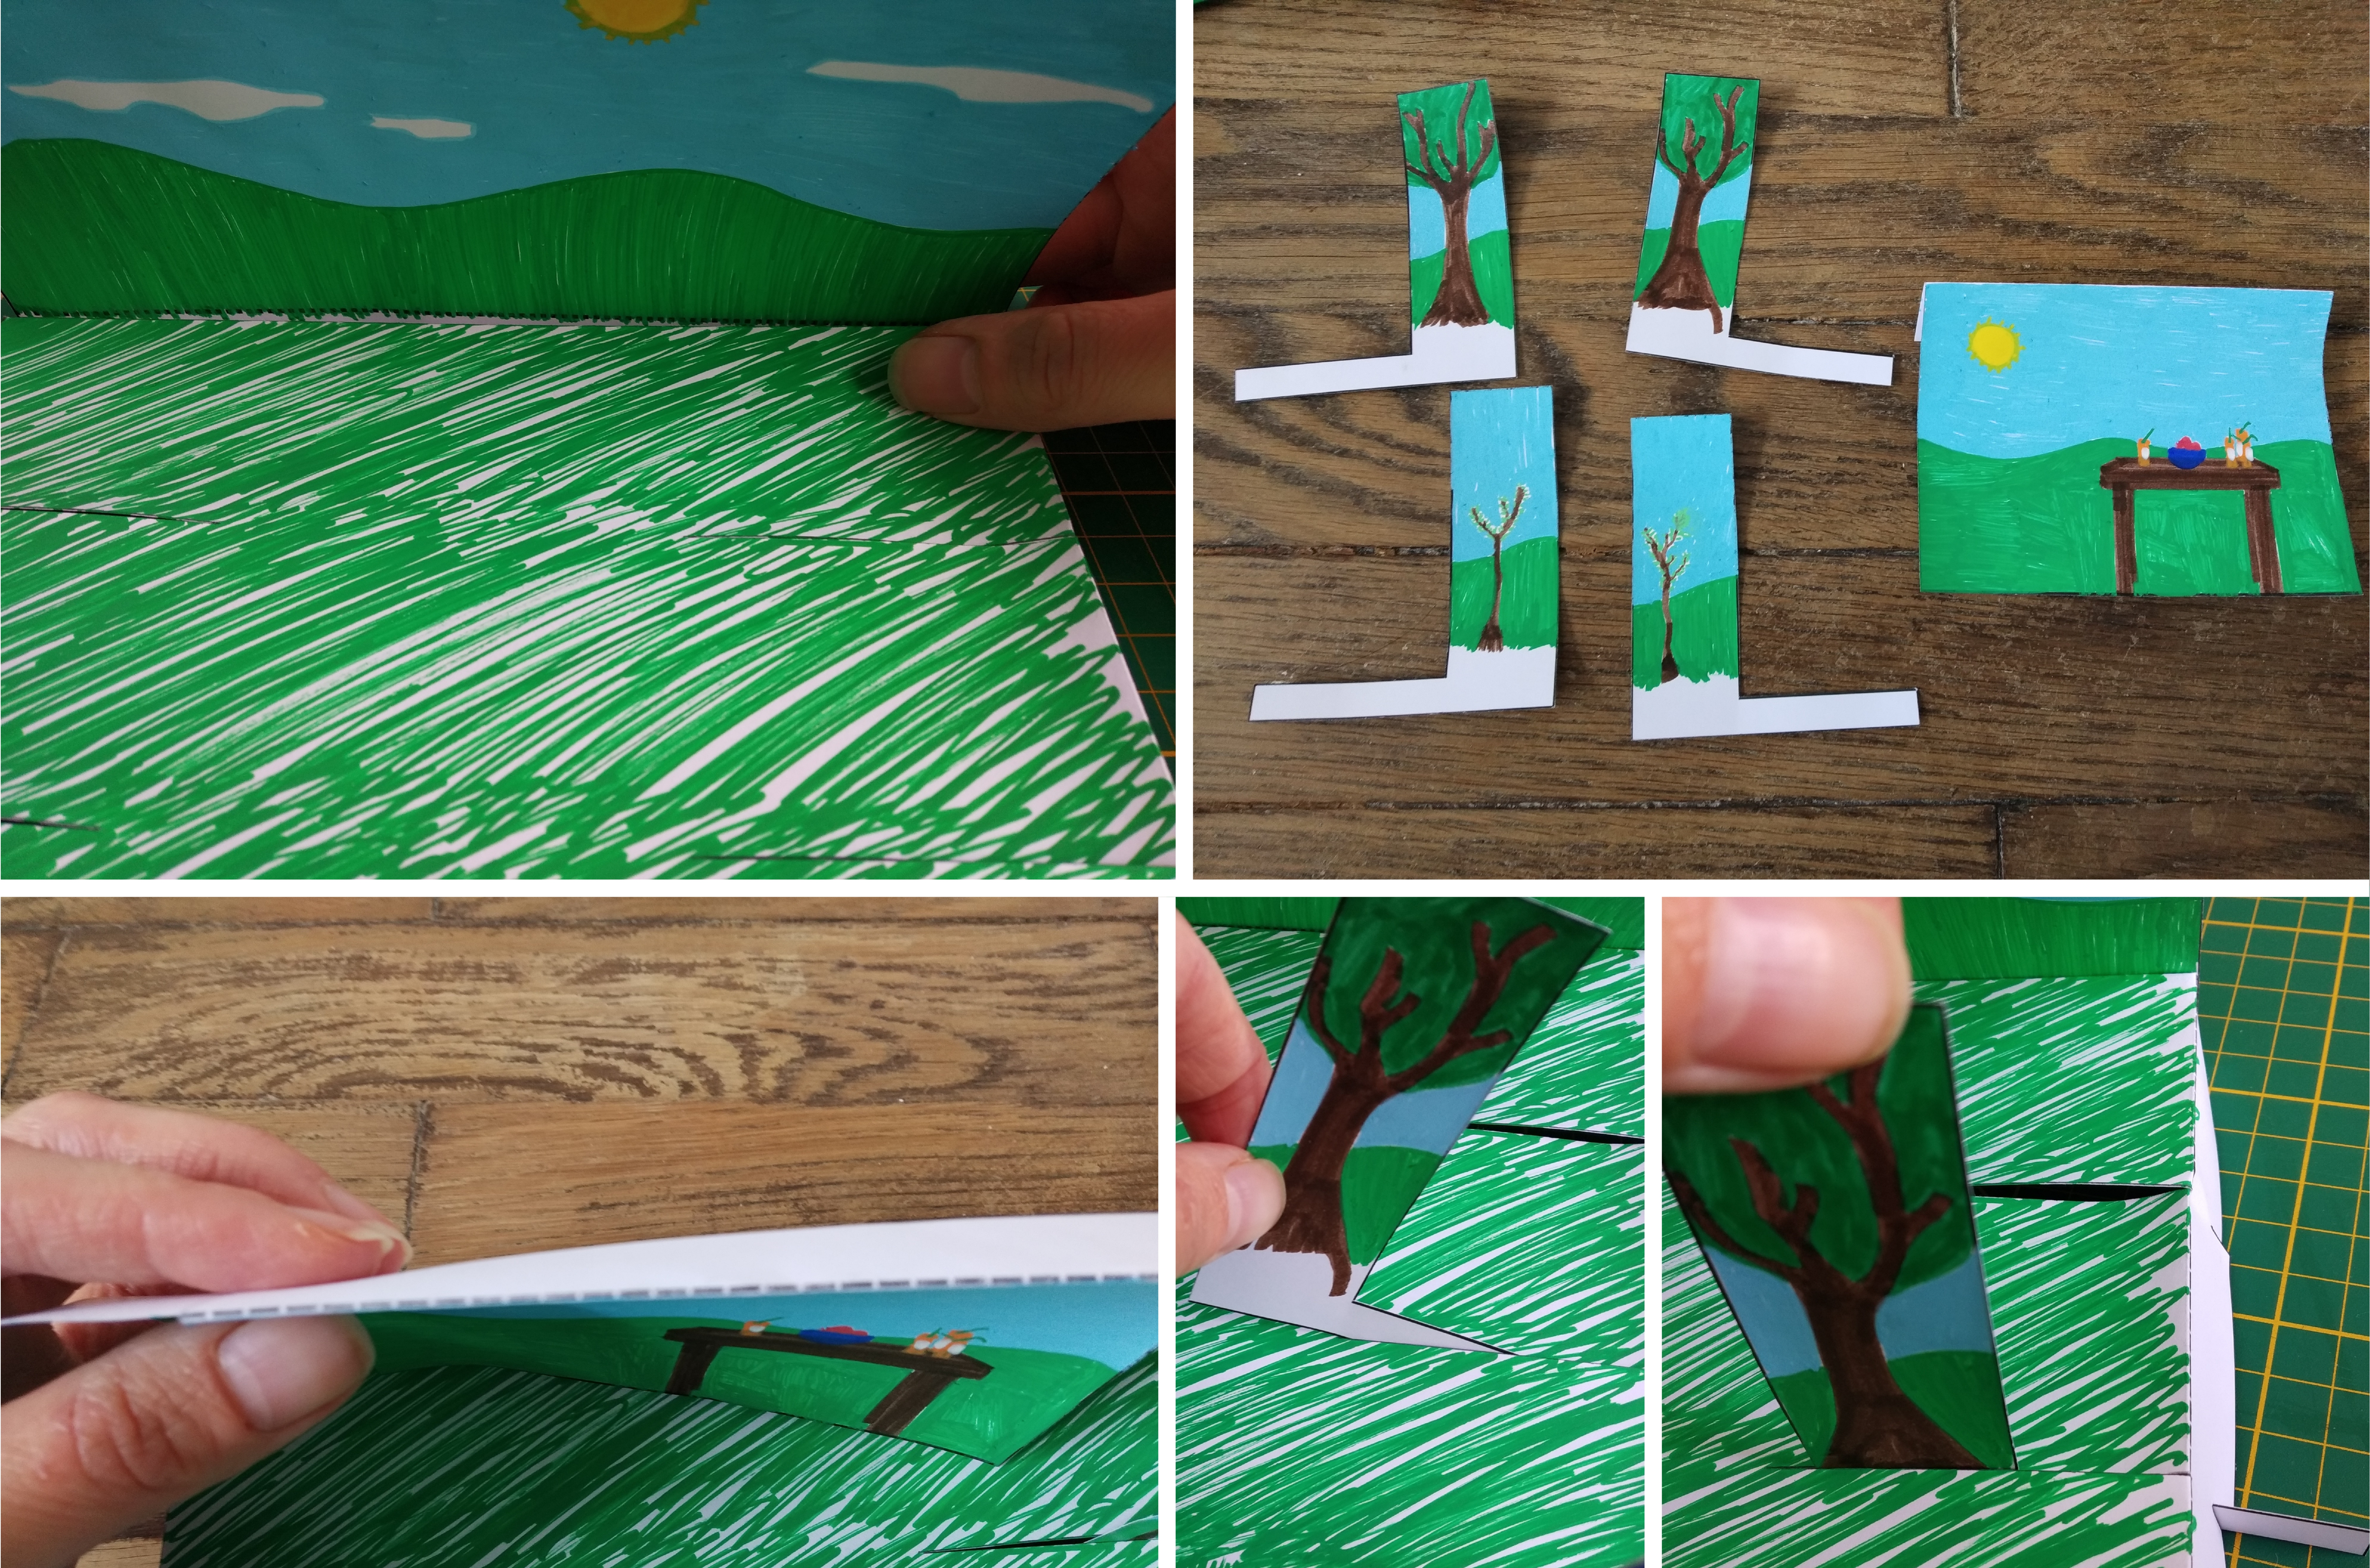
Now we add the mobile stuff: flats and removable backdrop. For the removable backdrop, you’ll simply fold the dashed line and hang the backdrop over the back wall of your stage, like in the picture.
The flats (L-shaped pieces) are mobile scenery: once you’ve inserted them through the slits, you can push them into view or pull them away by the parts that stick out from the sides of the stage. Using flats can be a fun way to play with depth!
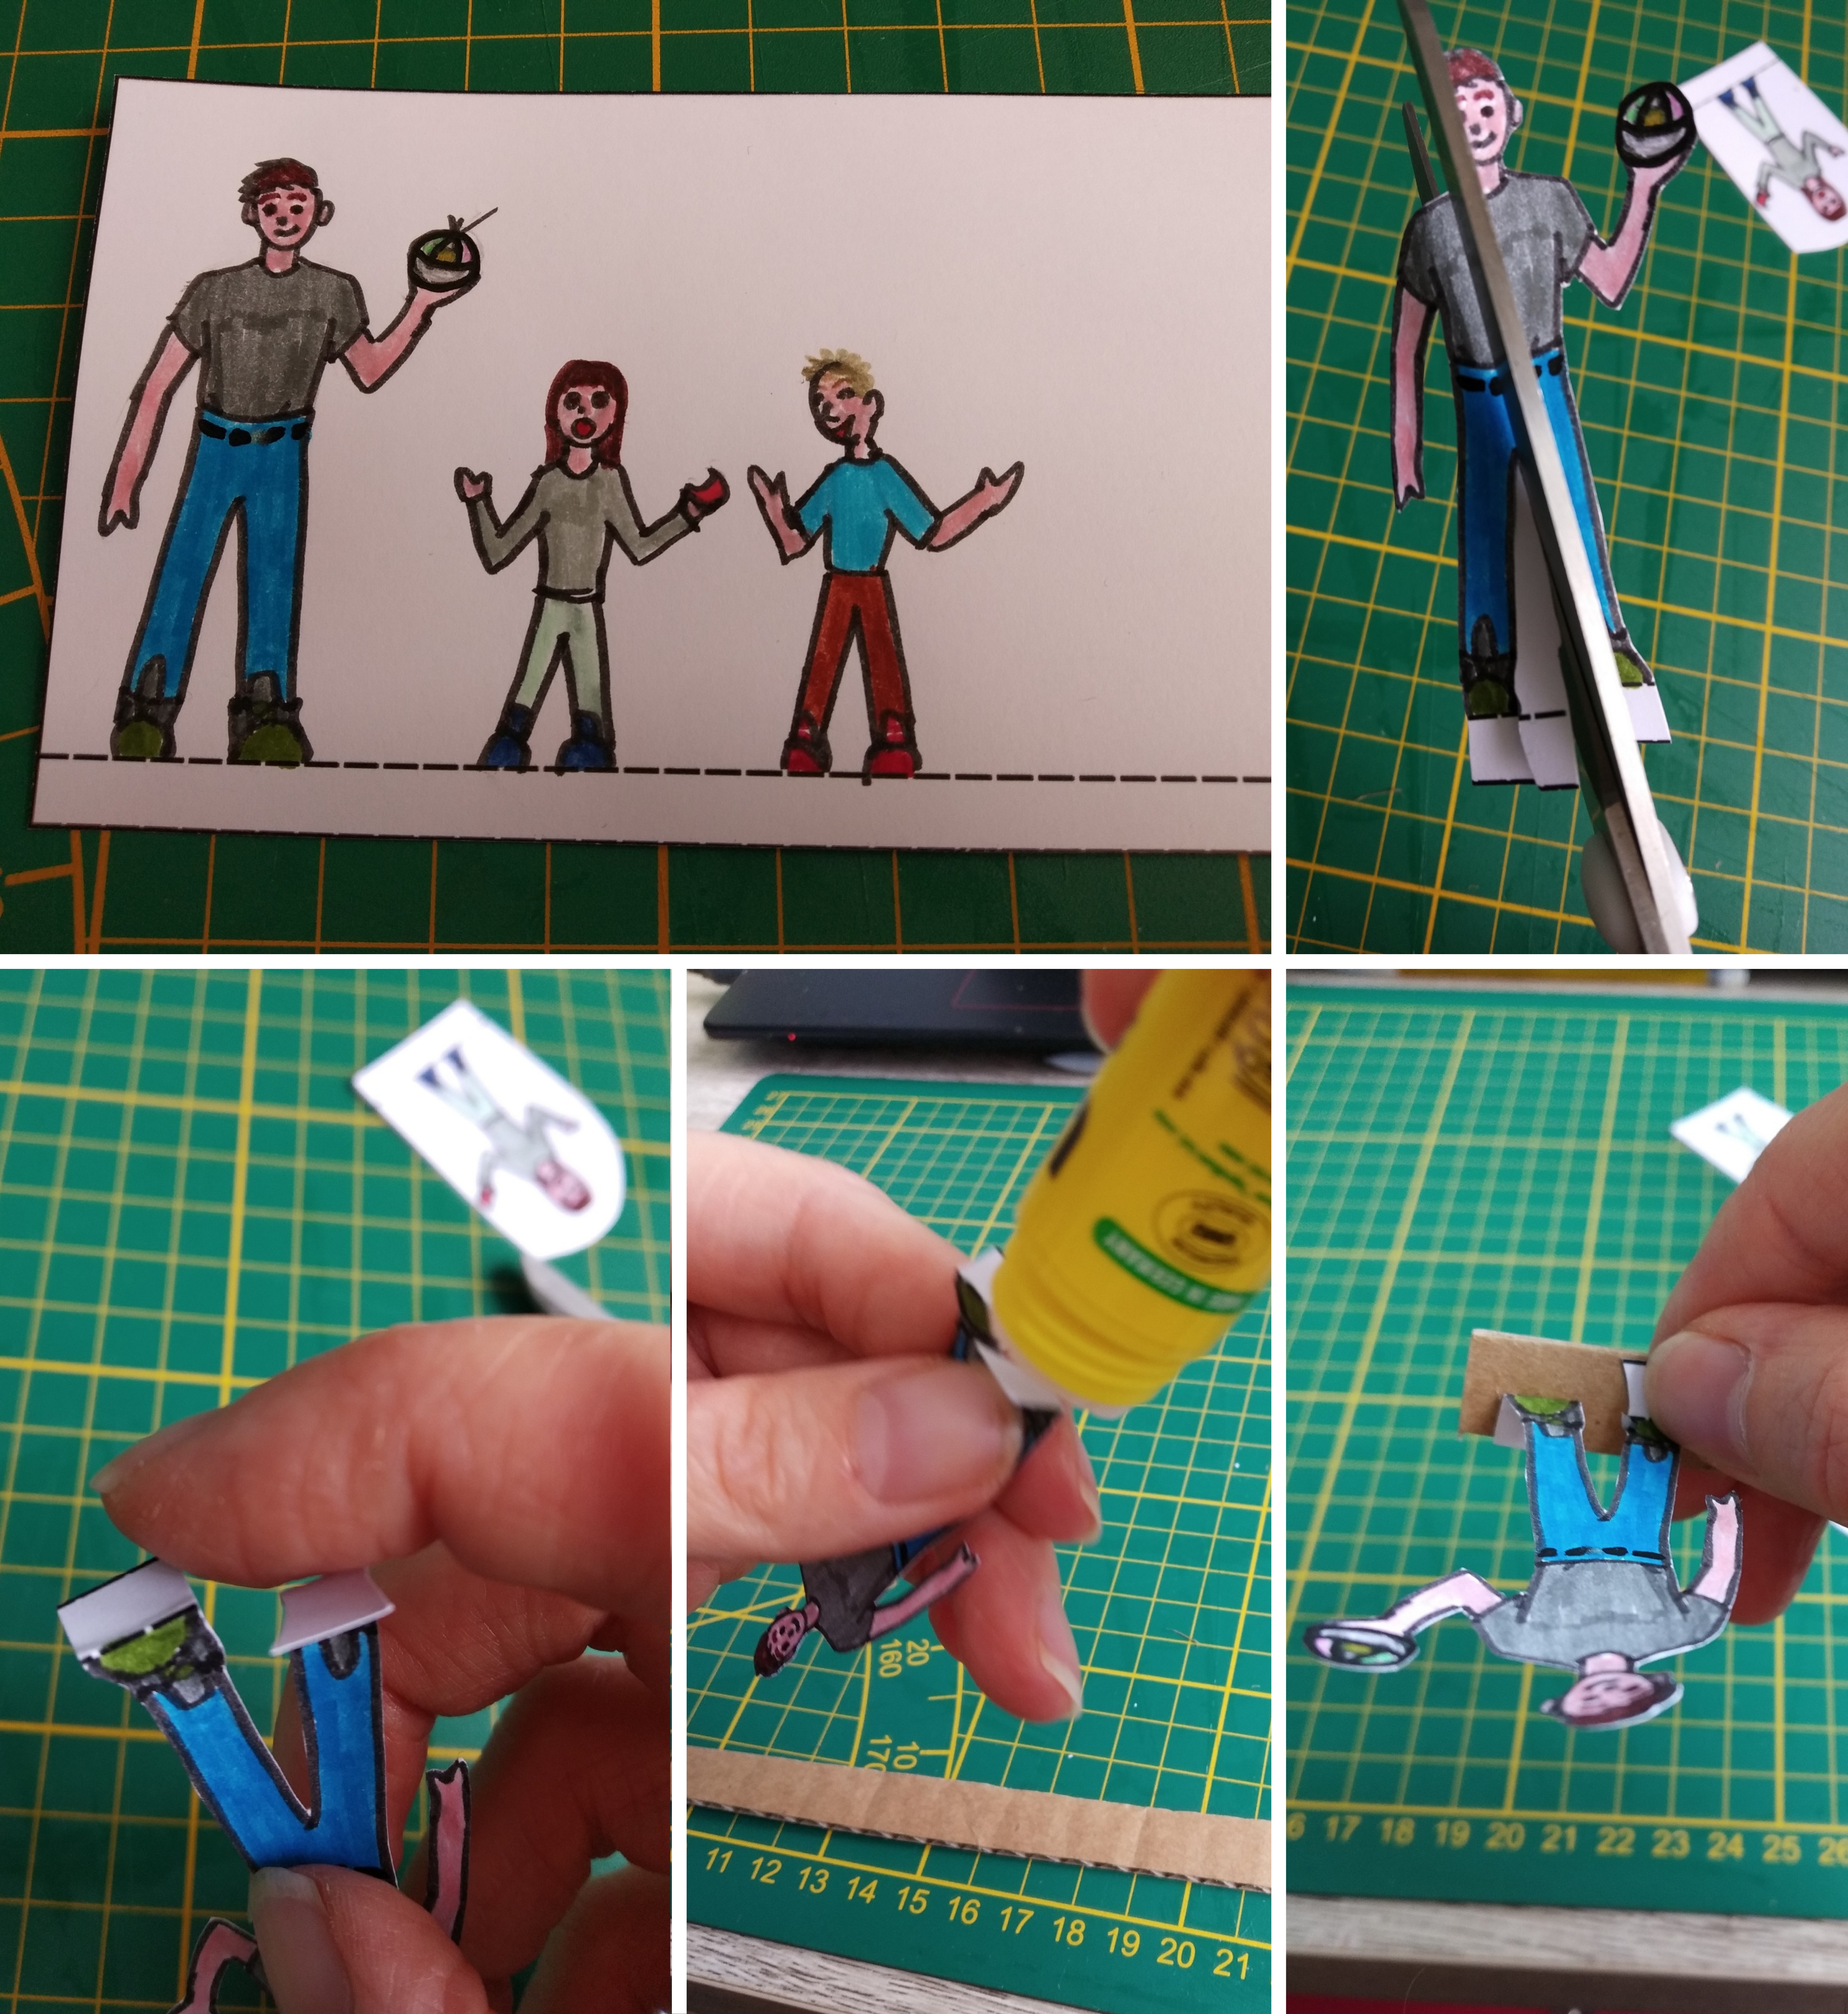
And now, the characters. Draw them on the last rectangle, then cut them out, but DON’T remove the part under the dashed line, or your characters won’t stand up!
Once you have all your characters cut, gently fold on the dashed line so that there’s a part sticking out on both sides. Glue these on the end of a strip of cardboard, and voila! You can now move your characters from the side of the stage using the cardboard strips.
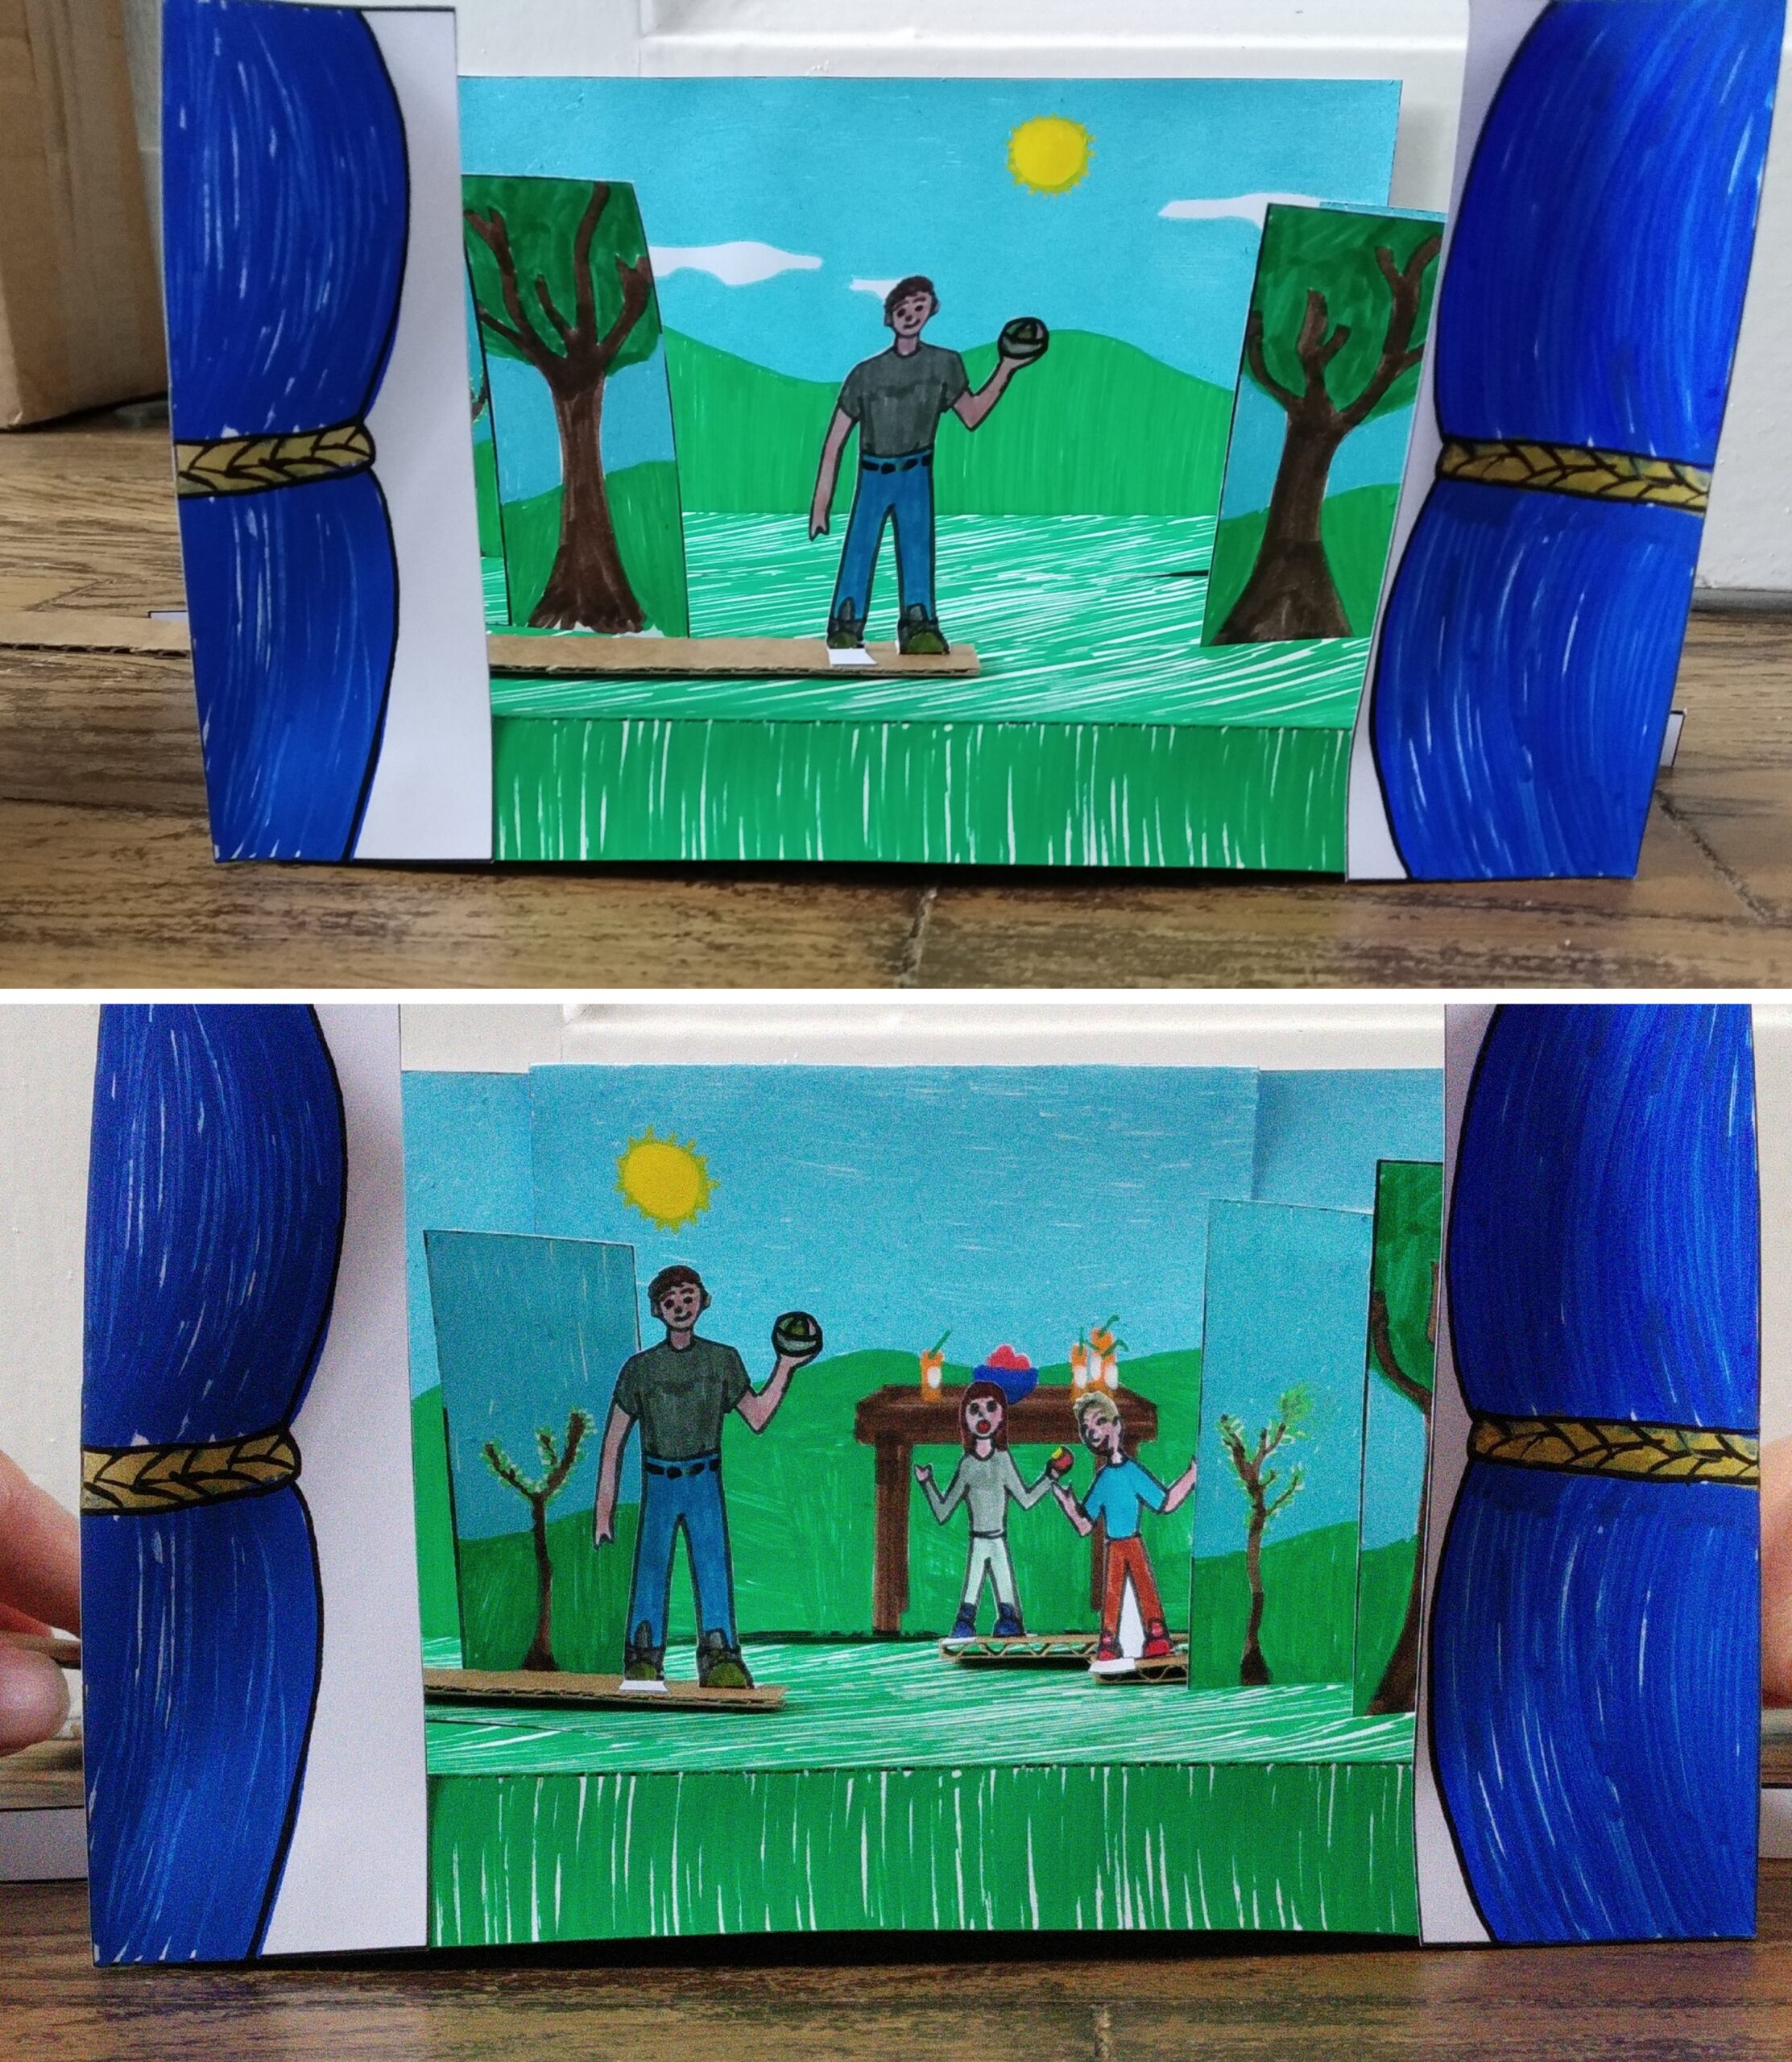
You have crafted your own paper theater! Now you could even add more characters, more scenery… Here’s mine:
Contributed by Dale
Dale, aka Doc Von Ondine, is a librarian. Between their efforts to bring TTRPGs to their rural French town and their regular ordering of sci-fi, fantasy and horror books, they can frequently be heard practicing their growl and talking to birds. Dale lurks on tumblr at spirit-of-boris.tumblr.com.

Leave A Comment
You must be logged in to post a comment.