Greetings, lovely Iggle Campers!! Gillyweed here, with another craft challenge just for IGGPPCamp! Last year, I posted a new craftastic challenge every day, and this year, I’m doing it again! I decided to go with some simpler crafts this time around, with hopes that more lovely folks join us this year!
Today we have the last troop necklace – a Troop Croft necklace!
I must admit, I was at a loss of what to make for Troop Croft. I’ve never played Tomb Raider, so I hadn’t a clue what could be done. And all I could find craft wise was DIY’s on how to make her holster. Then I googled “Tomb Raider necklace” and all these images popped up. Like this one:

This is apparently from the 2013 video game Tomb Raider. And there it is – a necklace! So that is what we’ll be crafting today!
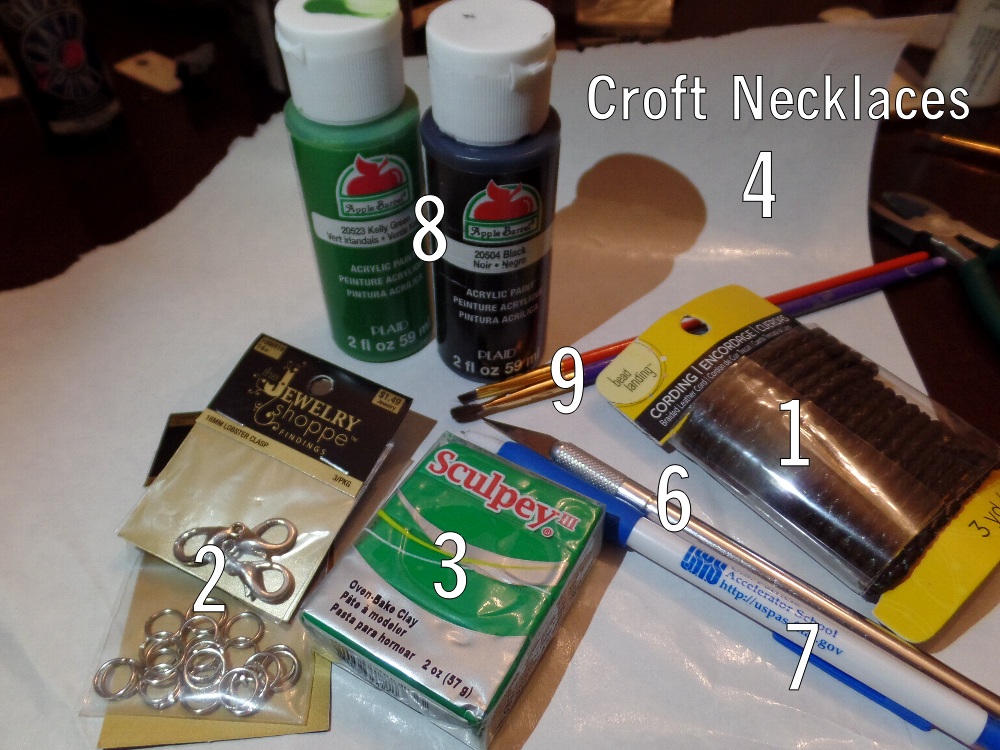
Here’s what you’ll need:
- Brown braided leather cording (This doesn’t have to be braided leather cording, it could be just regular leather cording or string, whatever you’d like to use!)
- Lobster clasp or other jewelry closure
- Oven bake clay (So many apologies! I didn’t even realize I’d written “modeling clay” for the Supplies list.)
- Wax paper (I’m actually using freezer paper here, which also works. You just need something to protect your table from clay)
- An oven to bake your clay in (not pictured)
- Craft knife
- Pencil, toothpick, or other shaping tools
- Green and black paints
- Paintbrushes
- A clear coat – spray, mod podge, etc. – to protect the surface of your pendant. (not pictured)
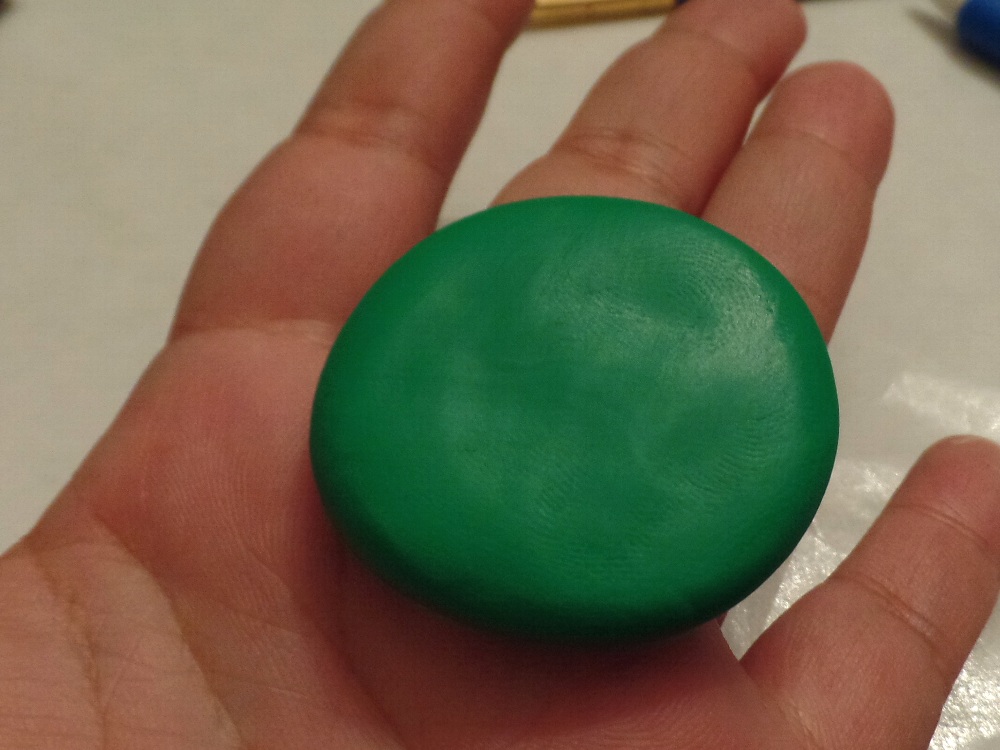
First we make a nice, round disc. Mine is about 1 and 3/4 inch wide and 1/4 inch thick.
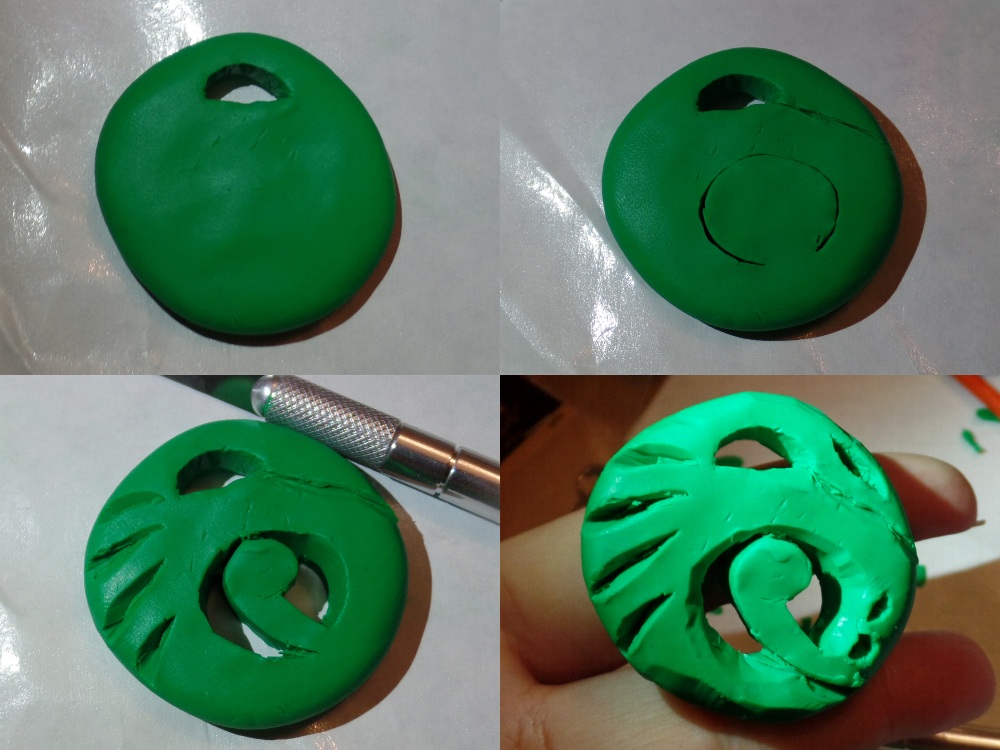
Now we get to carving. Carve the area necklace hole out, and make sure it’s wide enough for however you’re planning on attaching it to your necklace. For instance, I needed to make sure the hole was big enough to fit two cords wide. Then I started carving the partial circle and so on and so forth. We’re not looking for perfection, just resemblance.
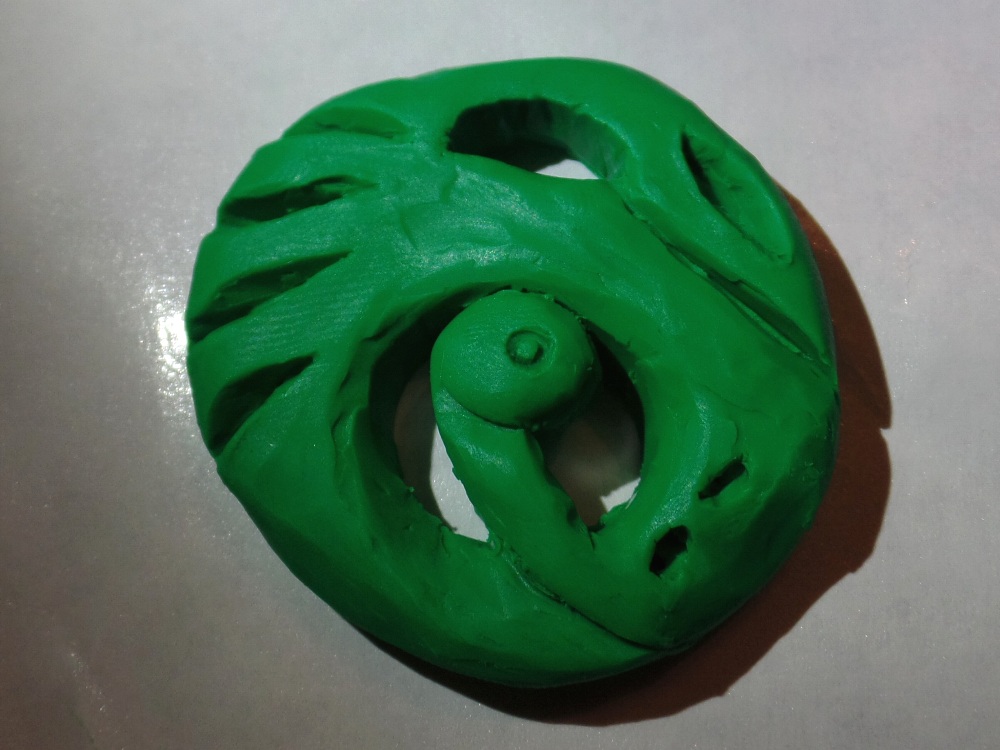
Then I built up the little snake inside the circle a little, so it wasn’t so flat, and I smoothed out a lot of the areas using the back of my nail or the pencil. Still though, I left it rough.
Bake according to directions on your oven bake clay.
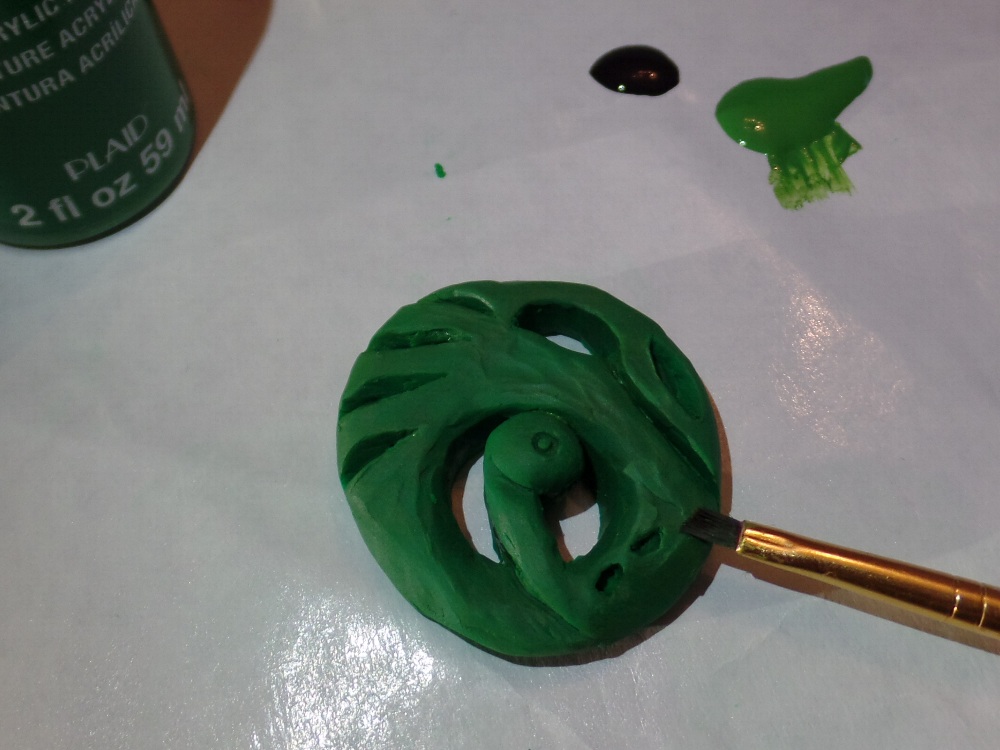
Next up, we paint! I used a Kelly Green all over the front. The green clay I used was super bright. I liked this color better.

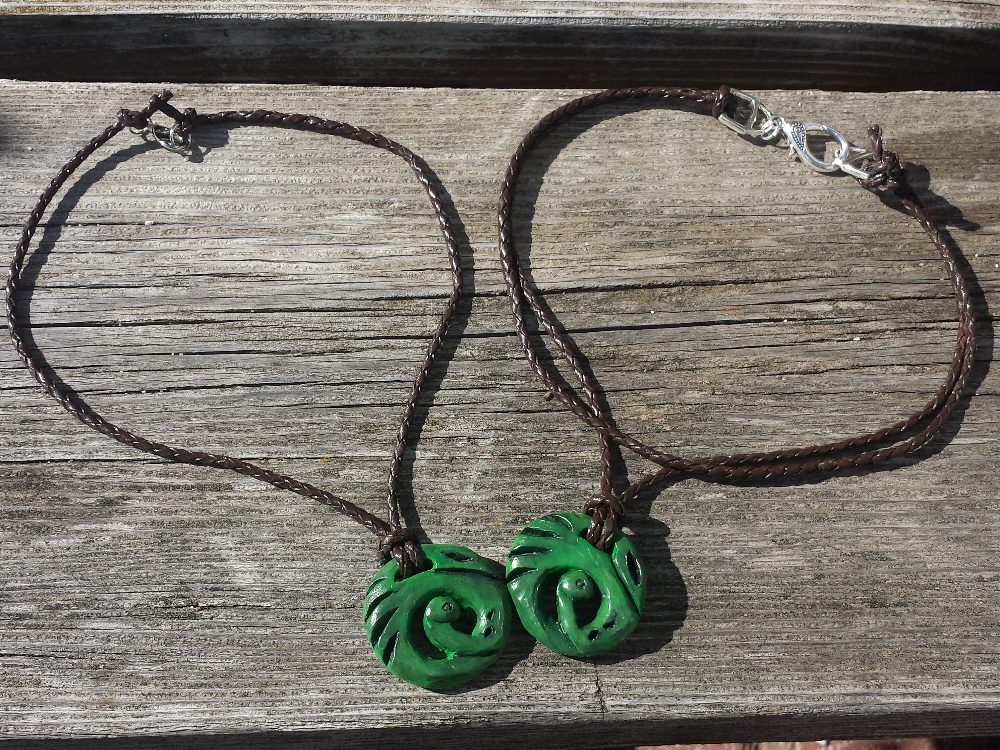
Here’s a side by side. The left pendant is completely covered in Kelly Green, while the right pendant is still mostly the clay green.
Once you’ve covered it all in the right green for you, use a mix of black and green and some water to “dirty up” the pendant. Use your darkest mix inside all of the indentations.
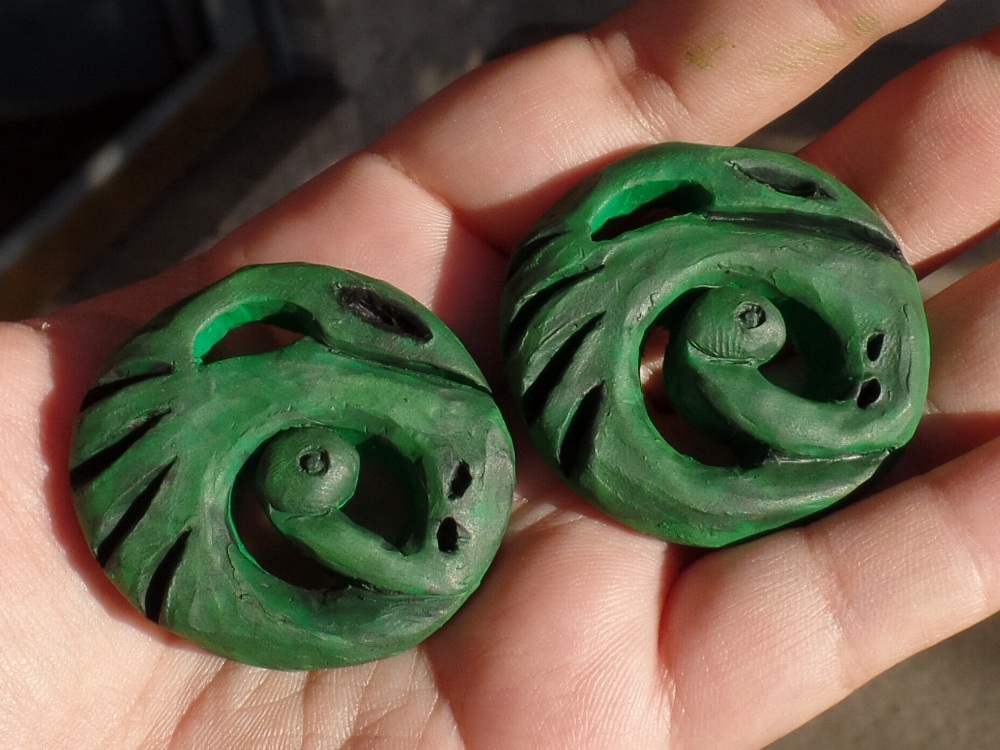
Here is what I ended up with! I’m loving how they turned out! I then covered them in one coat of matte clear spray.
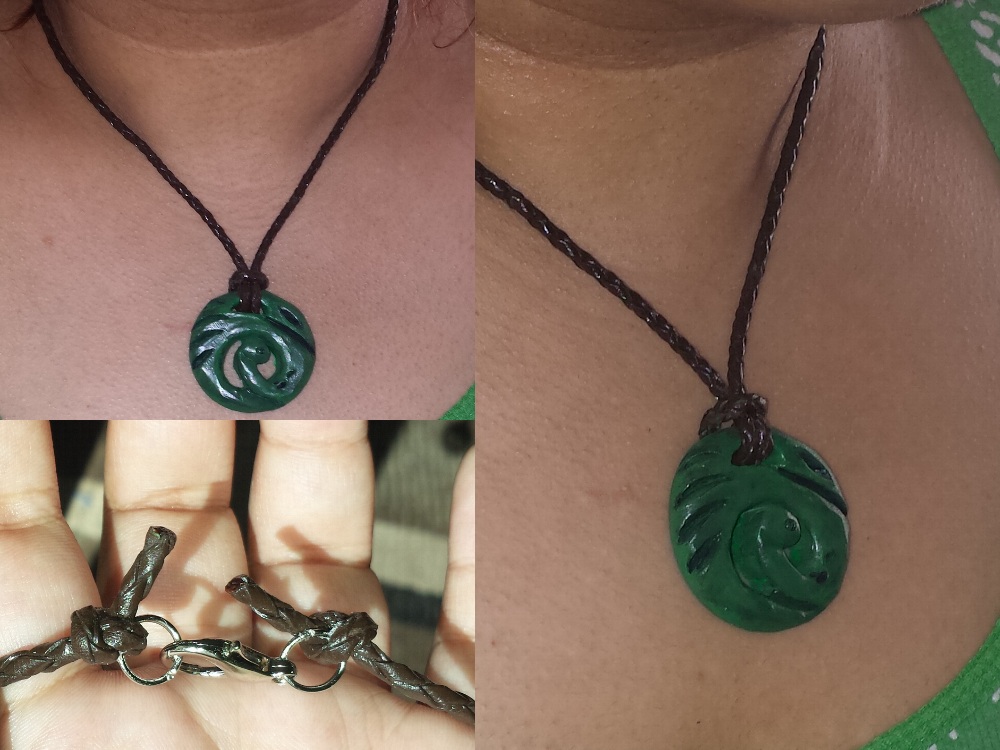
And there you have it! You can attach your pendant to the cord however you think is best. The above picture is the easier of the two I did.
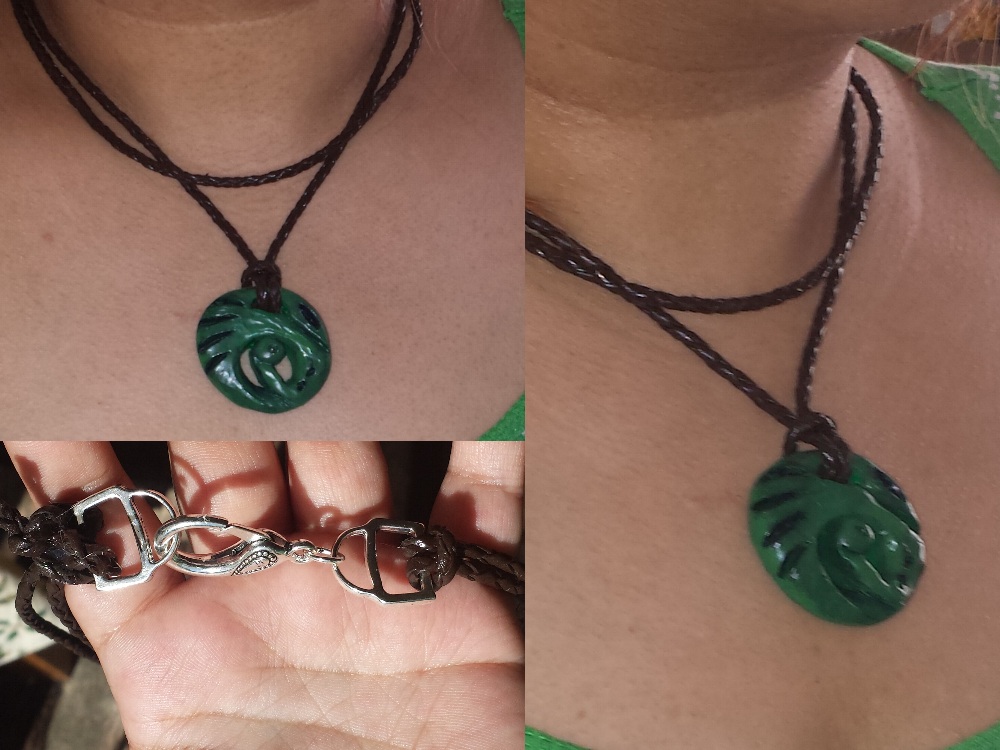
And this one was a bit more complicated with a fancier clasp.
So!! What do you guys think? Ready to make one on your own? Woot!
I hope you’ve enjoyed today’s challenge and that you give it a try yourself! If you do, an achievement awaits!! Enter campersgetcrafty5 to get IGGPPCamp Challenge Achievement #5, and please don’t forget to share your pics via twitter and hashtags #IGGPPCamp and #IggleCC!

Leave A Comment
You must be logged in to post a comment.