
Have you ever wondered why the paper crane is the most iconic symbol of Origami? There are a few variations to the legend, each one as beautiful as the last. Allow me to briefly share parts of these beautiful tales with you whilst also showing you how to make your very own paper crane!
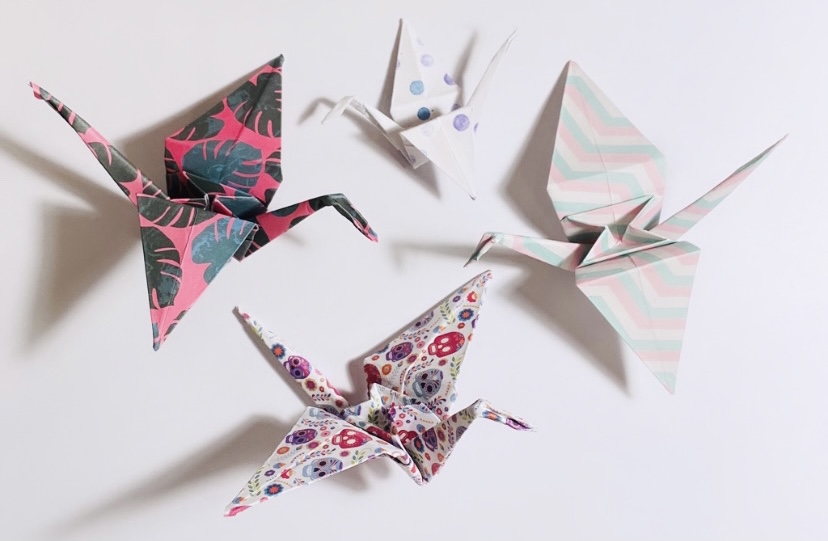
According to legend, cranes are seen as a symbol of love, faith and hope – as well as a personification of peace and freedom following WW2. In Japan, Cranes are seen as a sacred symbol, and so an ancient legend promises that anyone who folds one thousand origami cranes will be granted a special wish by the sacred crane. Cranes are thought to live for 1000 years and this is why people fold 1000 cranes, 1 for each year of its life.
Over time, paper cranes have also become a symbol of hope and healing during challenging times. With this in mind, I thought this may be a lovely collective camp project for us to take on together – especially after the extremely challenging year that was 2020!
You could even make a few and gift them to your fellow campers, friends, family, or even strangers to spread some love, hope and healing out into the world.
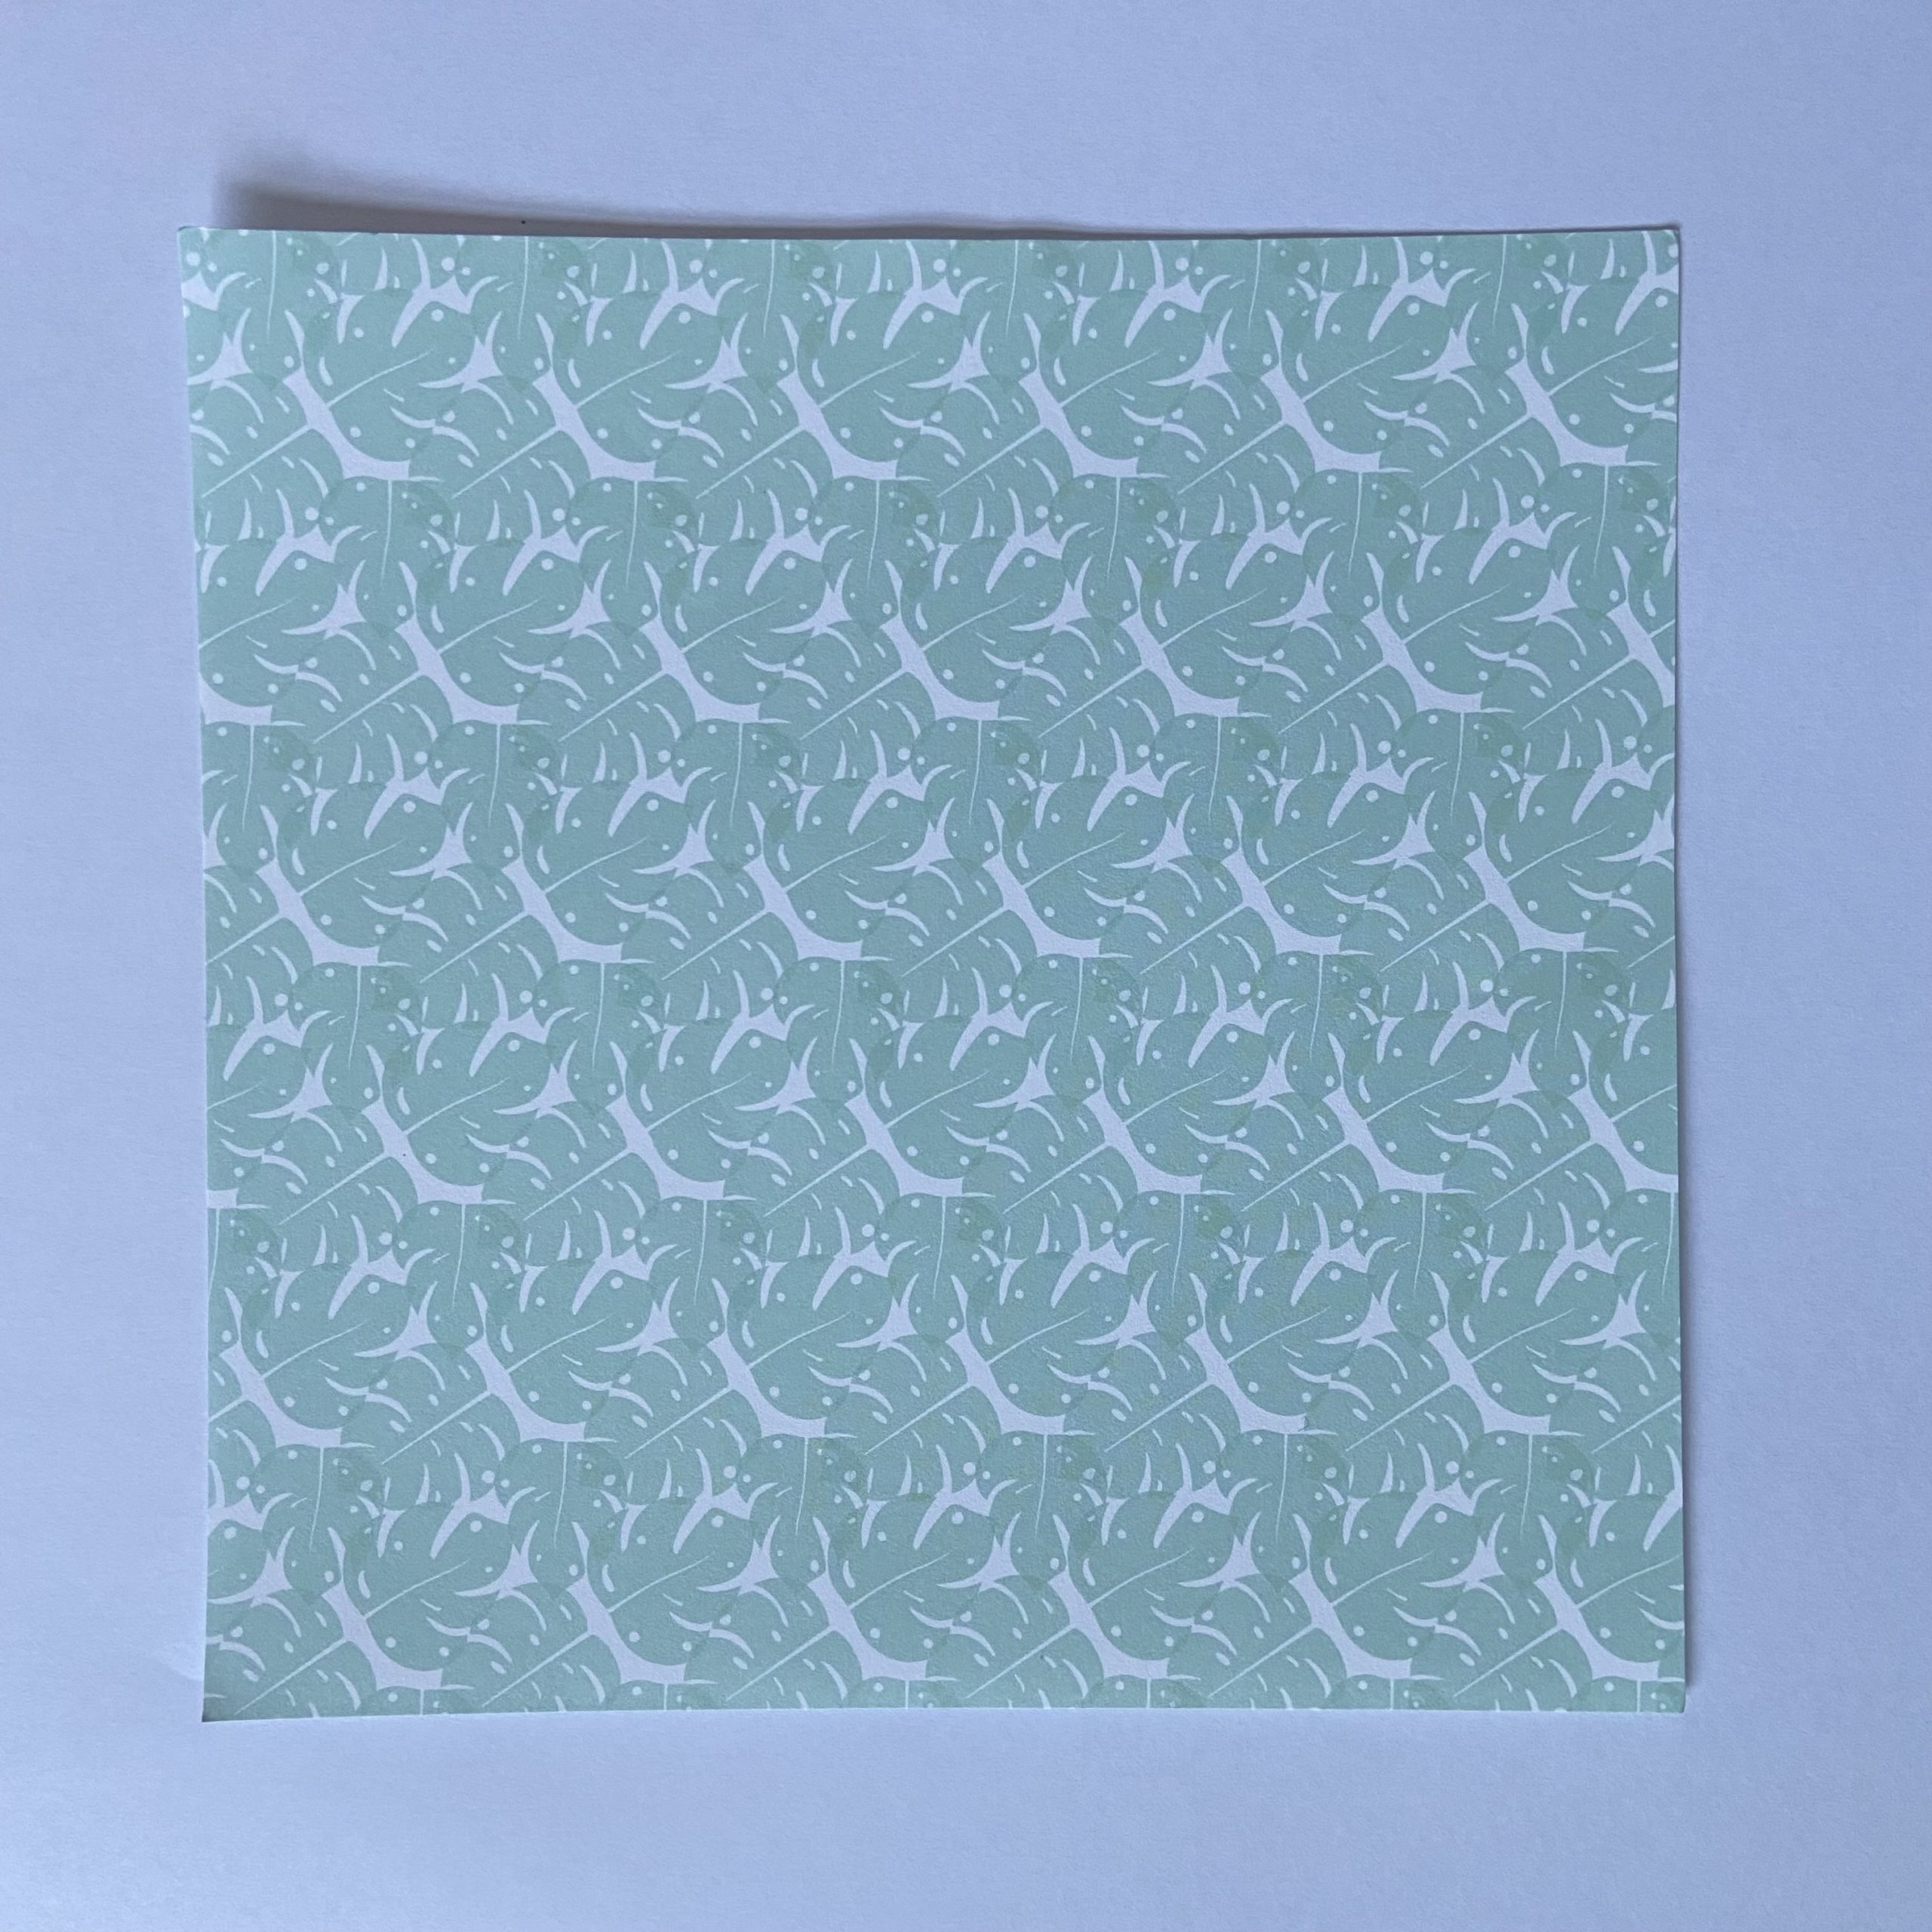
For this craft, you will simply need 1 piece of square paper – this can be your favourite colour, a pretty pattered piece or even some old newspaper!
(I recommend at least 6”x6” – but you can make them as big or as small as you like!)
Paper Crane Instructions
Step 1 – Begin by making an origami square base. To do this, start with your paper colour/pattern side facing up (this is the side that will be visible once your crane is complete)
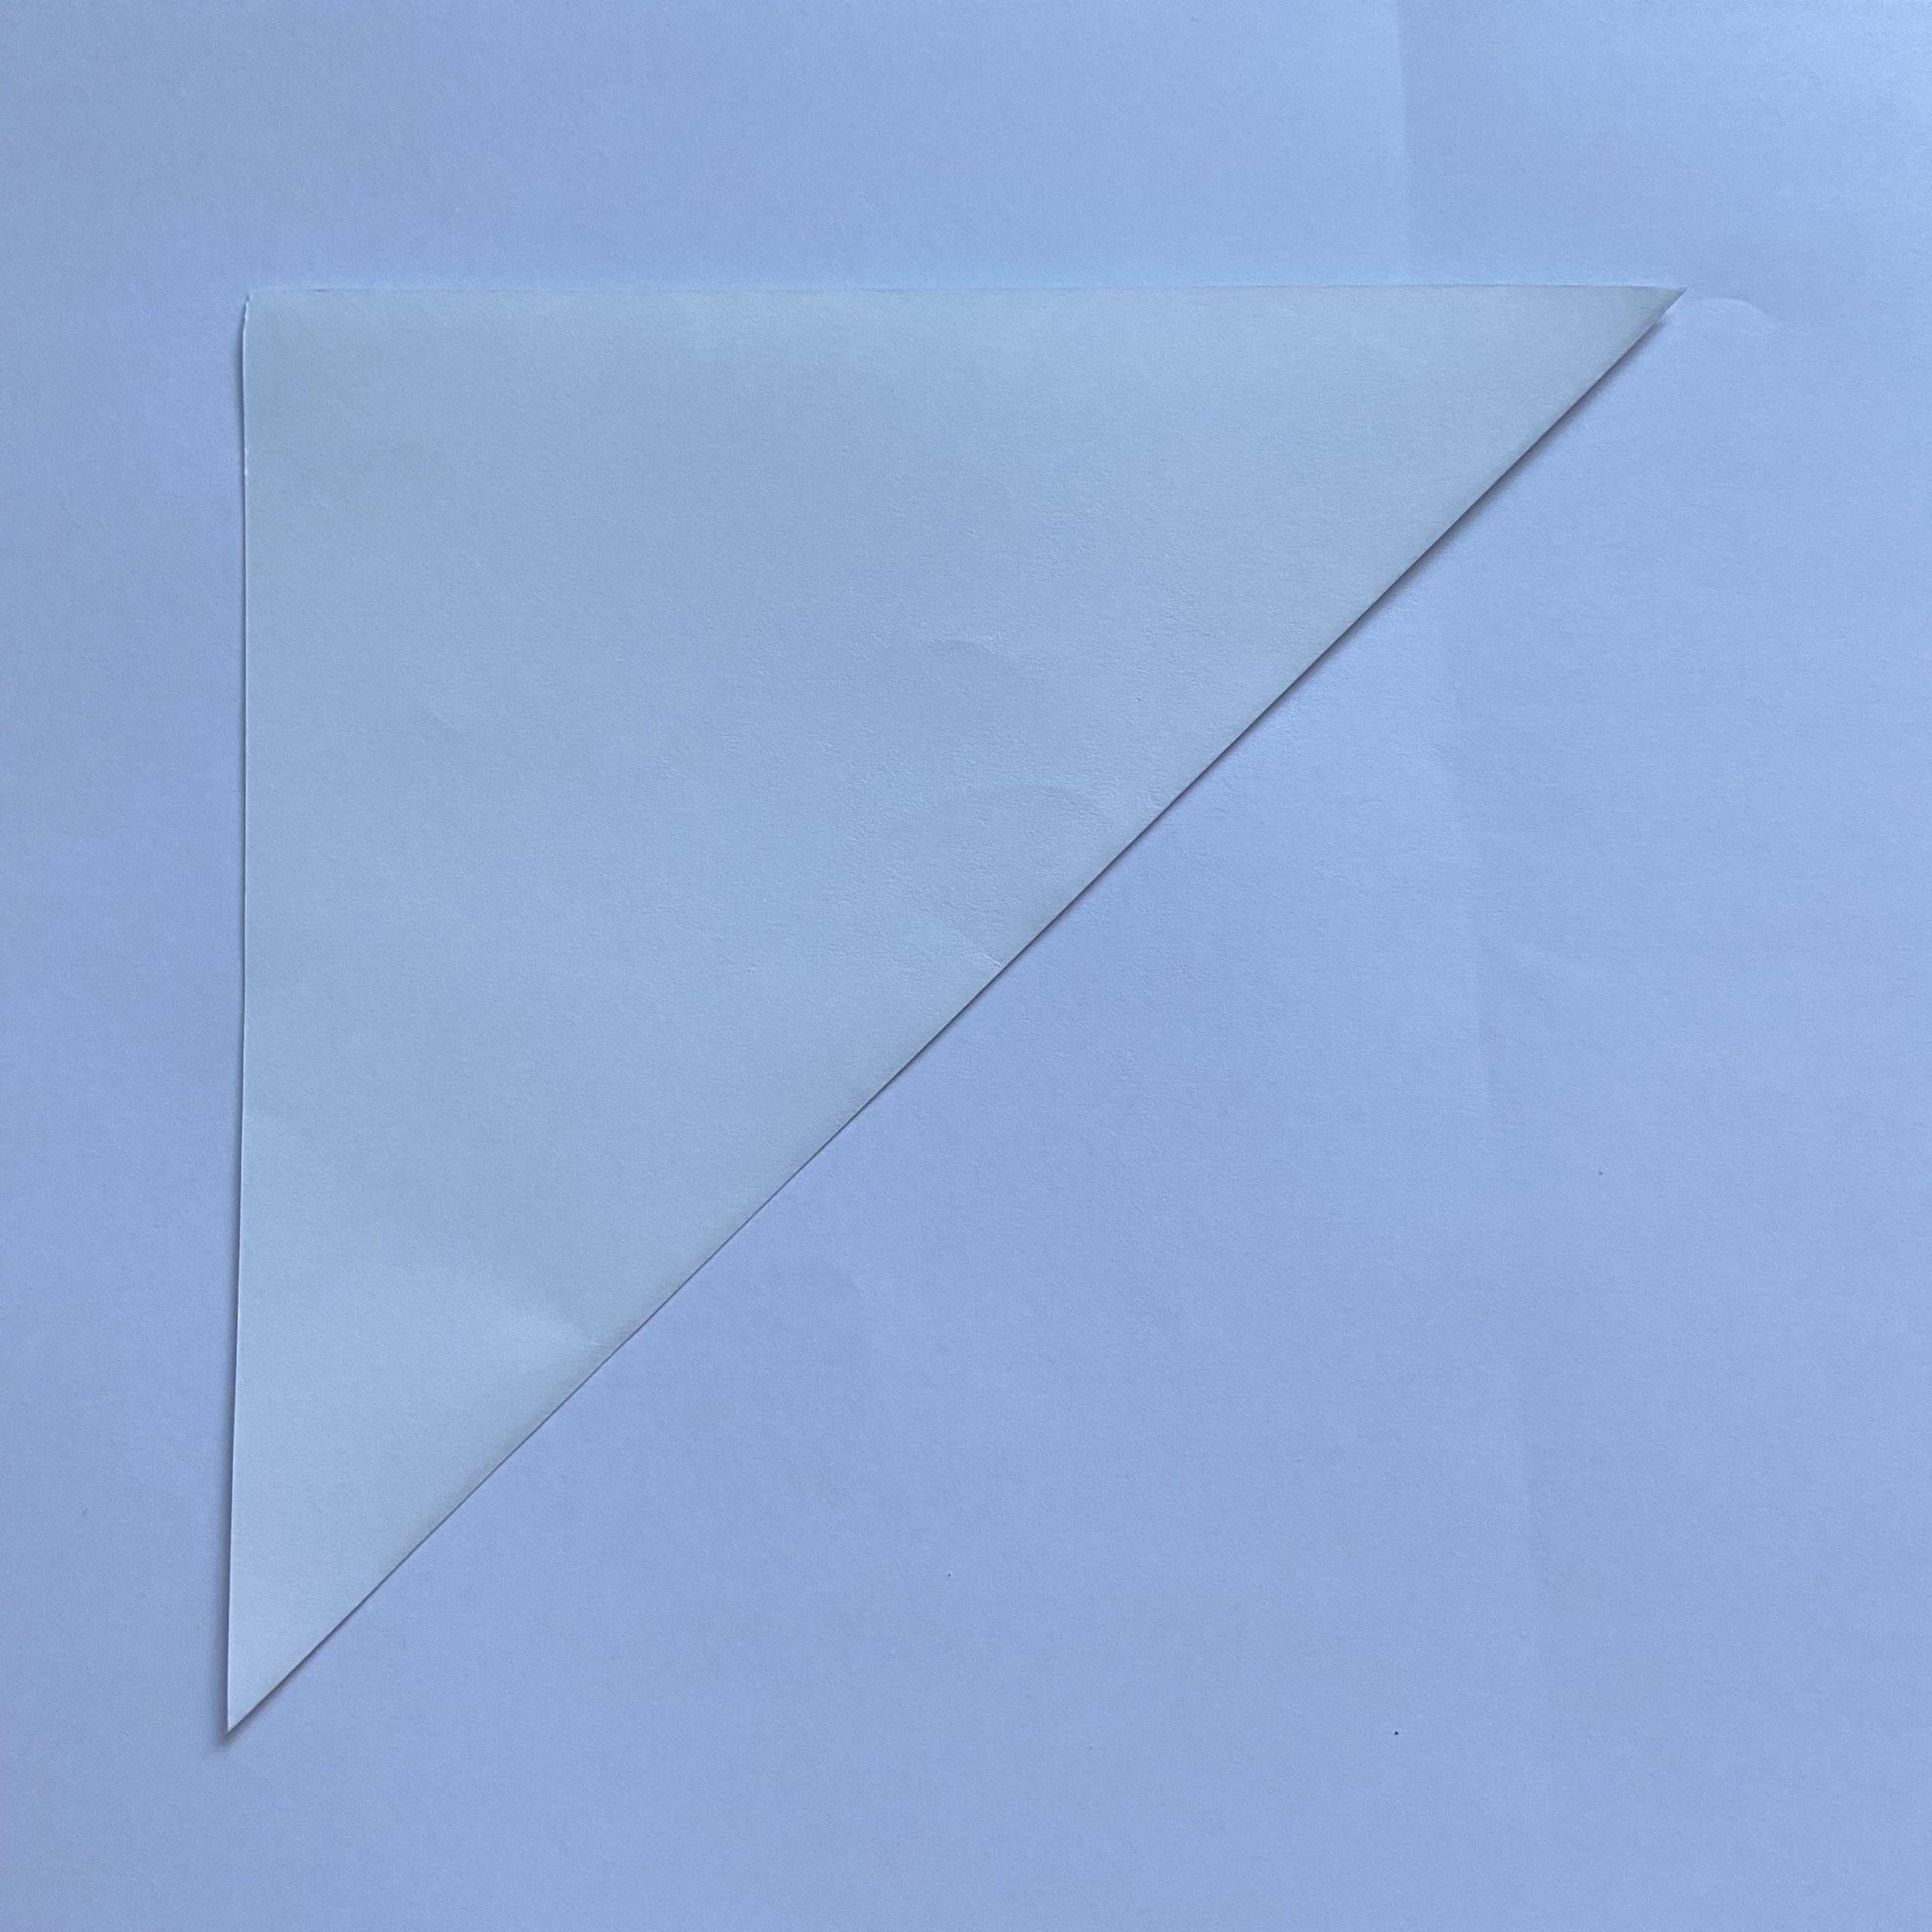
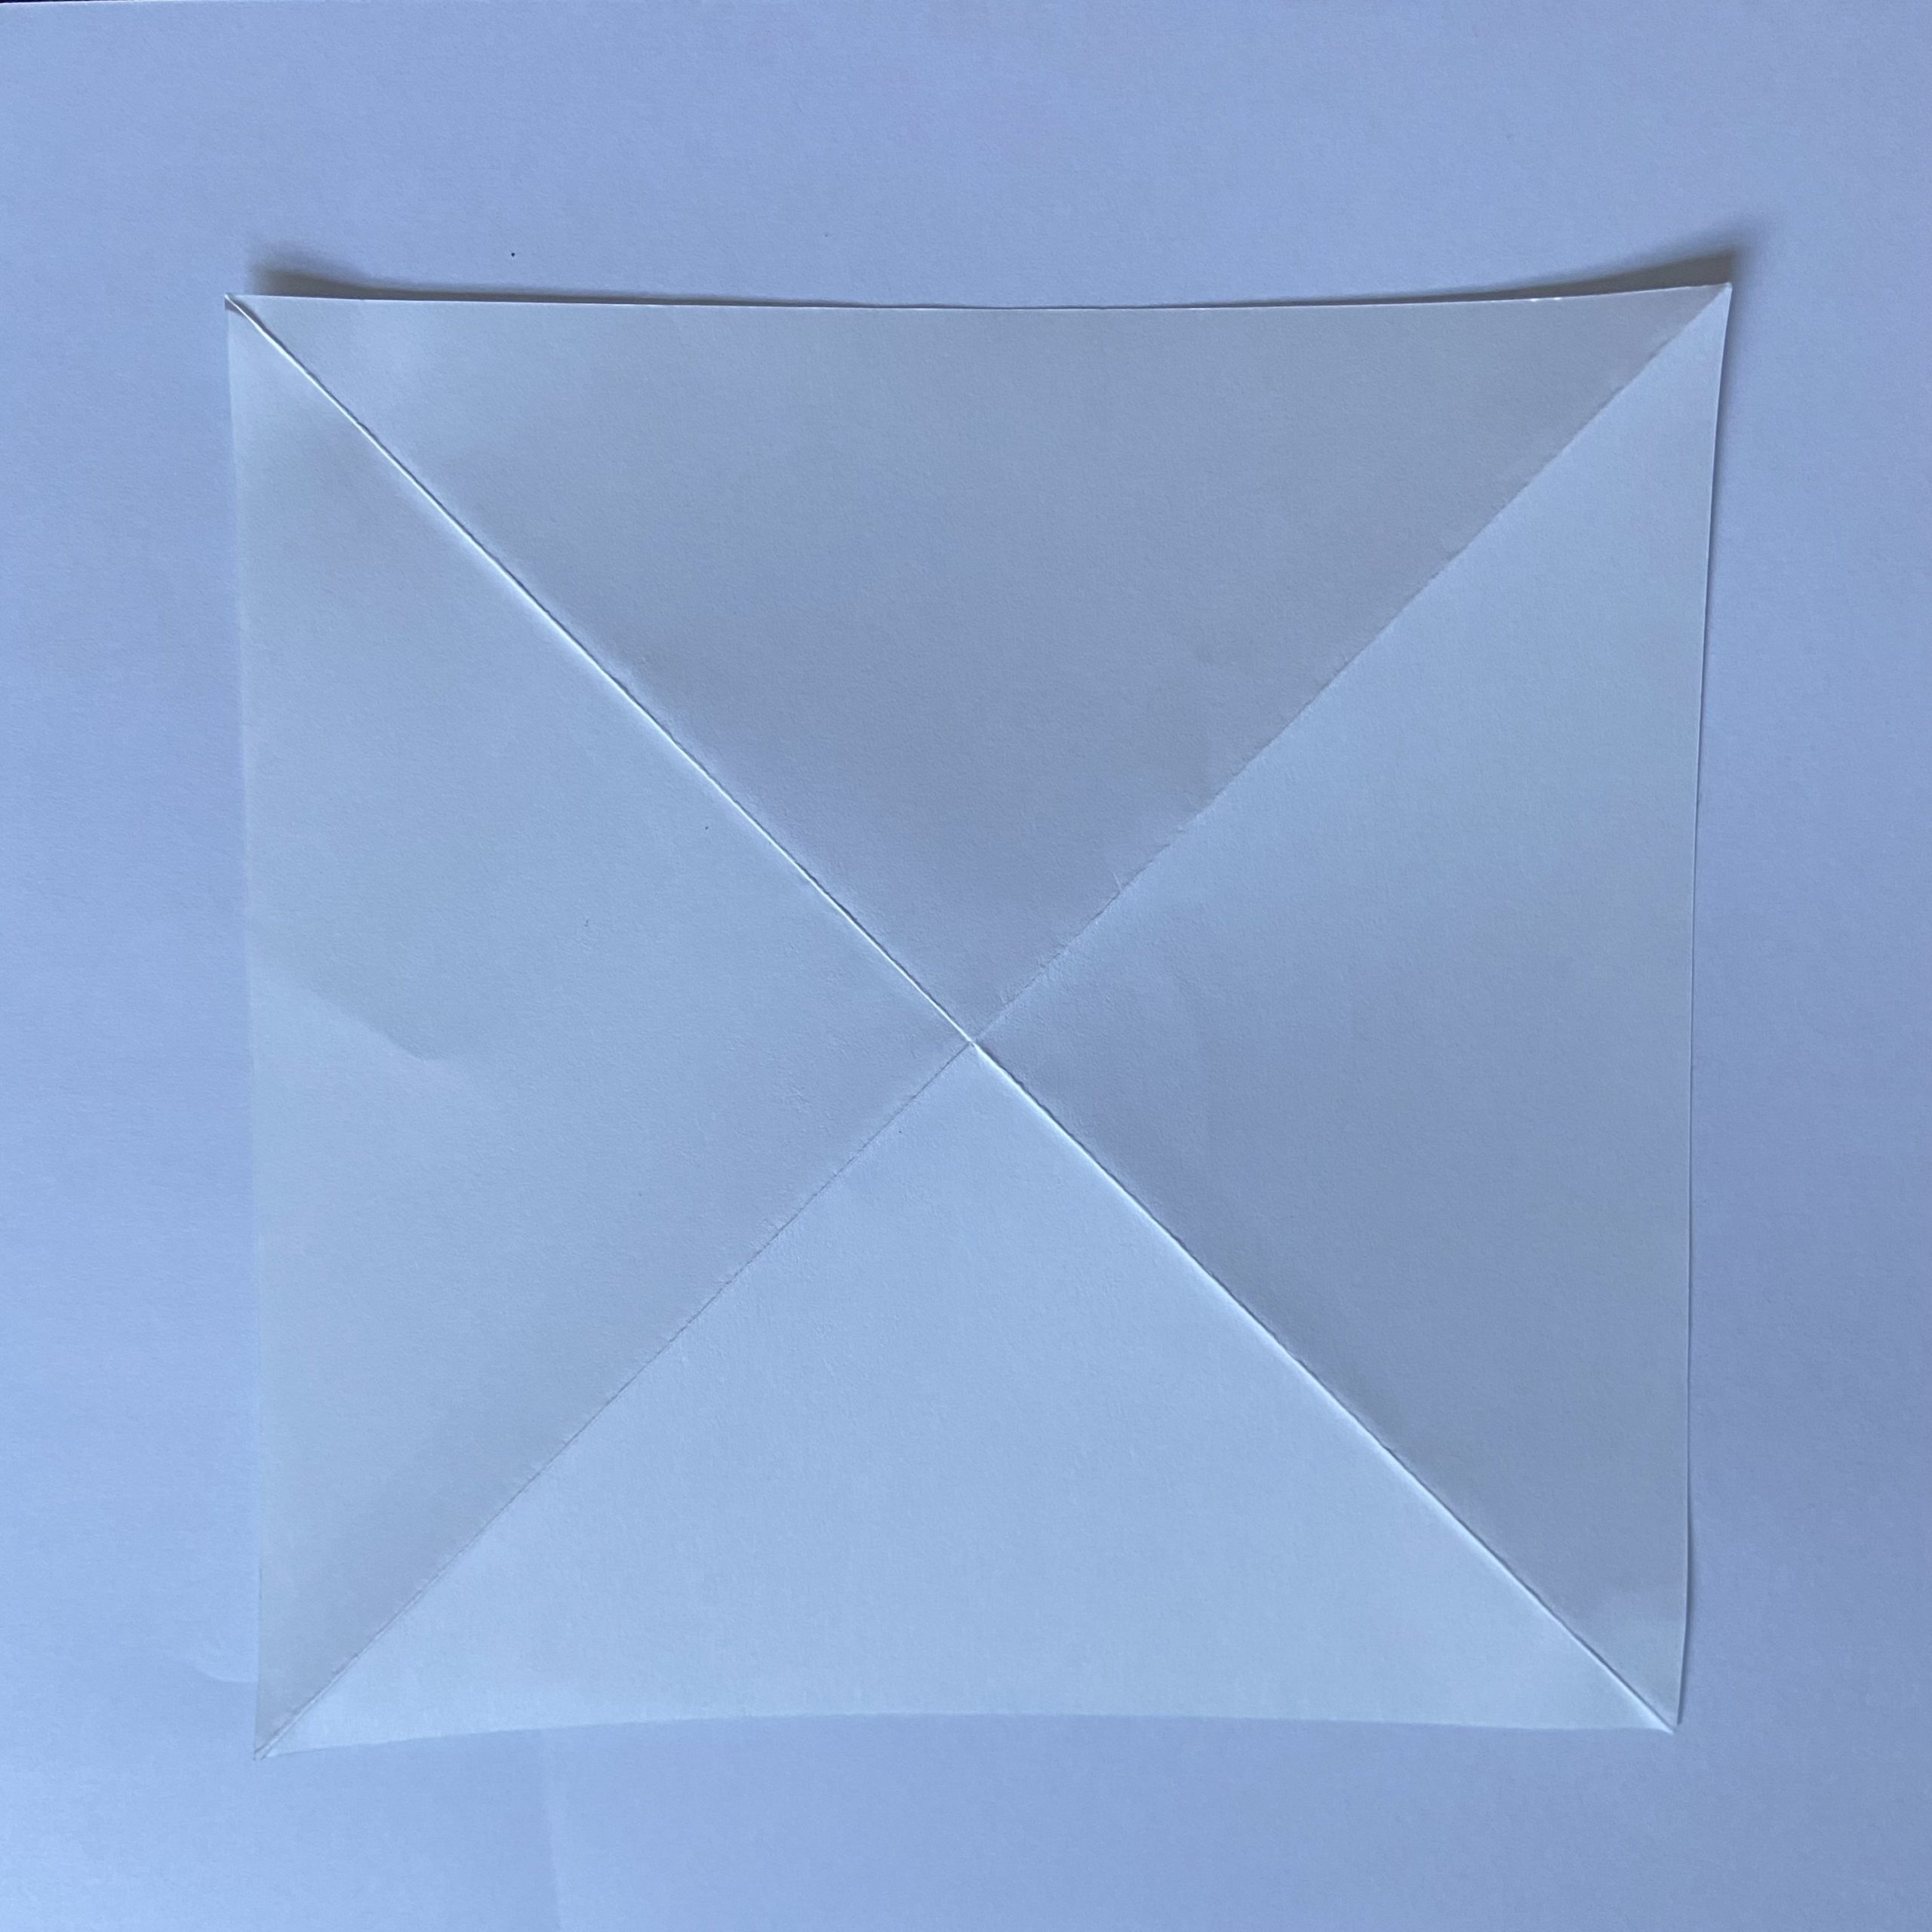
Step 2 – Fold the paper in half diagonally
Step 3 – Unfold. There should now be a diagonal crease in the paper from the fold

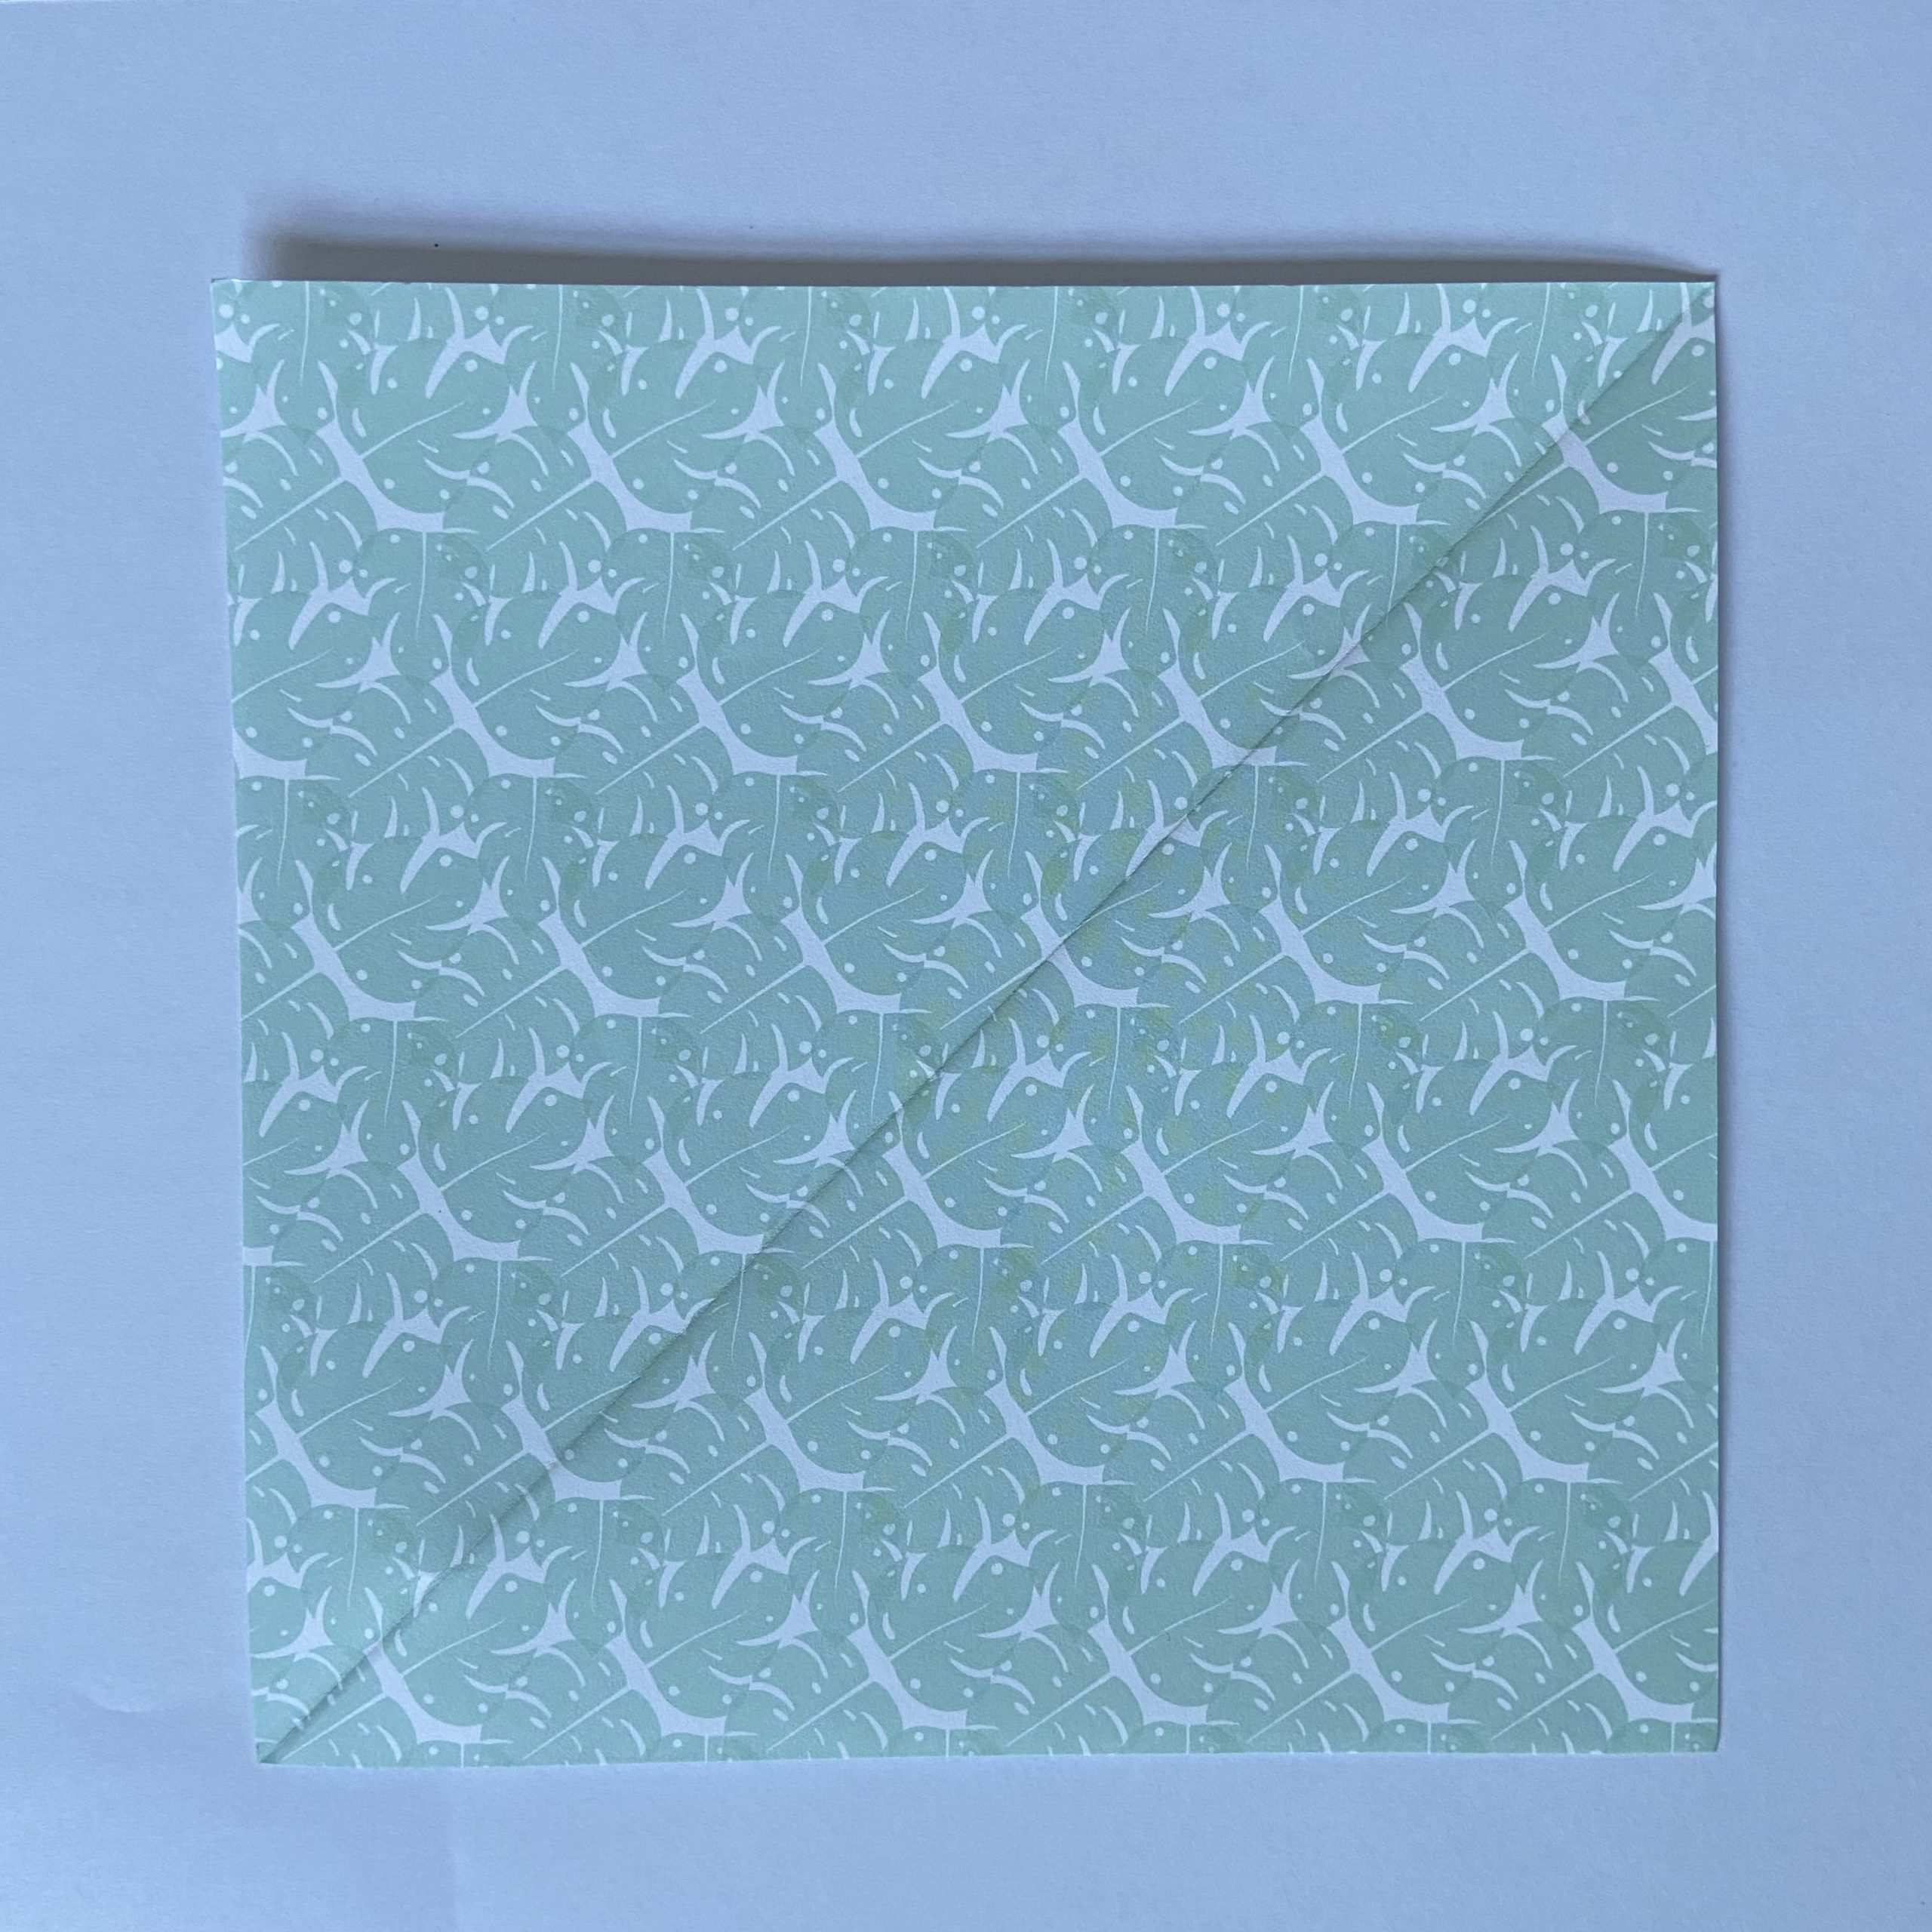
Step 4 – Fold the paper in half diagonally again, but this time in the other direction

Step 5 – Unfold. There should now be 2 diagonal creases that look like an X
Step 6 – Flip the paper over so that the other side is facing up (depending on the paper you chose, this will most likely be blank/white)
Step 7 – Fold the paper in half horizontally
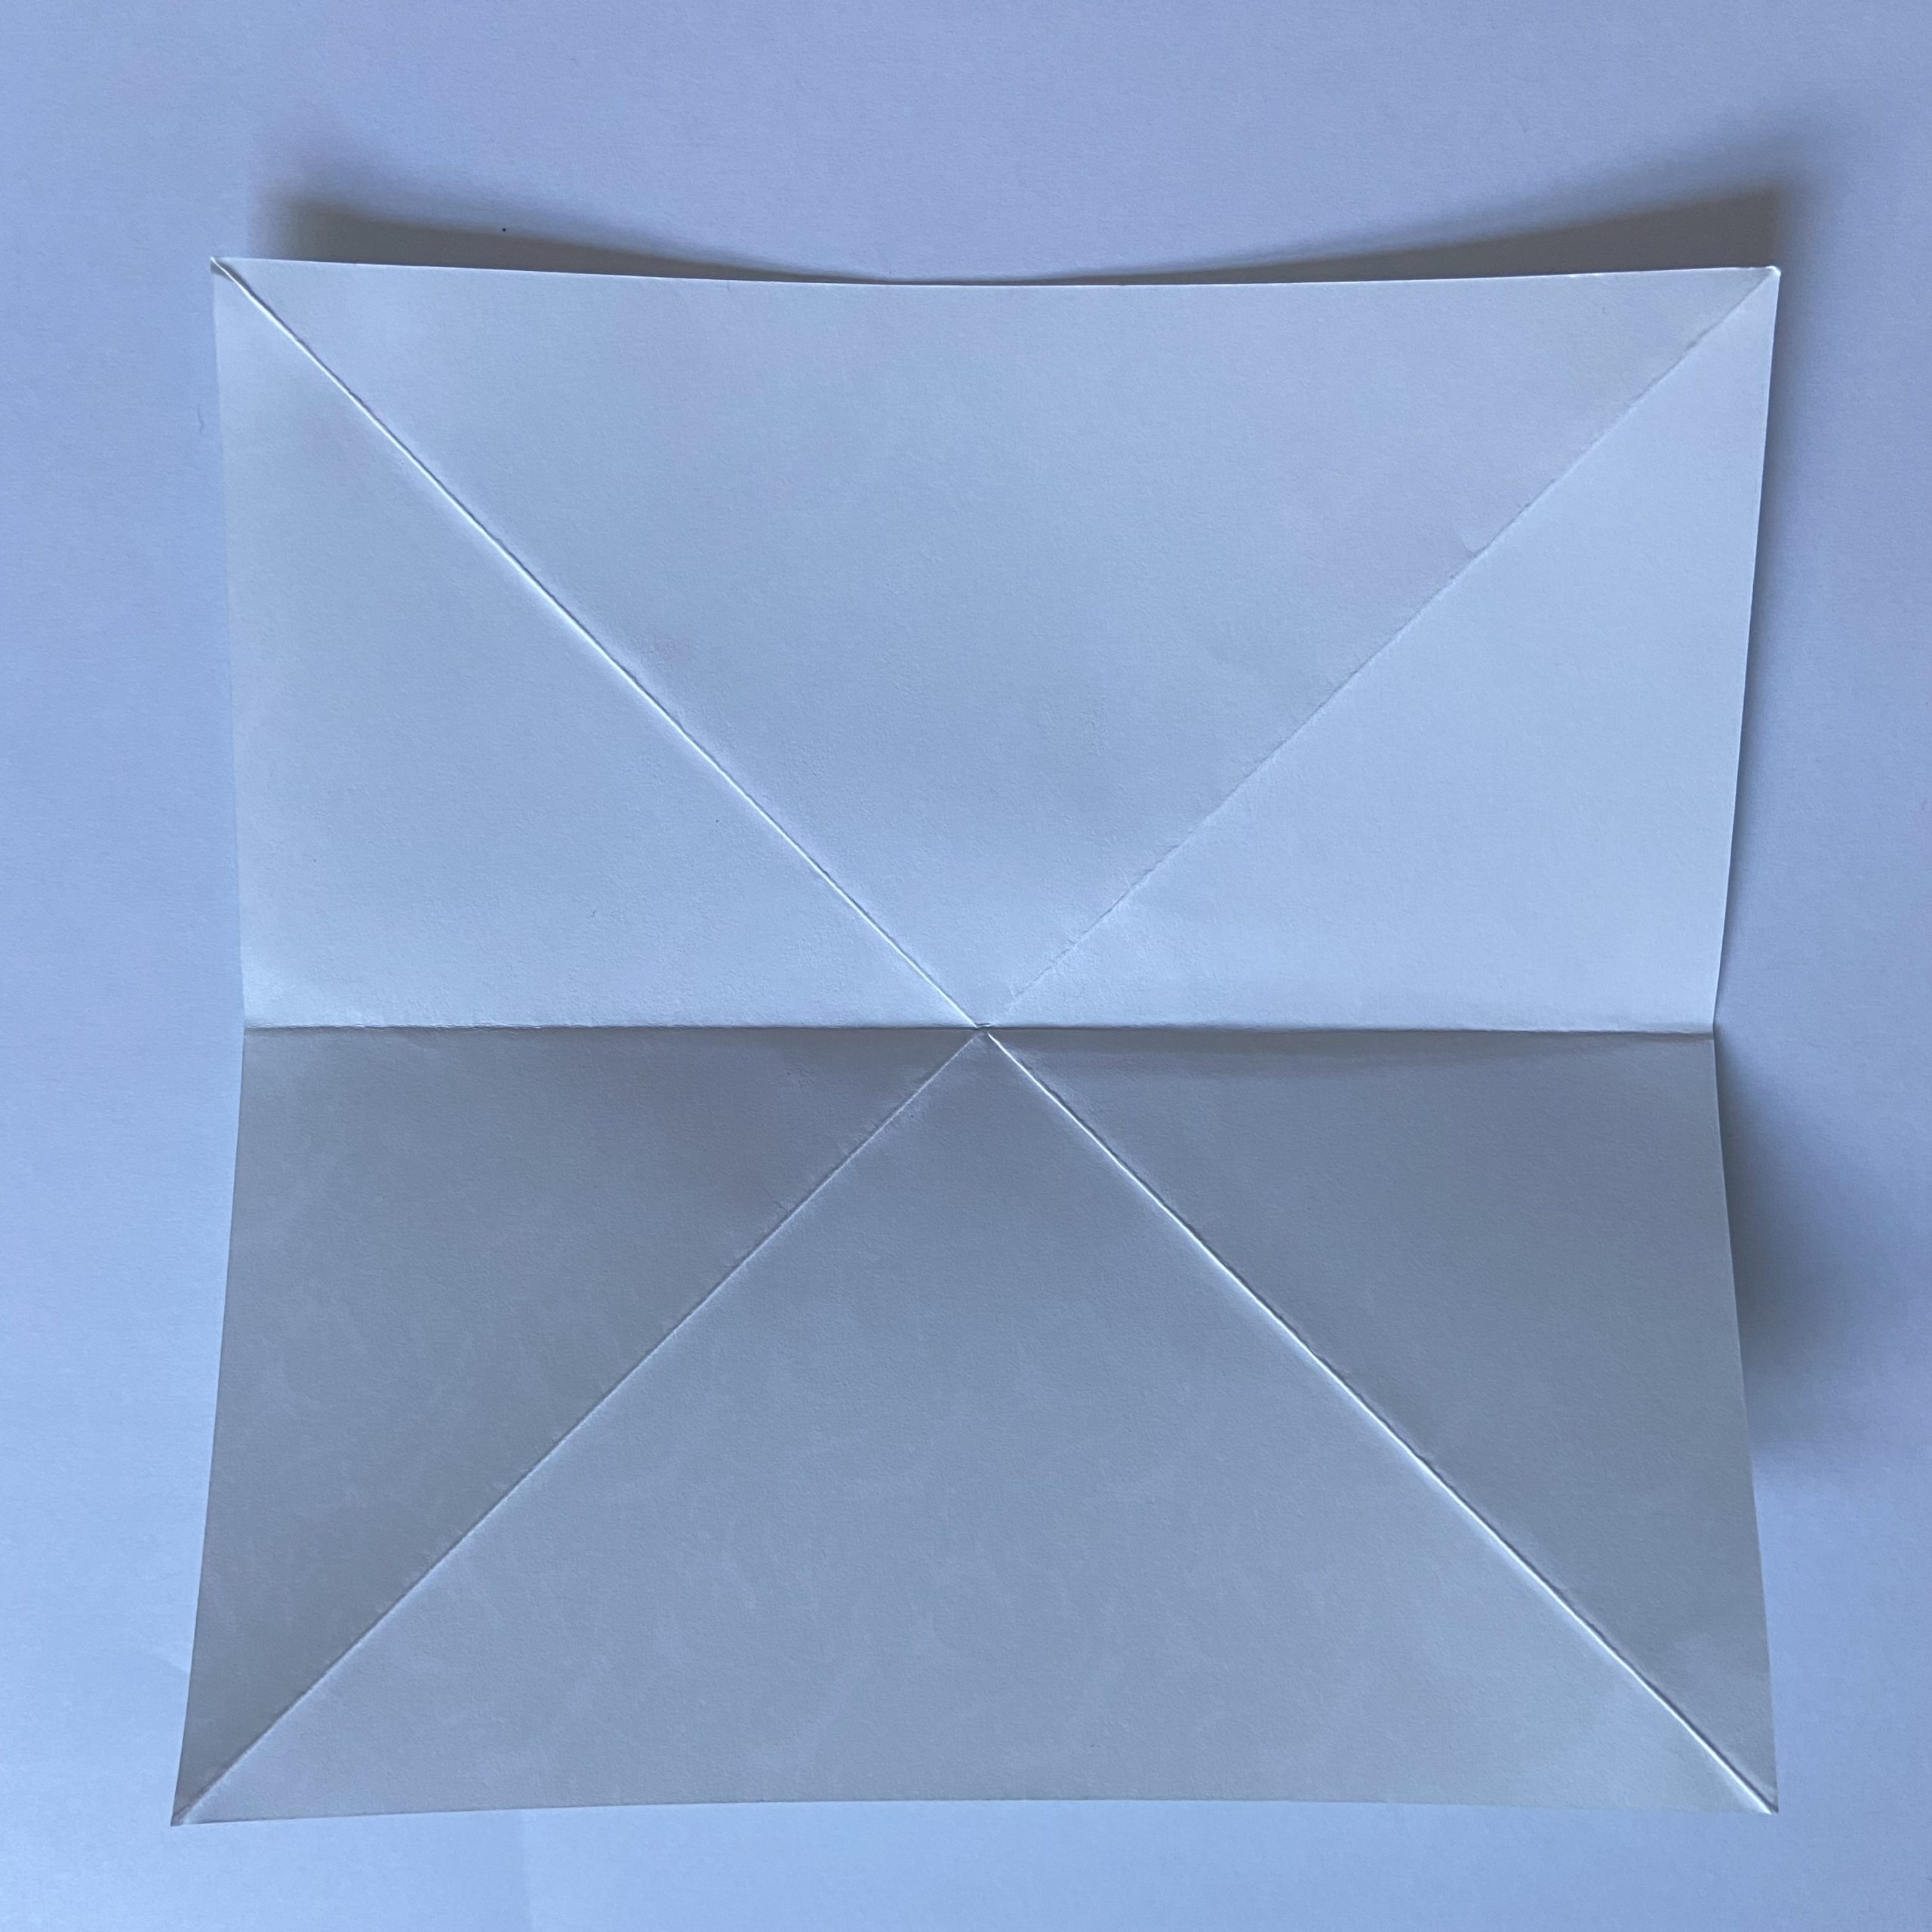
Step 8 – Unfold. There should now be a new crease across the middle
Step 9 – Fold the paper in half vertically
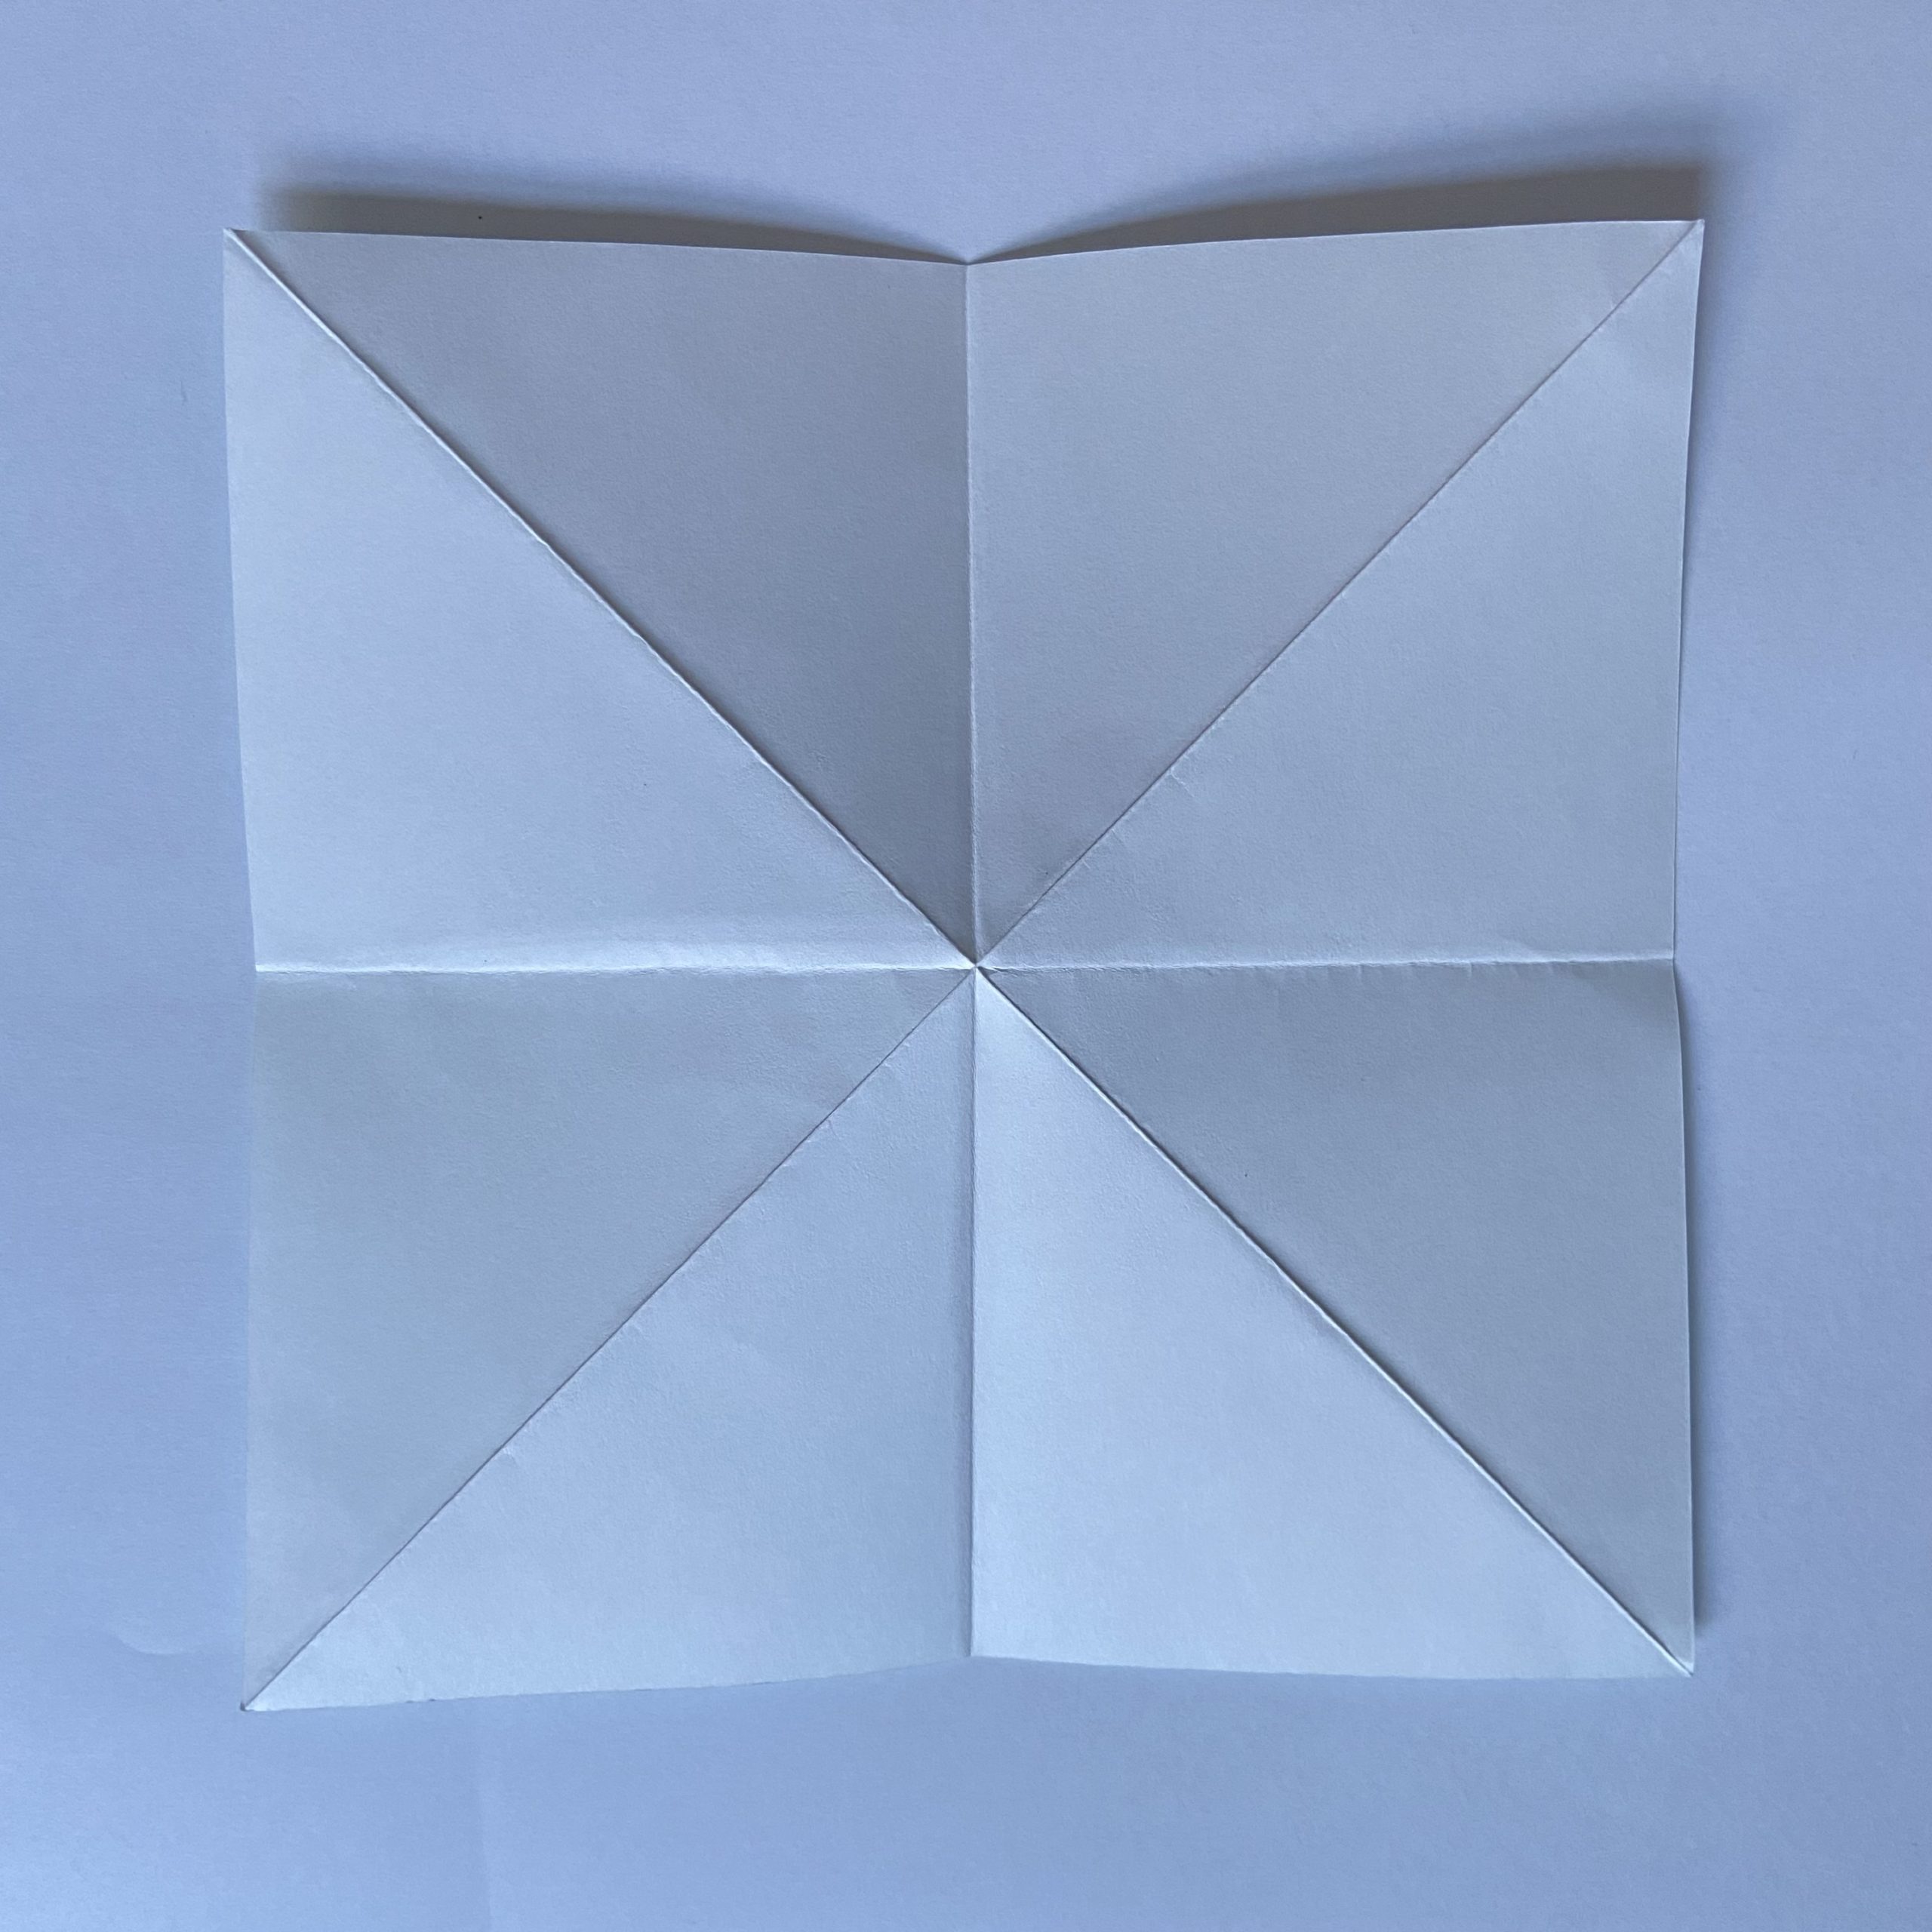
Step 10 – Unfold. You should now have a new cease down the middle
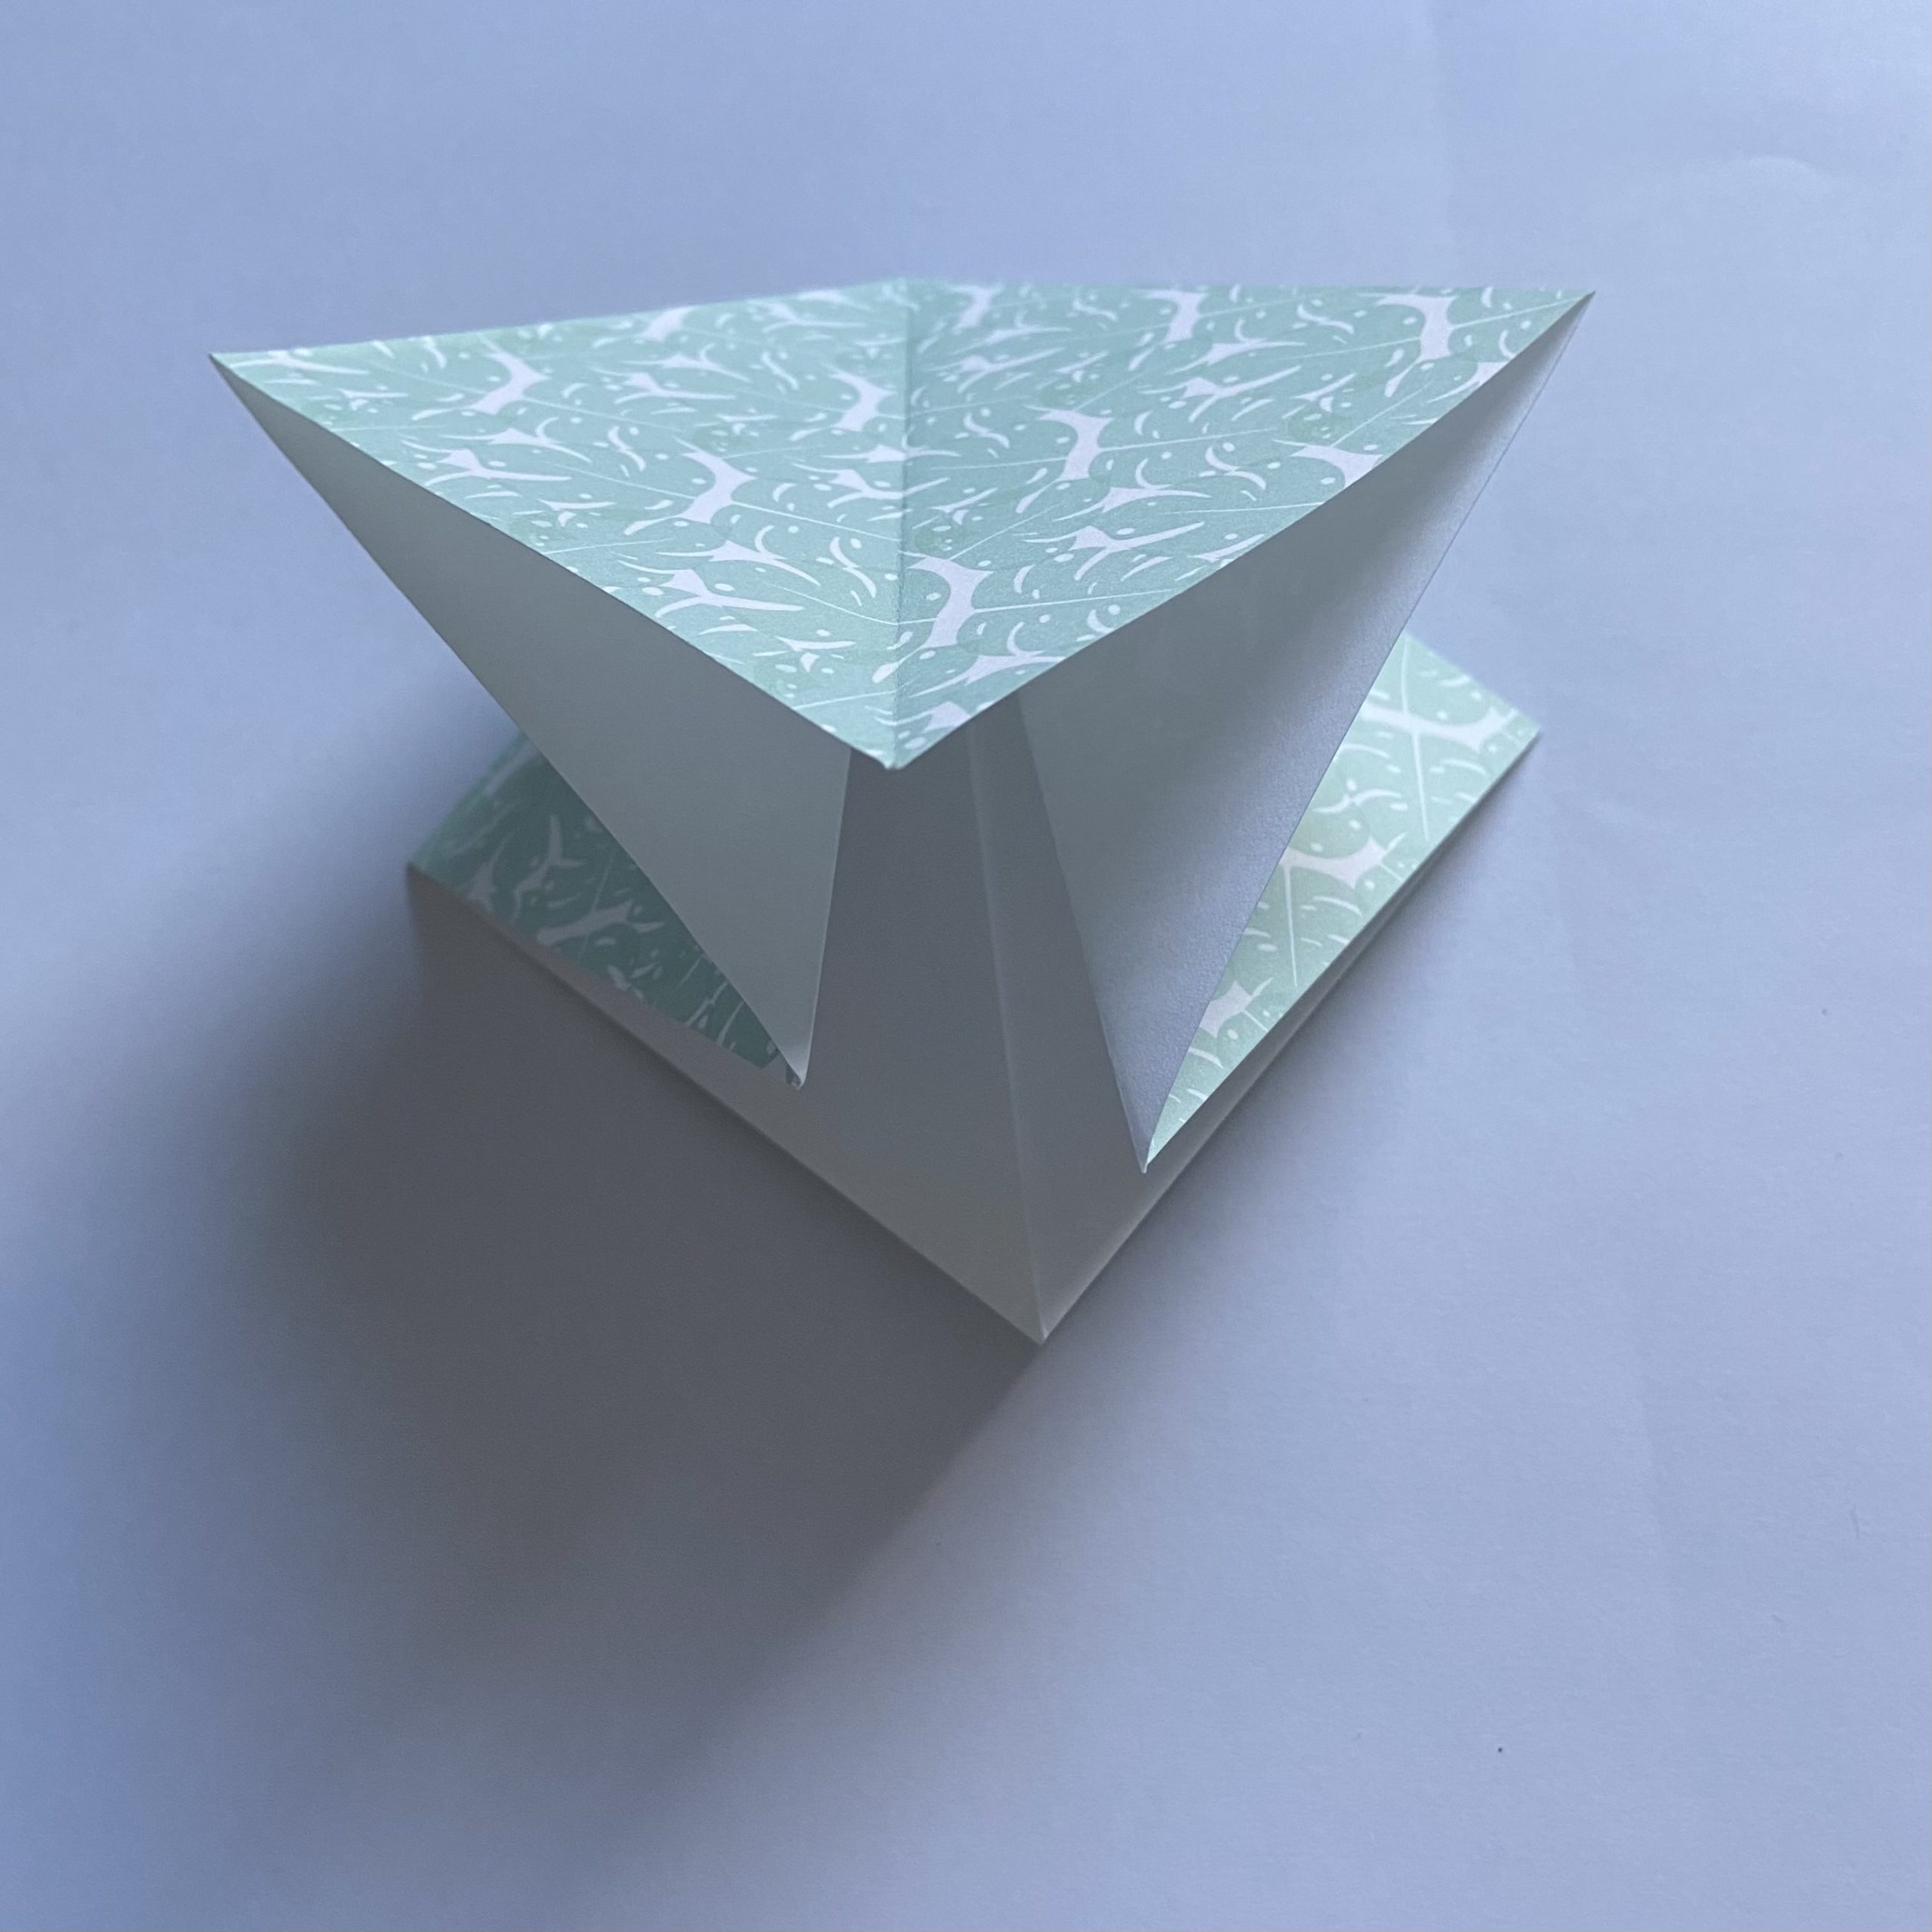
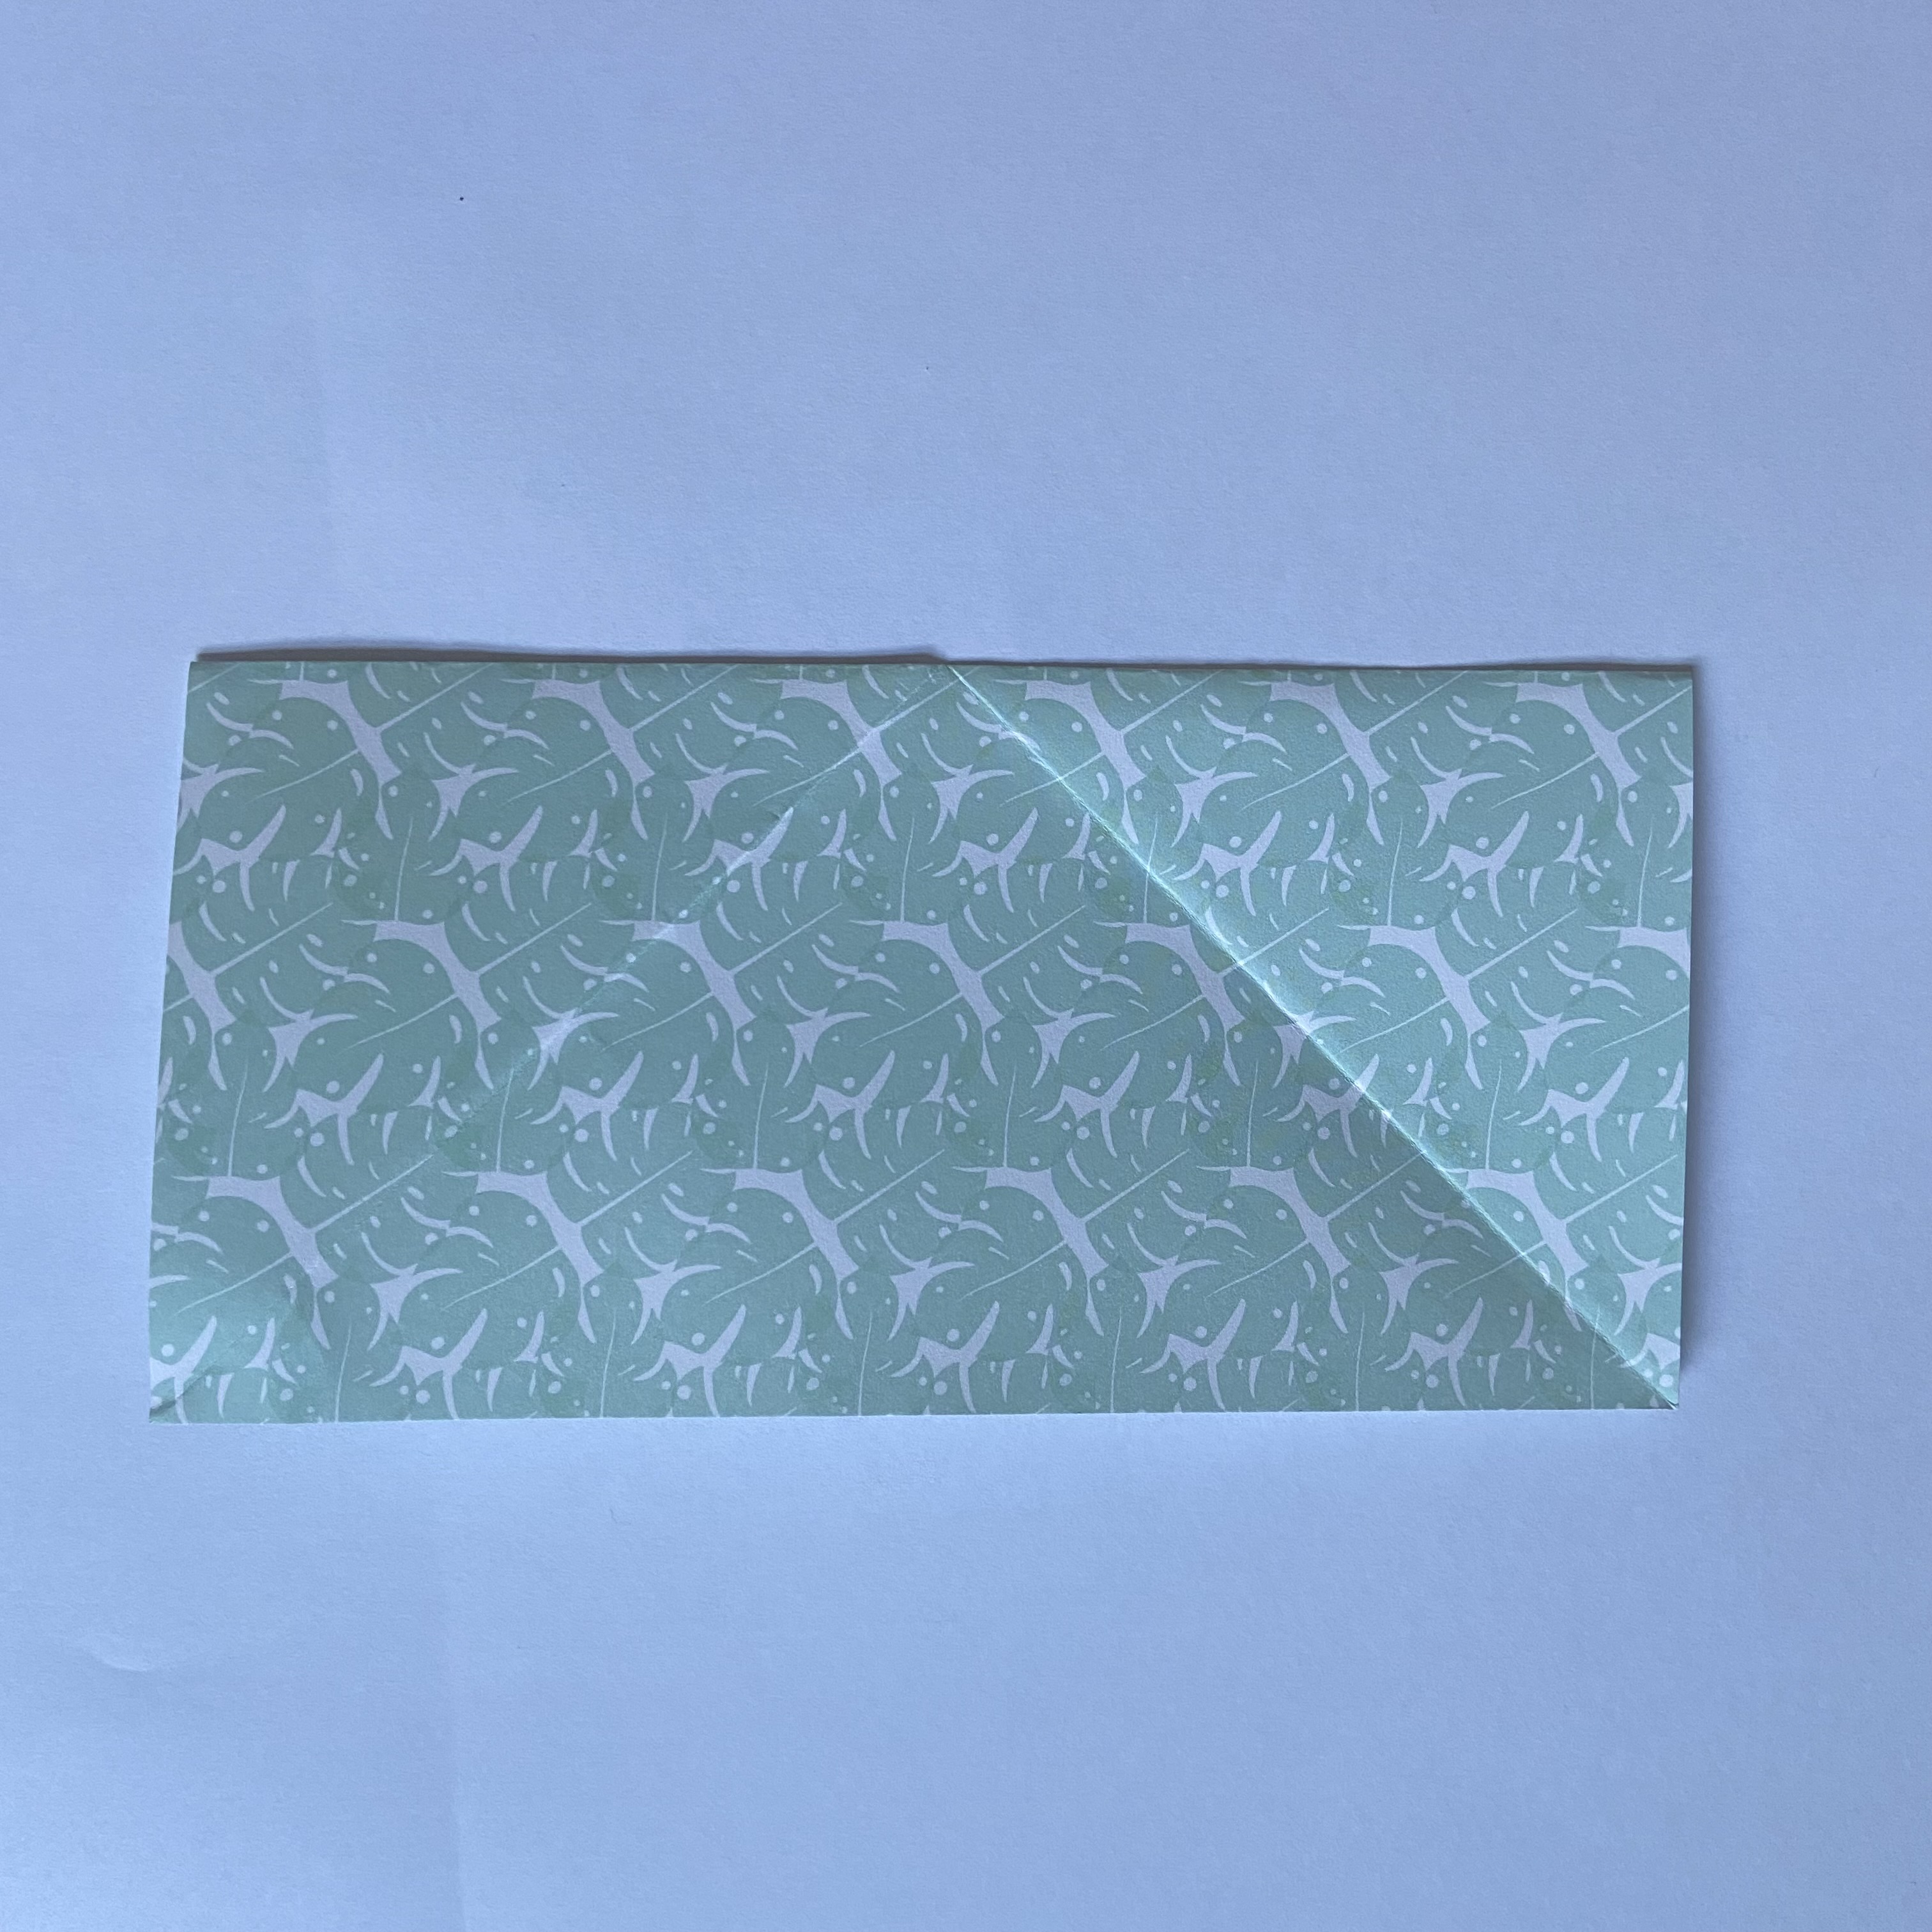
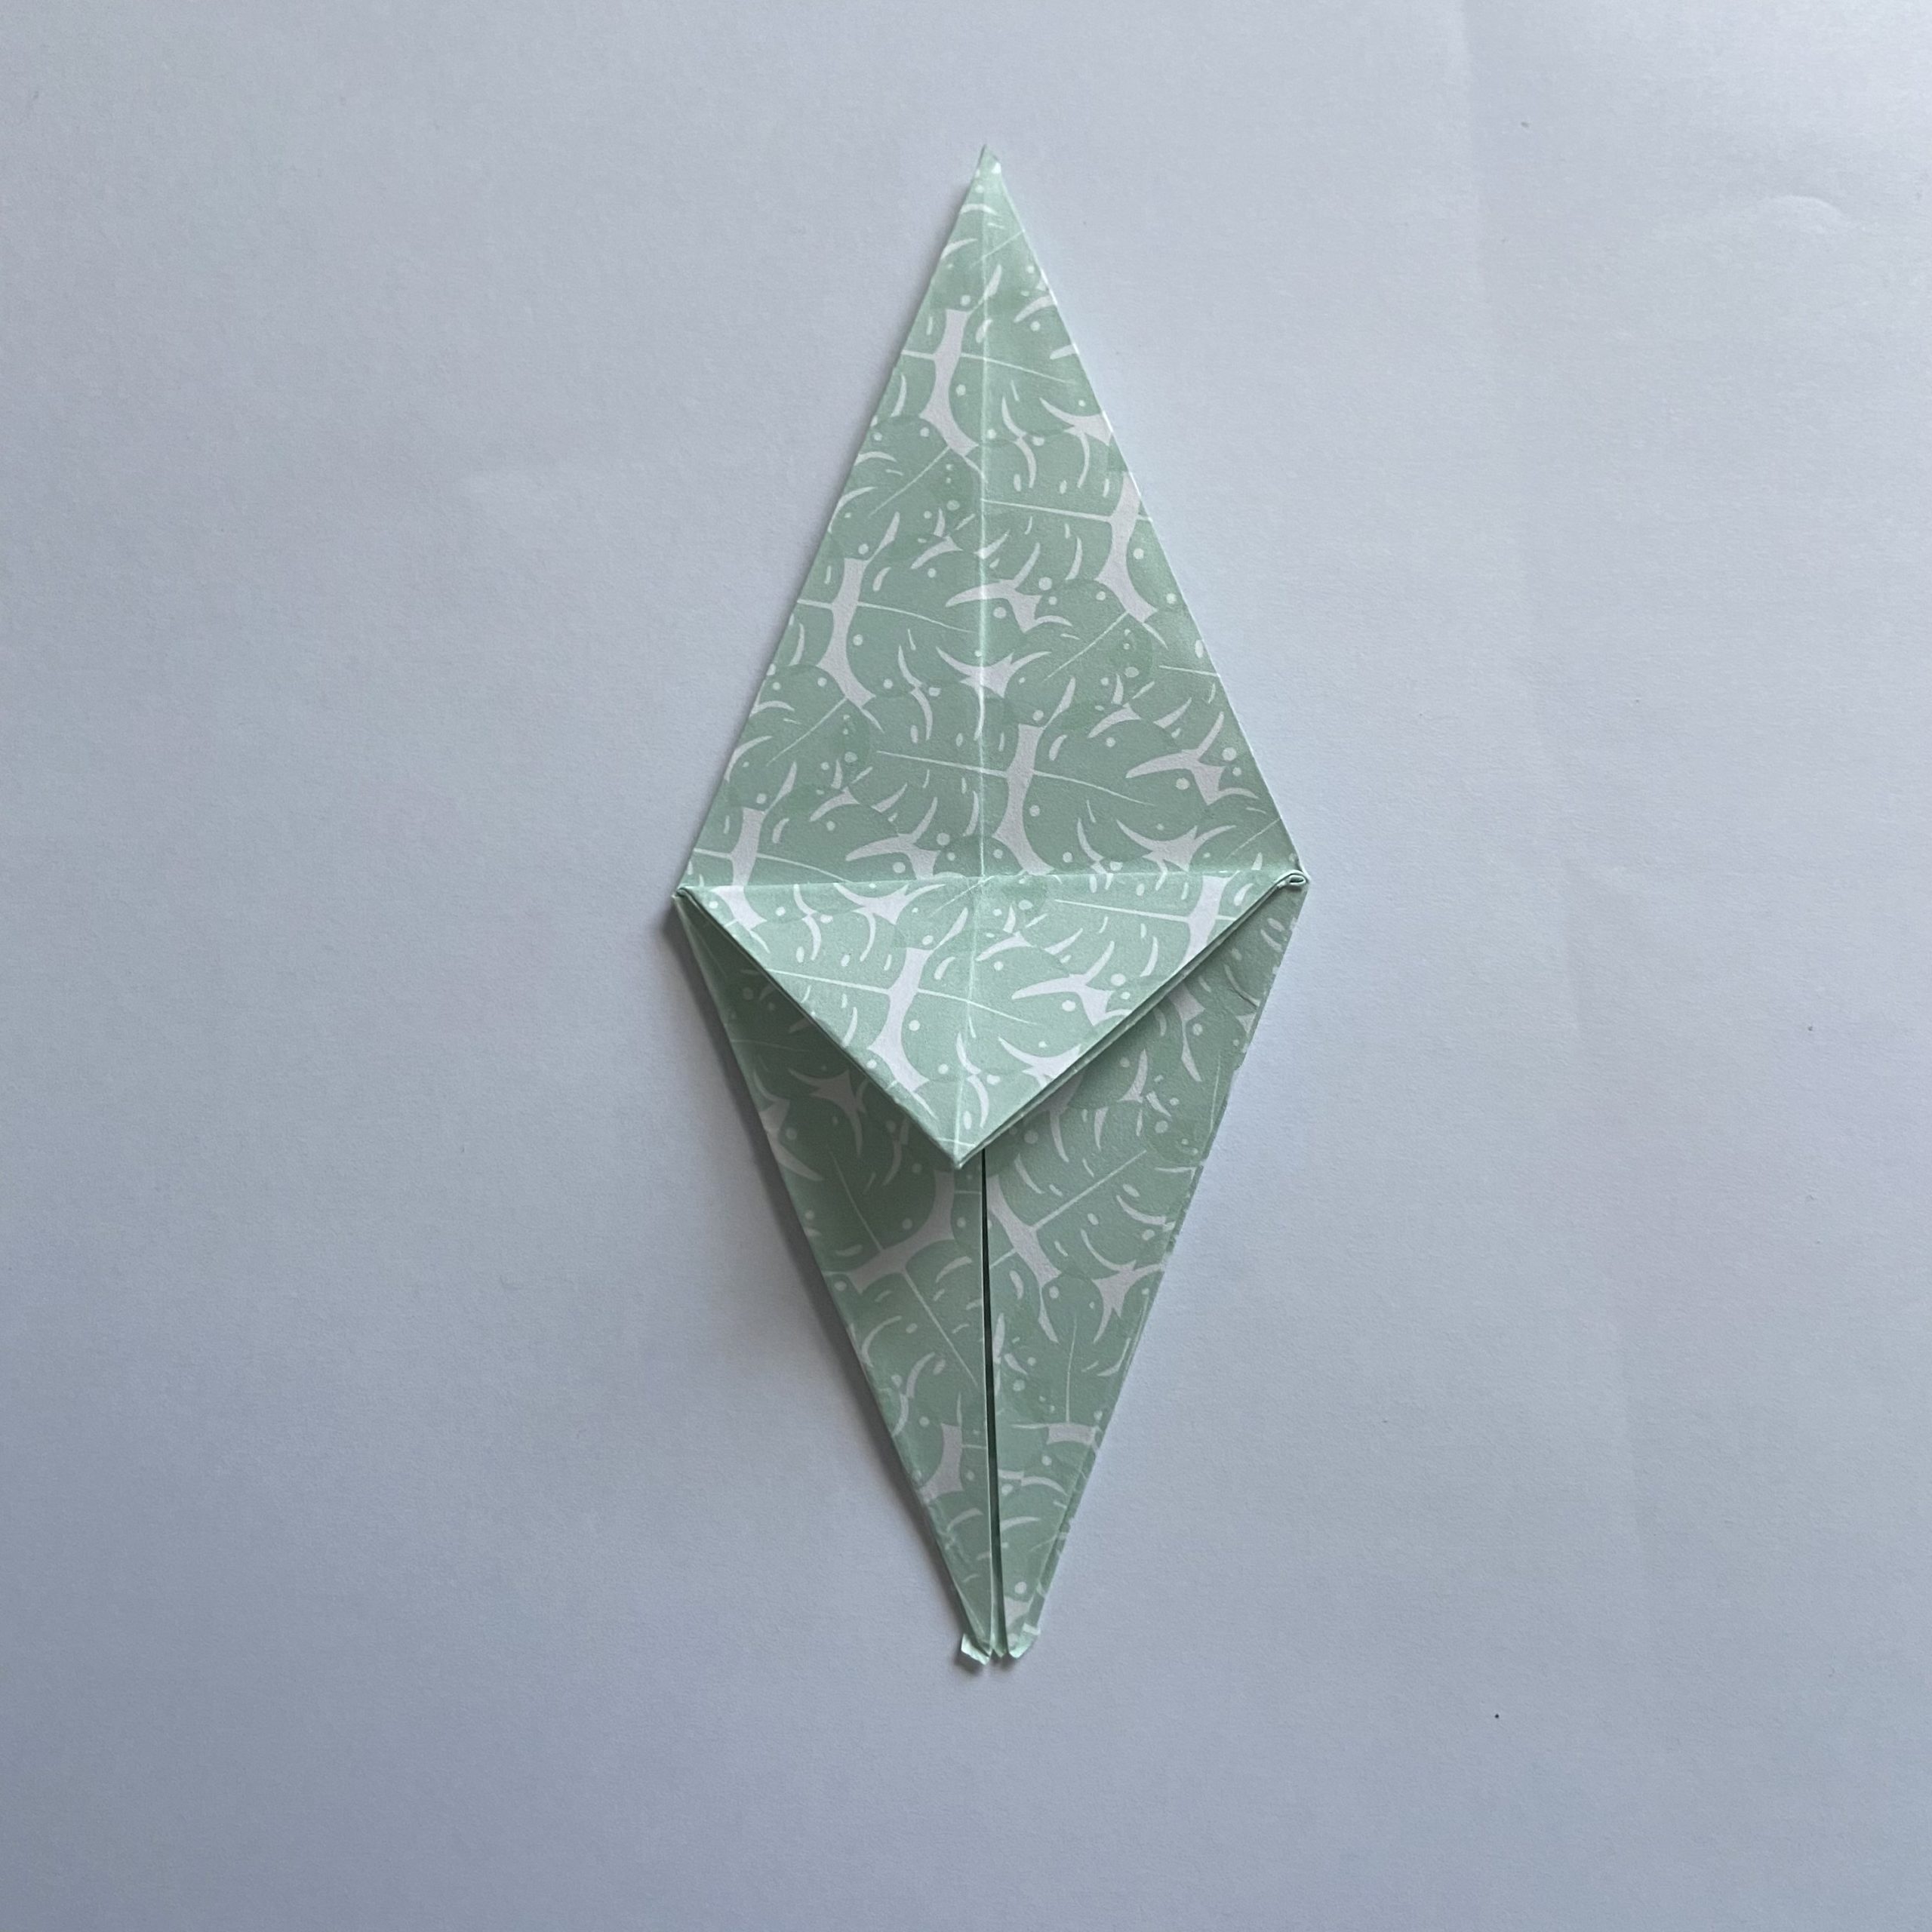
Step 11 – Turn the paper as pictured. Now fold from the top down – bring the top point down to meet the bottom point, whilst also folding the left and right corners into the center.
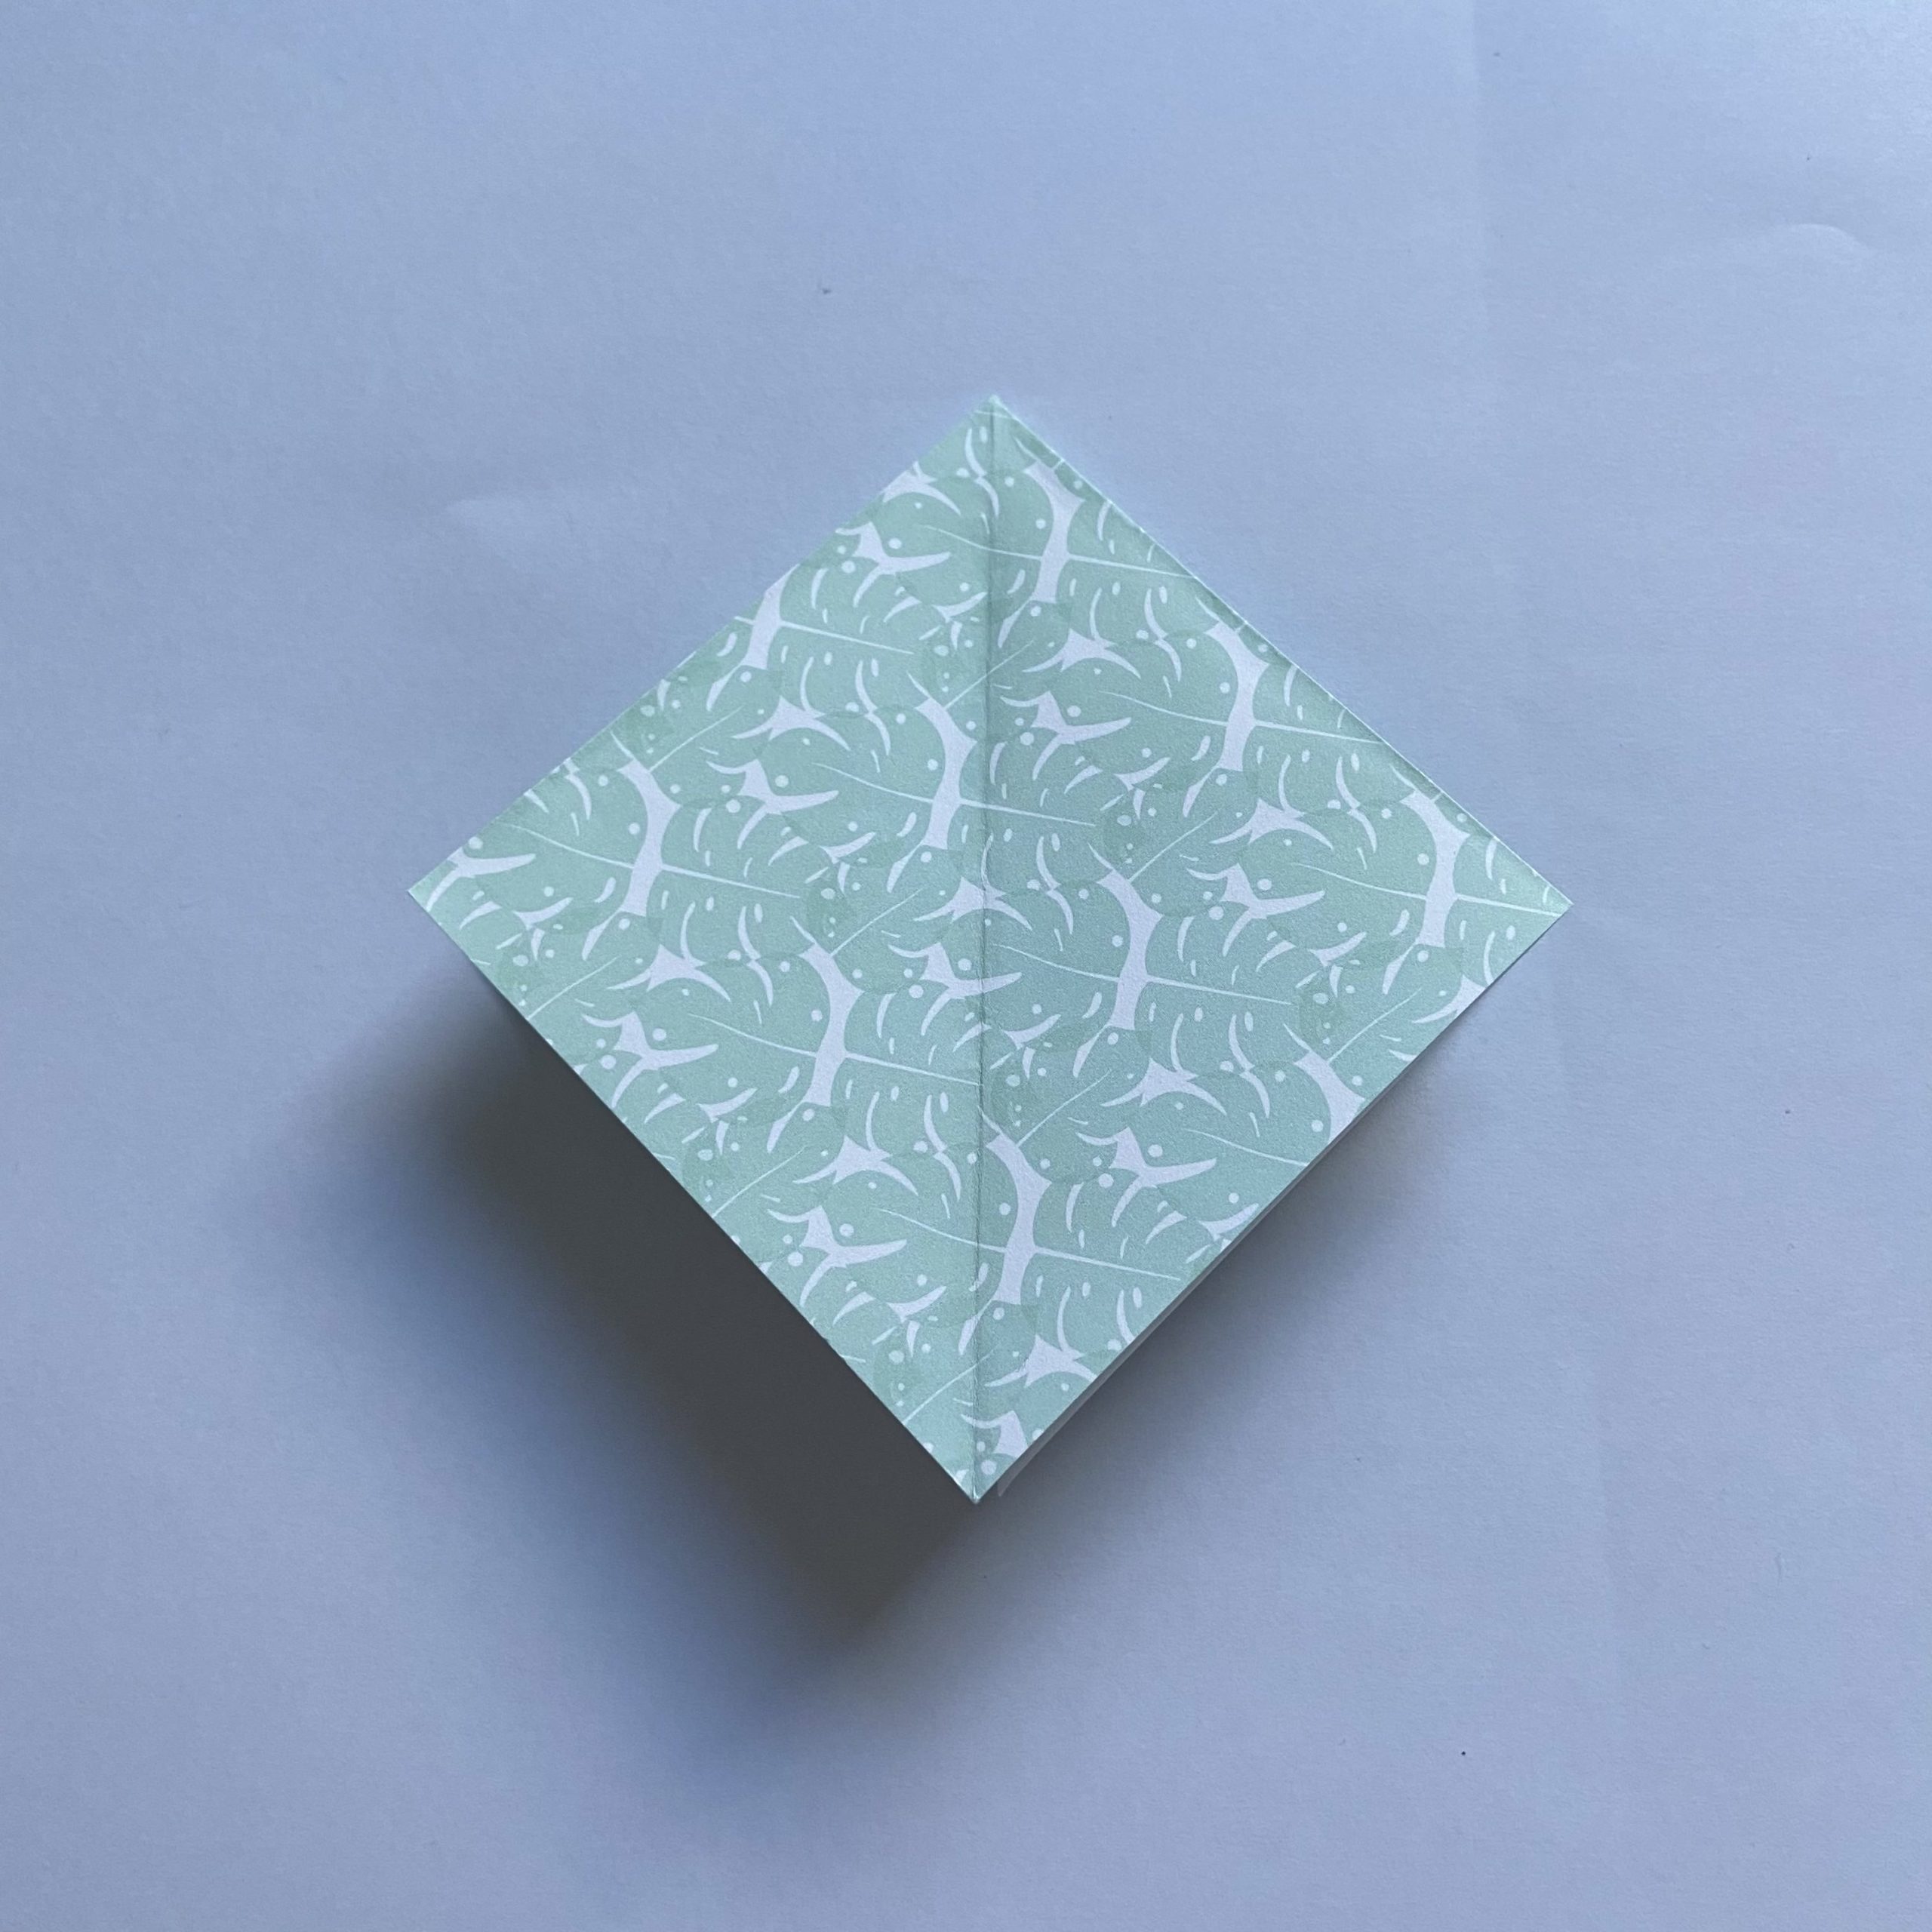
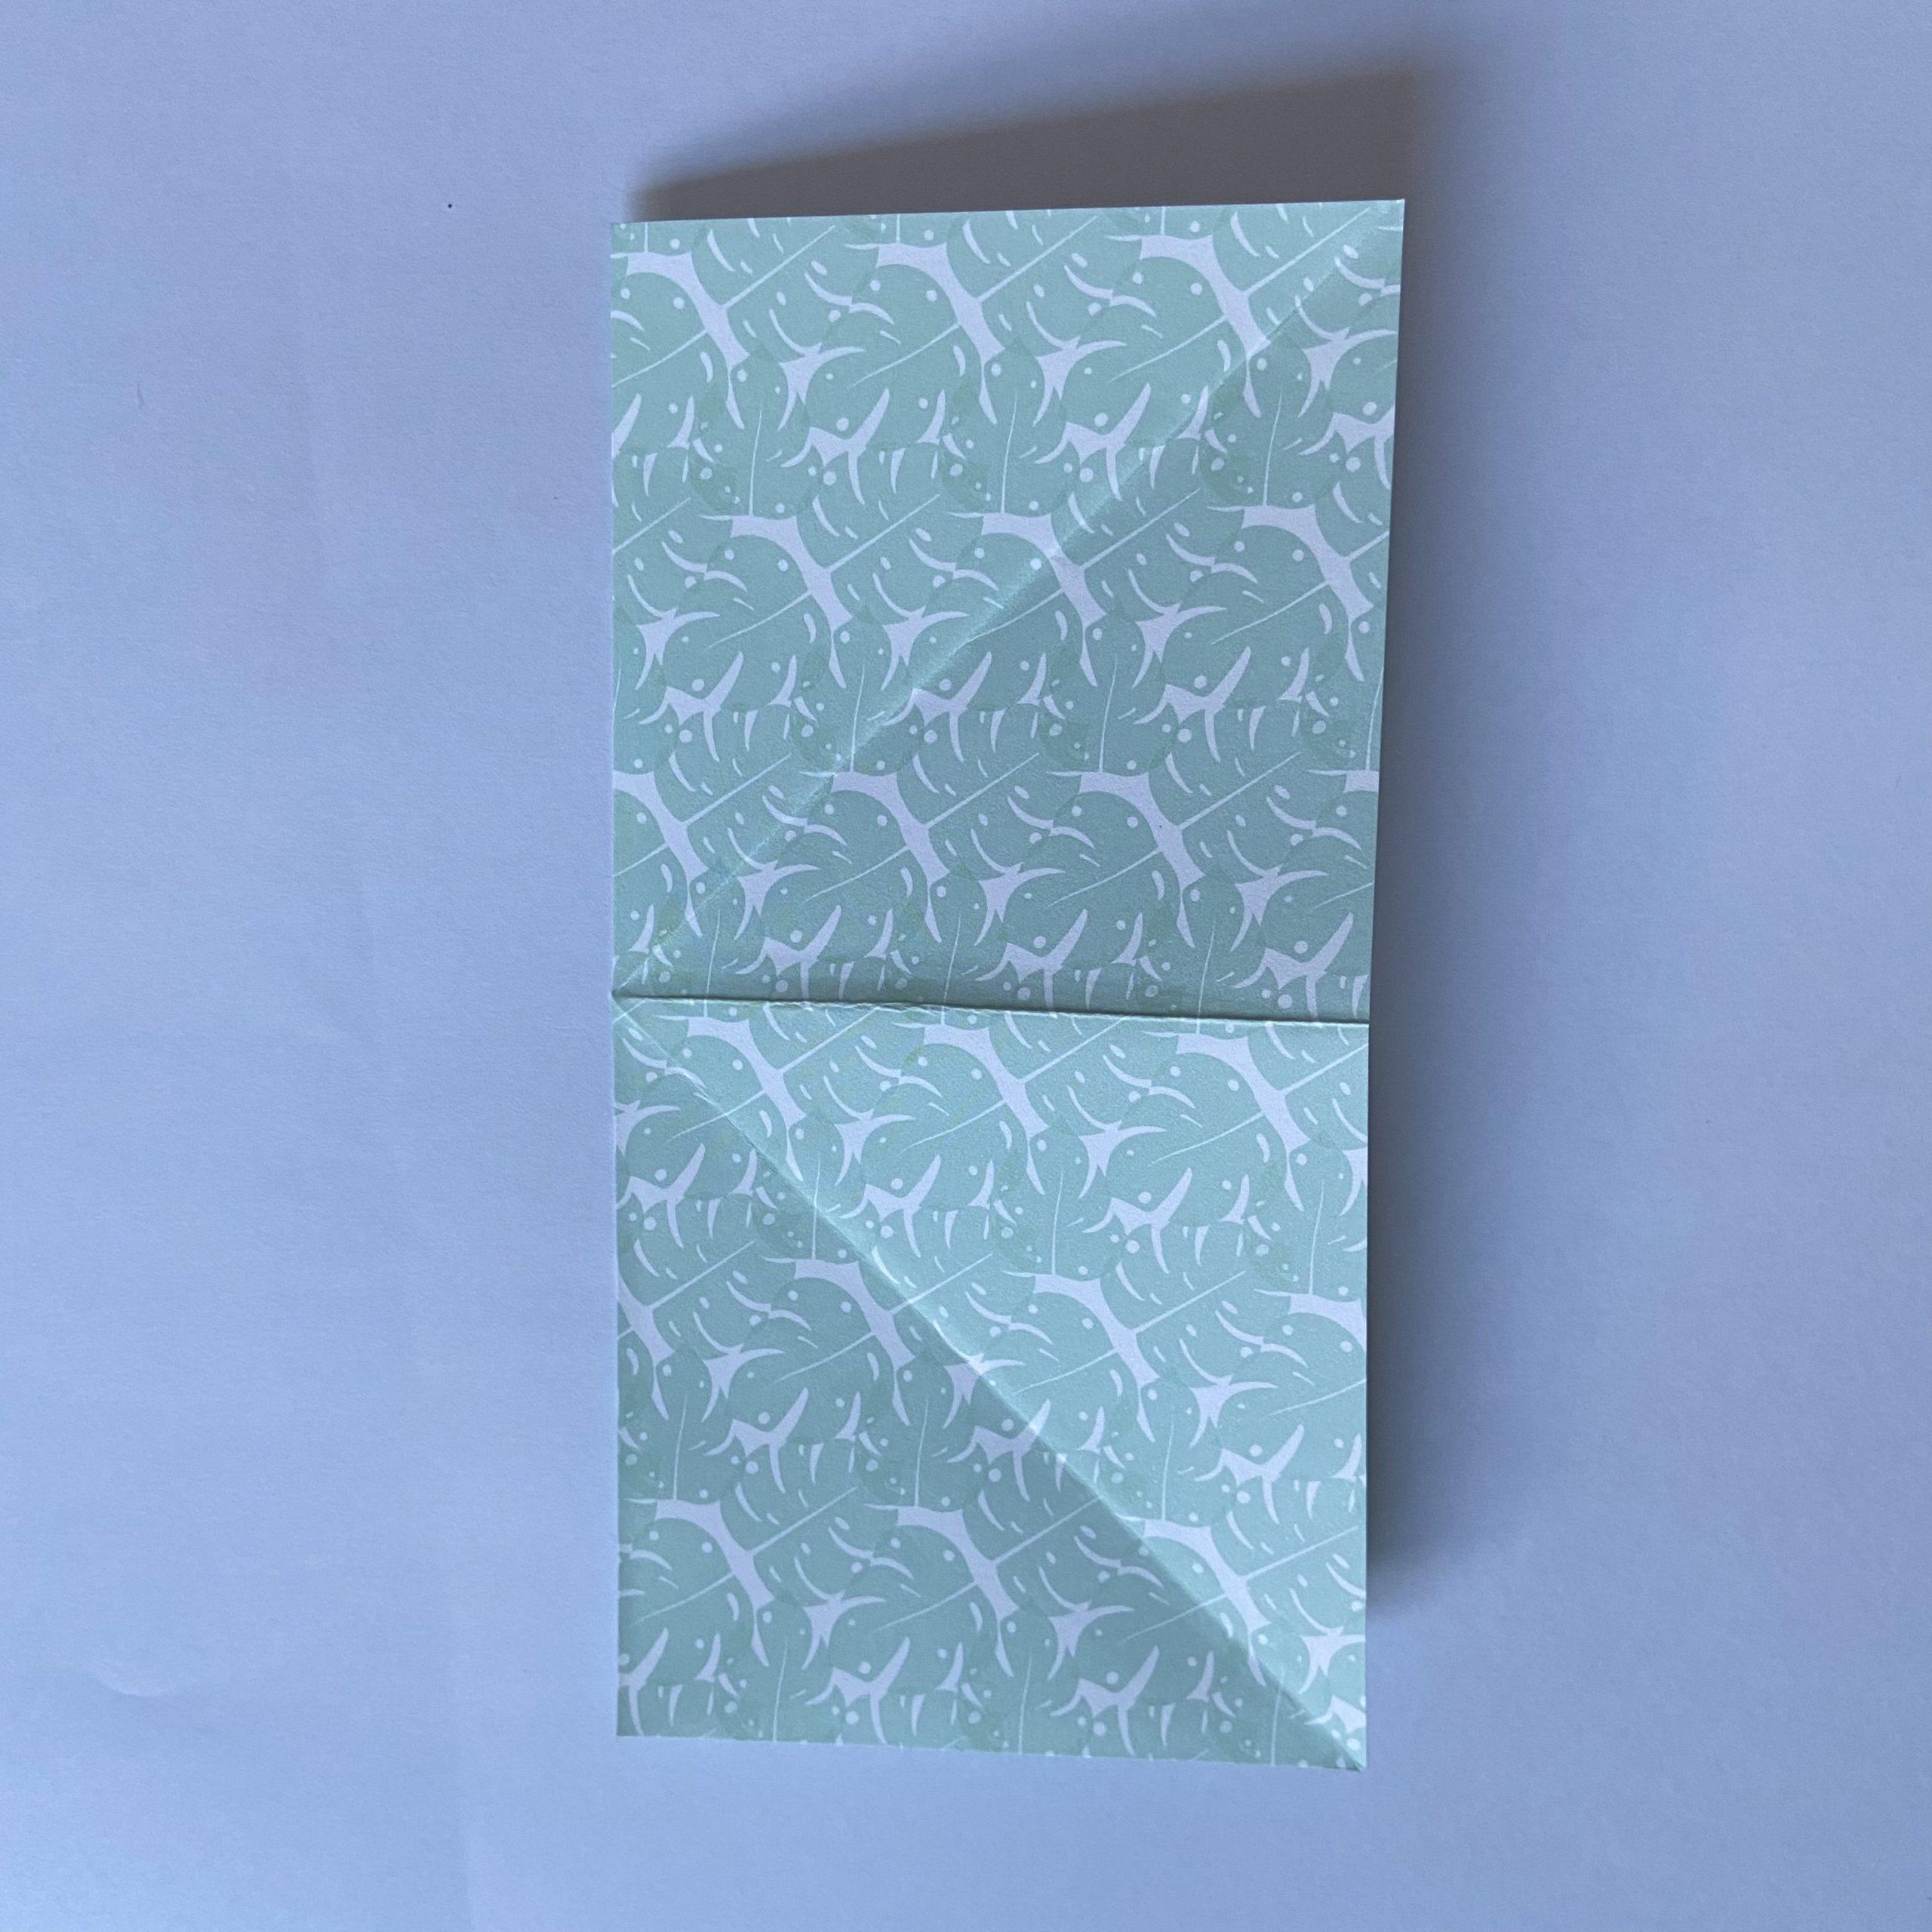
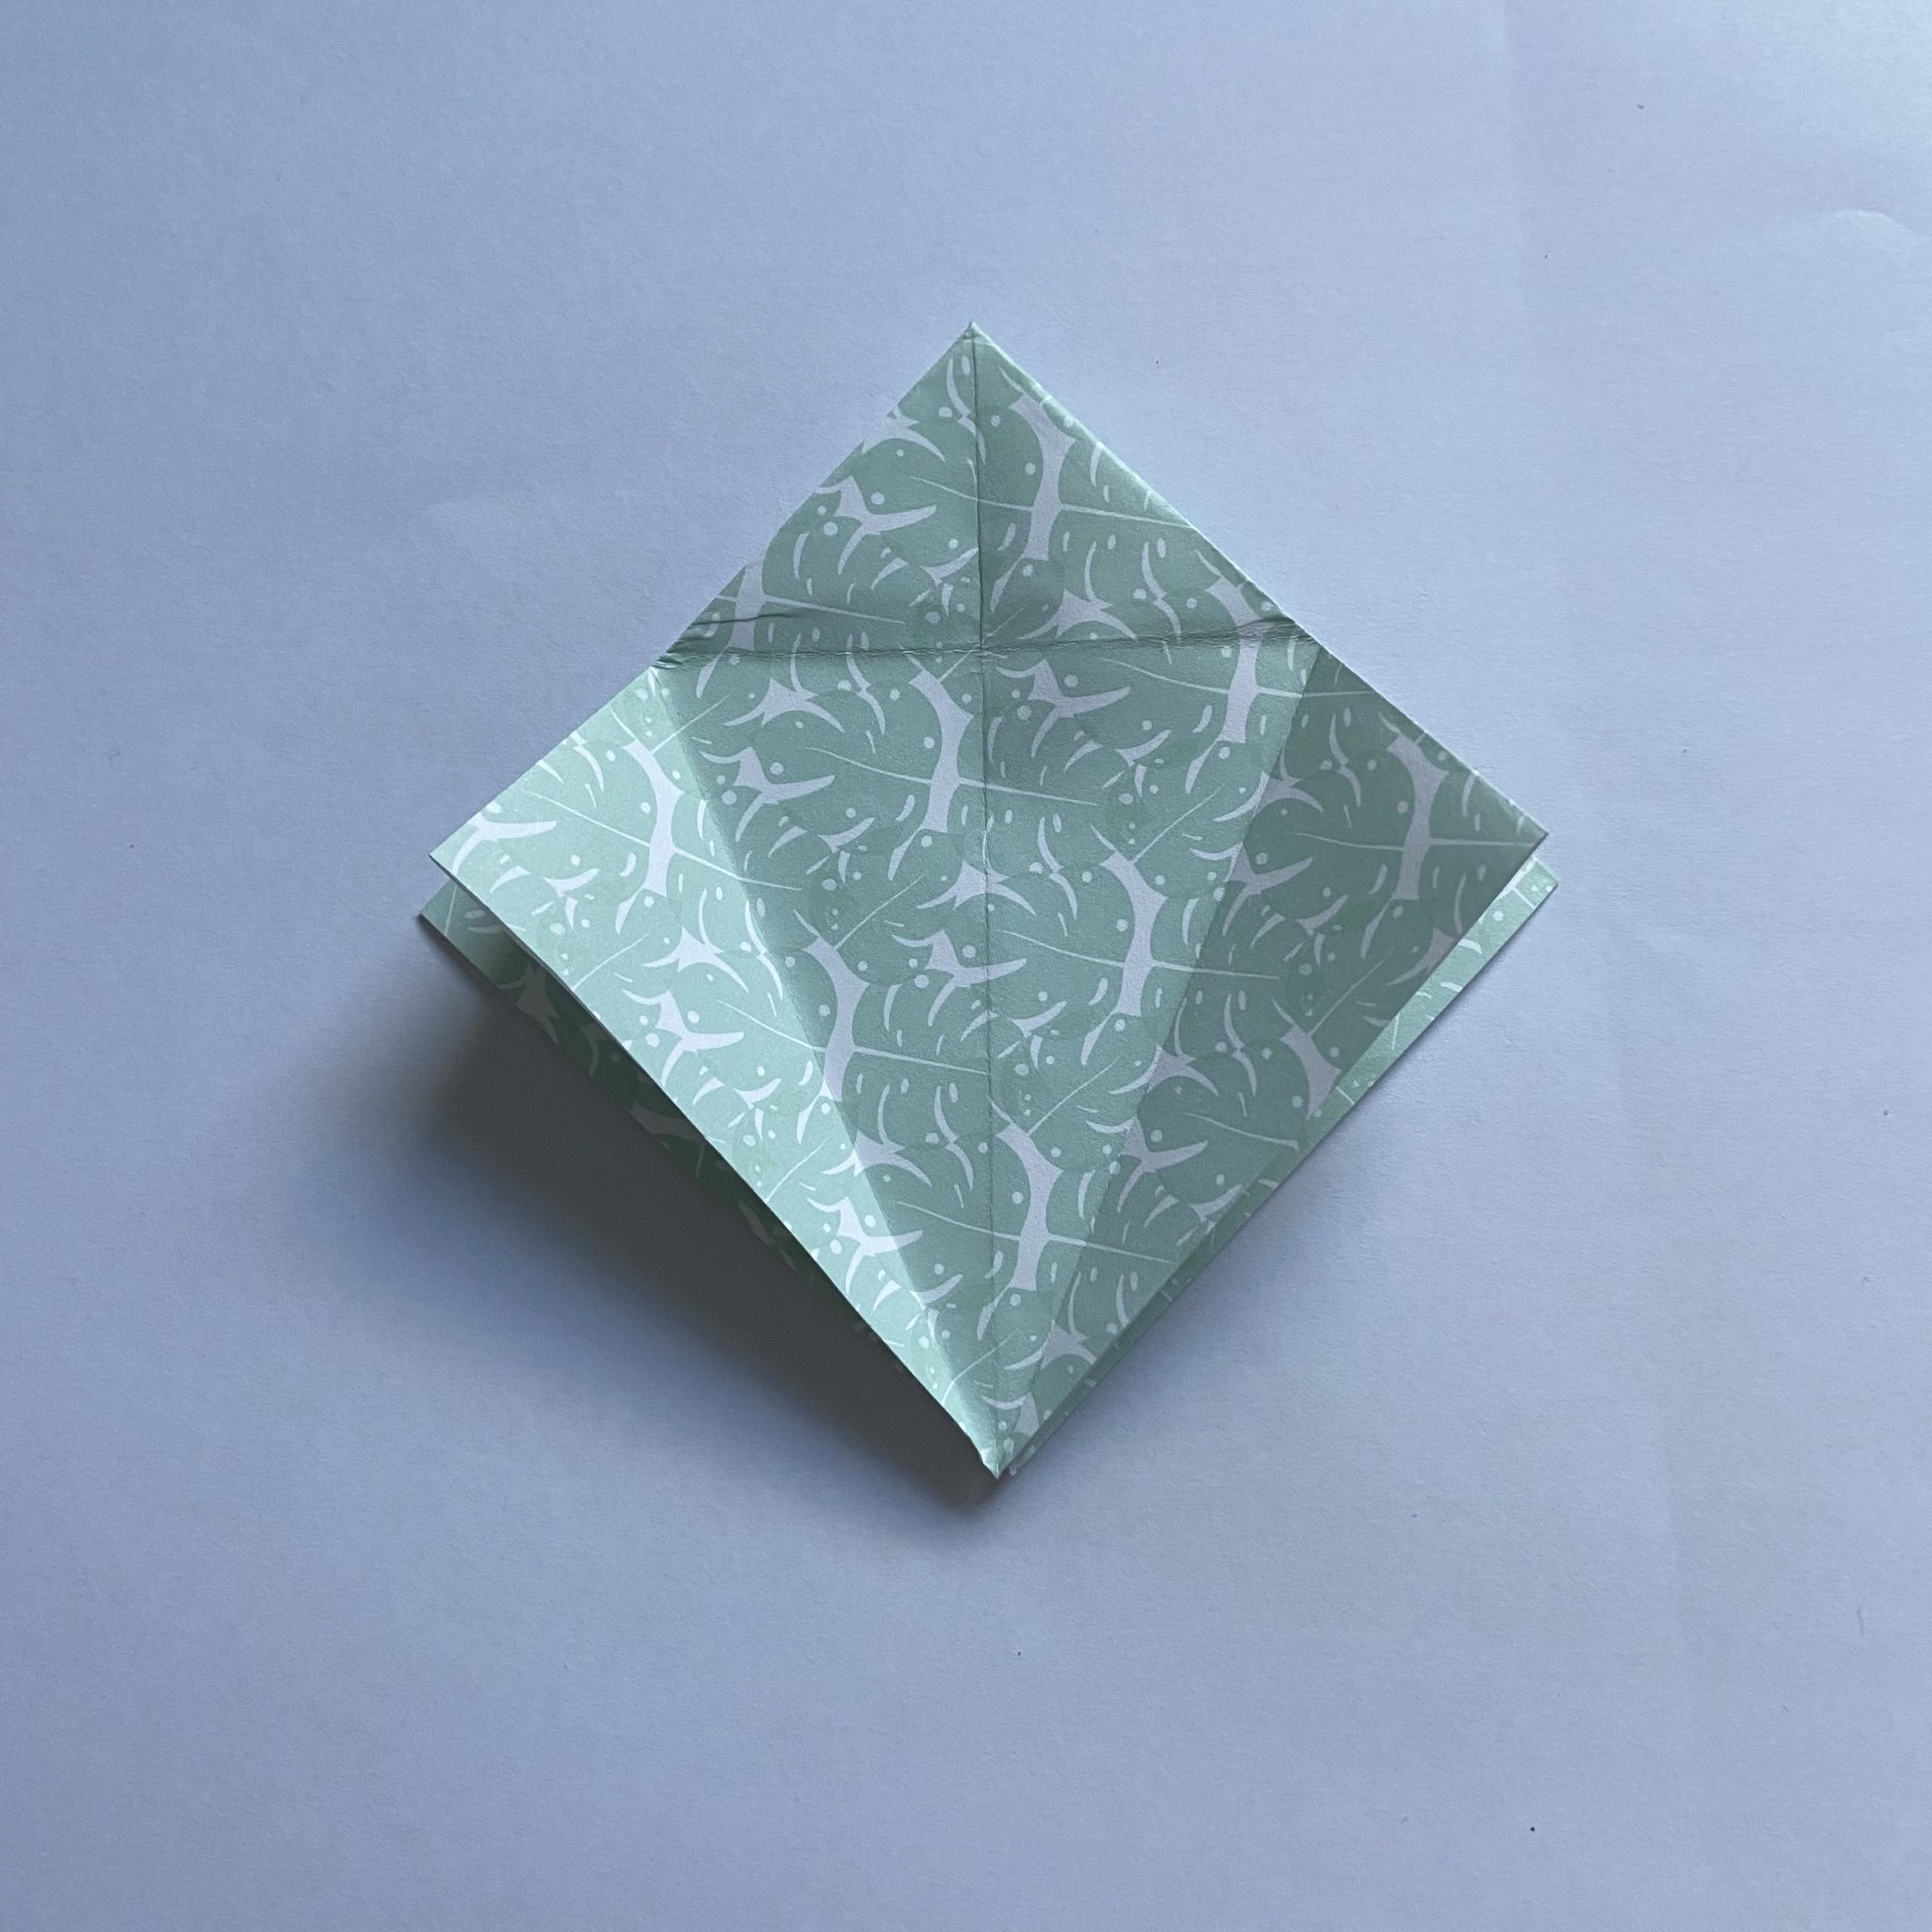
Step 12 – You should now have a diamond shape, with a vertical crease running down the centre. You have now made your origami square base!
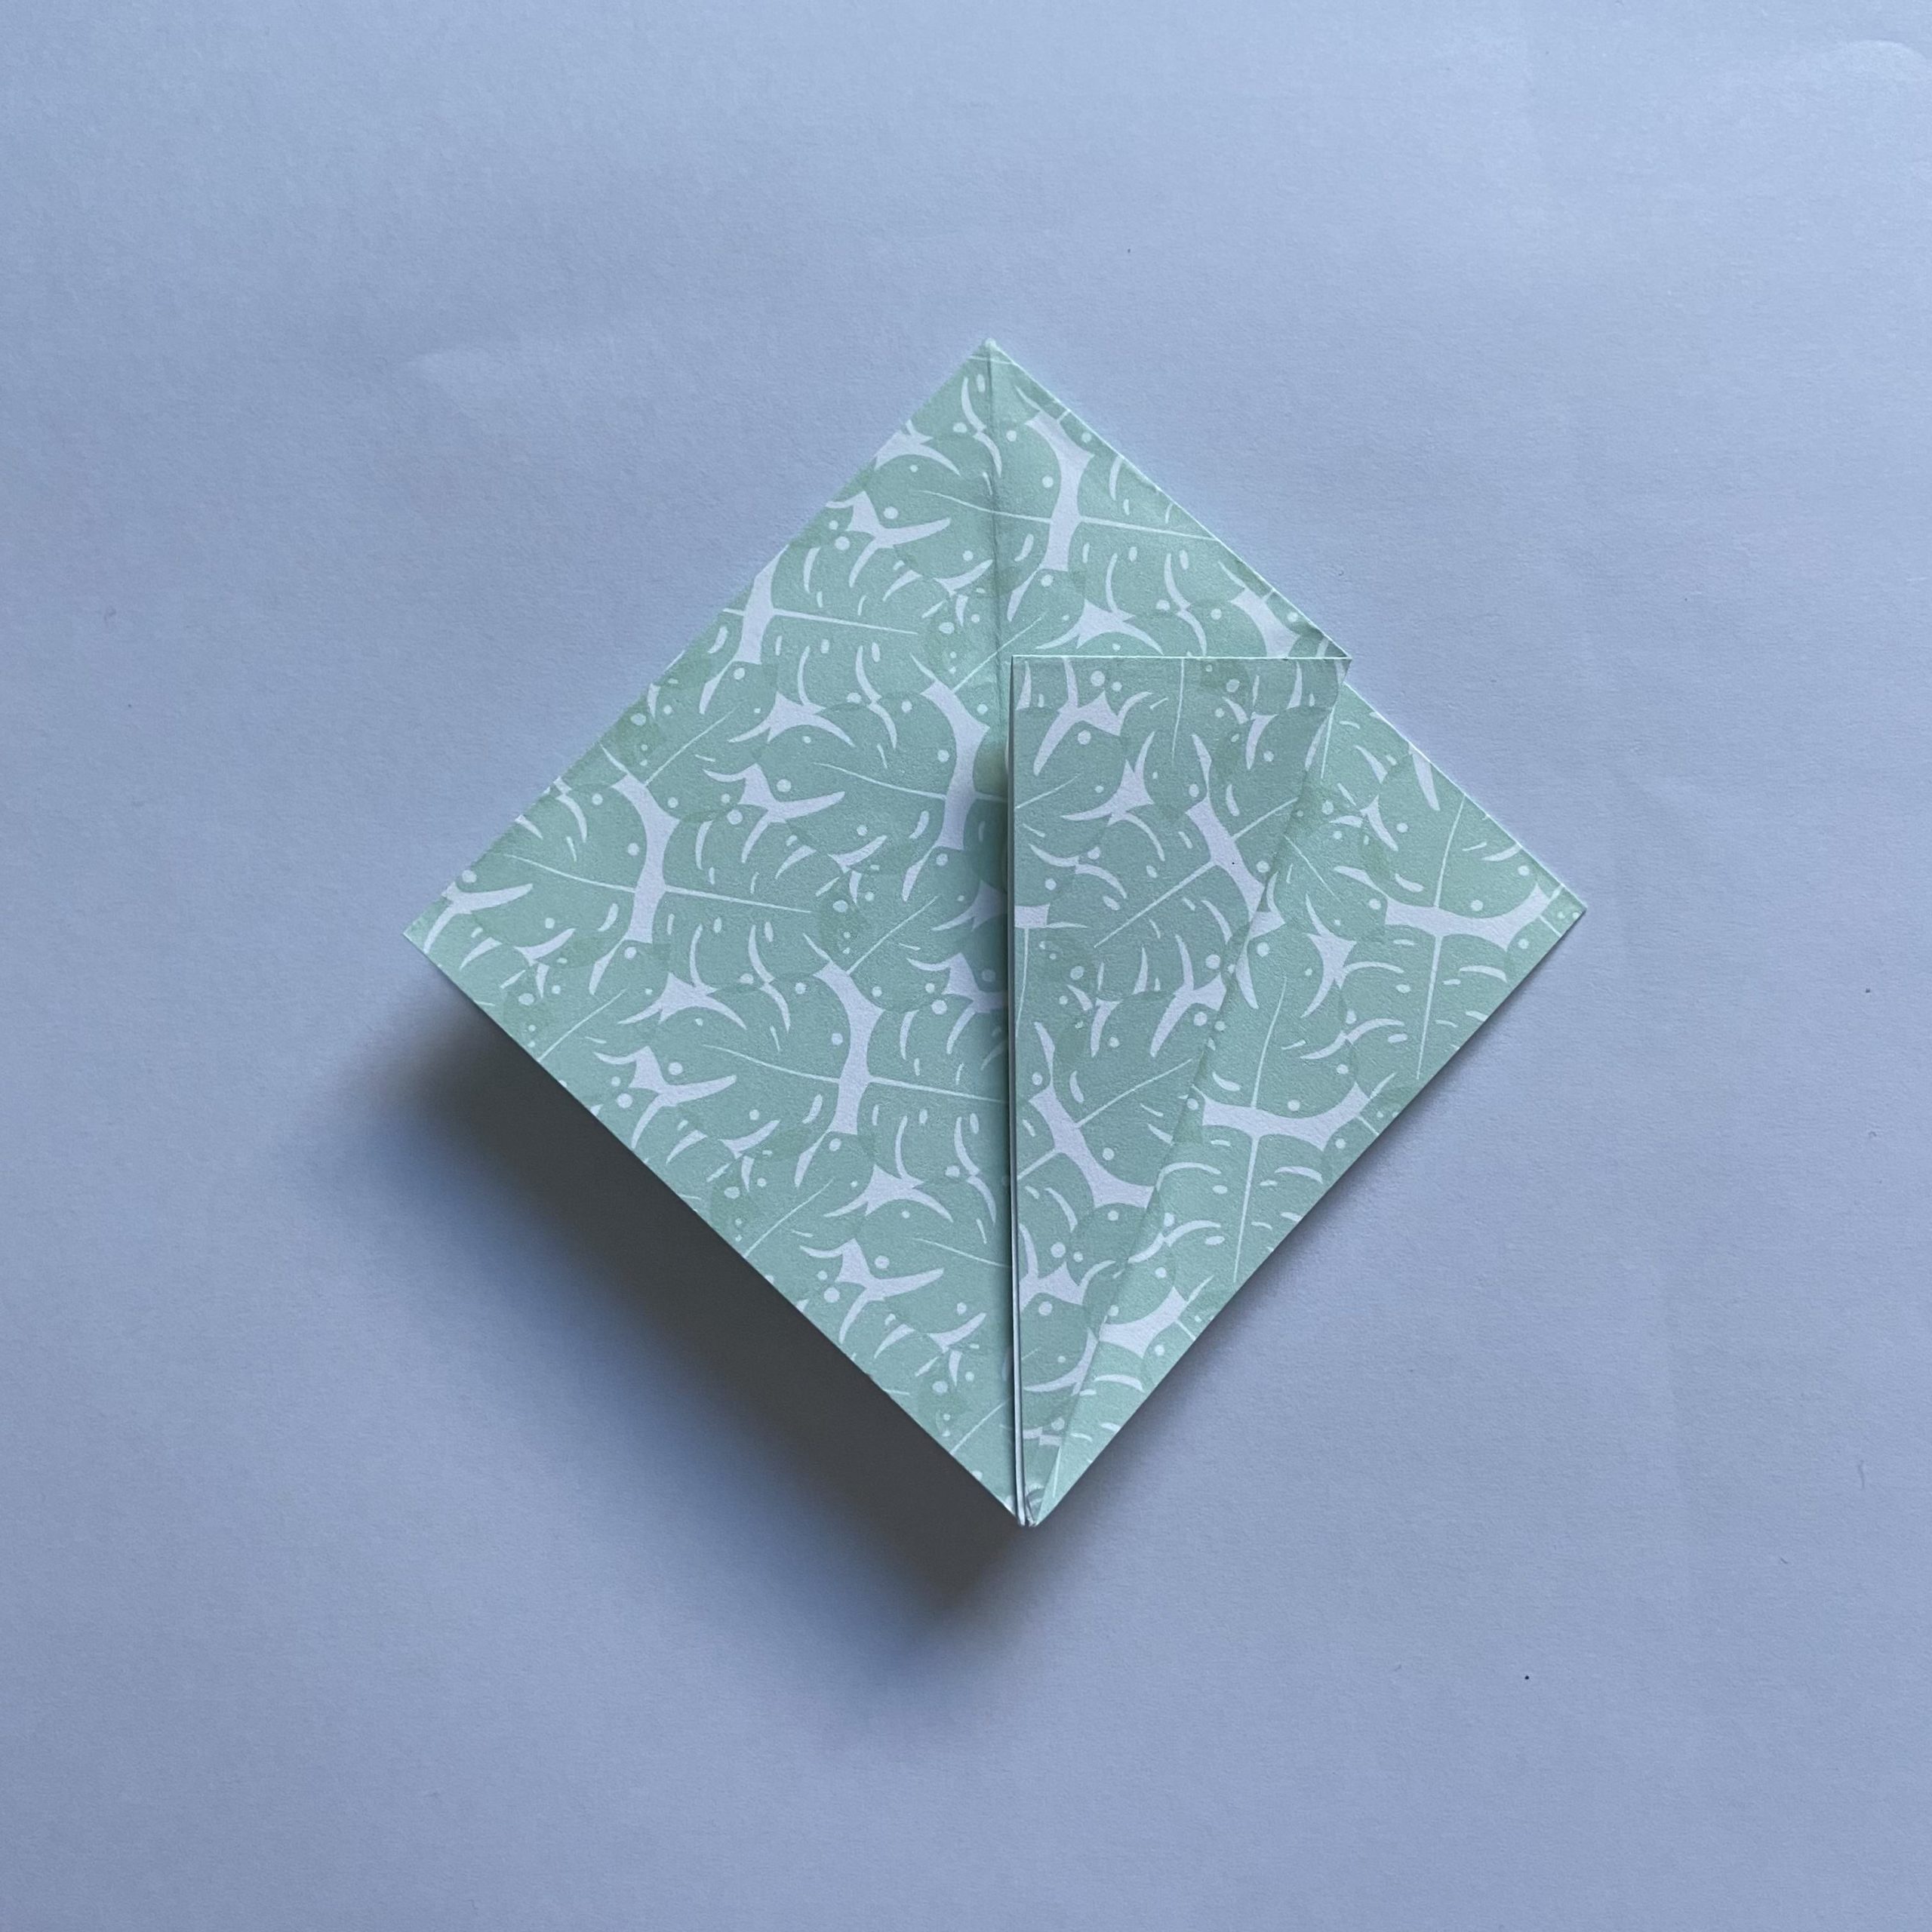
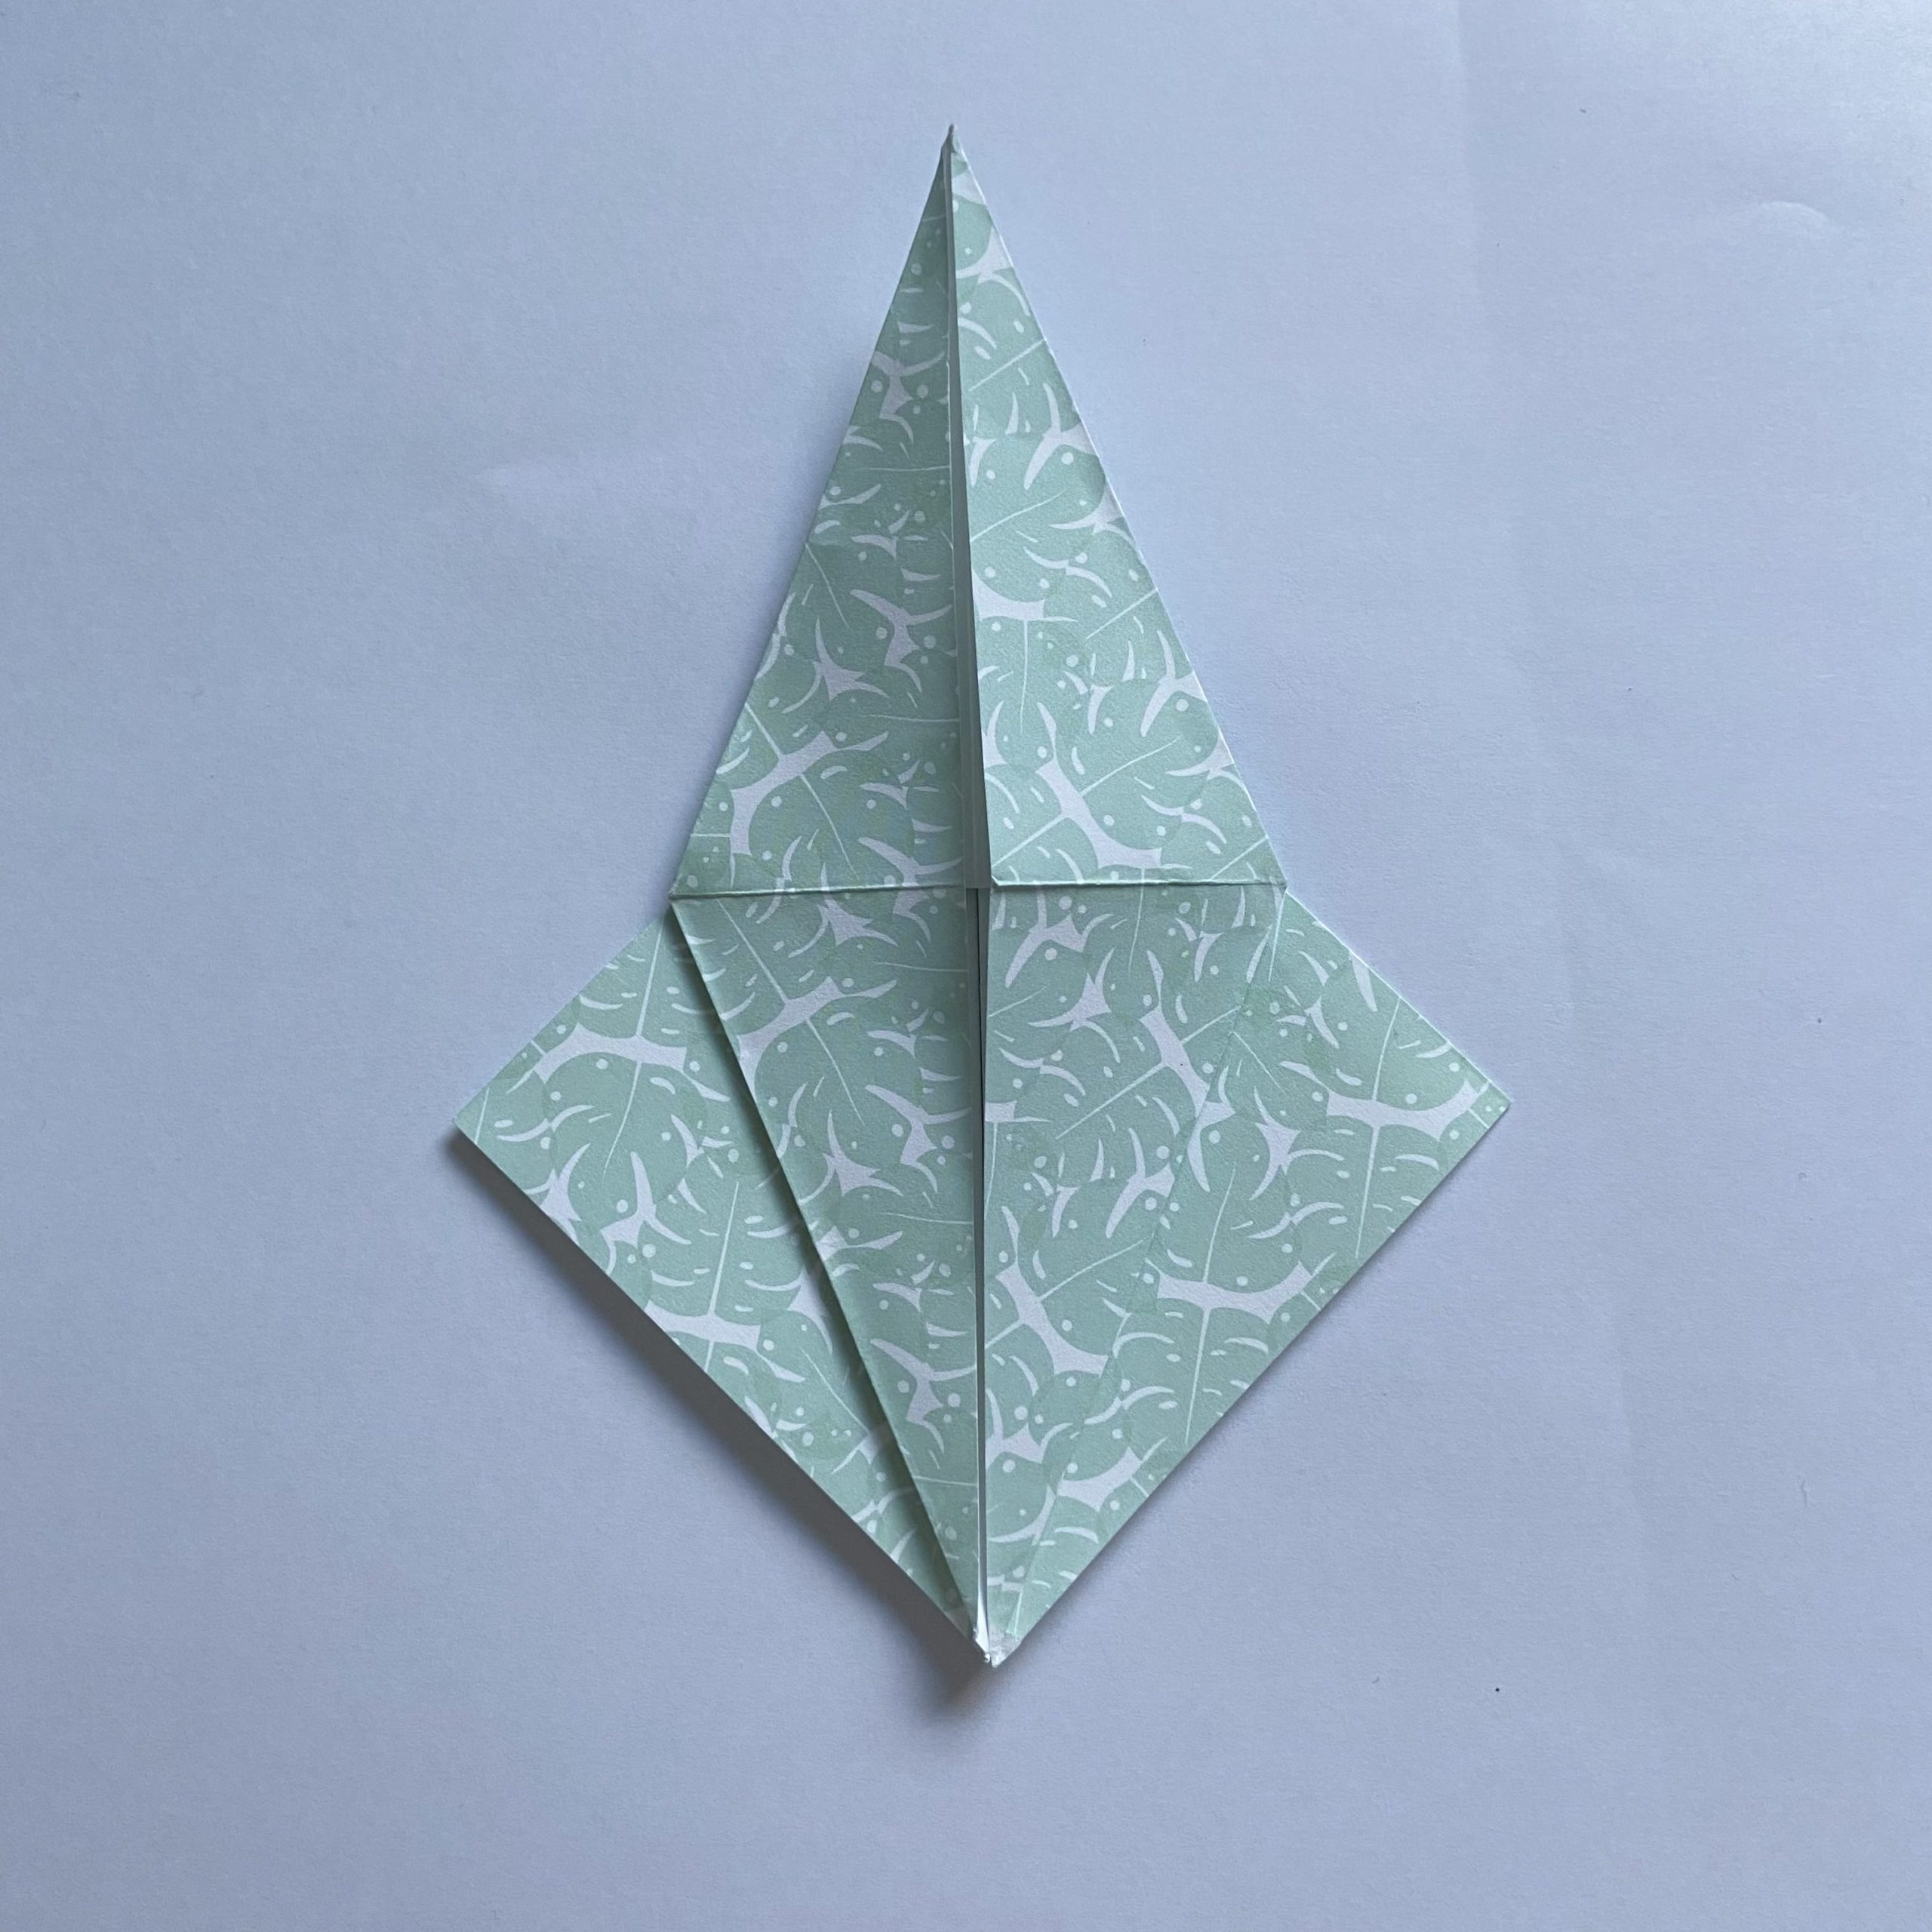
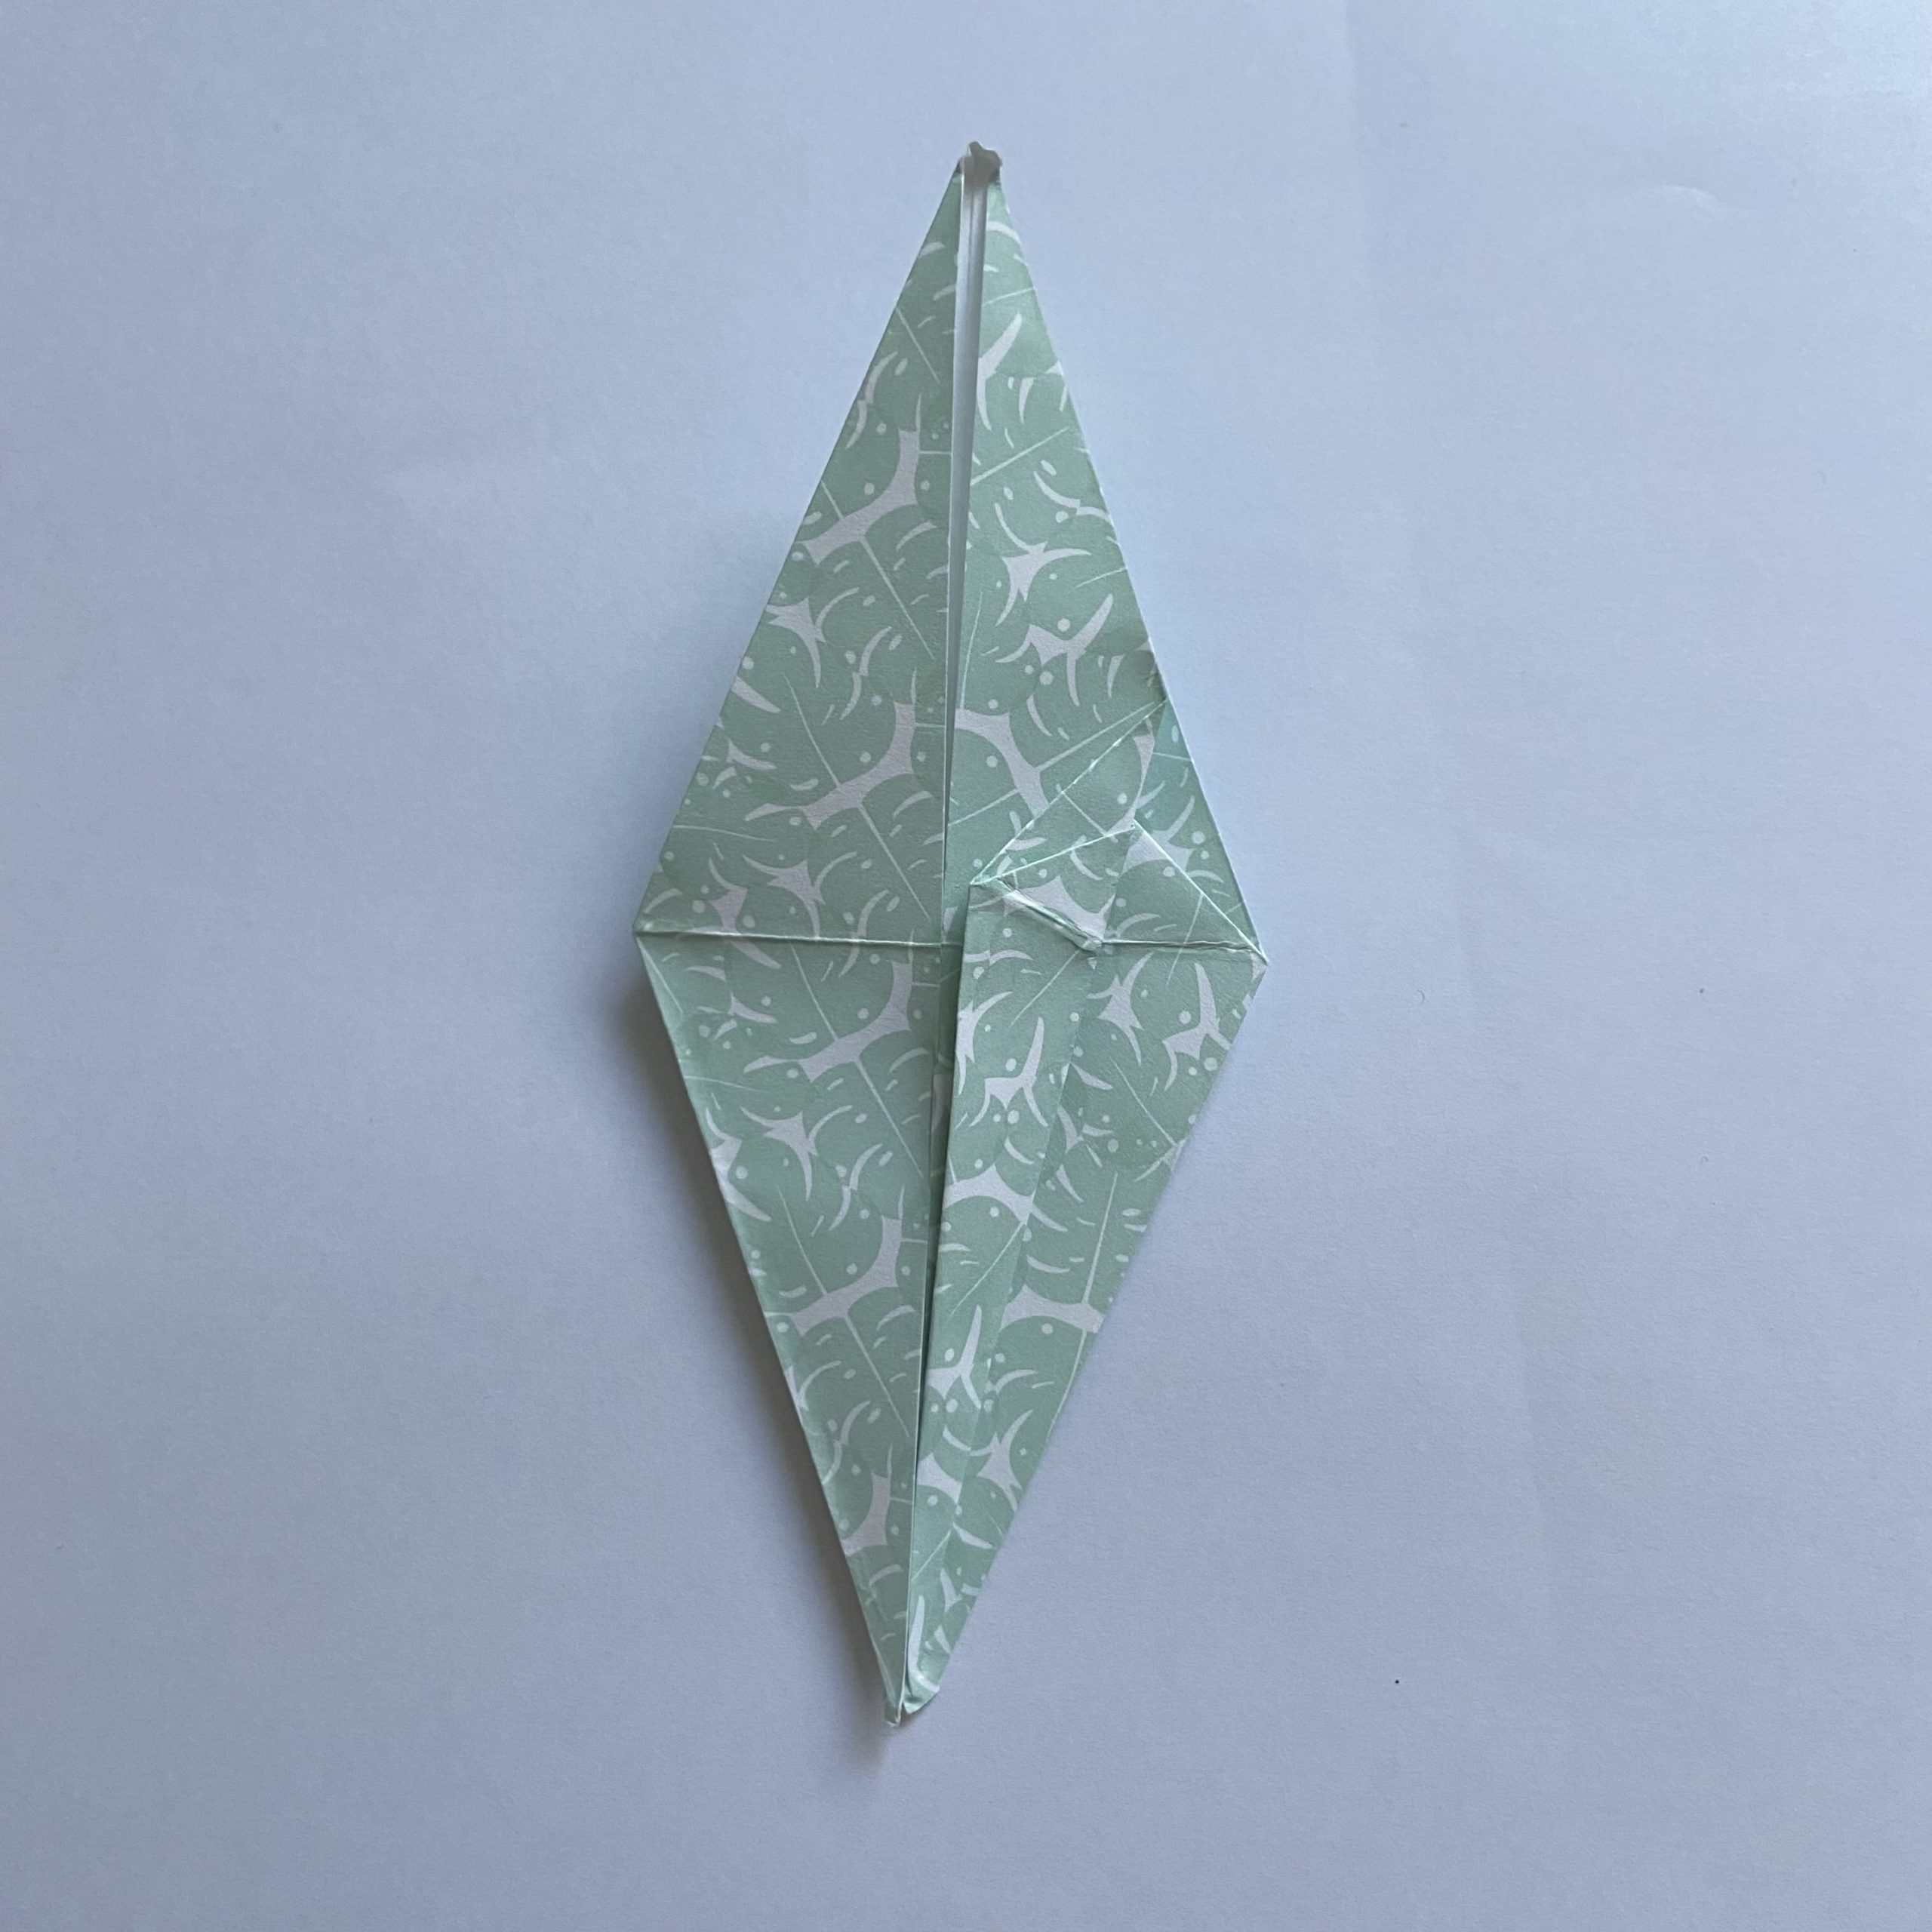
Step 13 – Time to make a squash fold. Bring the lower right edge to meet the central crease, and fold
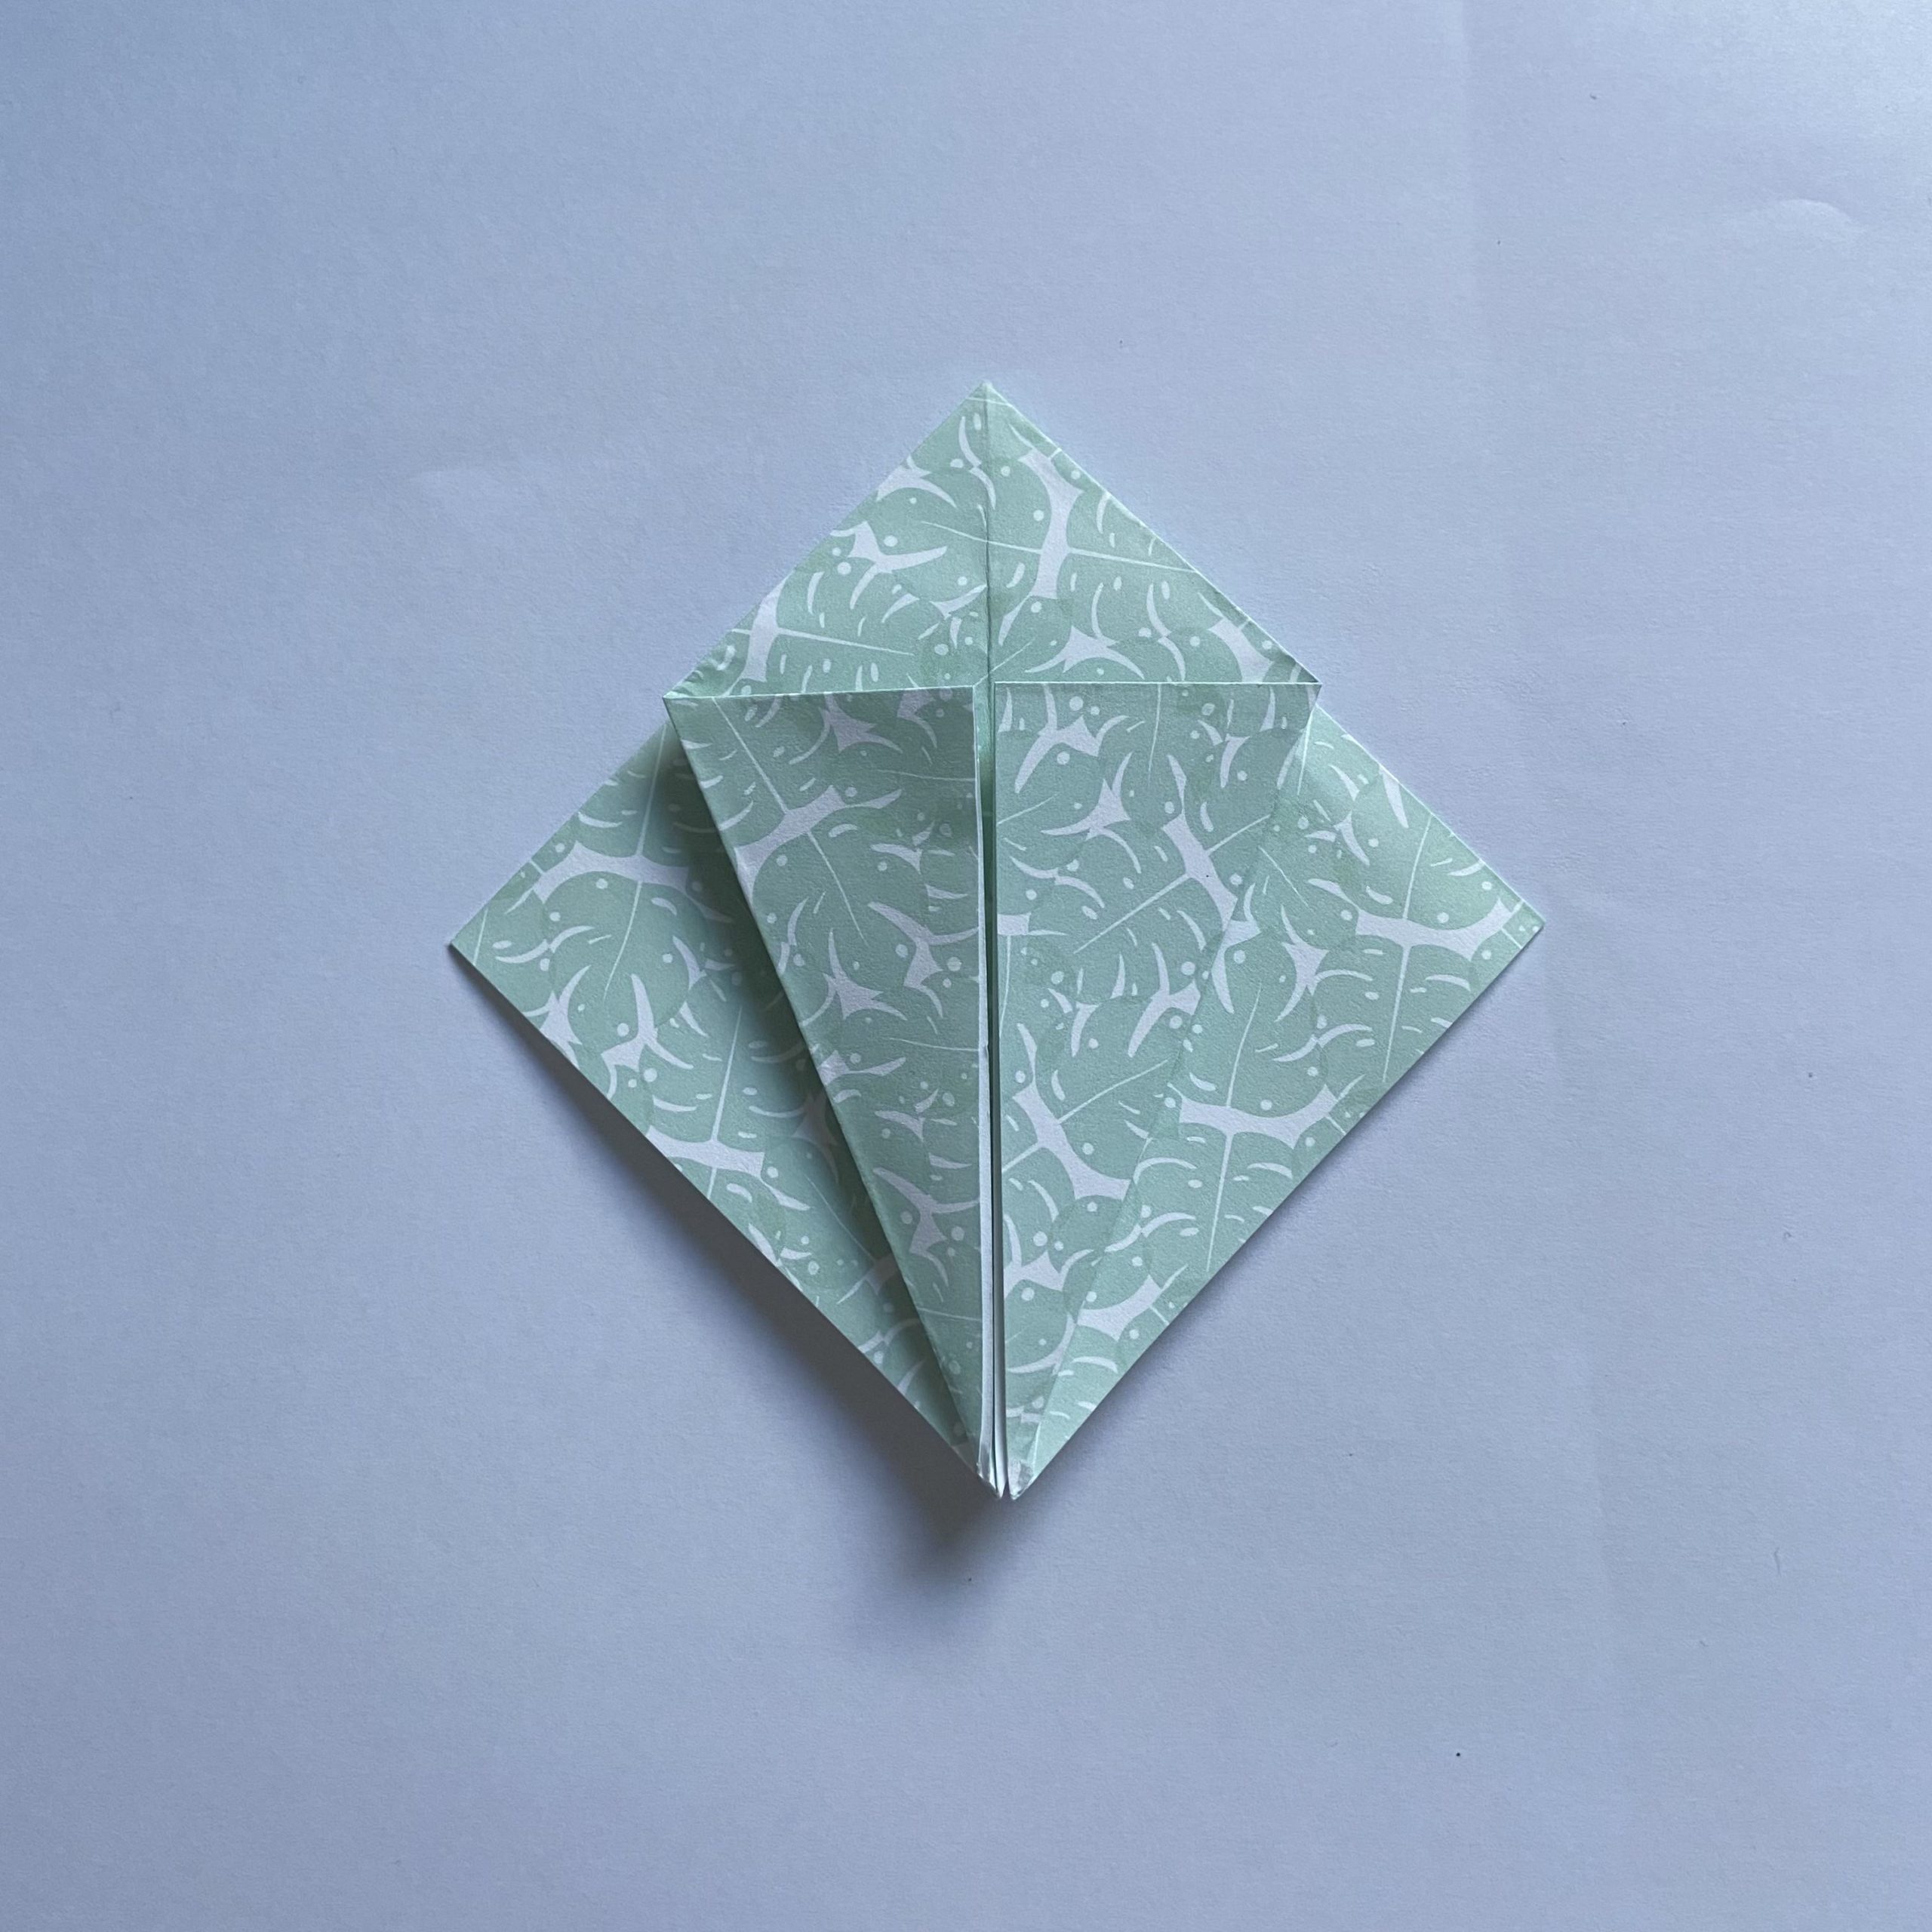
Step 14 – Repeating the previous step, but this time bring the lower left edge to meet the central crease, and fold
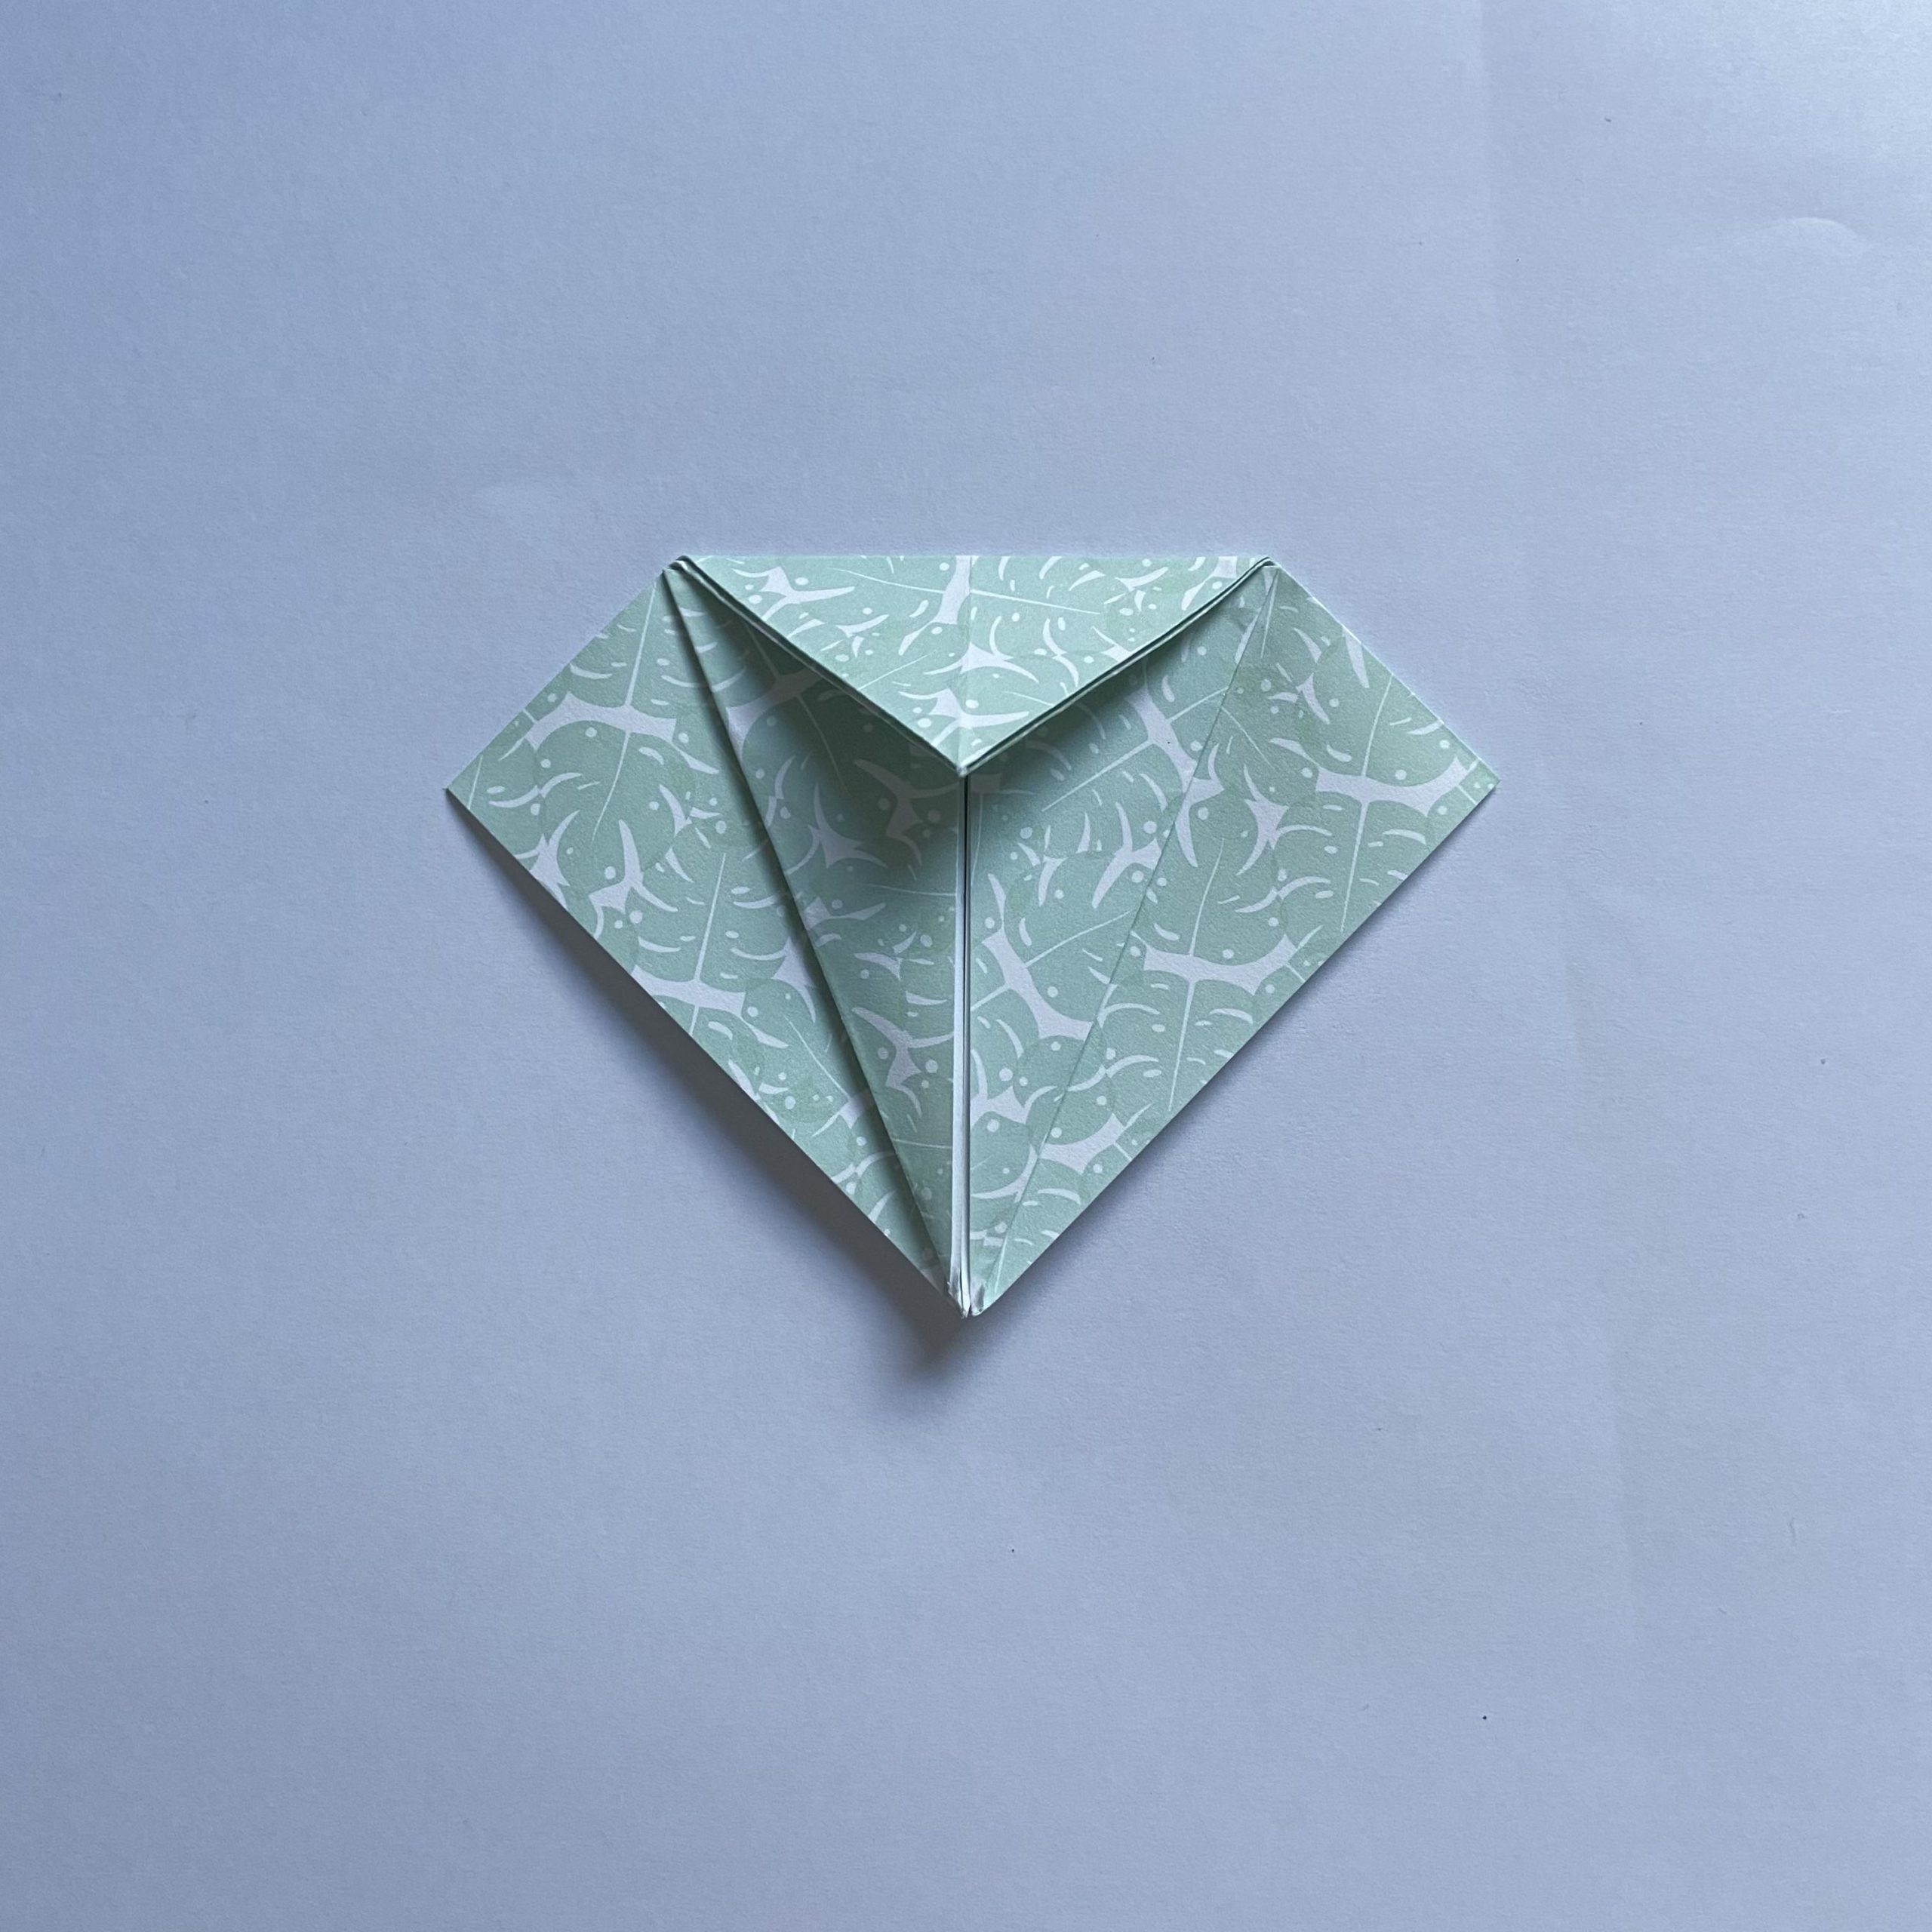
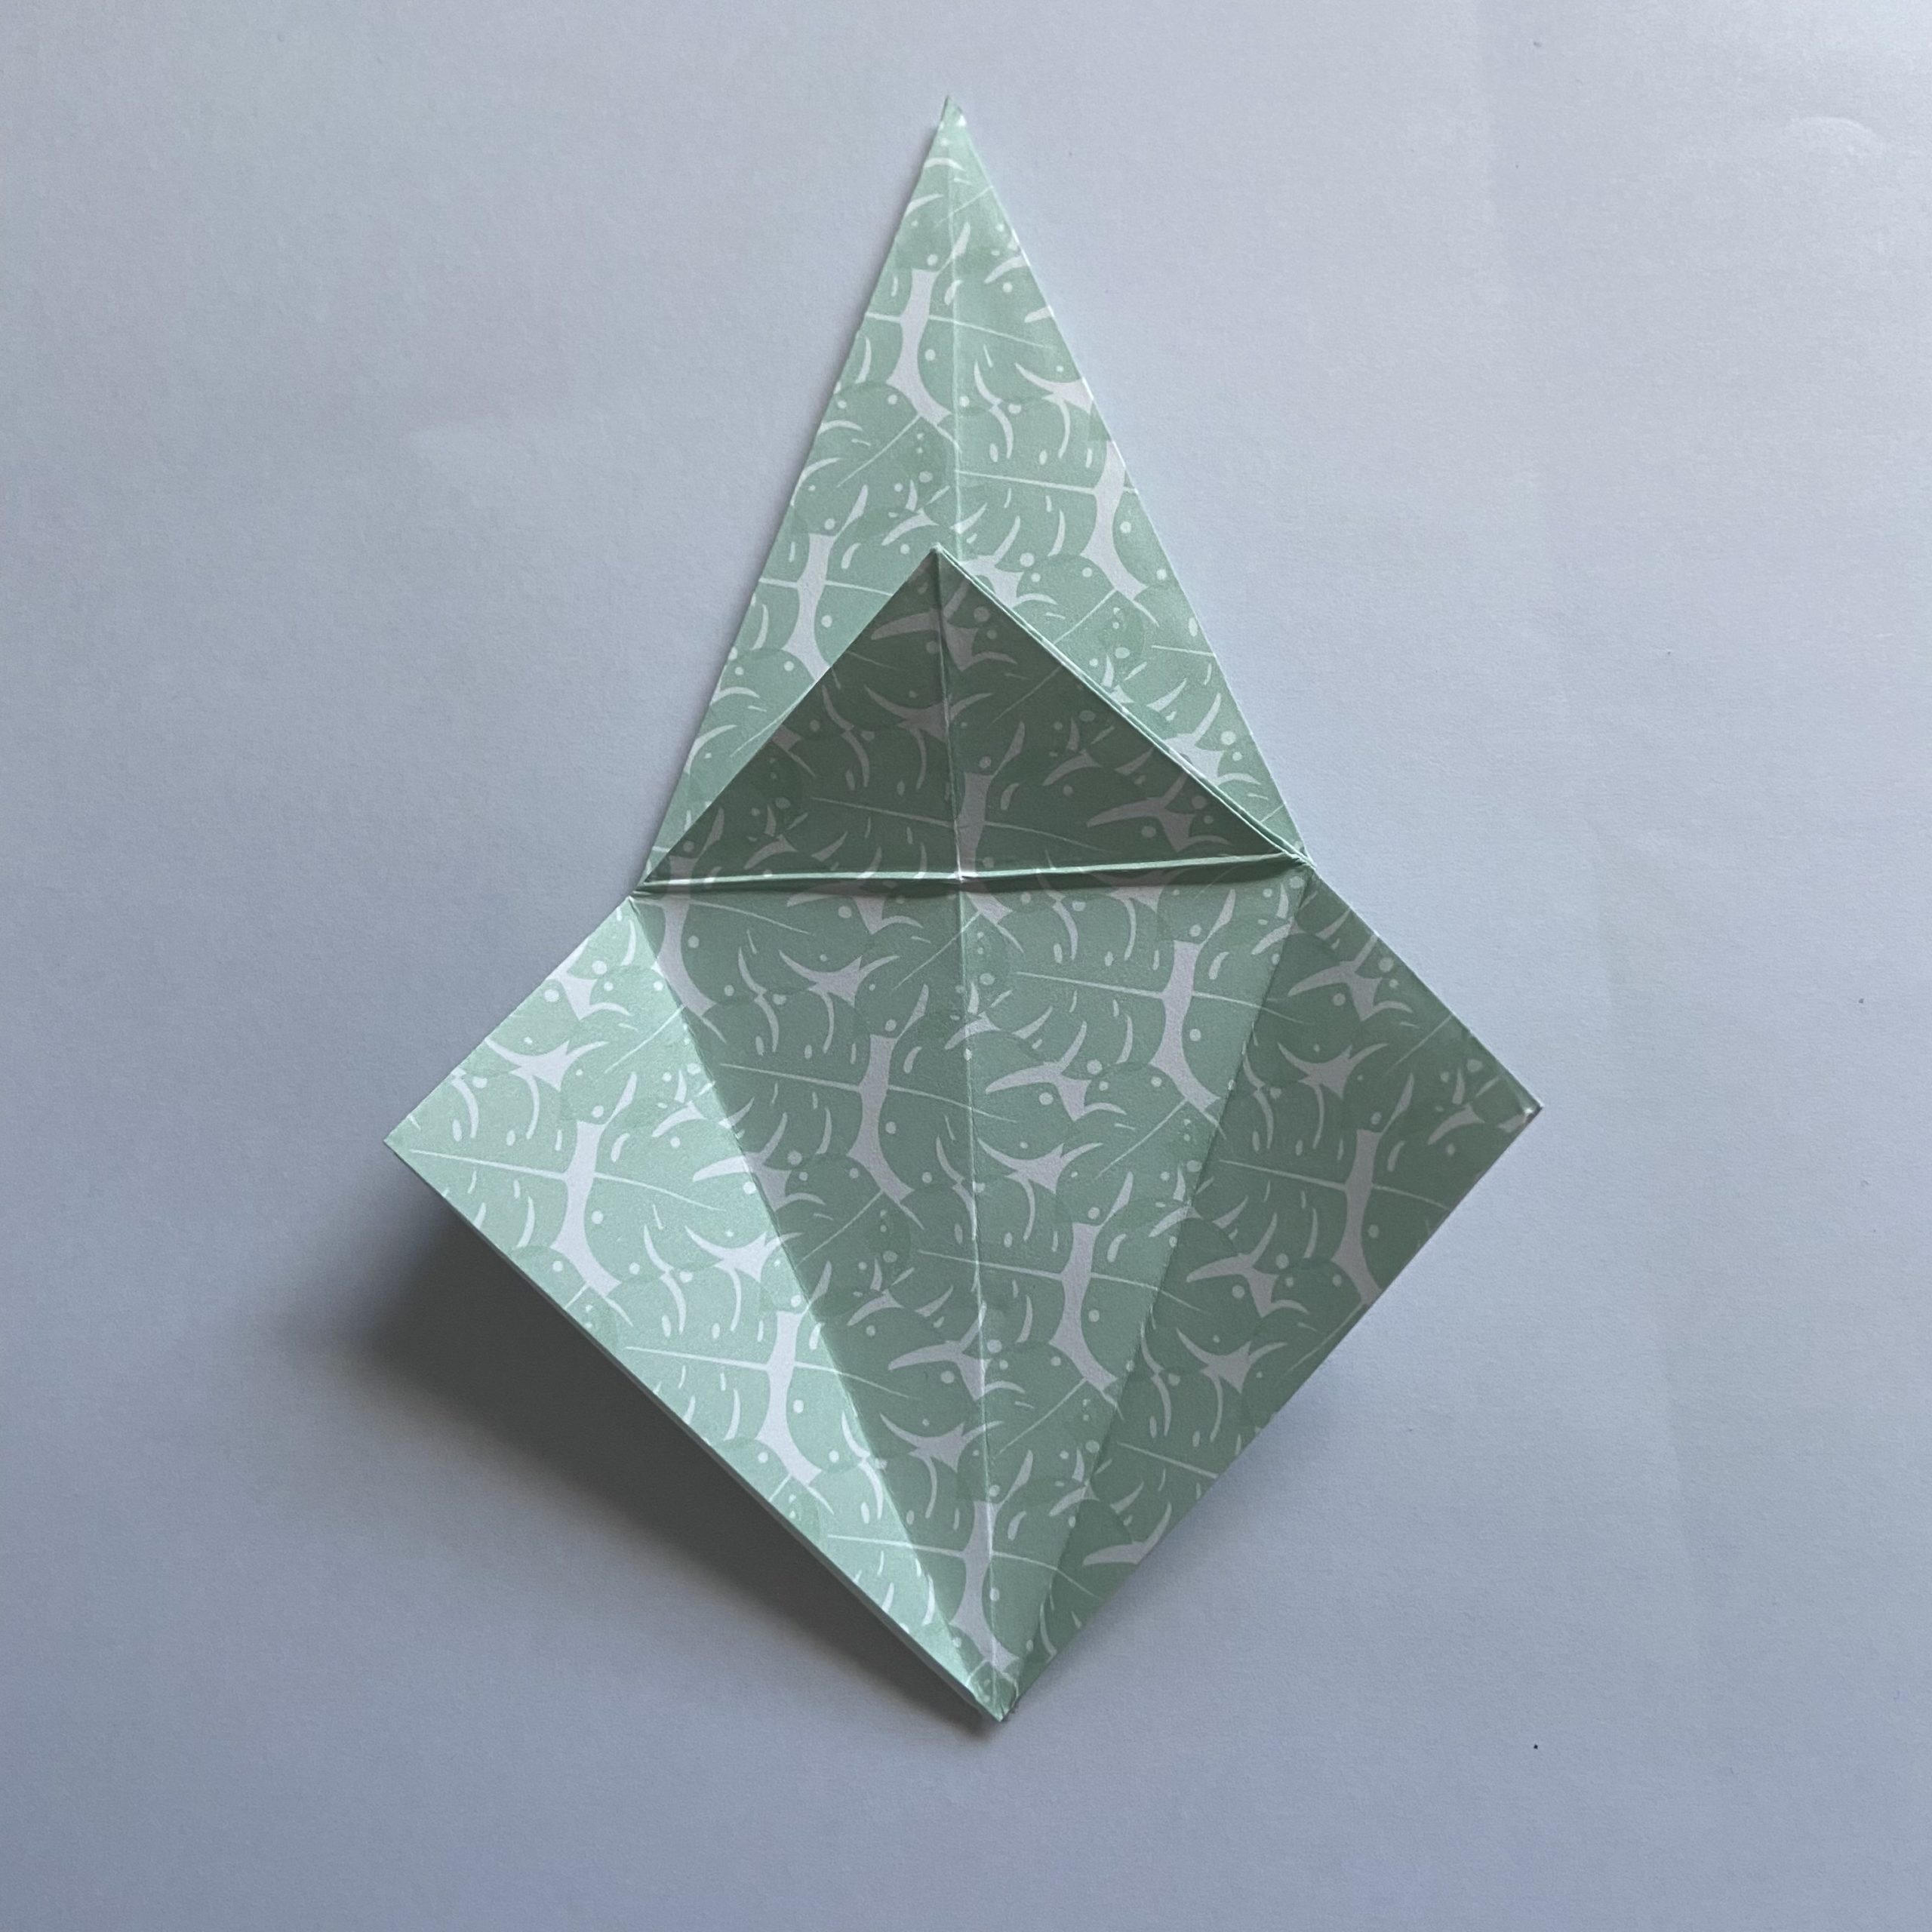
Step 15 – Fold the top section down as shown
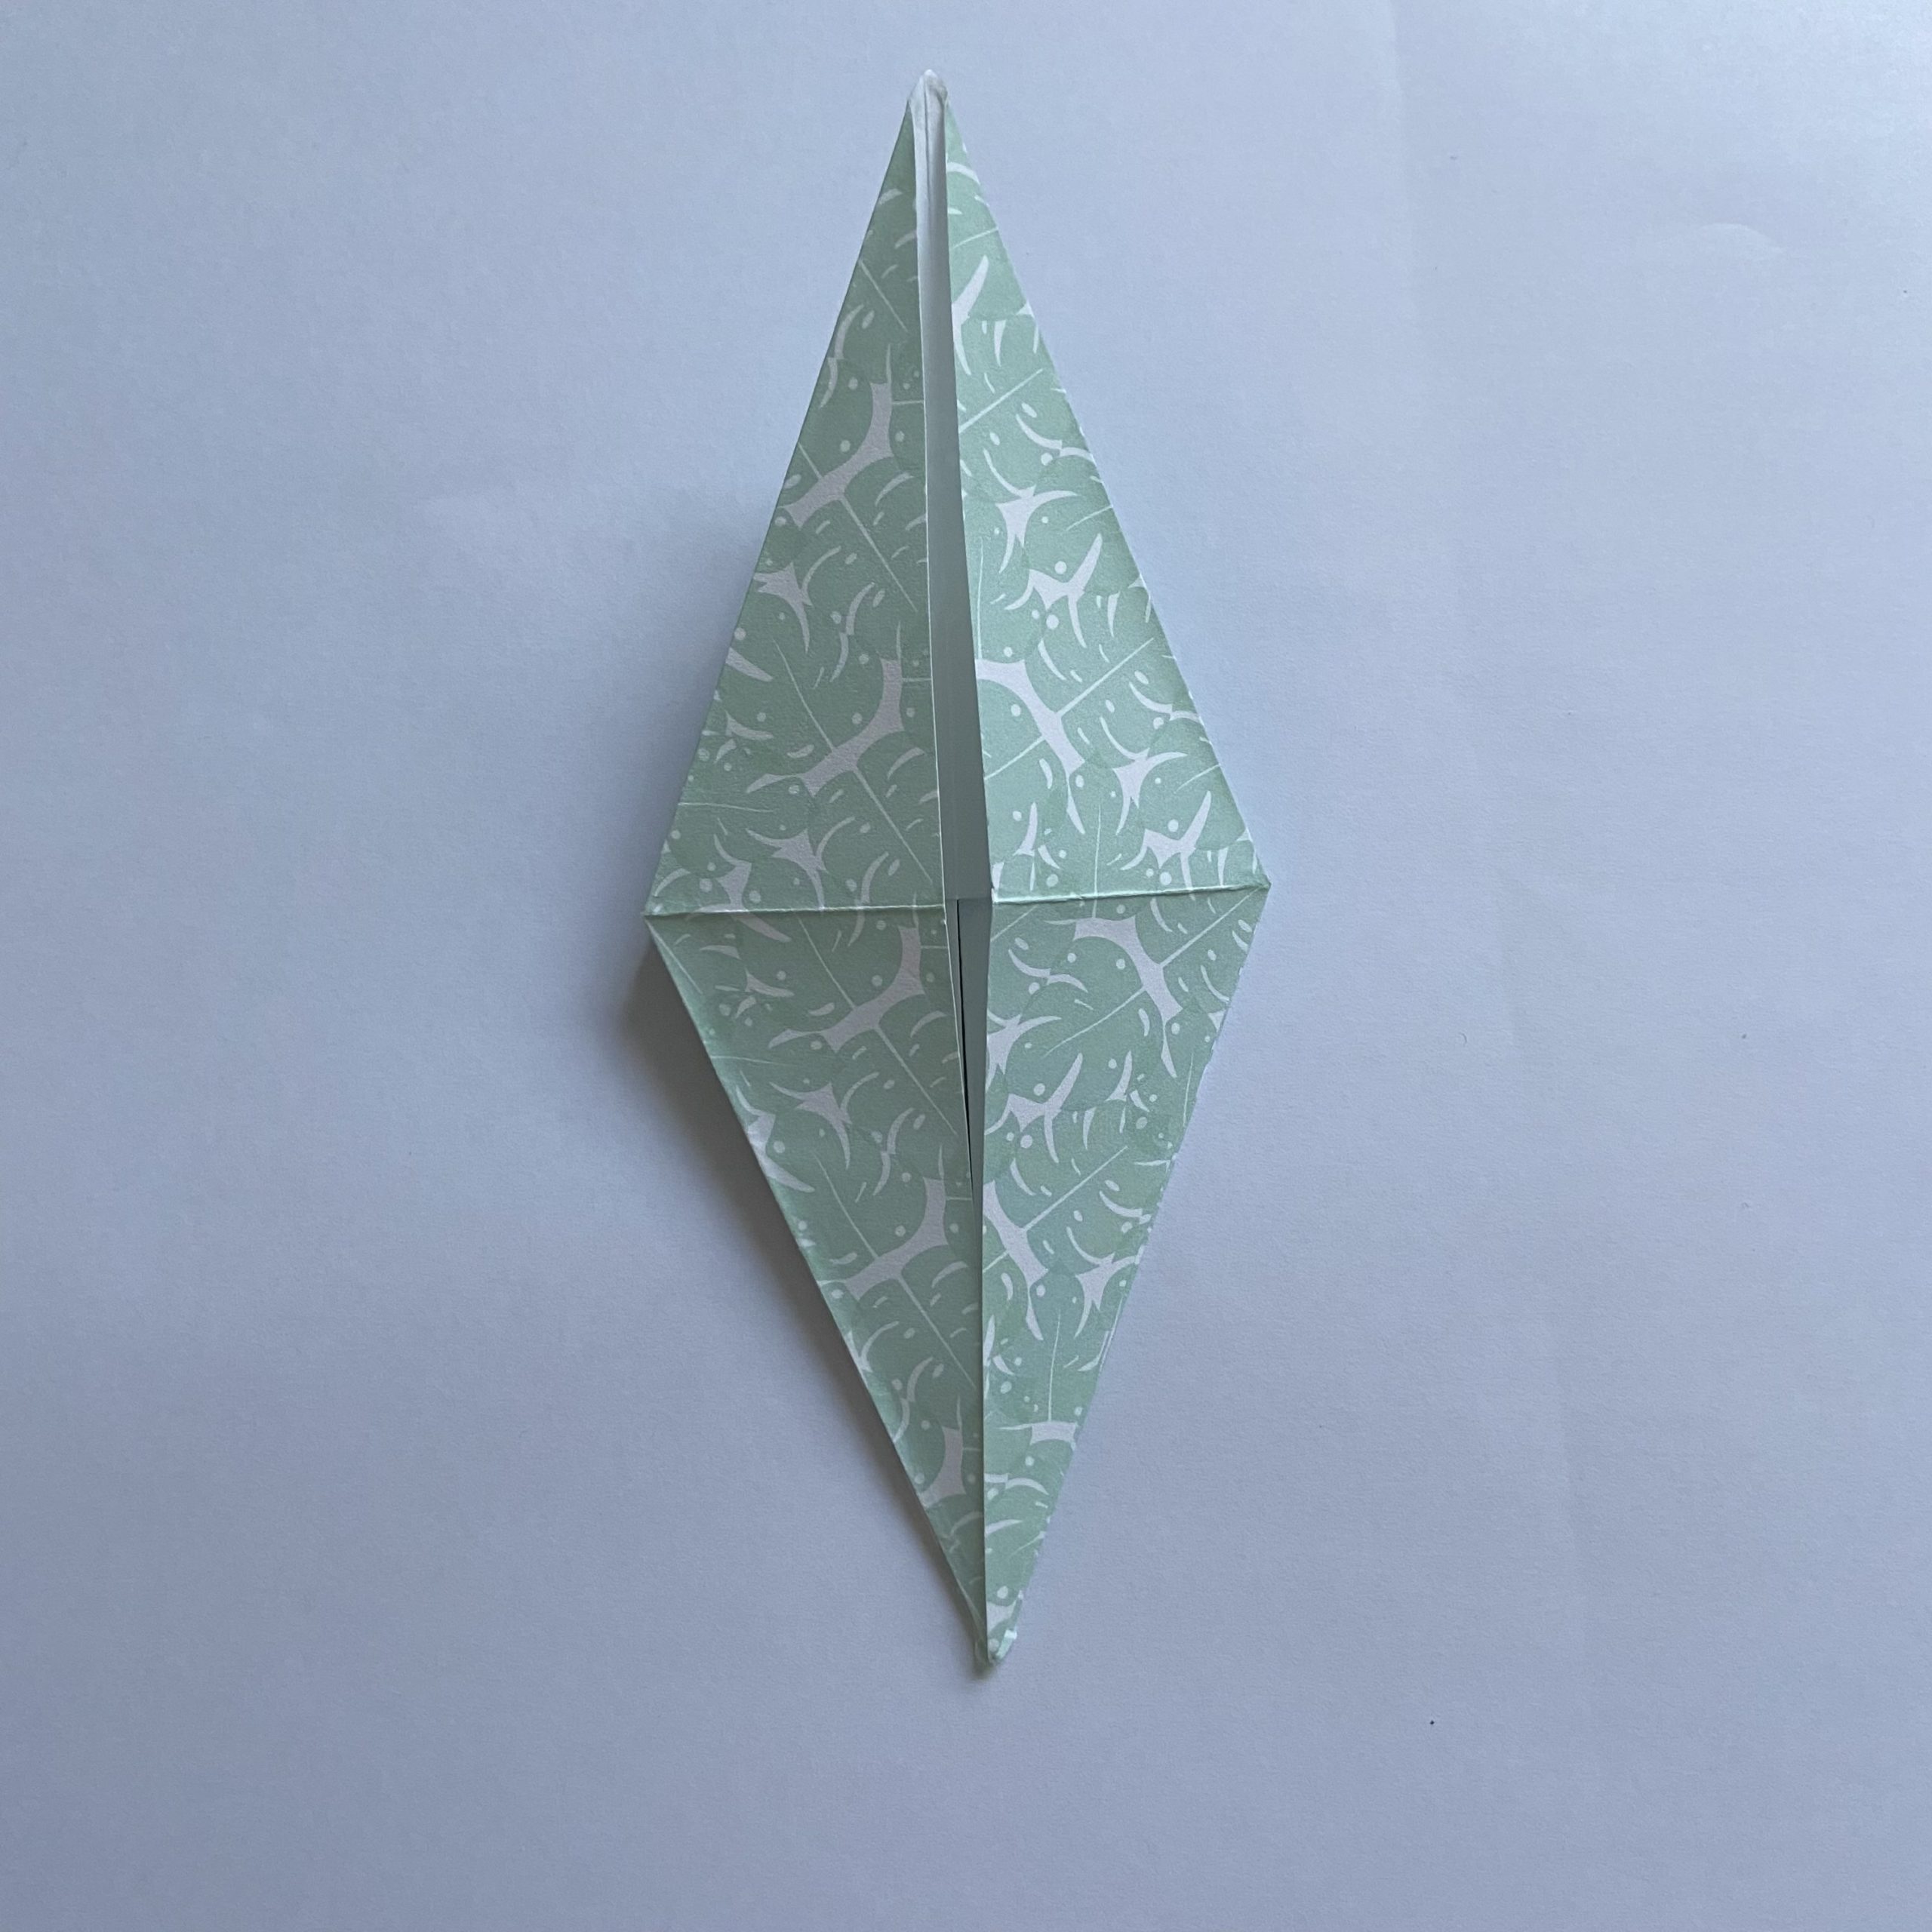
Step 16 – Unfold the previous 3 steps so that you are back to your diamond shape, but with new fold lines
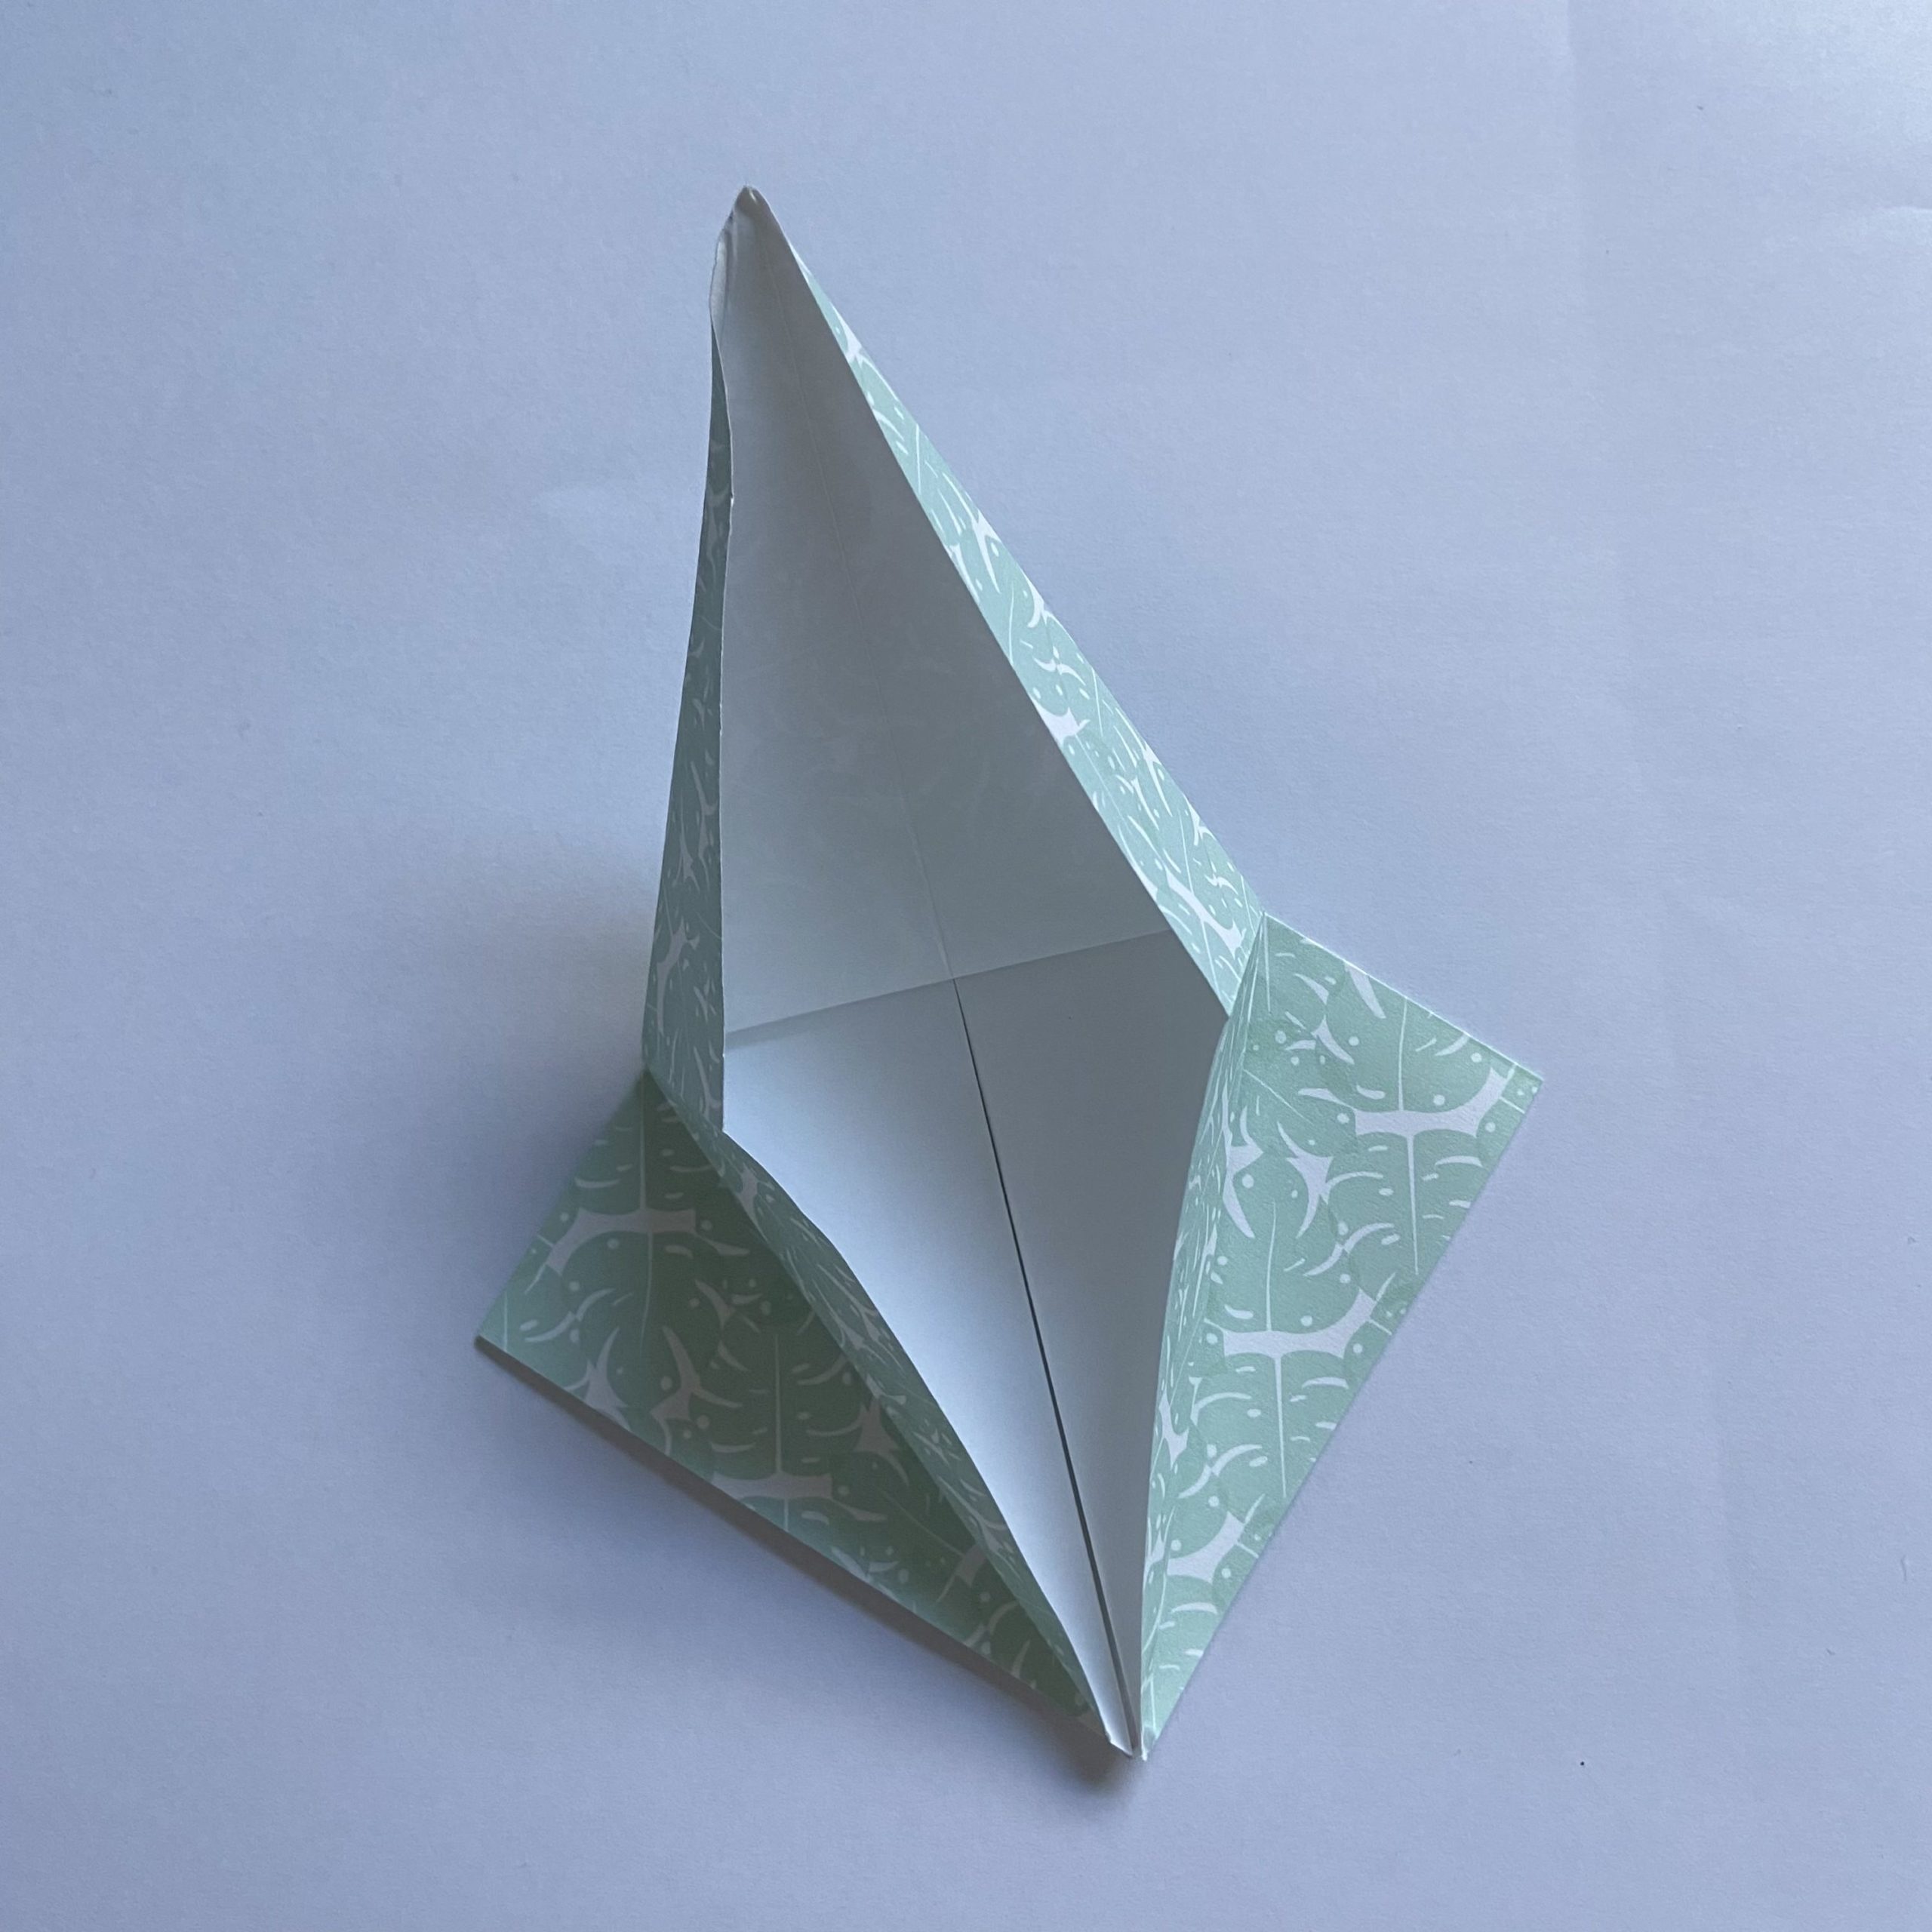
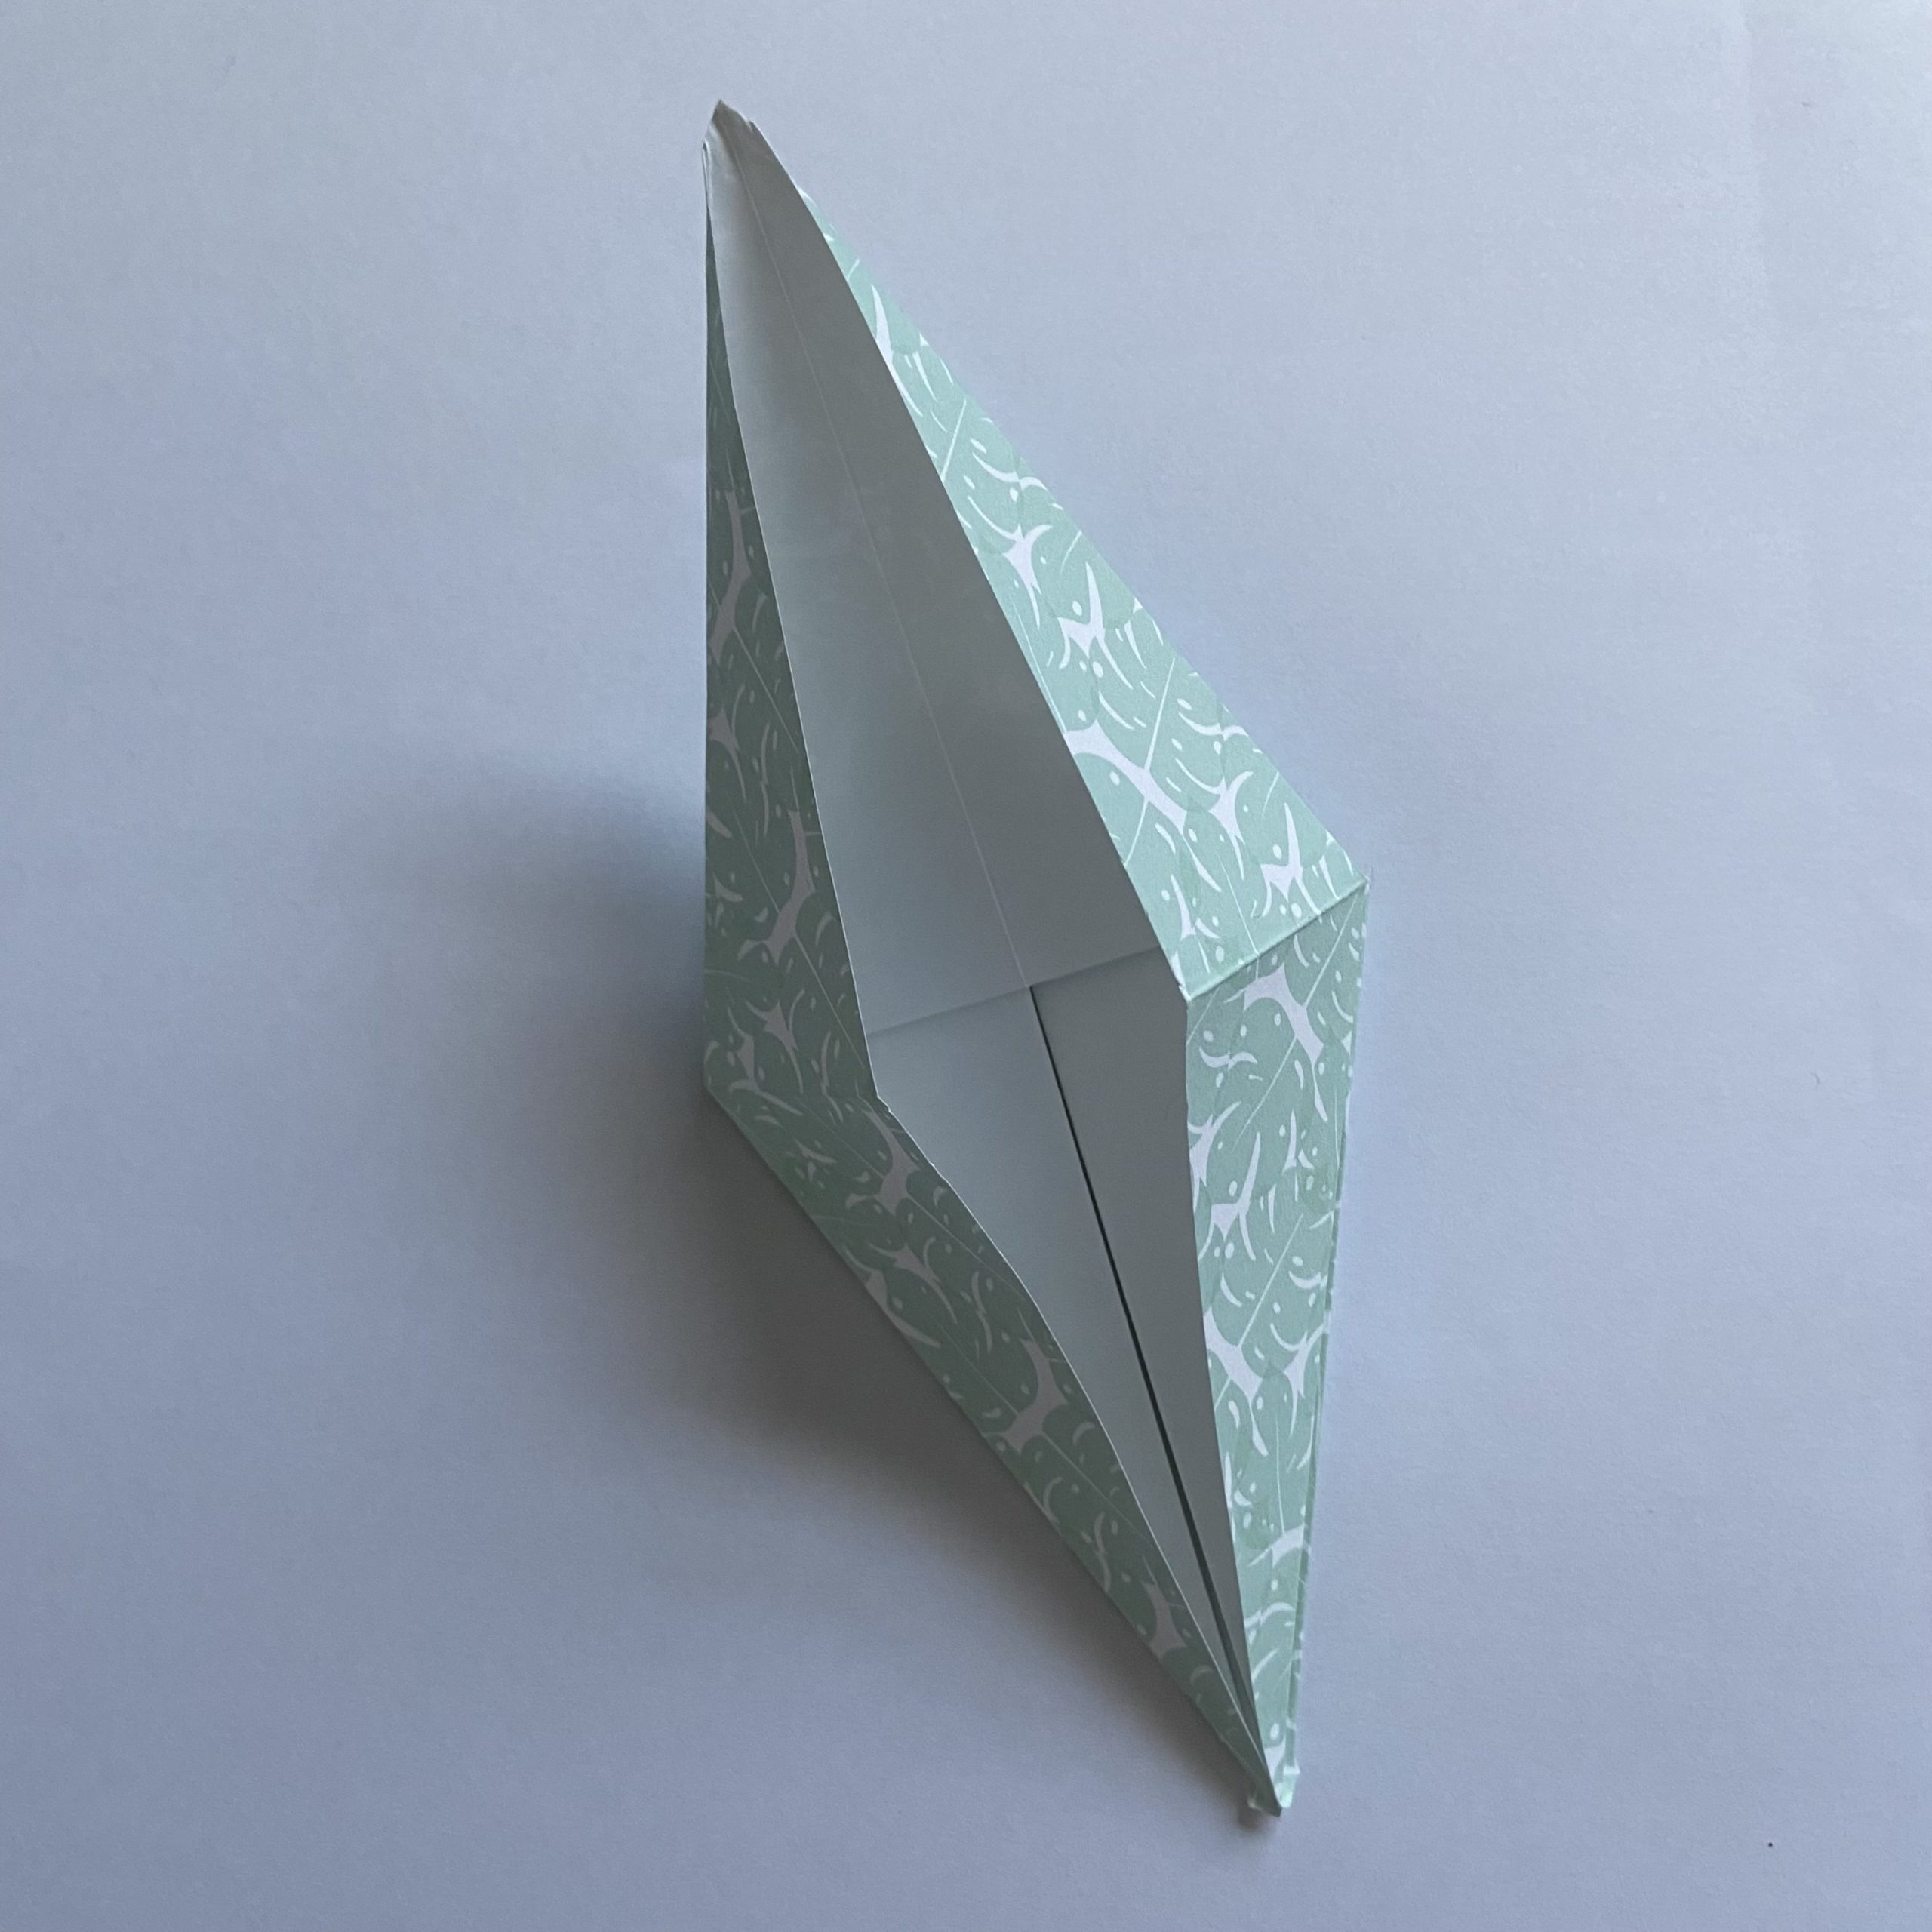
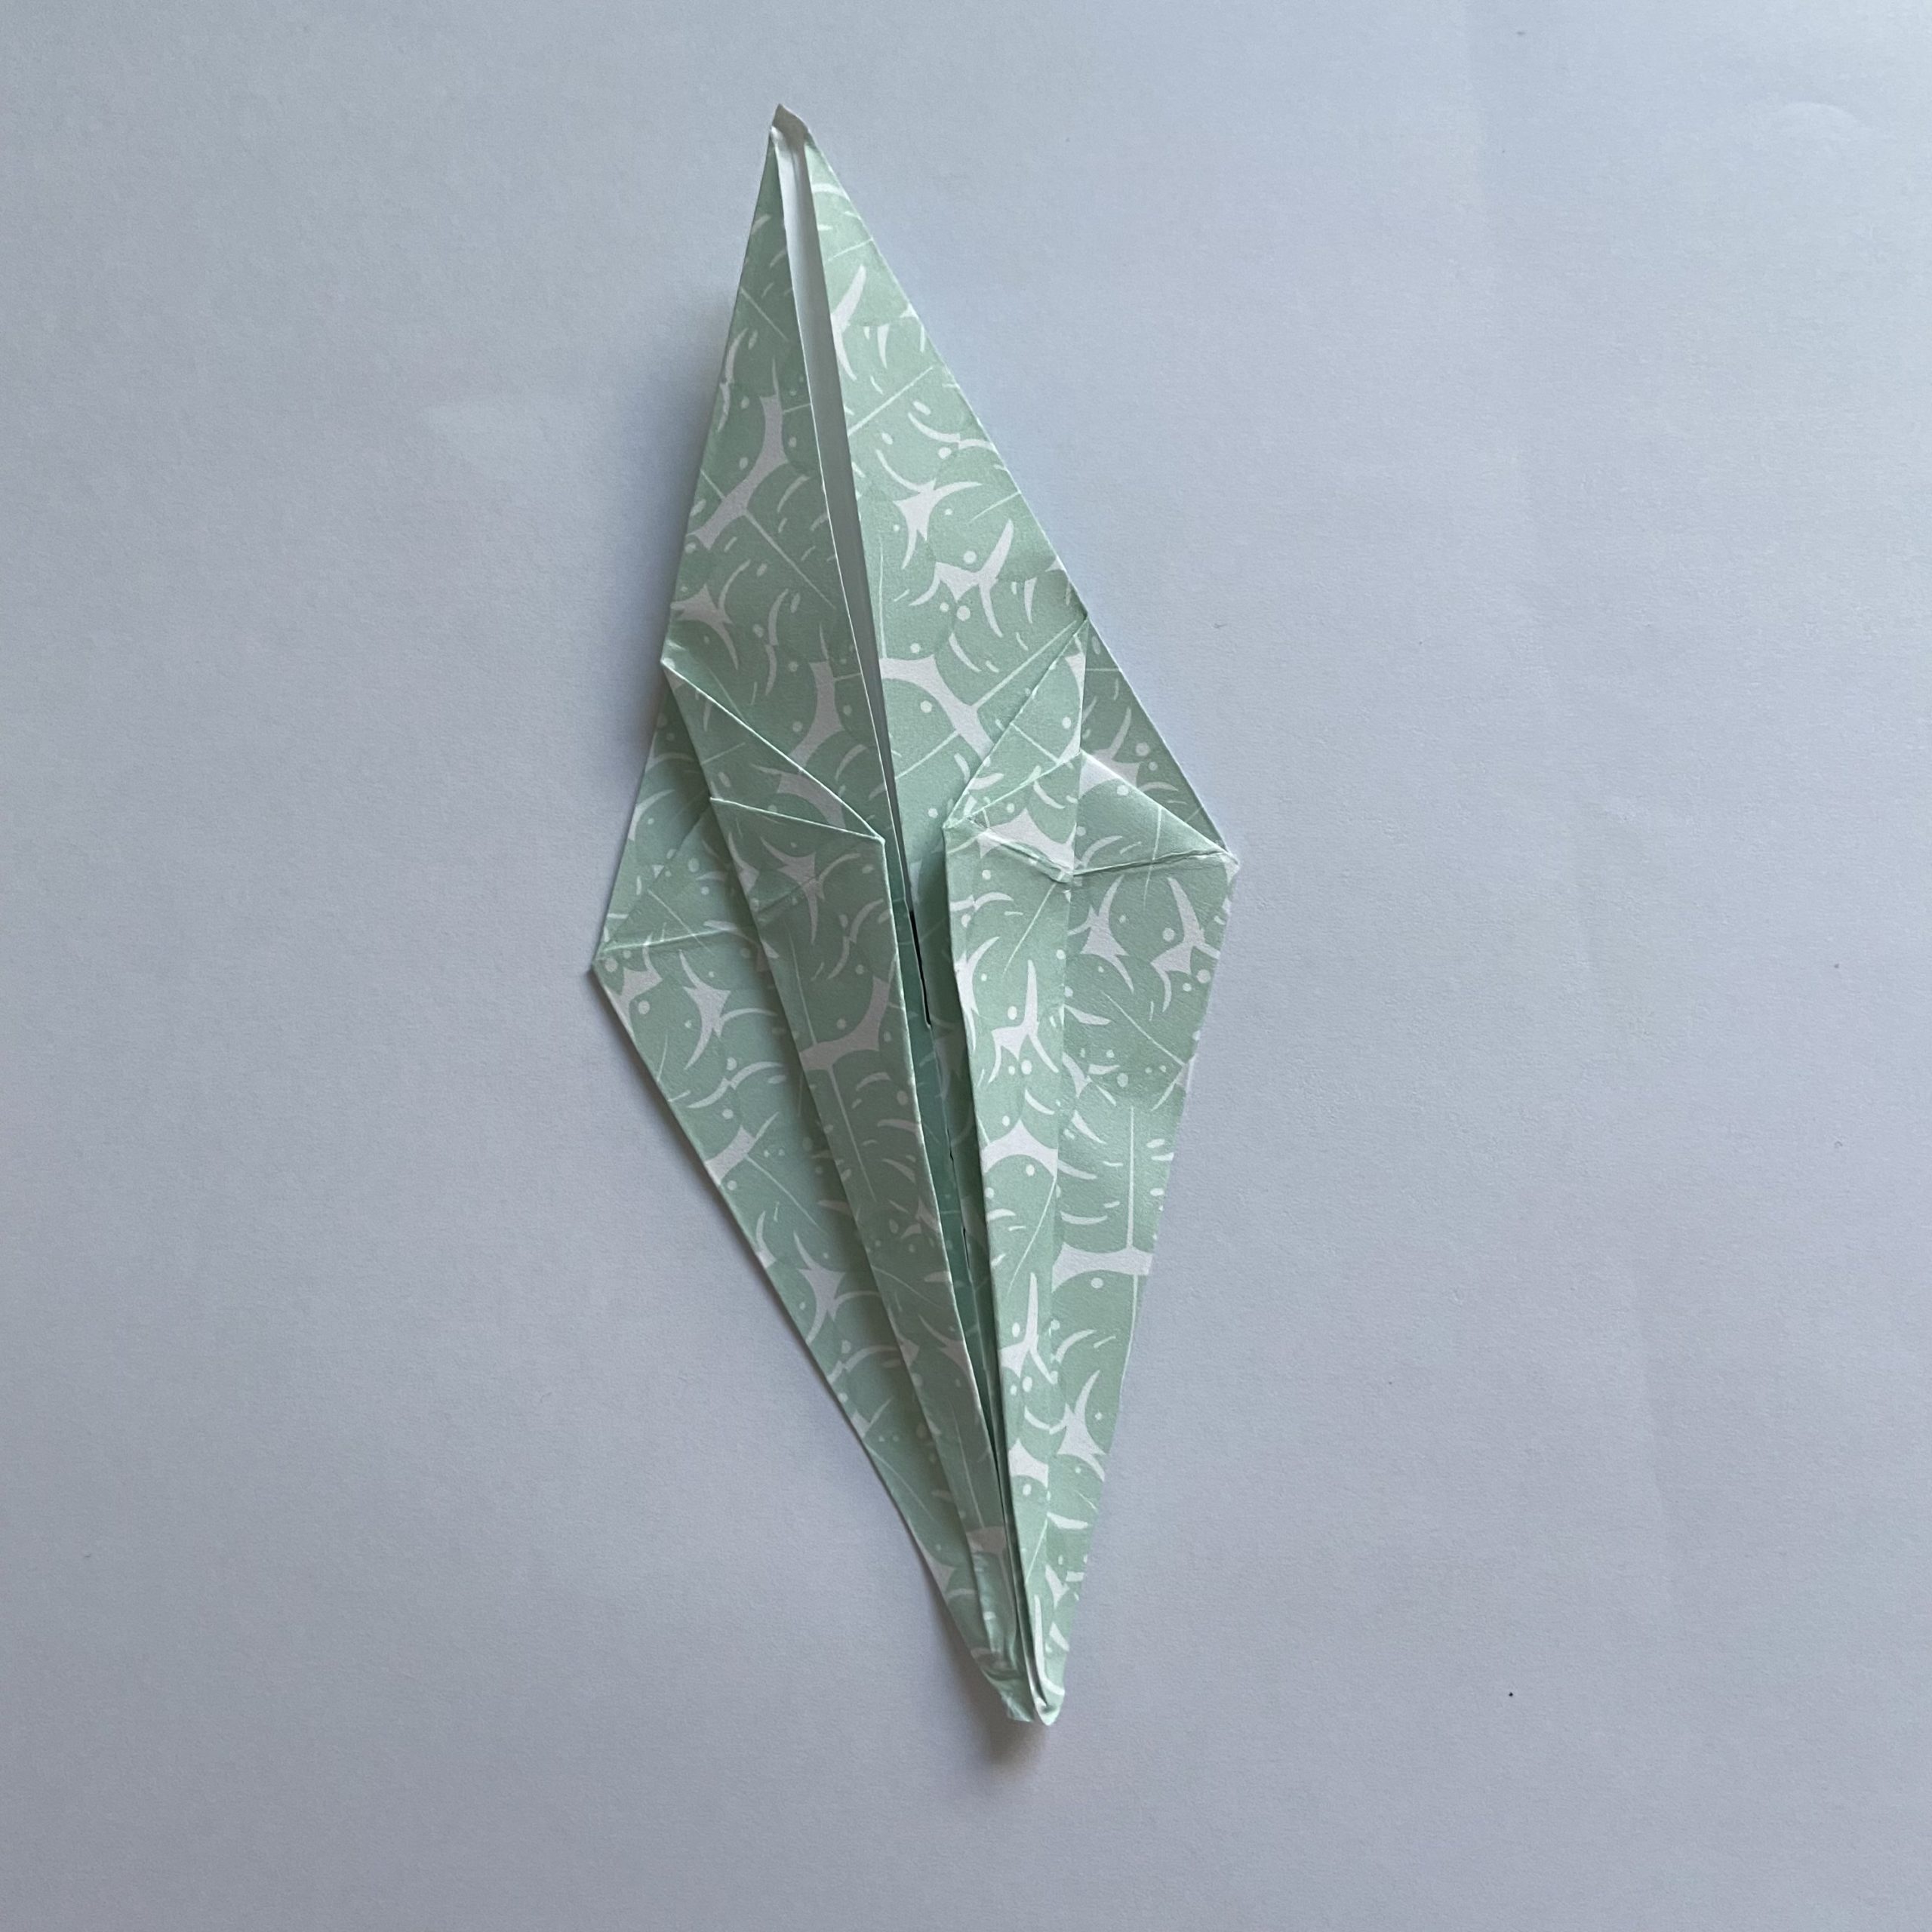
Step 17 – Pull one layer of paper up from the bottom, along the creases you’ve just made
Step 18 – Push the left and right edges inwards, using the fold lines as a guide. You should now have your squash fold!
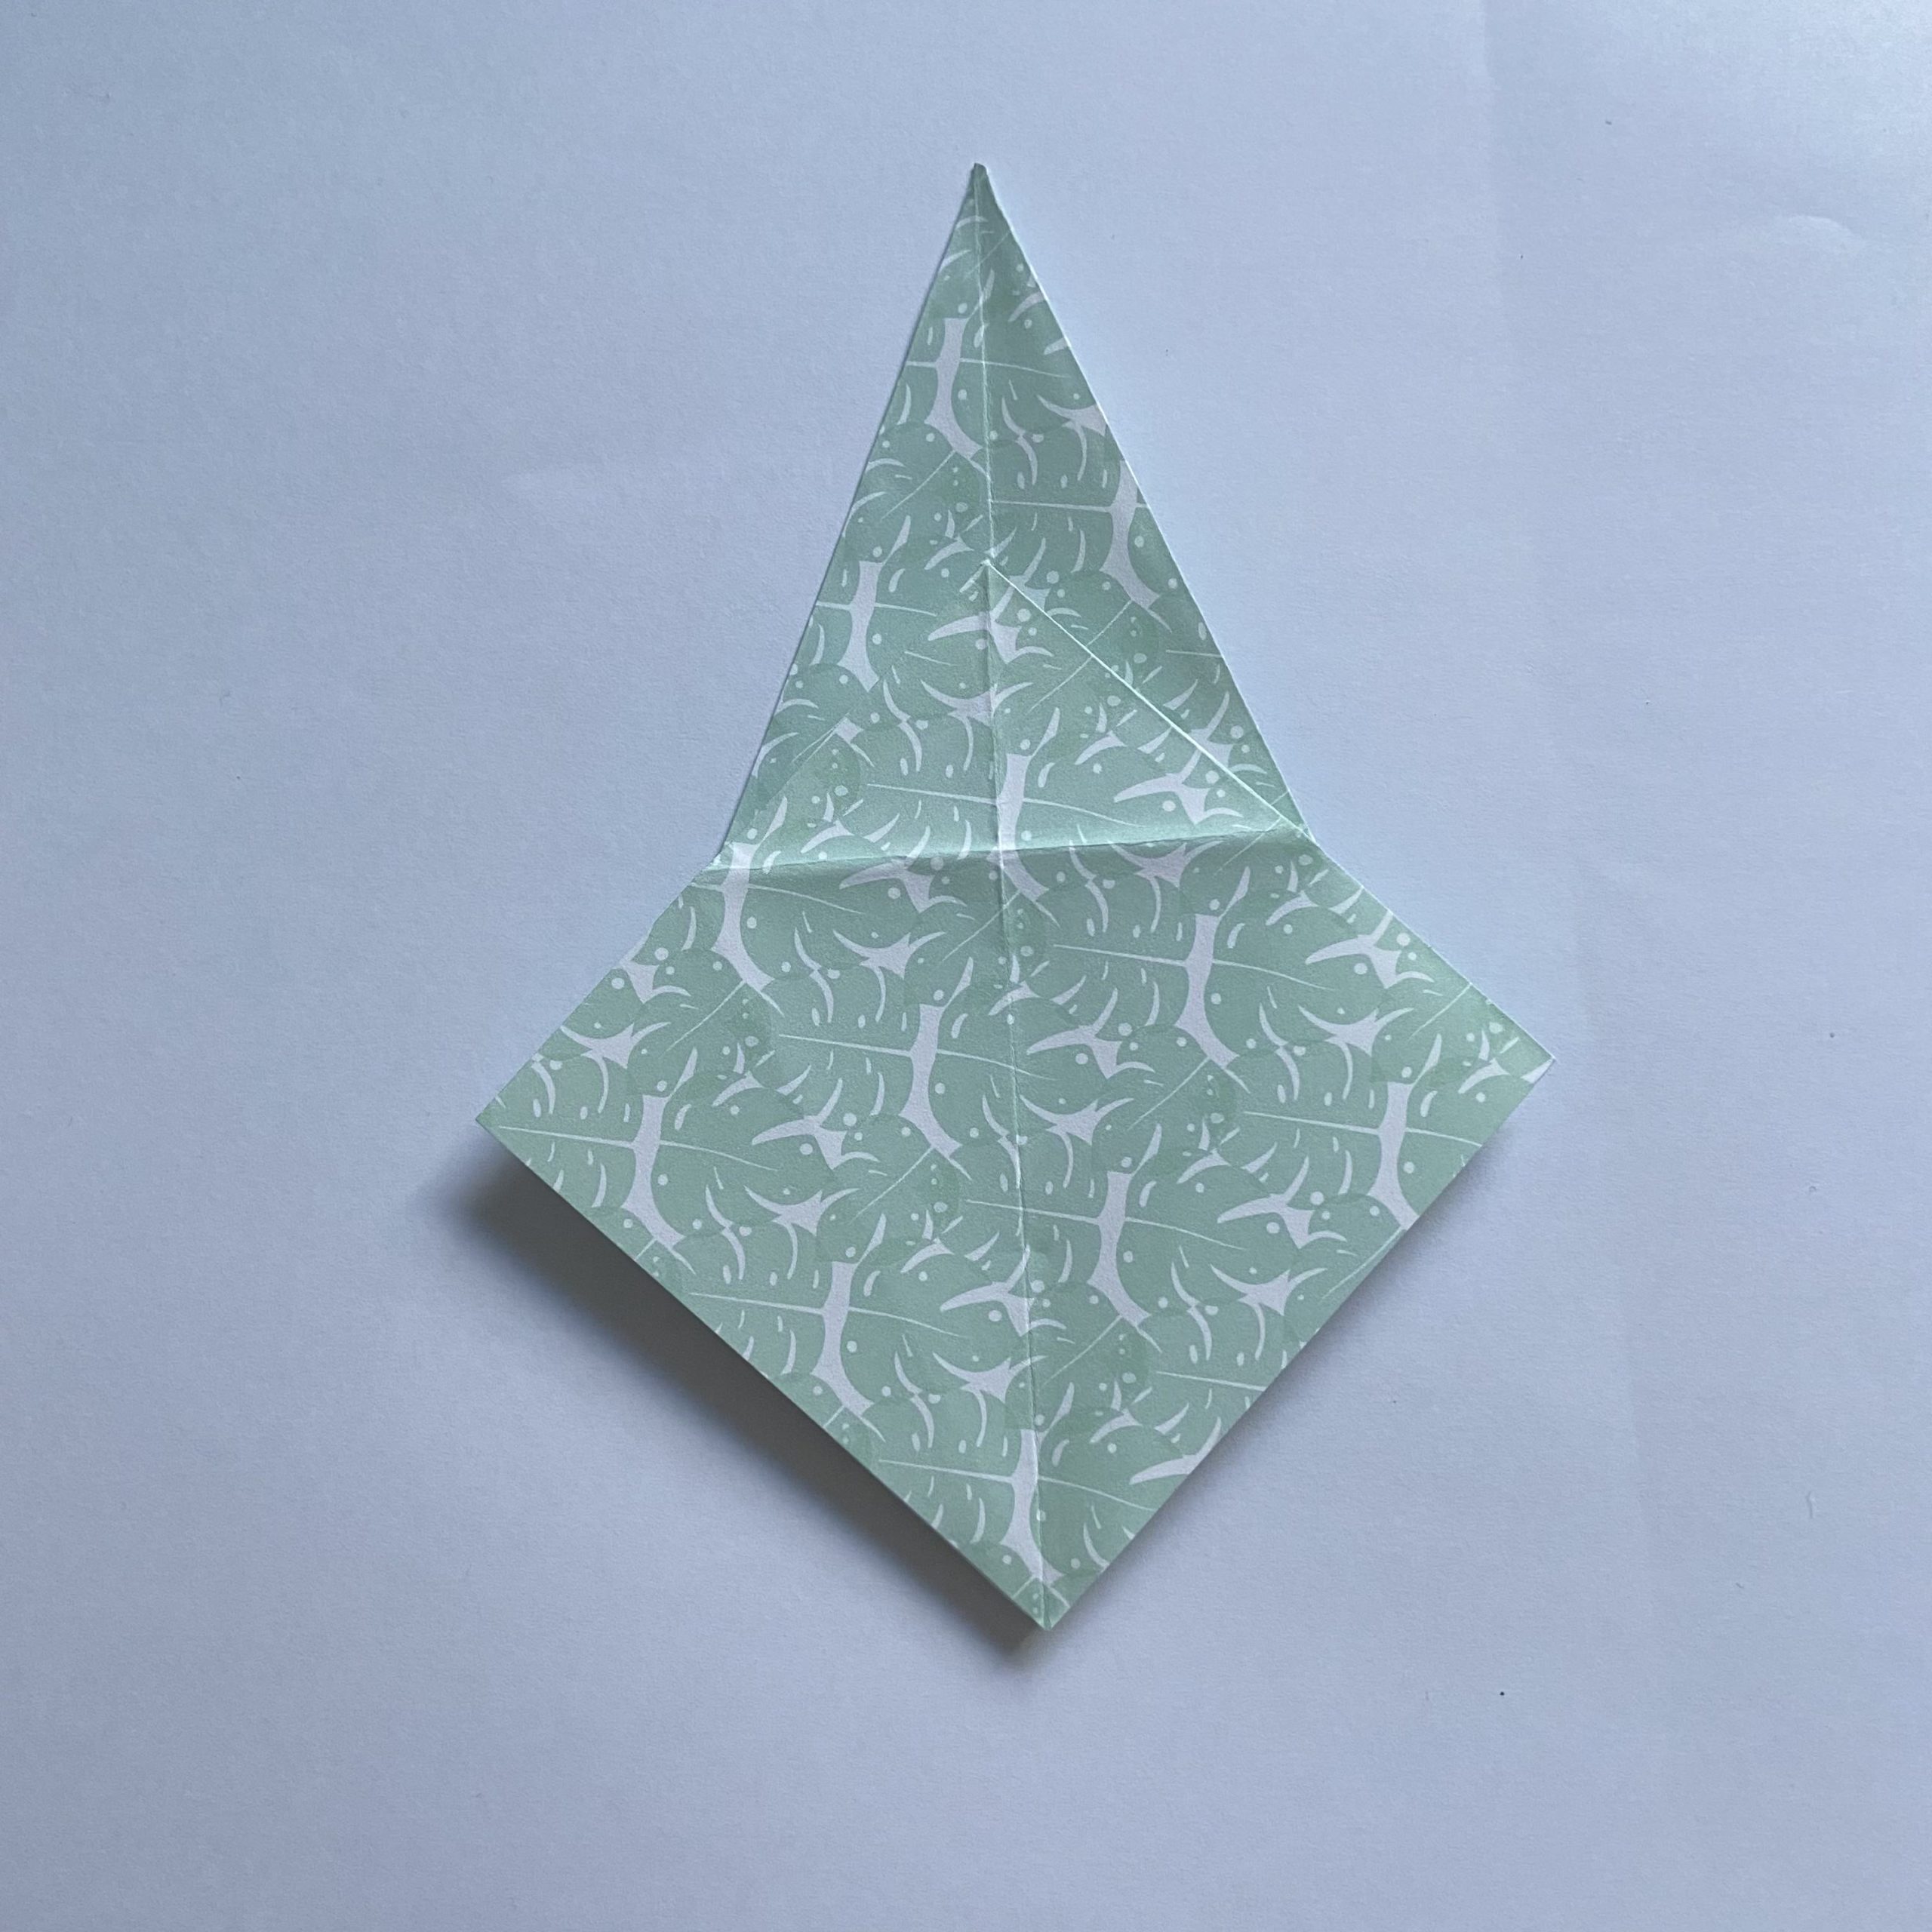
Step 19 – Flip the partially-formed model over
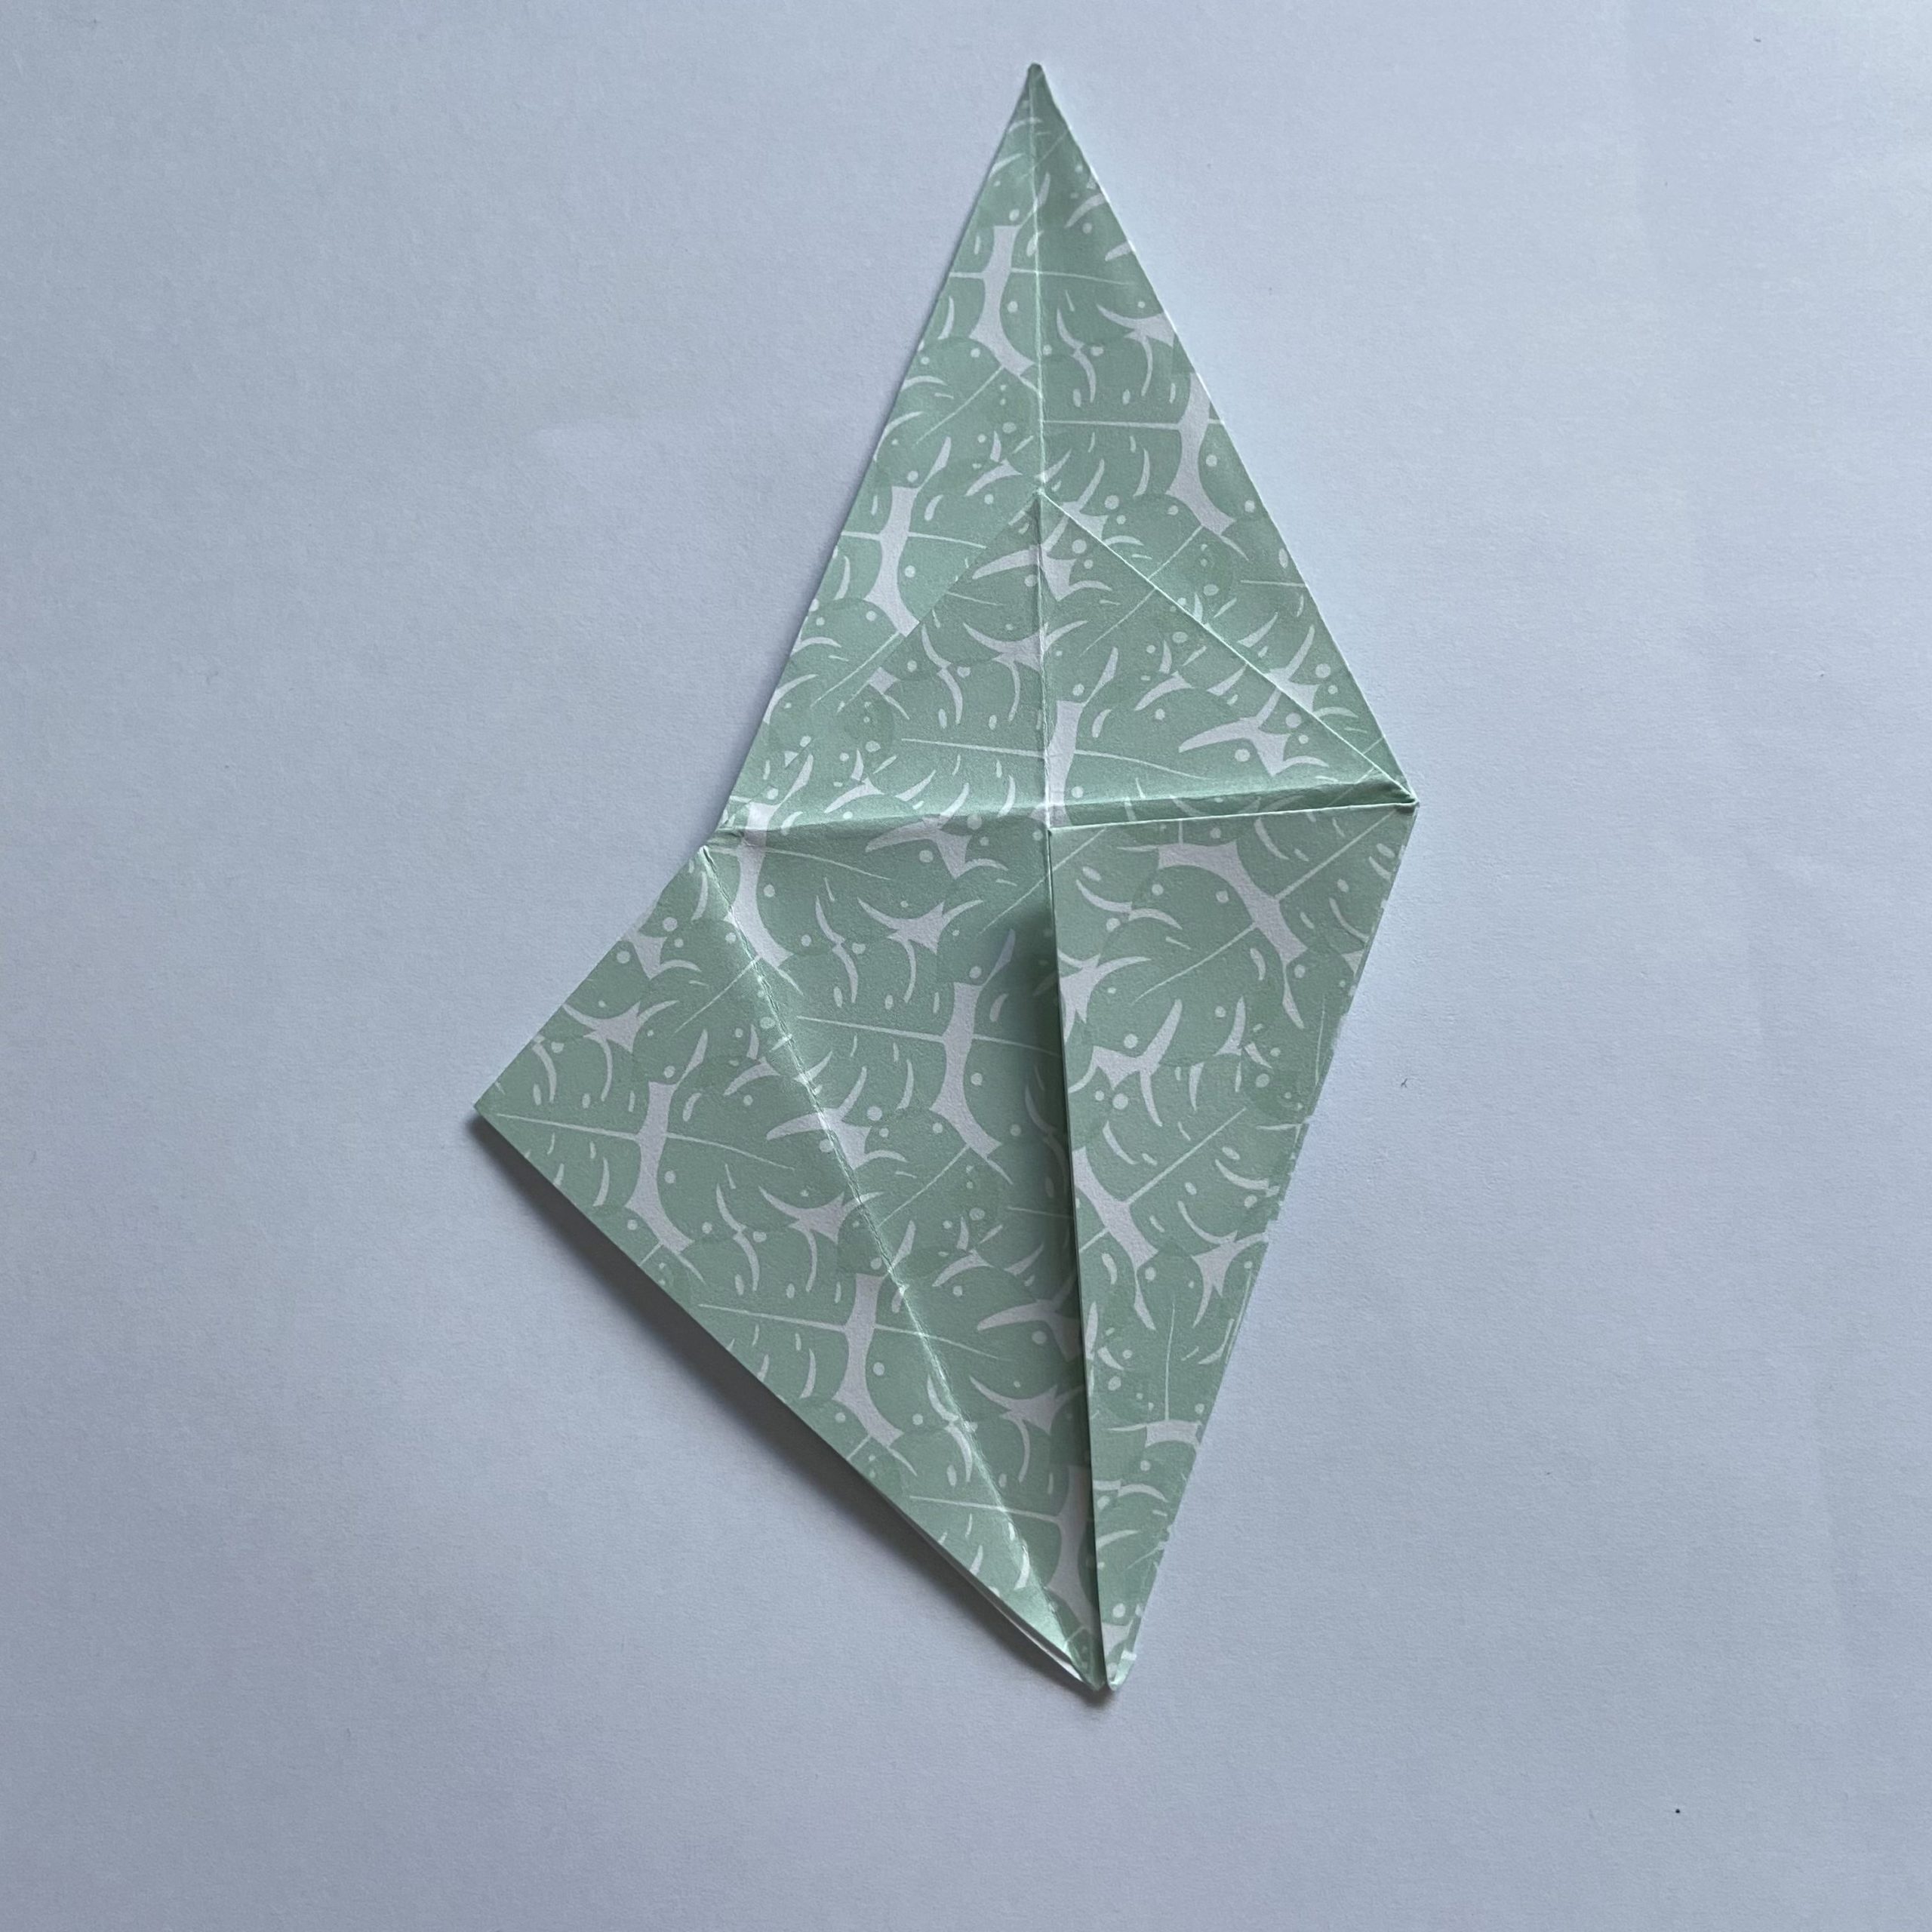
Step 20 – Now repeat steps 13-18 to form a second squash fold on this side, starting by bringing the lower right edge to the central crease and folding
Step 21 – Now bring the left edge to the central crease, and fold
Step 22 – Fold the top down as before (do not include the squash fold from the other side in this)
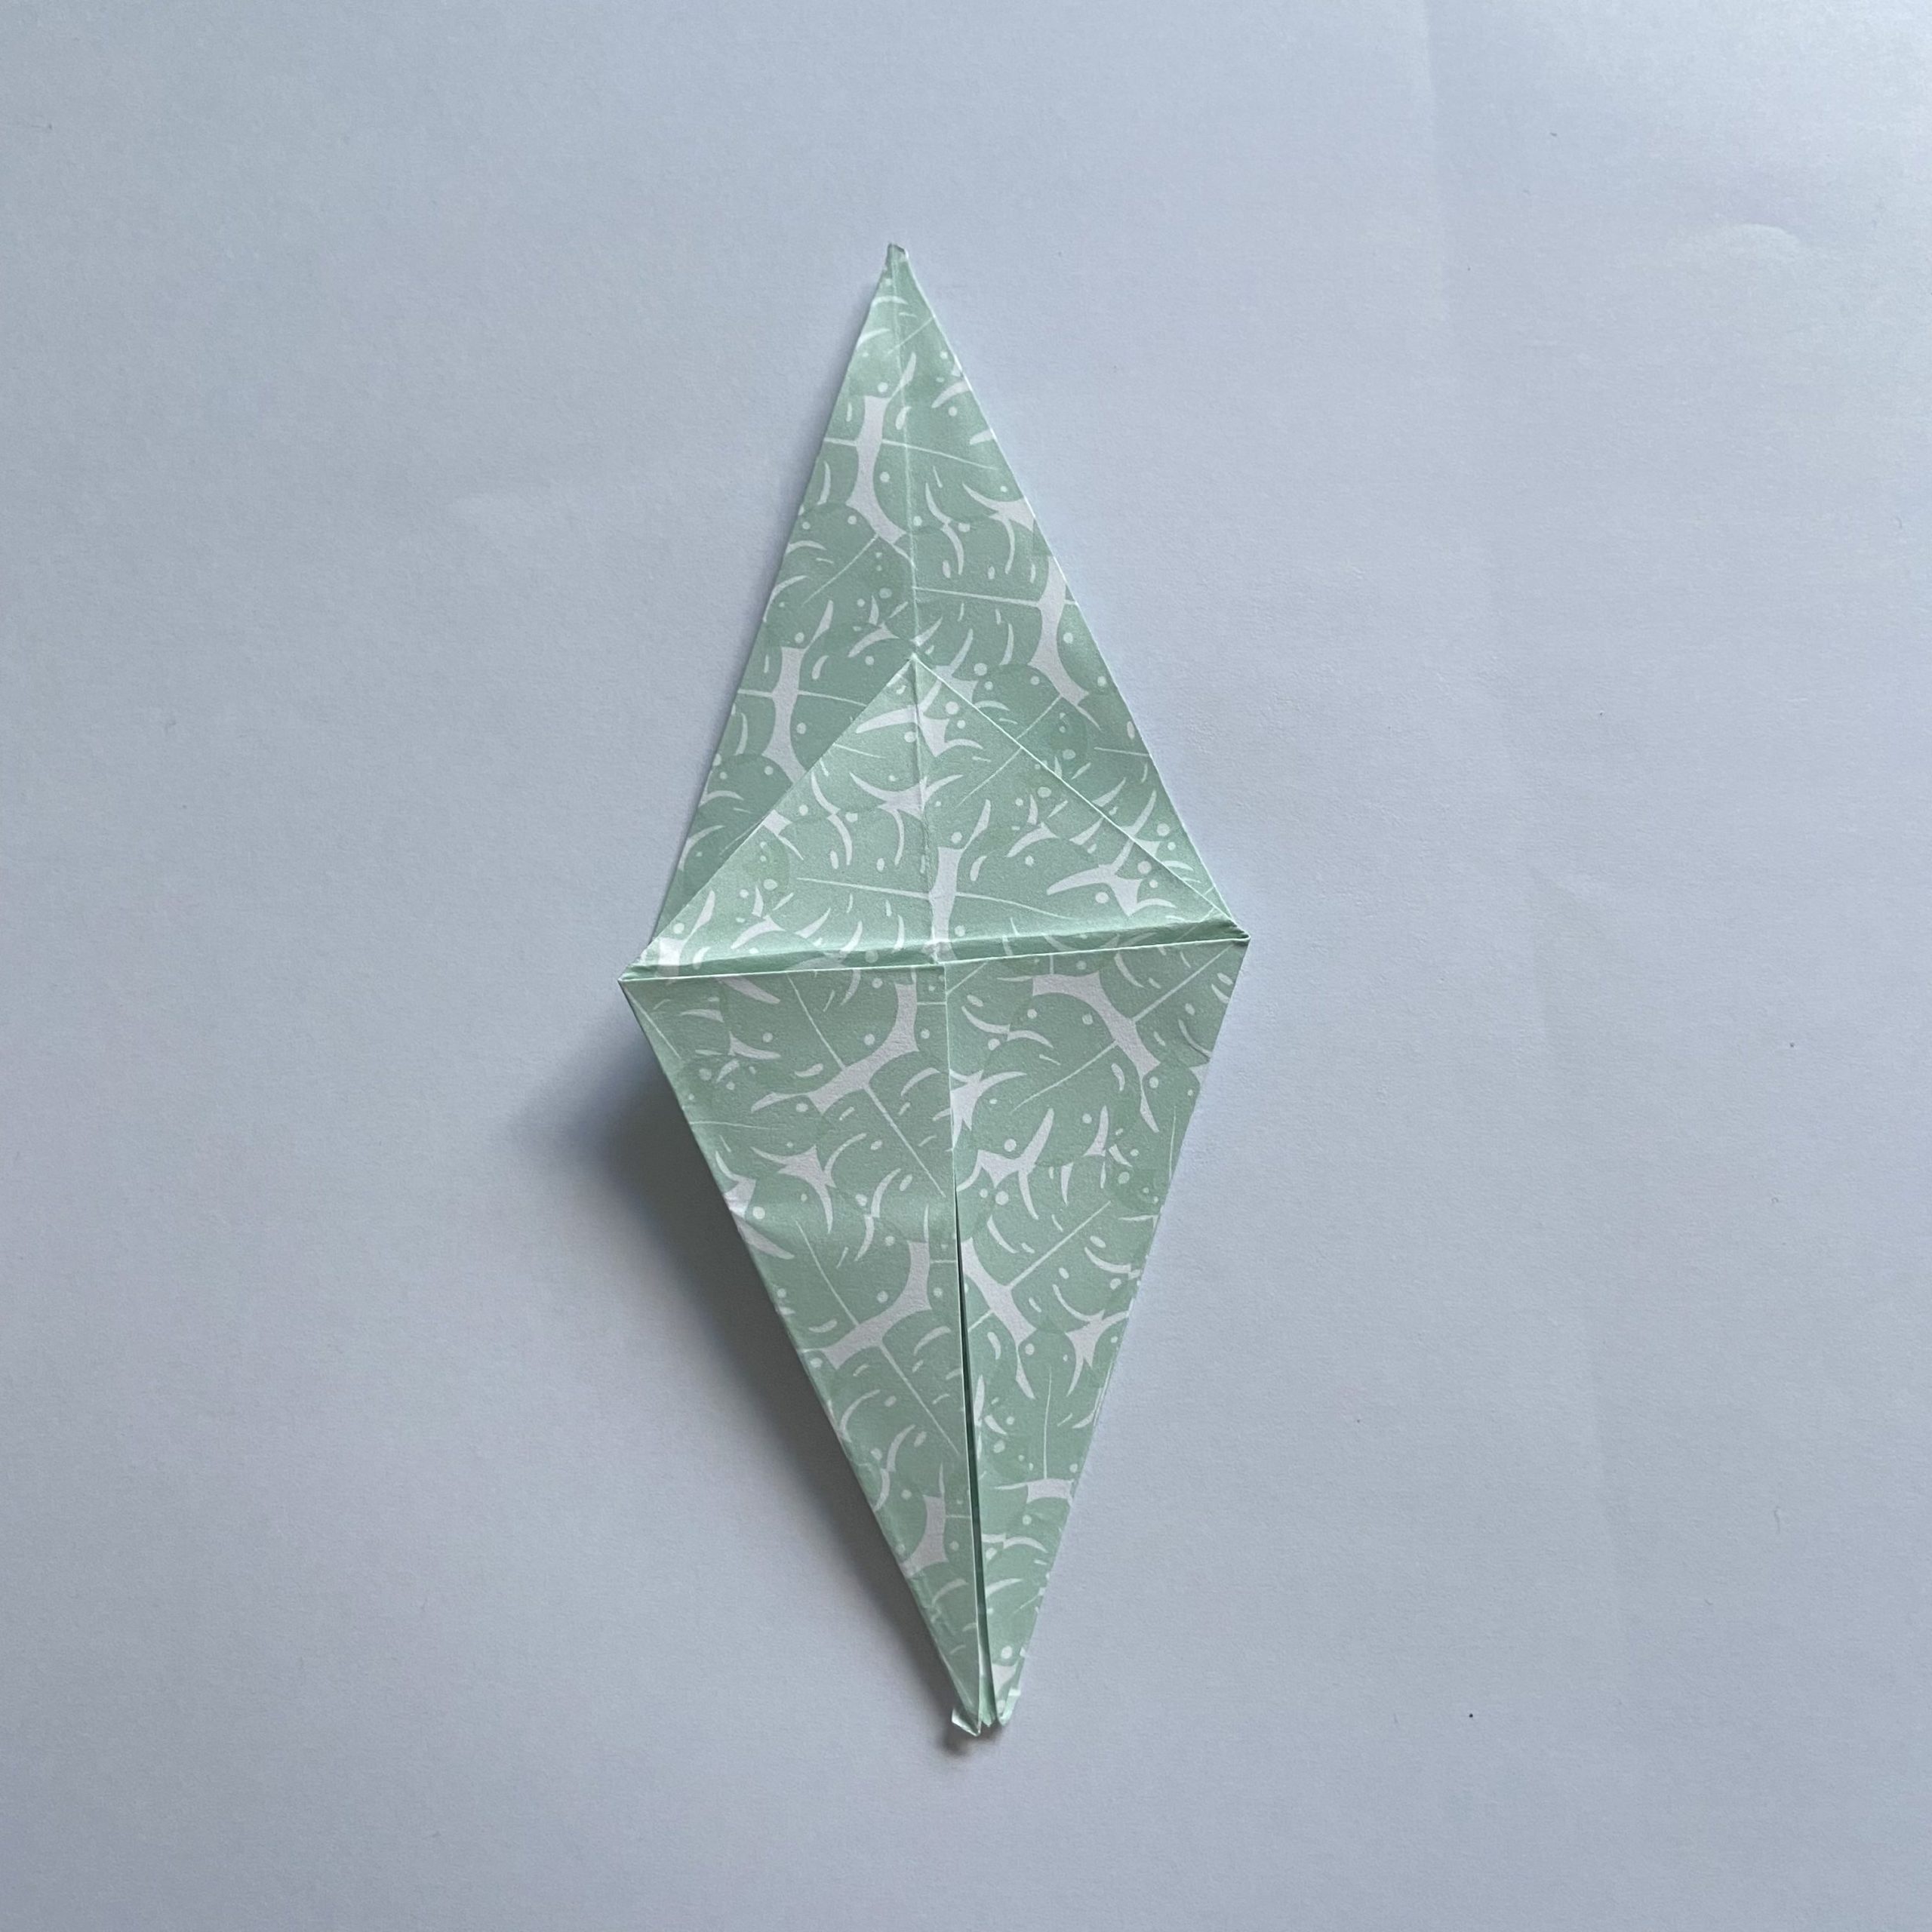
Step 23 – Unfold the previous 3 steps so that you are back to your diamond shape
Step 24 – Pull one layer of paper up from the bottom, along the creases you’ve made
Step 25 – Push the left and right edges inwards to create your second squash fold
Step 26 – Fold the lower right edge to meet the central crease
Step 27 – Fold the lower left edge in the same way to meet the central crease
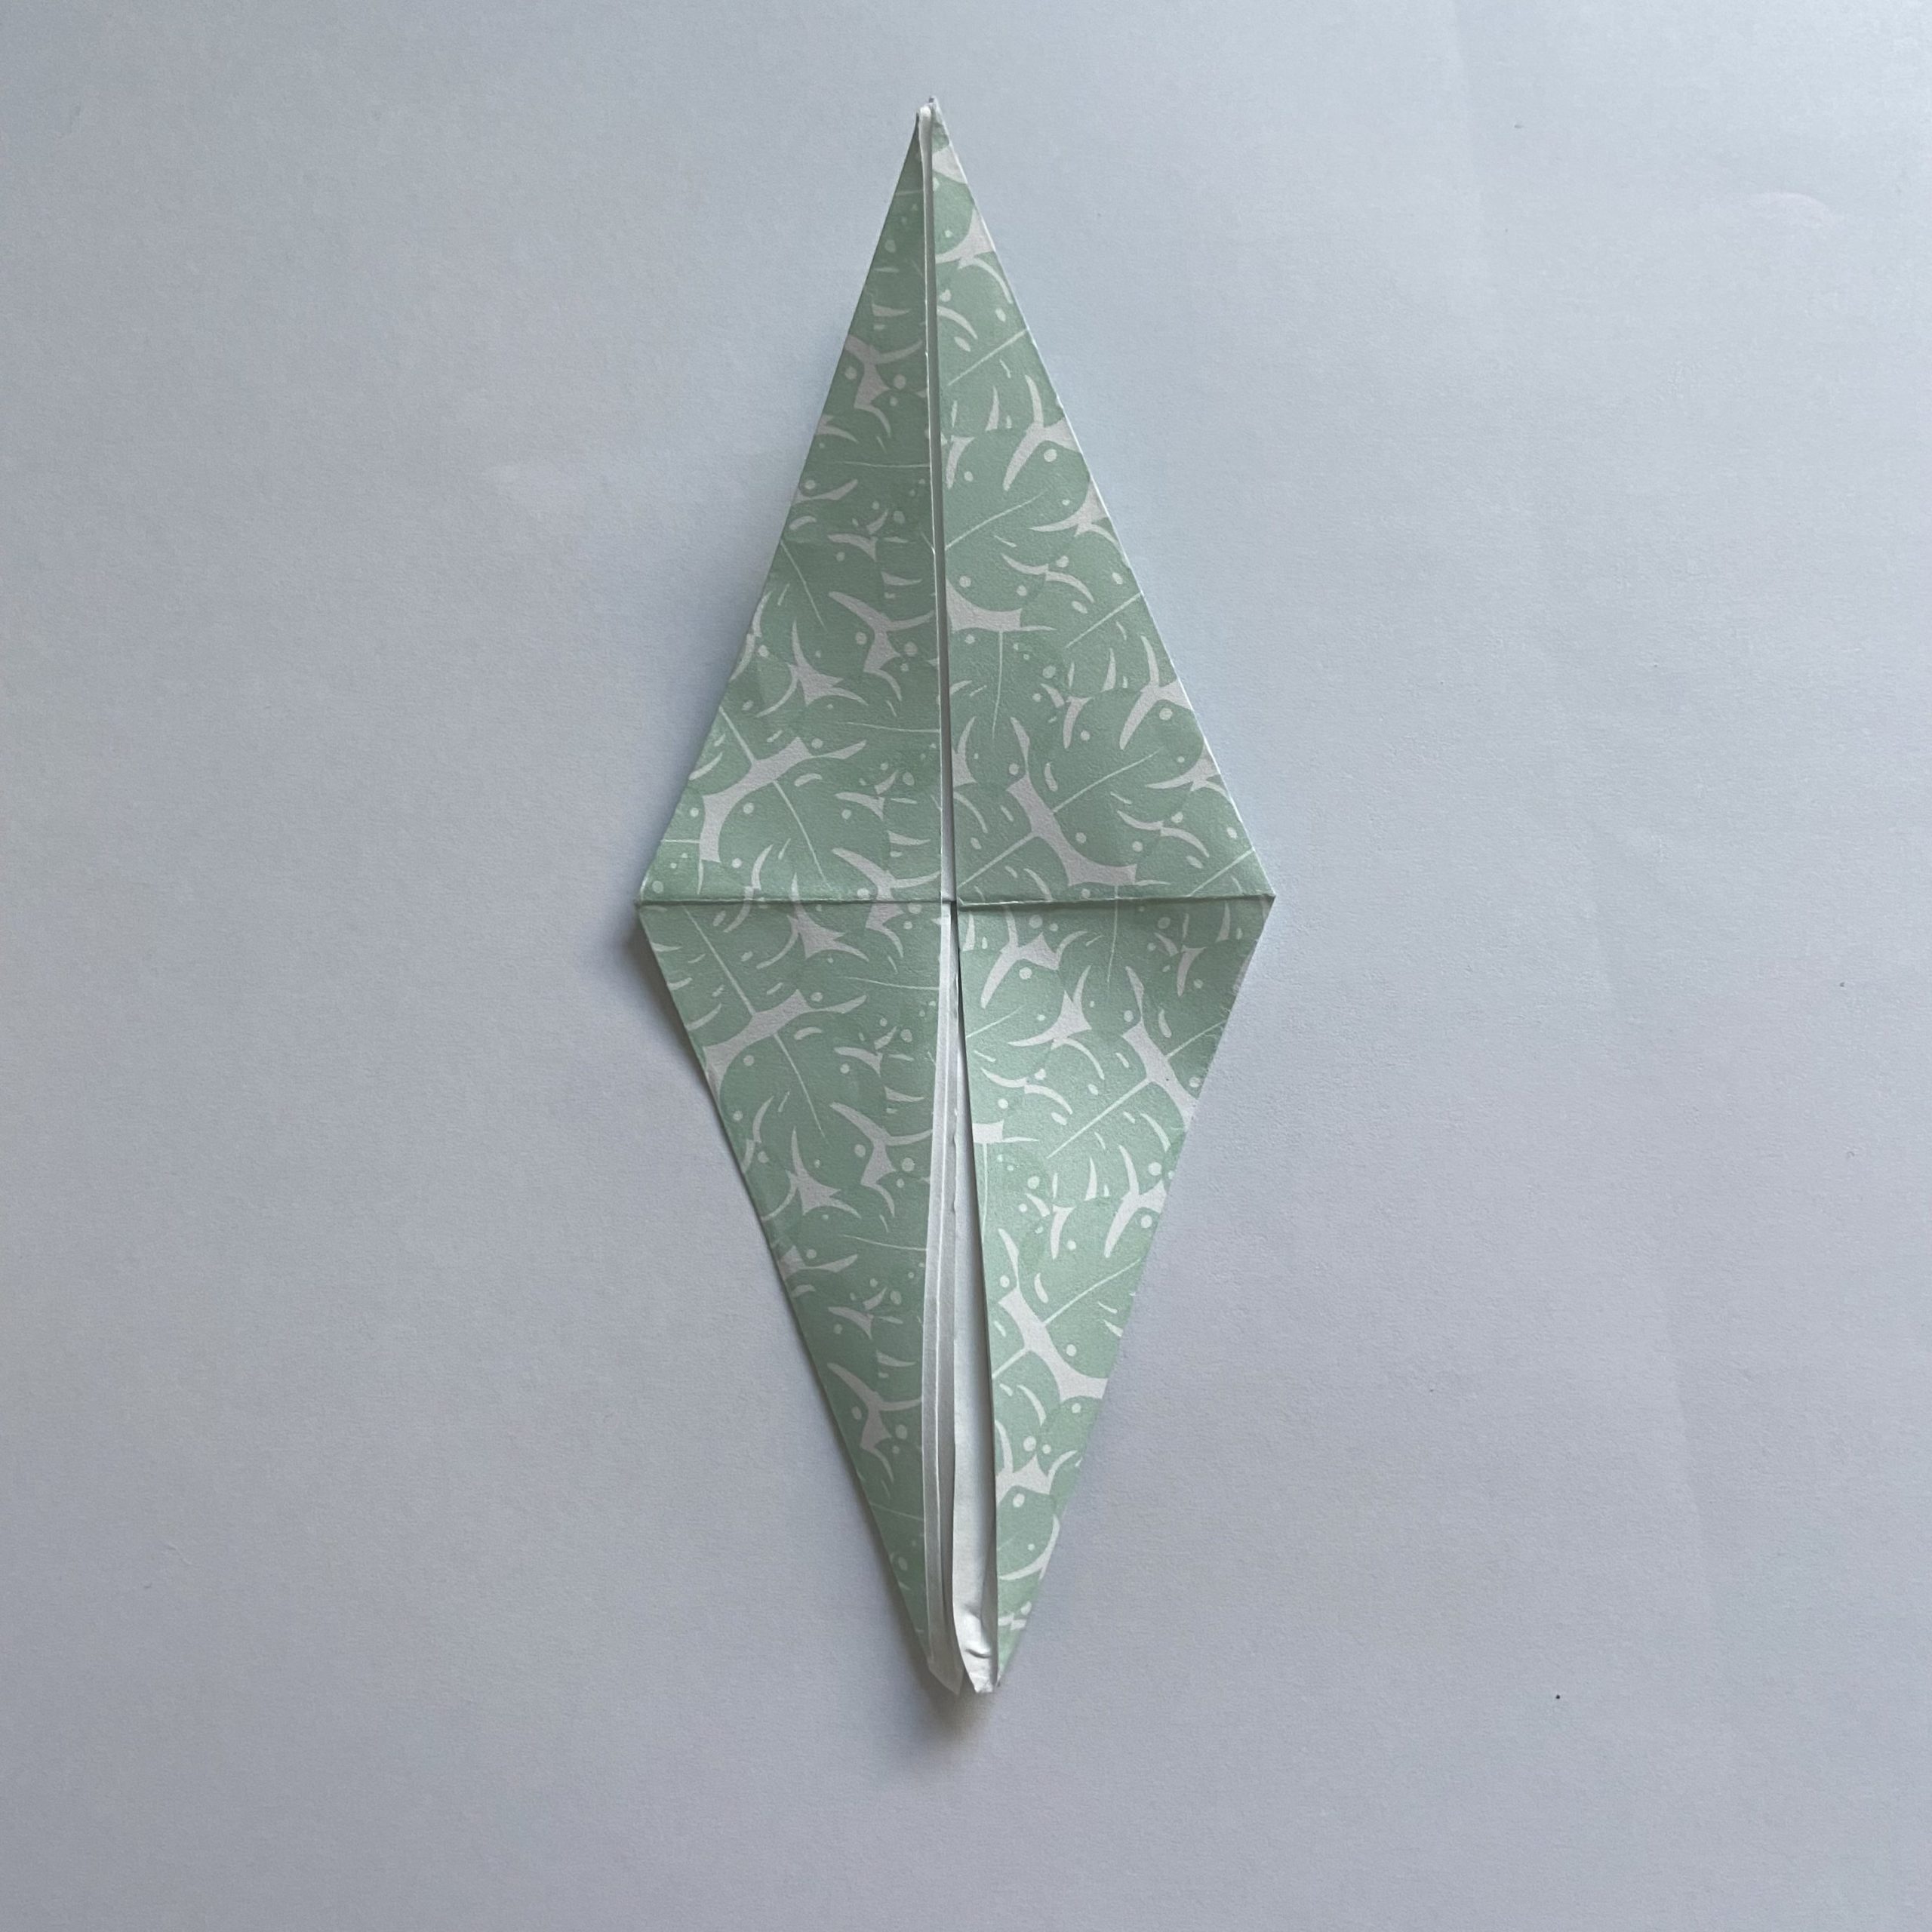
Step 28 – Flip the partially-former model over
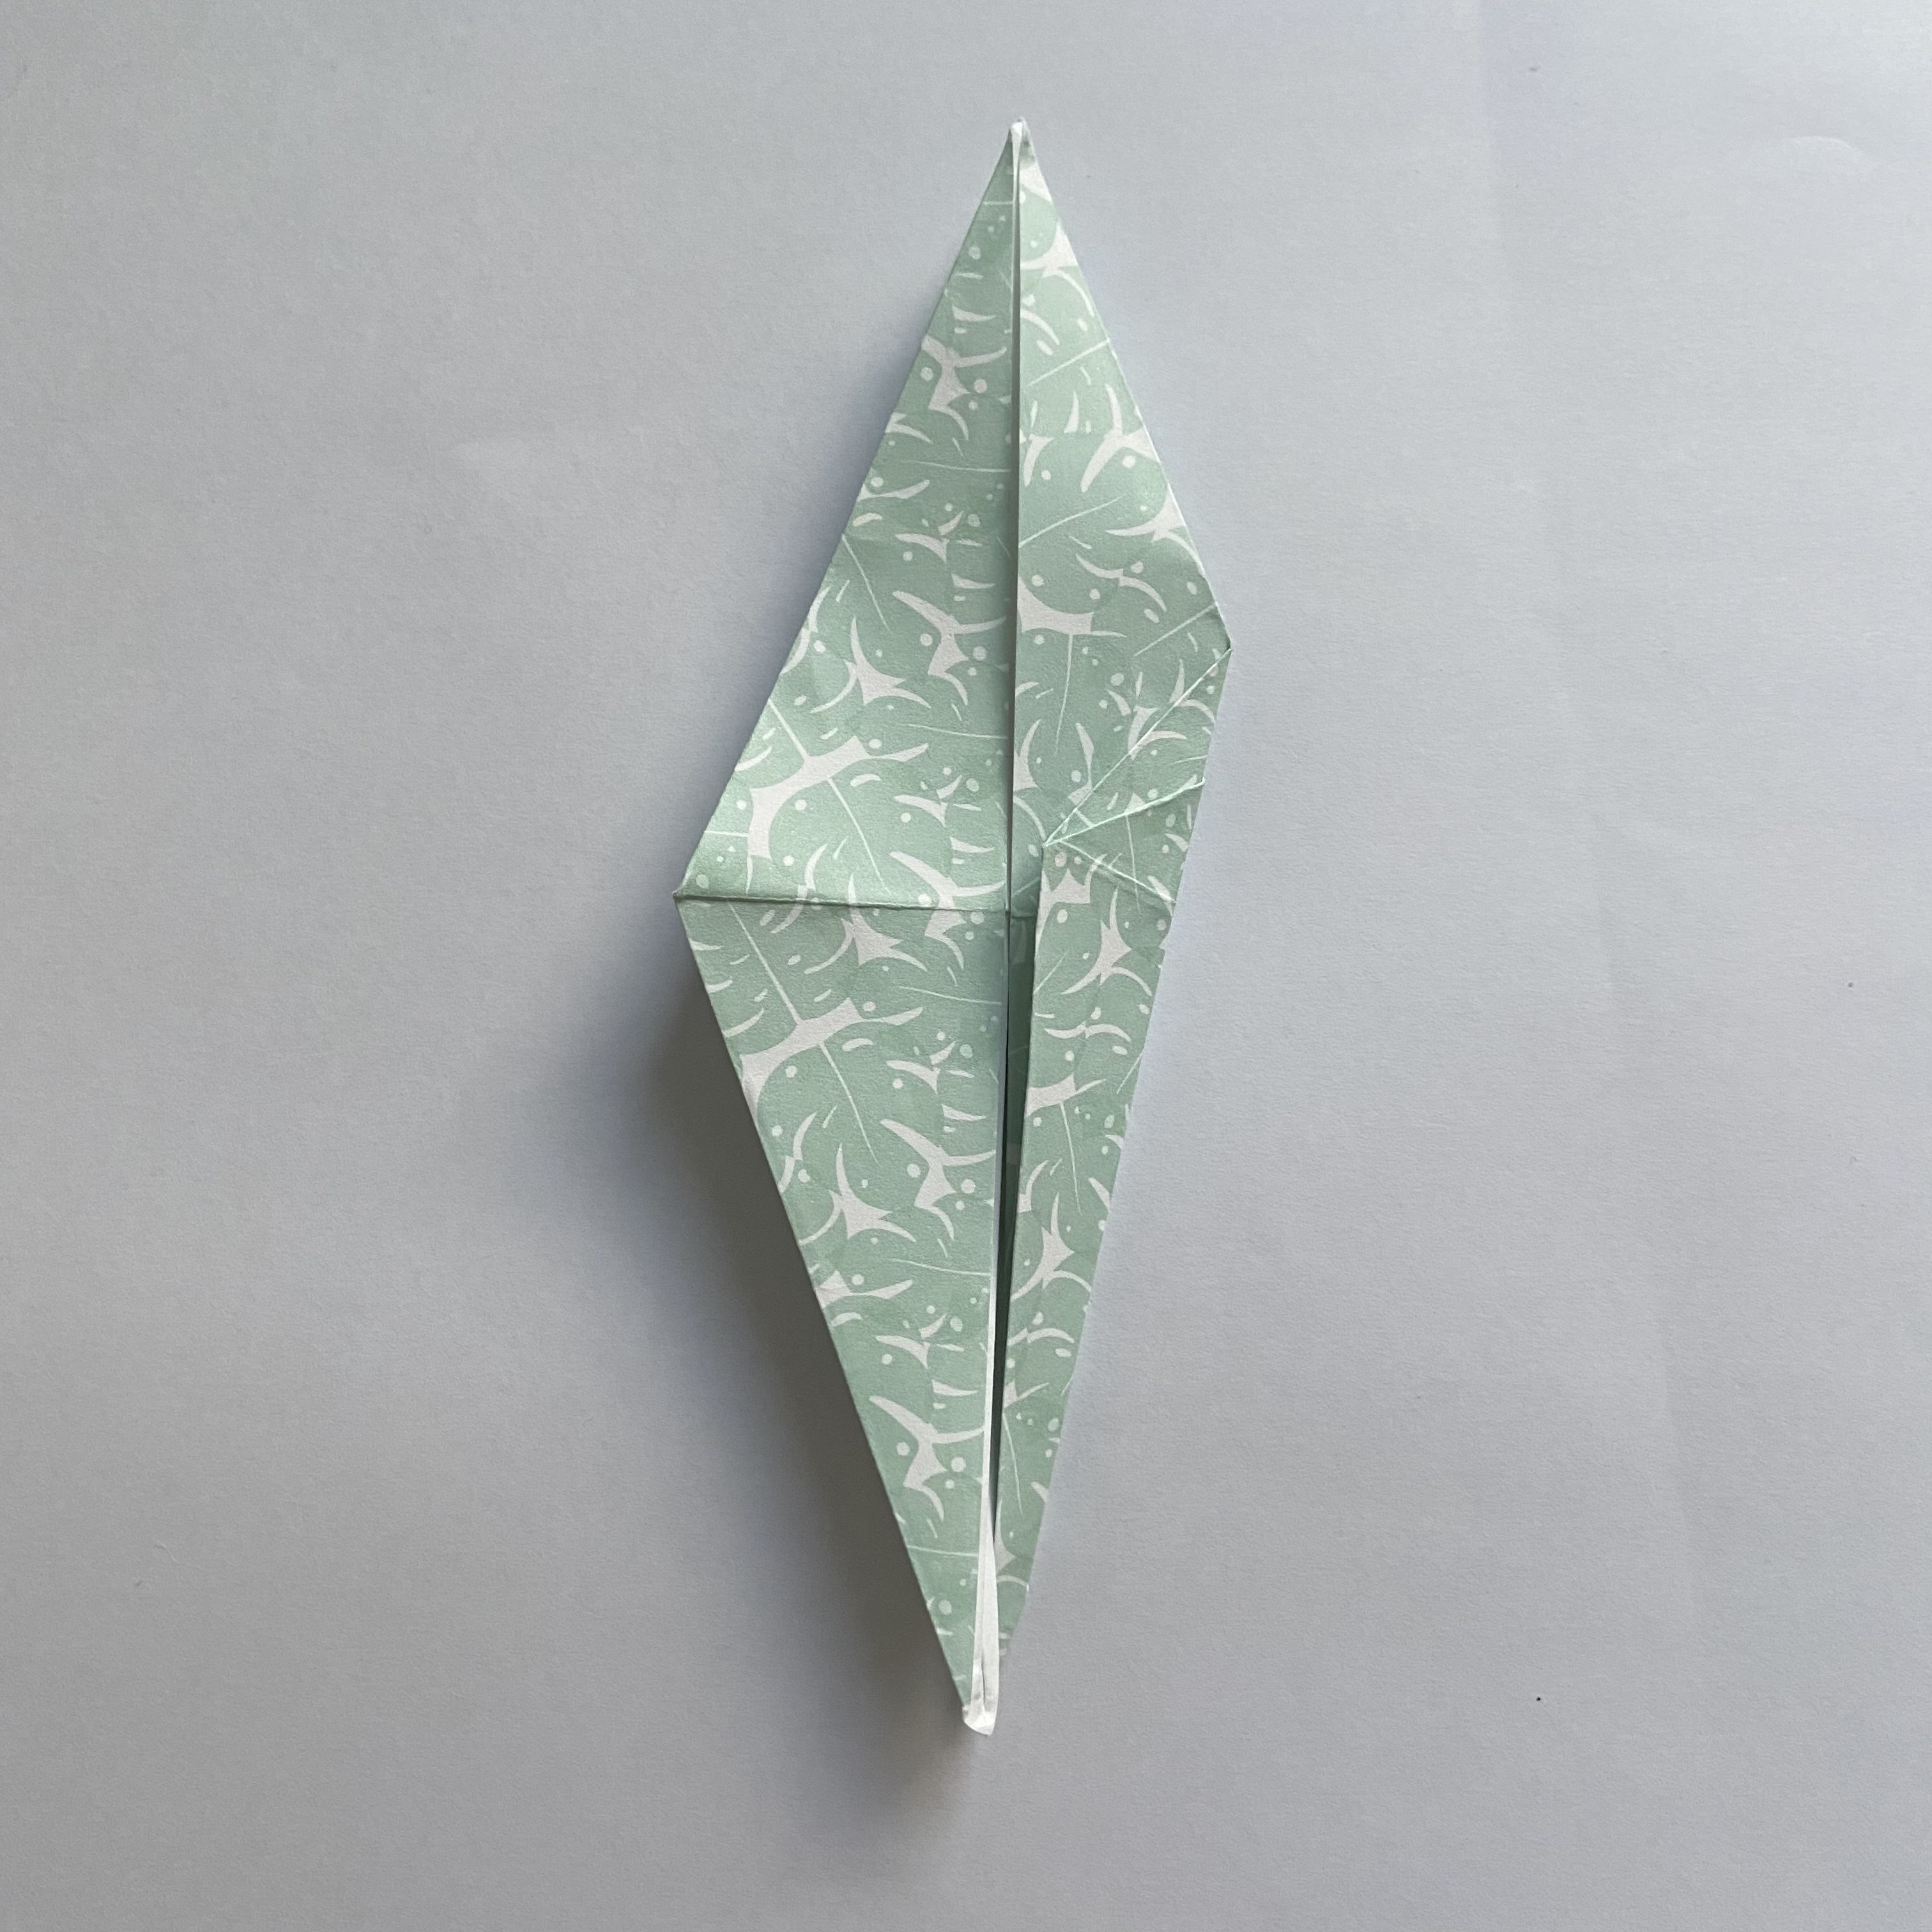
Step 29 – Repeat steps 26 & 27, starting by folding the lower right corner to meet the central crease
Step 30 – Fold the lower left side to meet the central crease
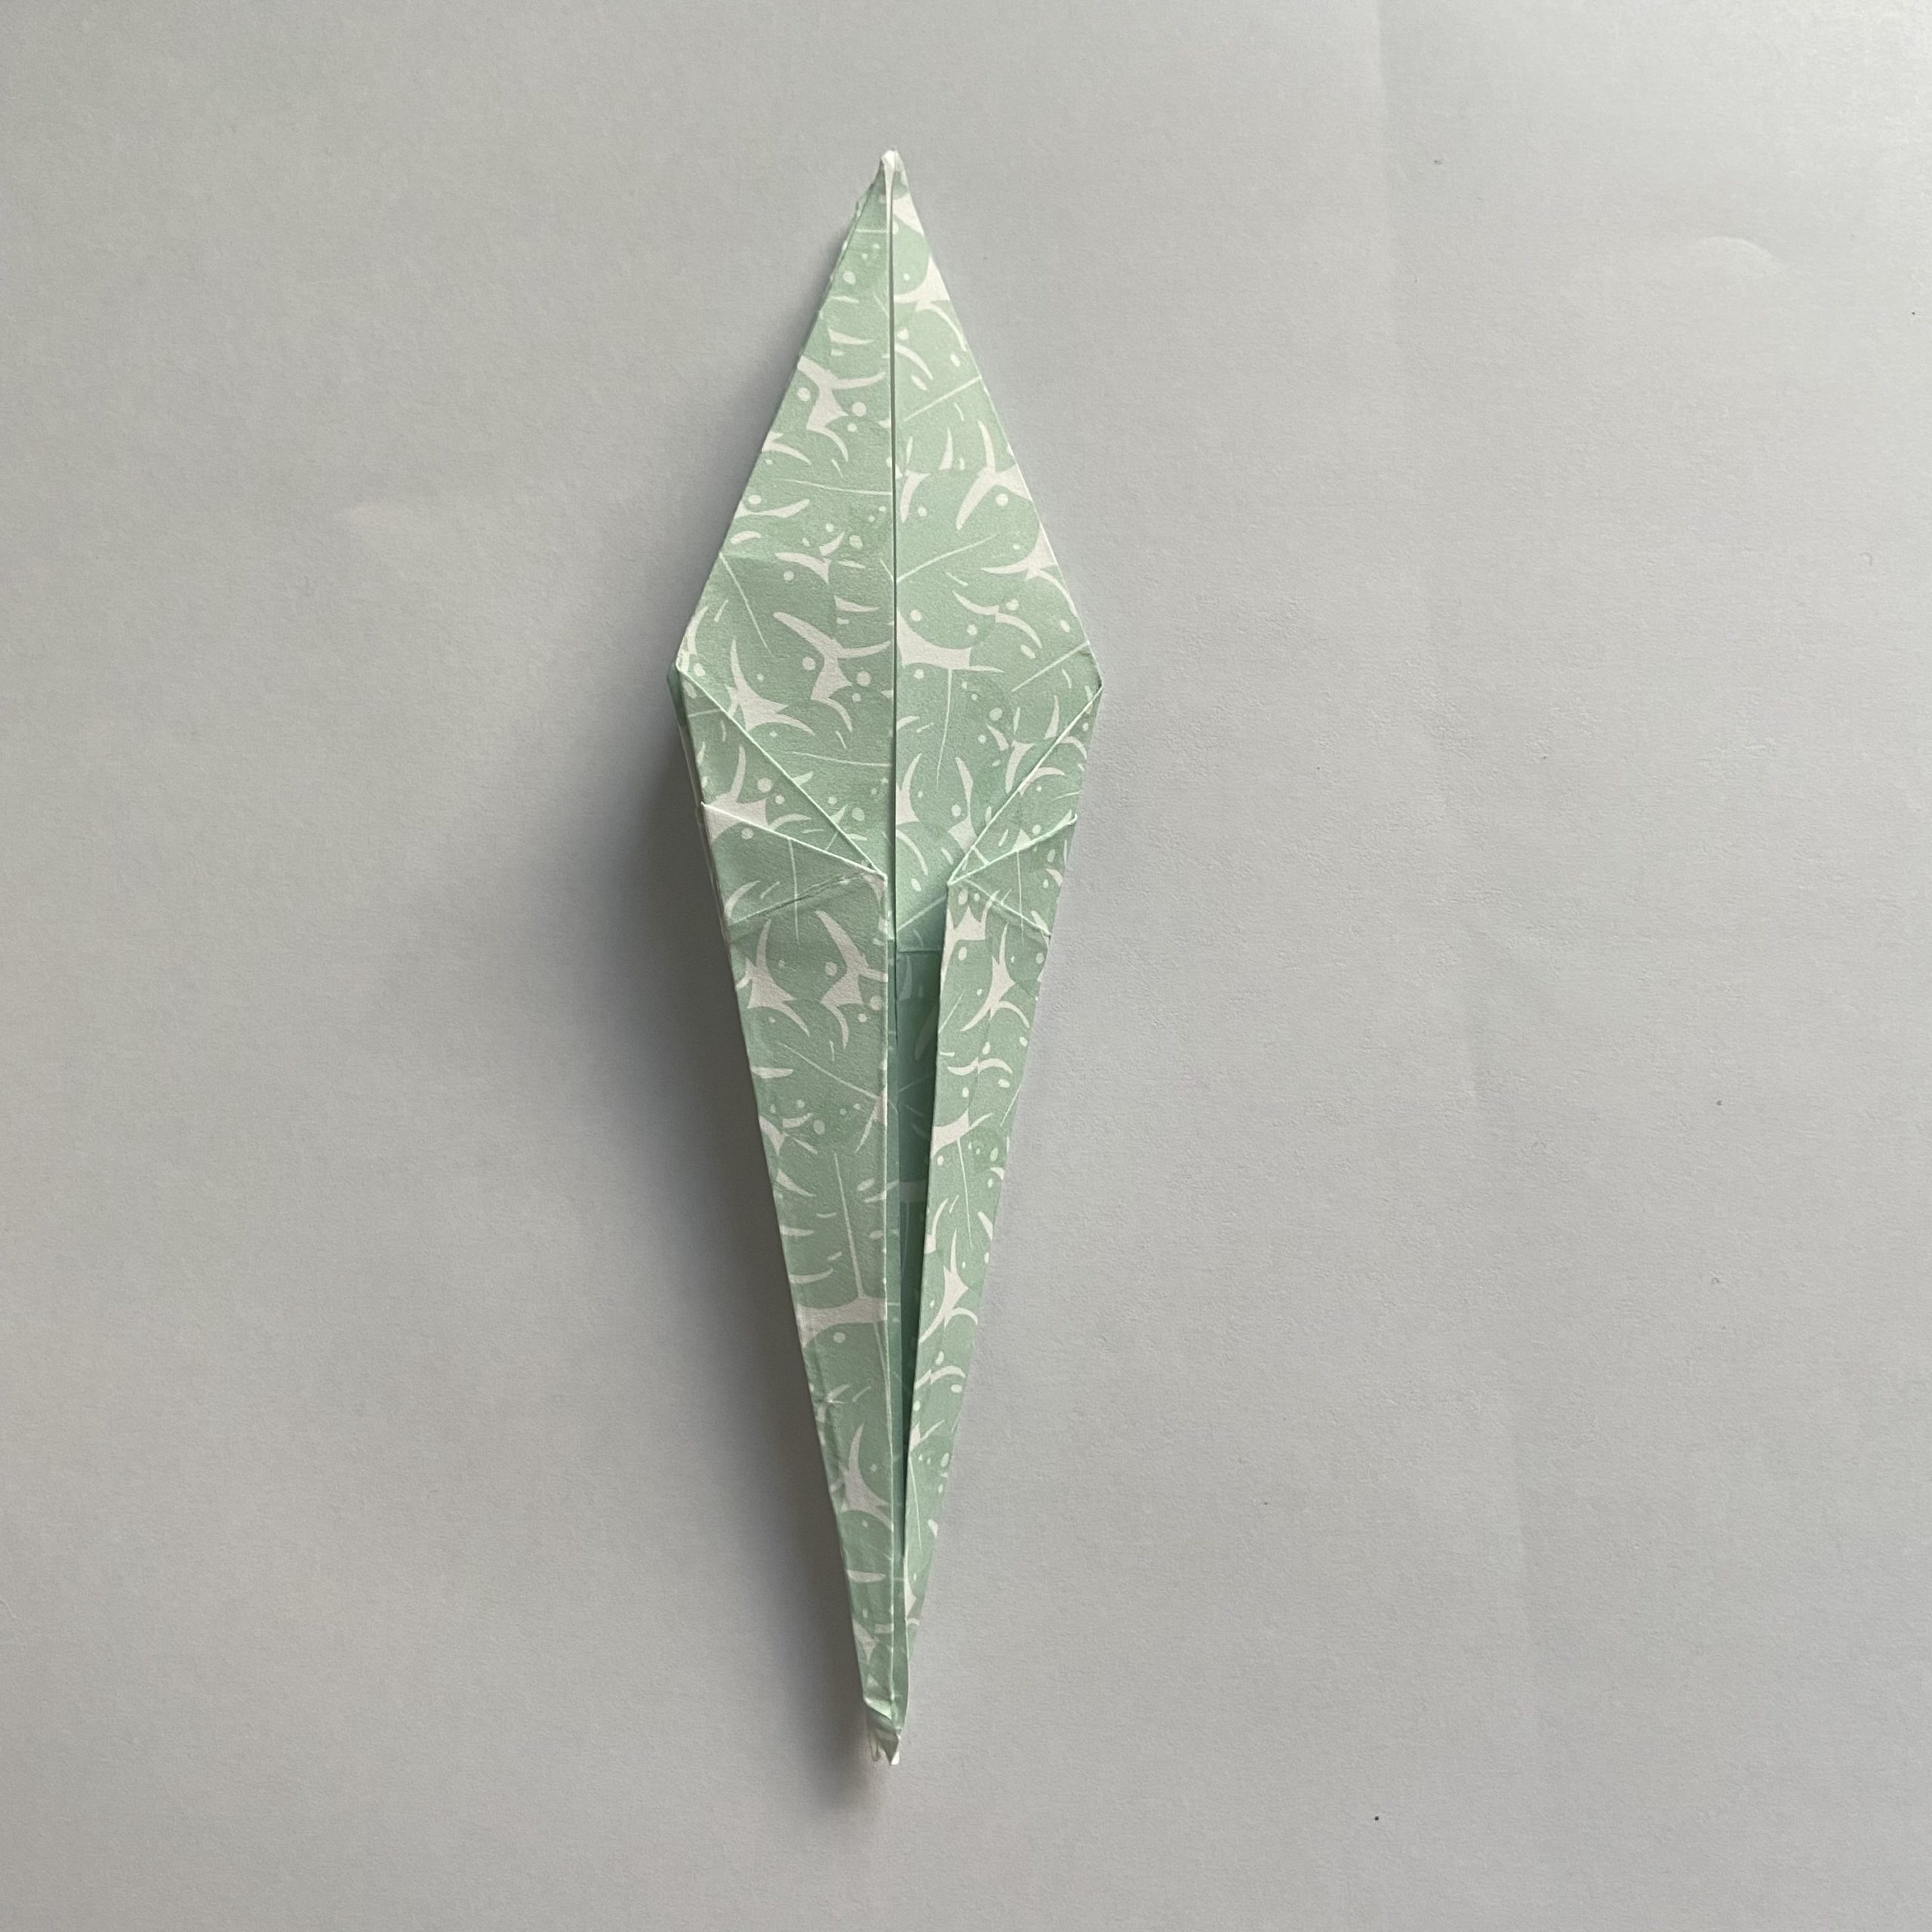
Step 31 – Fold the neck of the crane by folding the lower right flap up, under, and out to the right
Step 32 – Do the same with the left side to form the tail
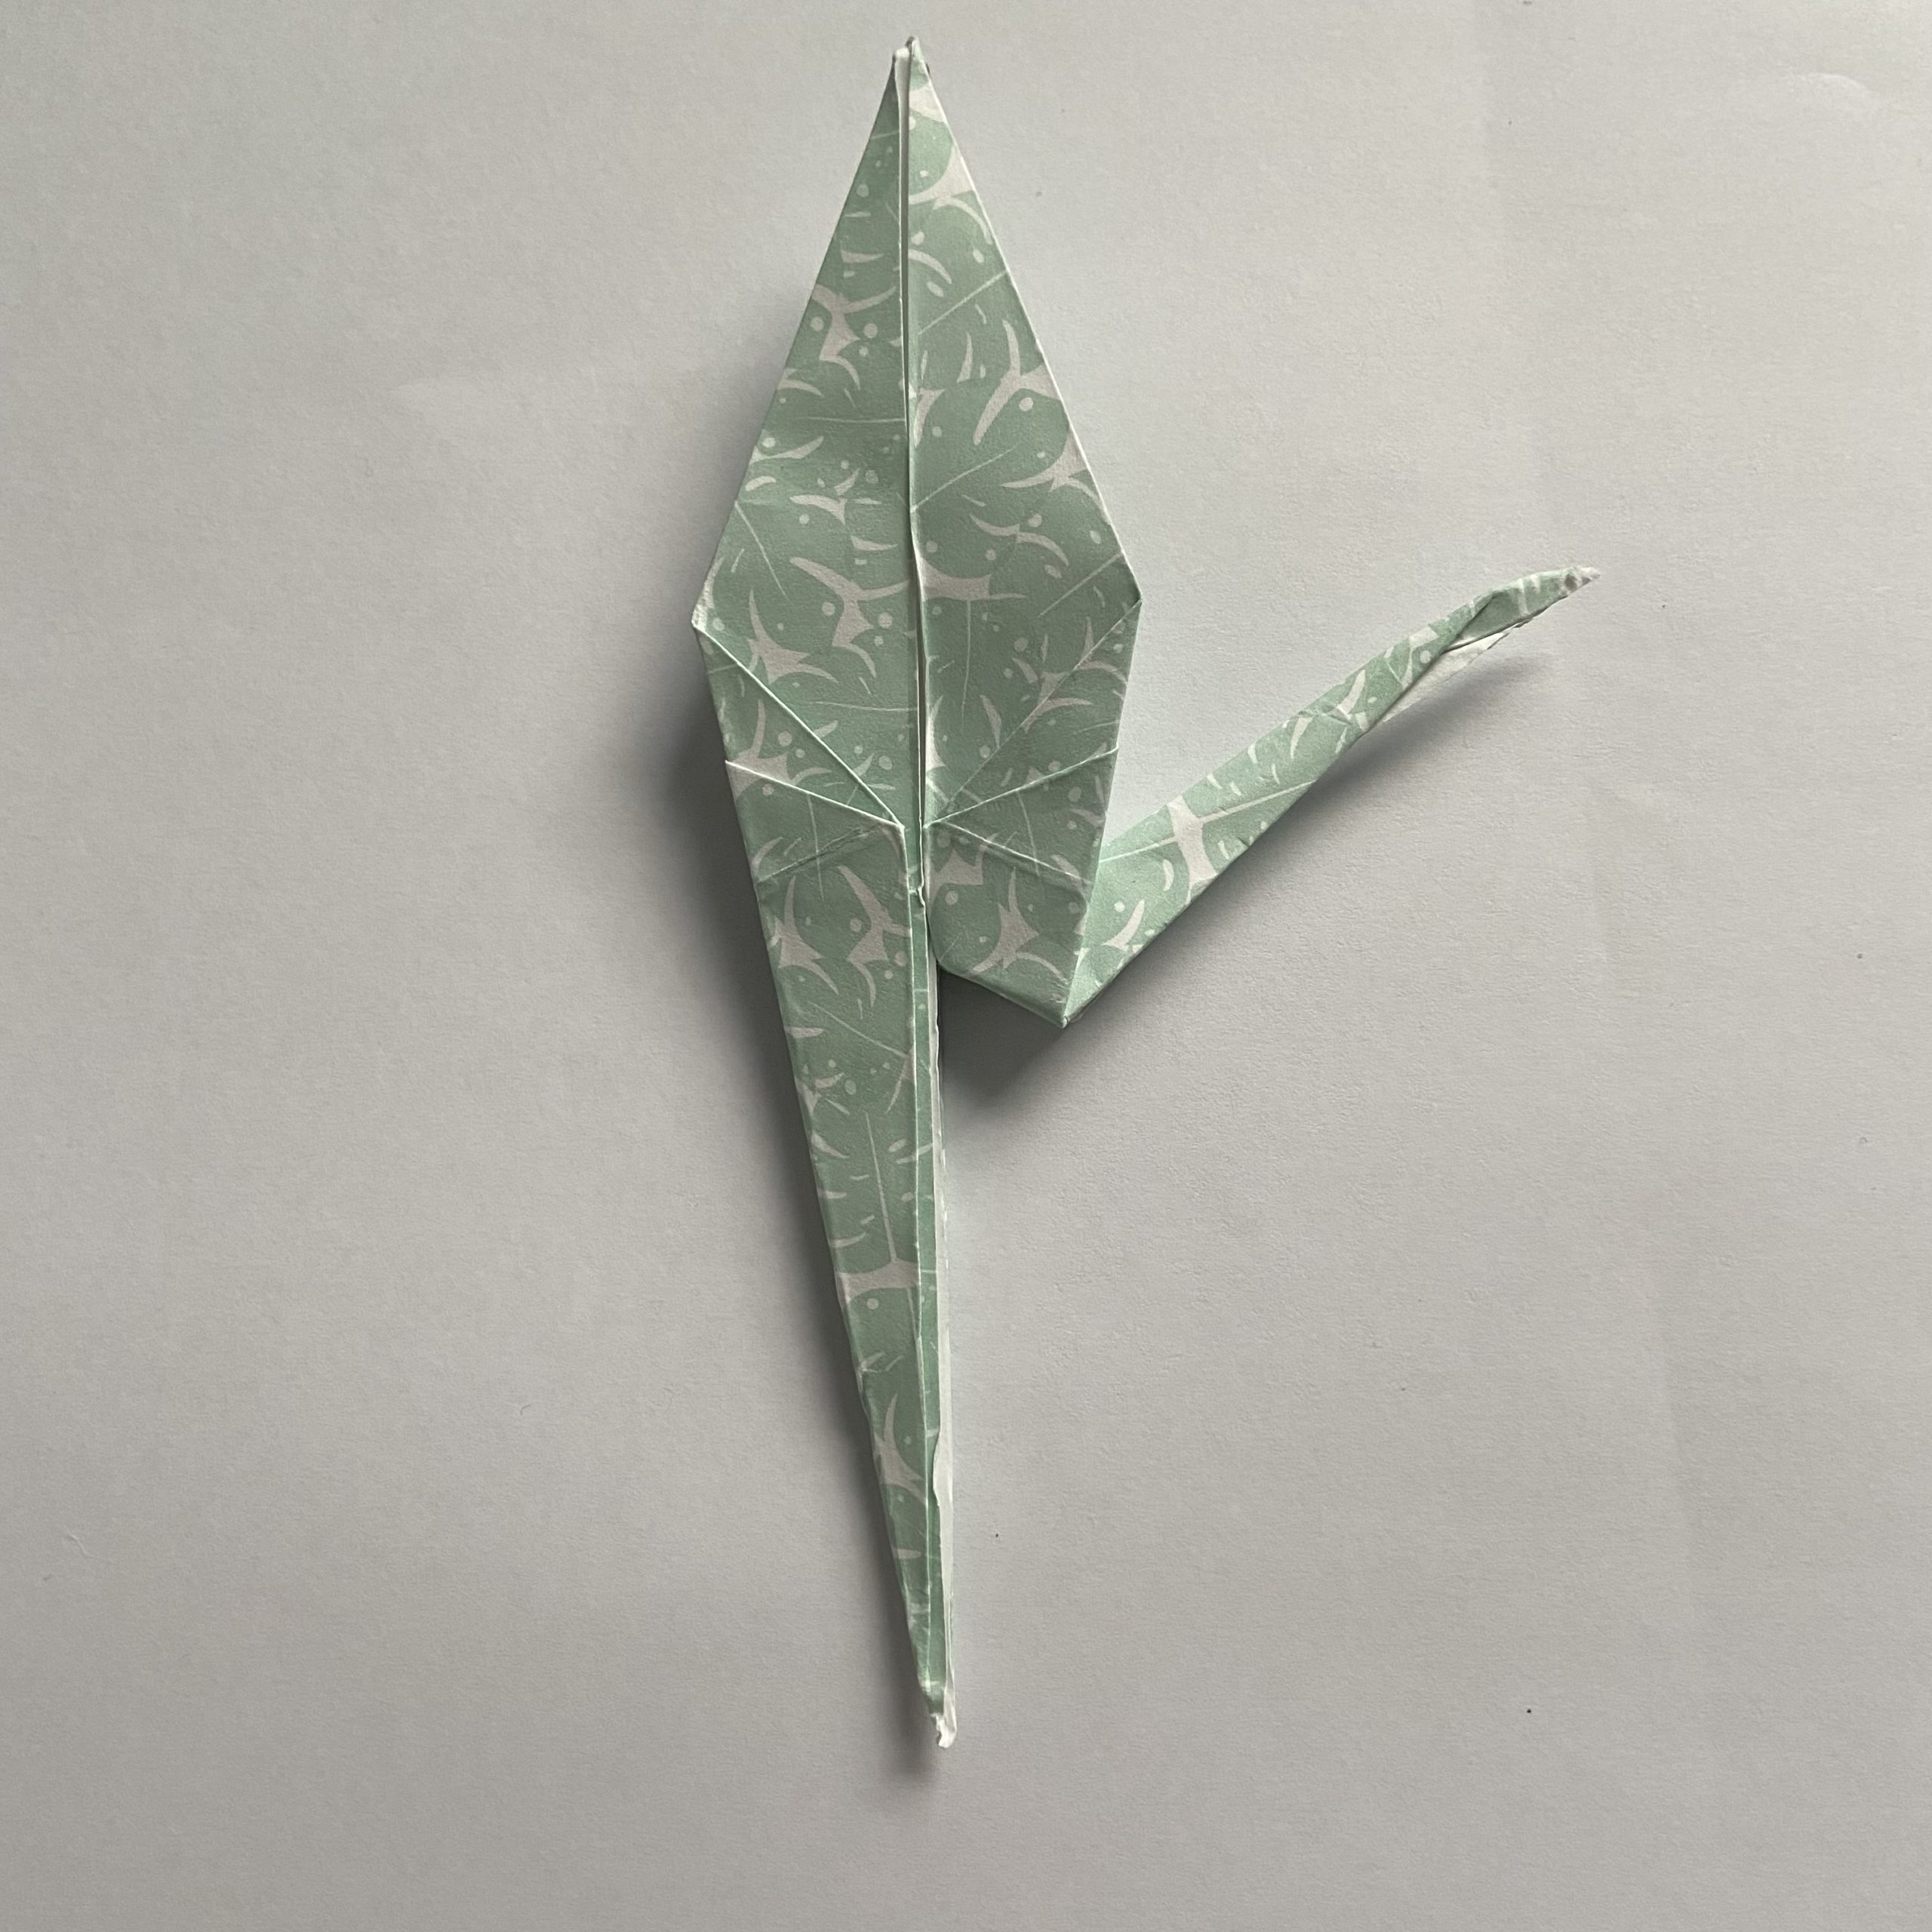
Step 33 – Fold the head of the crane (this can sometimes be a little tricky, especially with thicker paper so if you struggle – folding it over diagonally works just as well!) Create a head by flattening the flap and inside reverse folding a little section down at the top

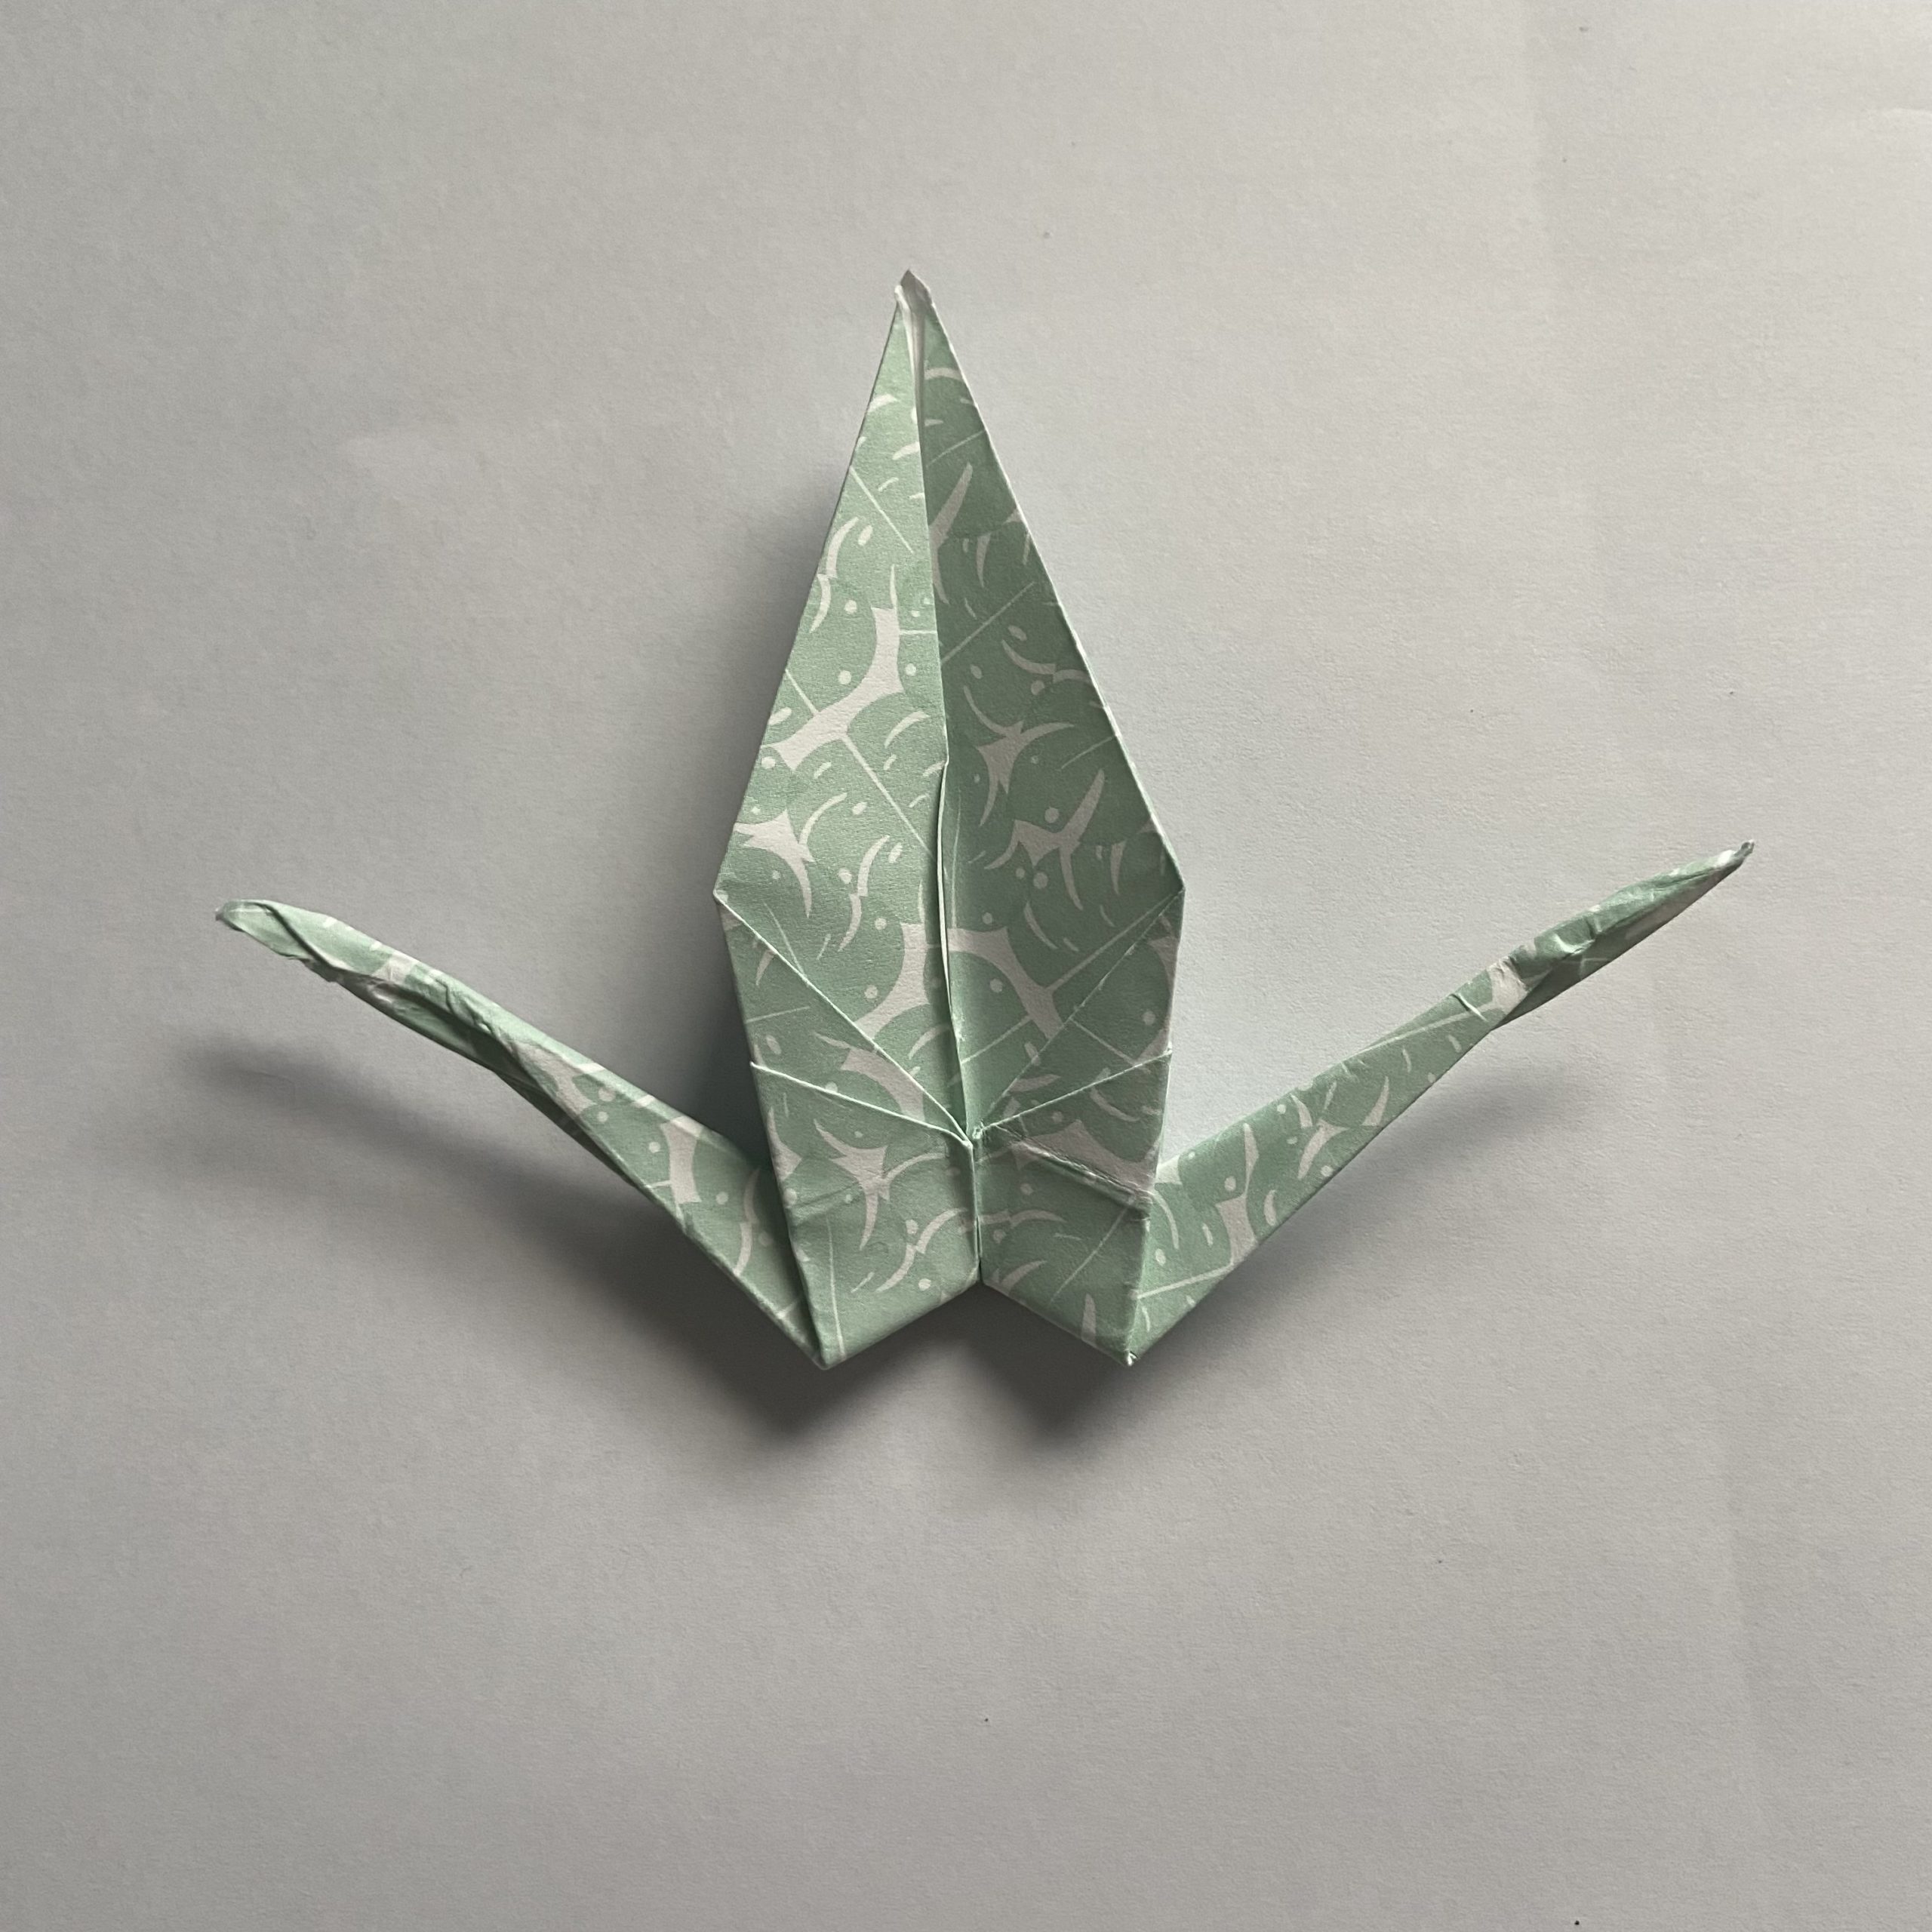
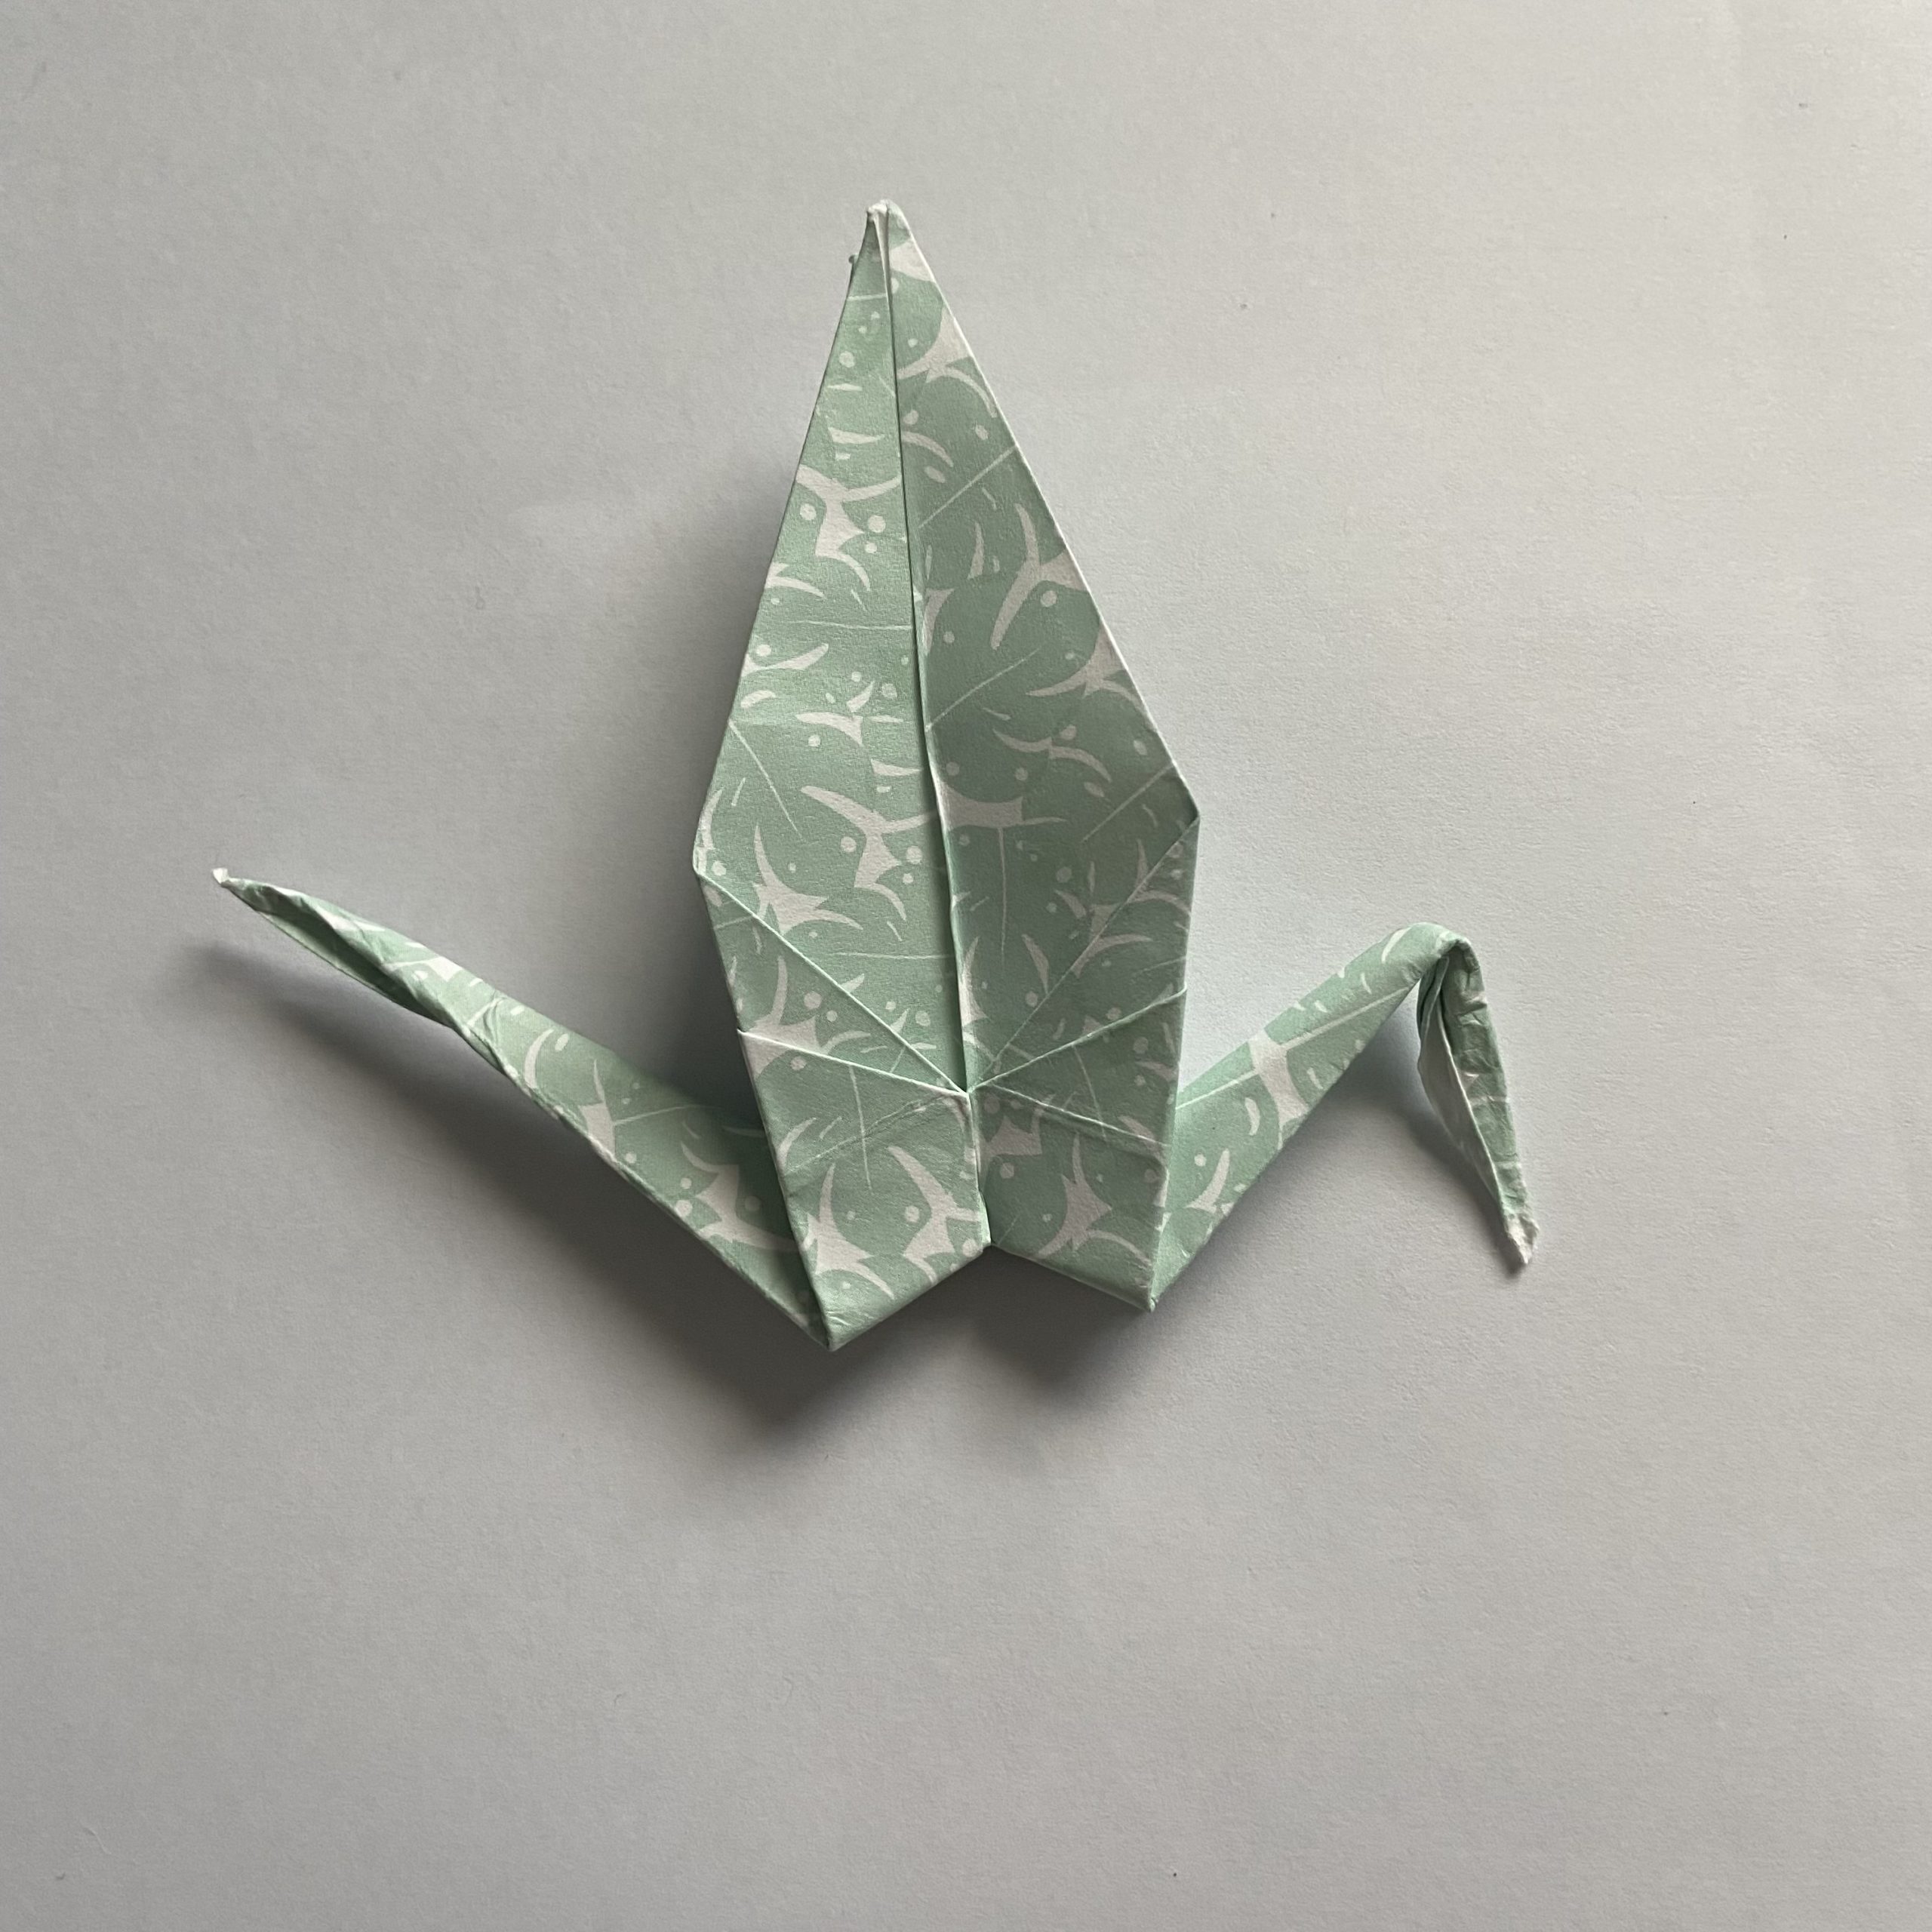
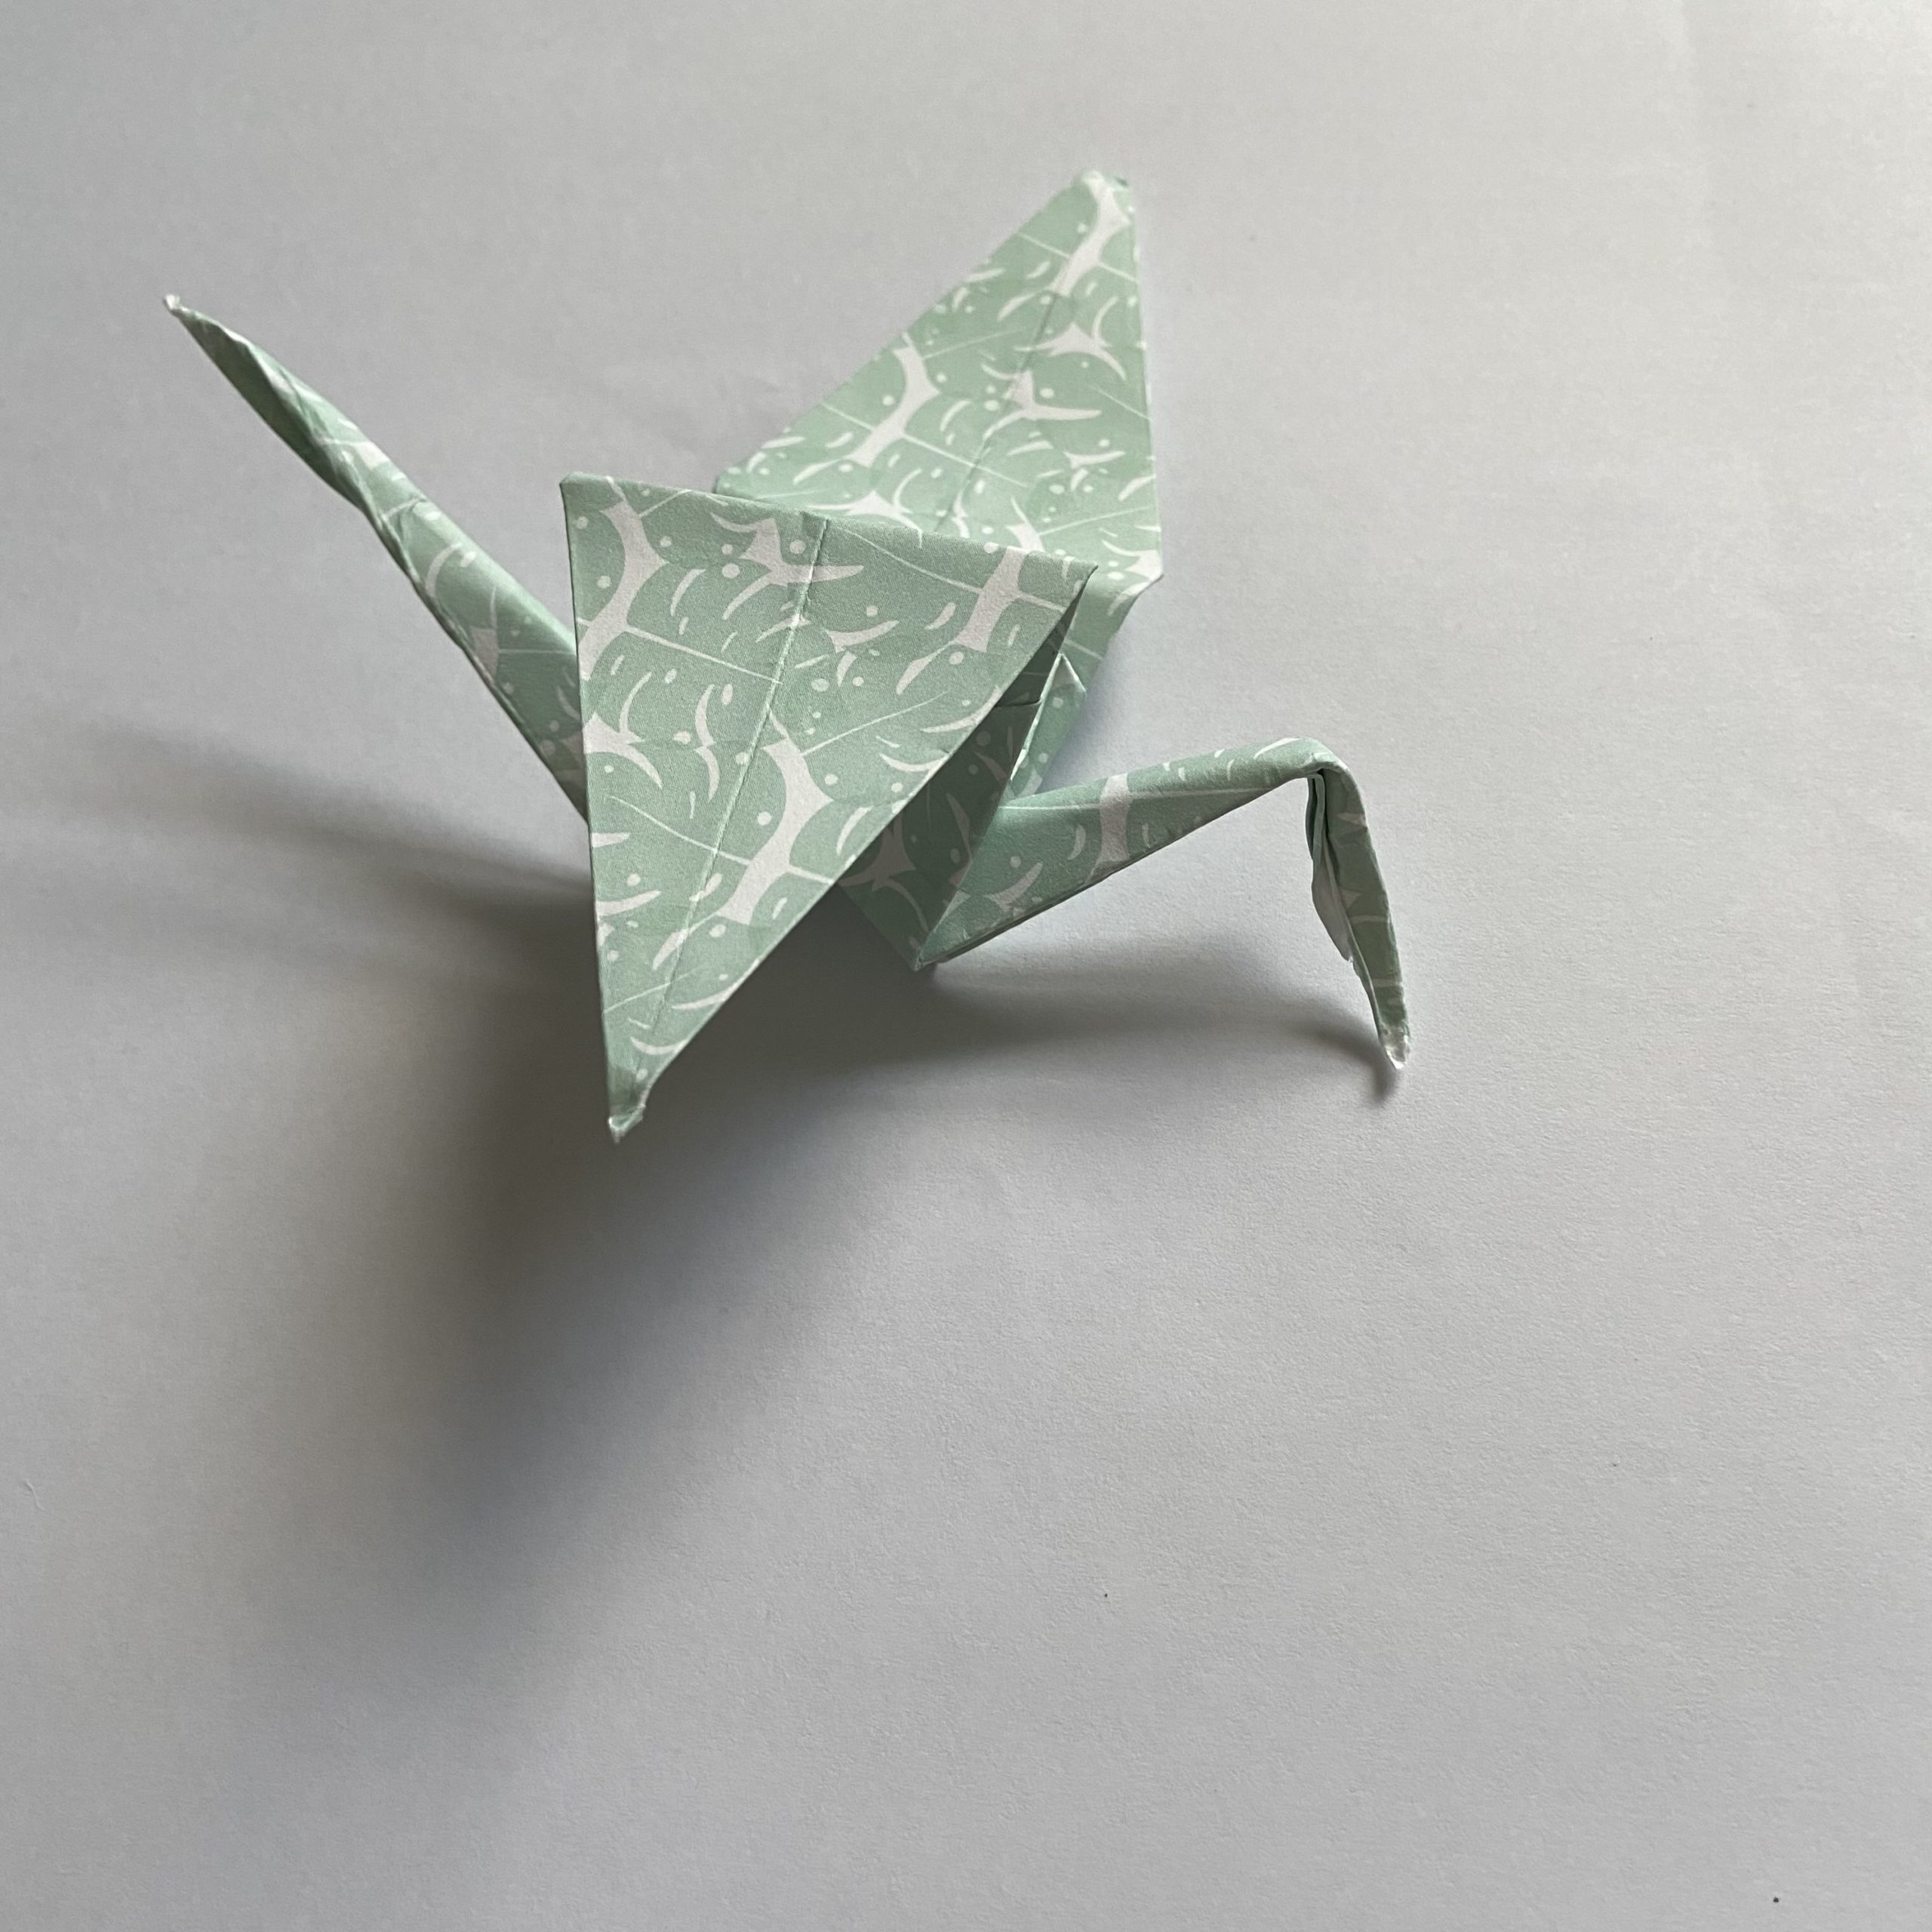
Step 34 – Complete your crane by folding out the wings – well done you for creating your very own paper crane!
By now, you should hopefully have your very own paper crane (or maybe even a flock!) to display in your home or gift to fellow campers and friends!
Some other fun uses for these little guys are; party/table décor, using some string to turn them into a garland, or even gluing them to cocktail sticks/skewers to make drinks or cakes extra fancy.
I hope you enjoyed learning something new with me but if you get stuck and need a little extra guidance then you can find me on Discord as Gemmily/Counsellor Echo. I would also love to see your beautiful creations which you can share with me on Discord or Instagram @gemmilyacnh
Wishing you all love, hope and healing, always.
Happy Camping and Happy Crafting!
Contributed by Gemma, aka Counselor Echo
Gemma is a simple soul who is happiest when snuggled under a blanket with a cup of tea and her switch. Gemma’s best friend is her Frenchie who is almost always by her side (so if your snacks disappear or you hear a strange noise from your bunks at night it’s probably just him!) She loves the colour lilac, wears sunglasses 365 days a year and likes to pretend that every day is Halloween. Her days are filled with an abundance of magic, creativity, curiosity and love which she can not wait to share with you all! You can find Counsellor Echo on Twitter @gemmilyecho or Instagram @gemmilyacnh

[…] the ARTS & CRAFTS shed we have The Legend of Paper Folding and Camp Director Joanna teaches us to make Cardboard Swords! In the MESS HALL our S’MORE OF […]