
Are you headed on an EPIC QUEST but need a handy item to protect yourself? Are you looking for that PERFECT SHINY ACCESSORY for your fancy hero outfit? It’s dangerous to go alone: TAKE THIS (set of instructions for a DIY cardboard sword)!
Supplies:
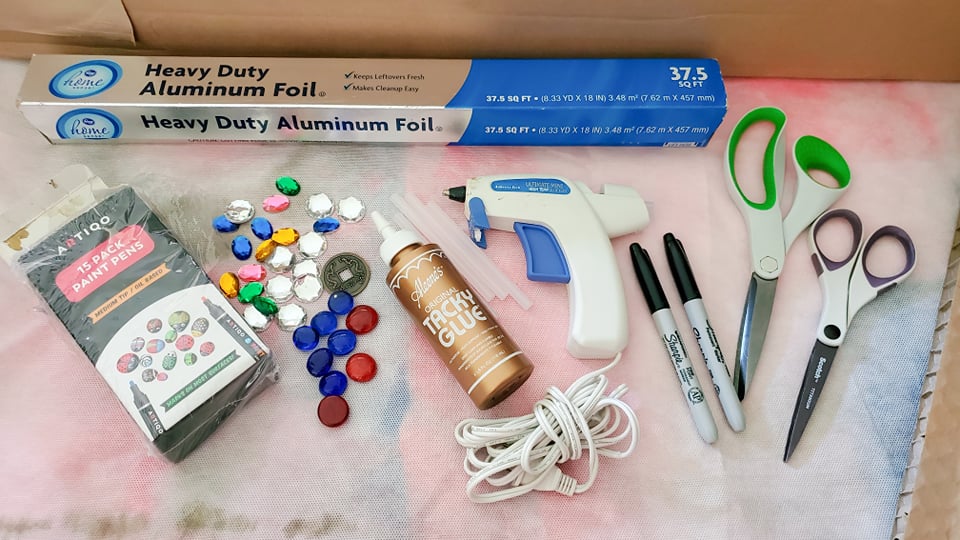
- cardboard (can also use craft foam, card stock, construction paper, or anything on hand)
- printer paper or newspaper (for pattern– though I drew directly on my cardboard)
- marker or pen
- scissors
- glue (I used a glue gun but any adhesive will work!)
- optional: paint/paintbrush, stickers, foil, other decorating bits
Cardboard Sword Instructions:
The first thing to do is assess your cardboard and decide how big of a sword you can/want to make. For me this involved laying my cardboard out on the dropcloth I put under all of my big craft projects and deciding to GO BIG. But any size is good! You can make anything from a sweet little dagger to a massive anime-style slicer with this!
1. Design your sword
Once you’ve assessed how much cardboard you have to work with, choose a pattern and sketched it out. At this point, you can use the newspaper or other paper to sketch out your design, then cut and trace it to your cardboard. I’m a bit of a Rogue (chaotic good, if you’re wondering) and live dangerously so I took my sharpie straight to the cardboard. Cut out your pattern either from the paper or directly from the cardboard leaving enough room for a second copy.
2. Cut your Sword
You will need TWO (2) cut-outs of your sword for stability, so once you’ve traced your pattern, TURN THE PATTERN OVER and trace a mirror of it as well. Then cut the mirror image out. (Pro-tip: If you accidentally trace matching instead of mirror images, THIS IS OKAY! The beauty of cardboard is you can just flip it over anyway!)
Notes on design and cutting cardboard:
- I included a hilt in my base design and have used a very high fantasy style “leaf” shape for the blade. (If you need inspiration, here’s a Pinterest board I found with a bunch of different types of swords!)
- If your cardboard has creases/seams or folds in it, try to trace your pattern so that the folds do not line up. This will create more stability in the design, and keep your sword from folding in half once it’s done!

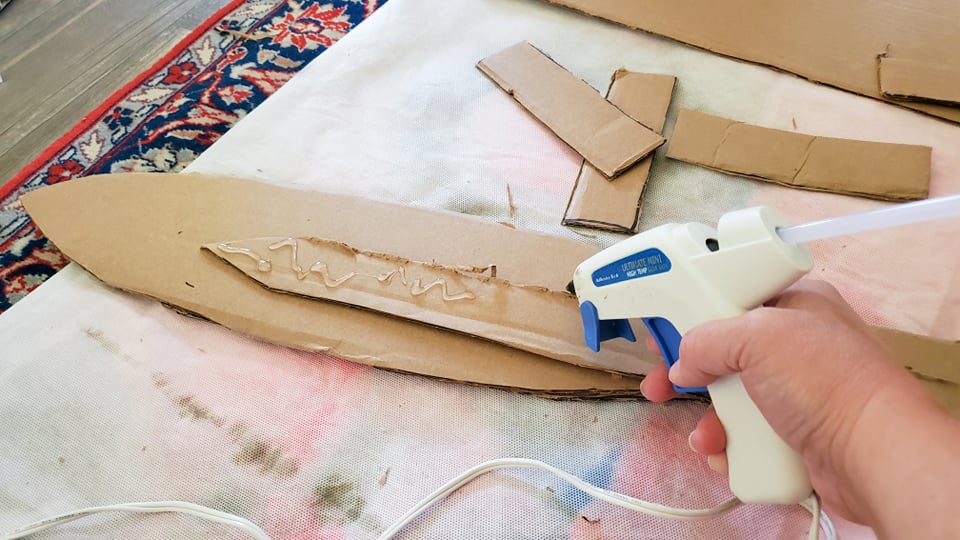
3. Begin assembling your sword into layers
Next, glue the two main mirror pieces back to back to create a nice, thick body for your sword. From here, you can skip to the next stage, or you can build up a few layers if you want. I took some of the leftover cardboard and cut a pair of matching long, thin pieces to add “depth” to my sword, and glued them into the center of the main blade section.
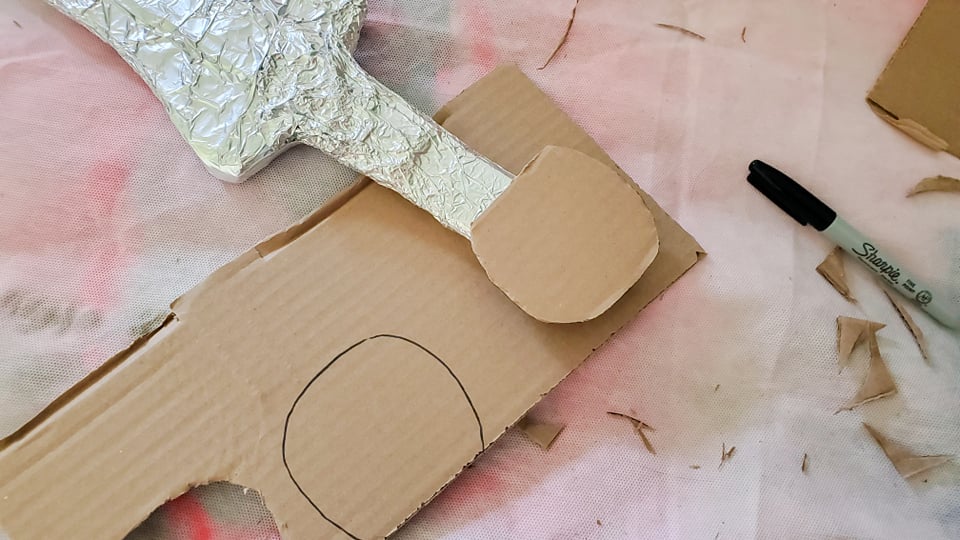
At this point you can also add any structural details, such as a pommel, a cross guard, or any other bits that you want to include! The good news is that you can add bits at any point even if you change your mind– I realized partway through decorating that I wanted a nice, round pommel, so I added that after I started foil wrapping (step 4). The key is to continue mirroring your pattern and attaching the pieces on both sides so that your sword is balanced.
To add a pommel, I drew a round shape with slightly squared “corners” and a flat bottom and glued each half to one side of the hilt. Because my blade was wide, I decided to skip a cross guard.
4. Begin decorating your sword
Once you’re happy with the shape of your sword, it’s time to decorate! I chose to wrap my whole design in foil to make it extra shiny and elvish-looking. To wrap this way, lay the foil on a smooth surface. Foil often has a “shiny” and a “matte” surface, so be sure to put the side you want to show down on the surface. Center your sword and gently pull the foil around the shape, pulling it tight but not enough to tear.
To include the point or other shapes, fold the foil inward in long, smooth pieces, and tuck under your main sword. Tack the foil in place with glue or whatever adhesive you’re using, with the edges folded and tucked in on itself. The foil won’t stay perfectly smooth, but that’s okay! Incorporate the imperfections into your design.

5. Get creative!
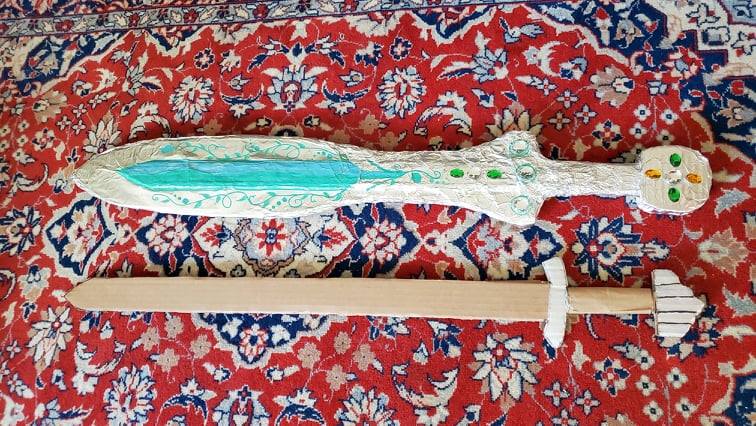
It’s time to get super creative! Use your paint, markers, stickers, and any other decorative bits you have to create your perfect sword! I used paint pens to create an ivy pattern on the blade of my sword (since I was going for a high fantasy style) and glued little fake jewels along the pommel and base of the blade.
If you don’t use foil, you can use paint or markers to create the details directly on the cardboard! Pictured below is a second, more “historical” design with the cardboard exposed and silver paint used to make the cross guard and pommel.
6. Wield your sword with pride!
Once the glue and paint dry, your sword is ready to go! Heft it proudly into the air and pose with your best hero or warrior stance, wind whipping through your hair (or cape) and epic music swelling in the background! HUZZAH!
Contributed by Joanna AKA Camp Director Jo
Joanna is a semi-professional storyteller with a permanent case of wanderlust and a perpetual art dabbler. She loves national parks, wildlife conservation, geeky conventions, and weird roadside attractions. Come hang @joannavolavka on Instagram or at JoannaVolavka.com

[…] & CRAFTS shed we have The Legend of Paper Folding and Camp Director Joanna teaches us to make Cardboard Swords! In the MESS HALL our S’MORE OF THE DAY is S’mores Pizza with Nurse Buffalo! Lore […]