
So, this was originally going to be a tutorial, when suddenly it occurred to me that you’re all talented and brilliant.
Maybe you’re new to nail art, maybe you’ve painted your nails and everyone else’s more times than you can count. Either way, this is your time to try something new, or to shine at the thing you do best!
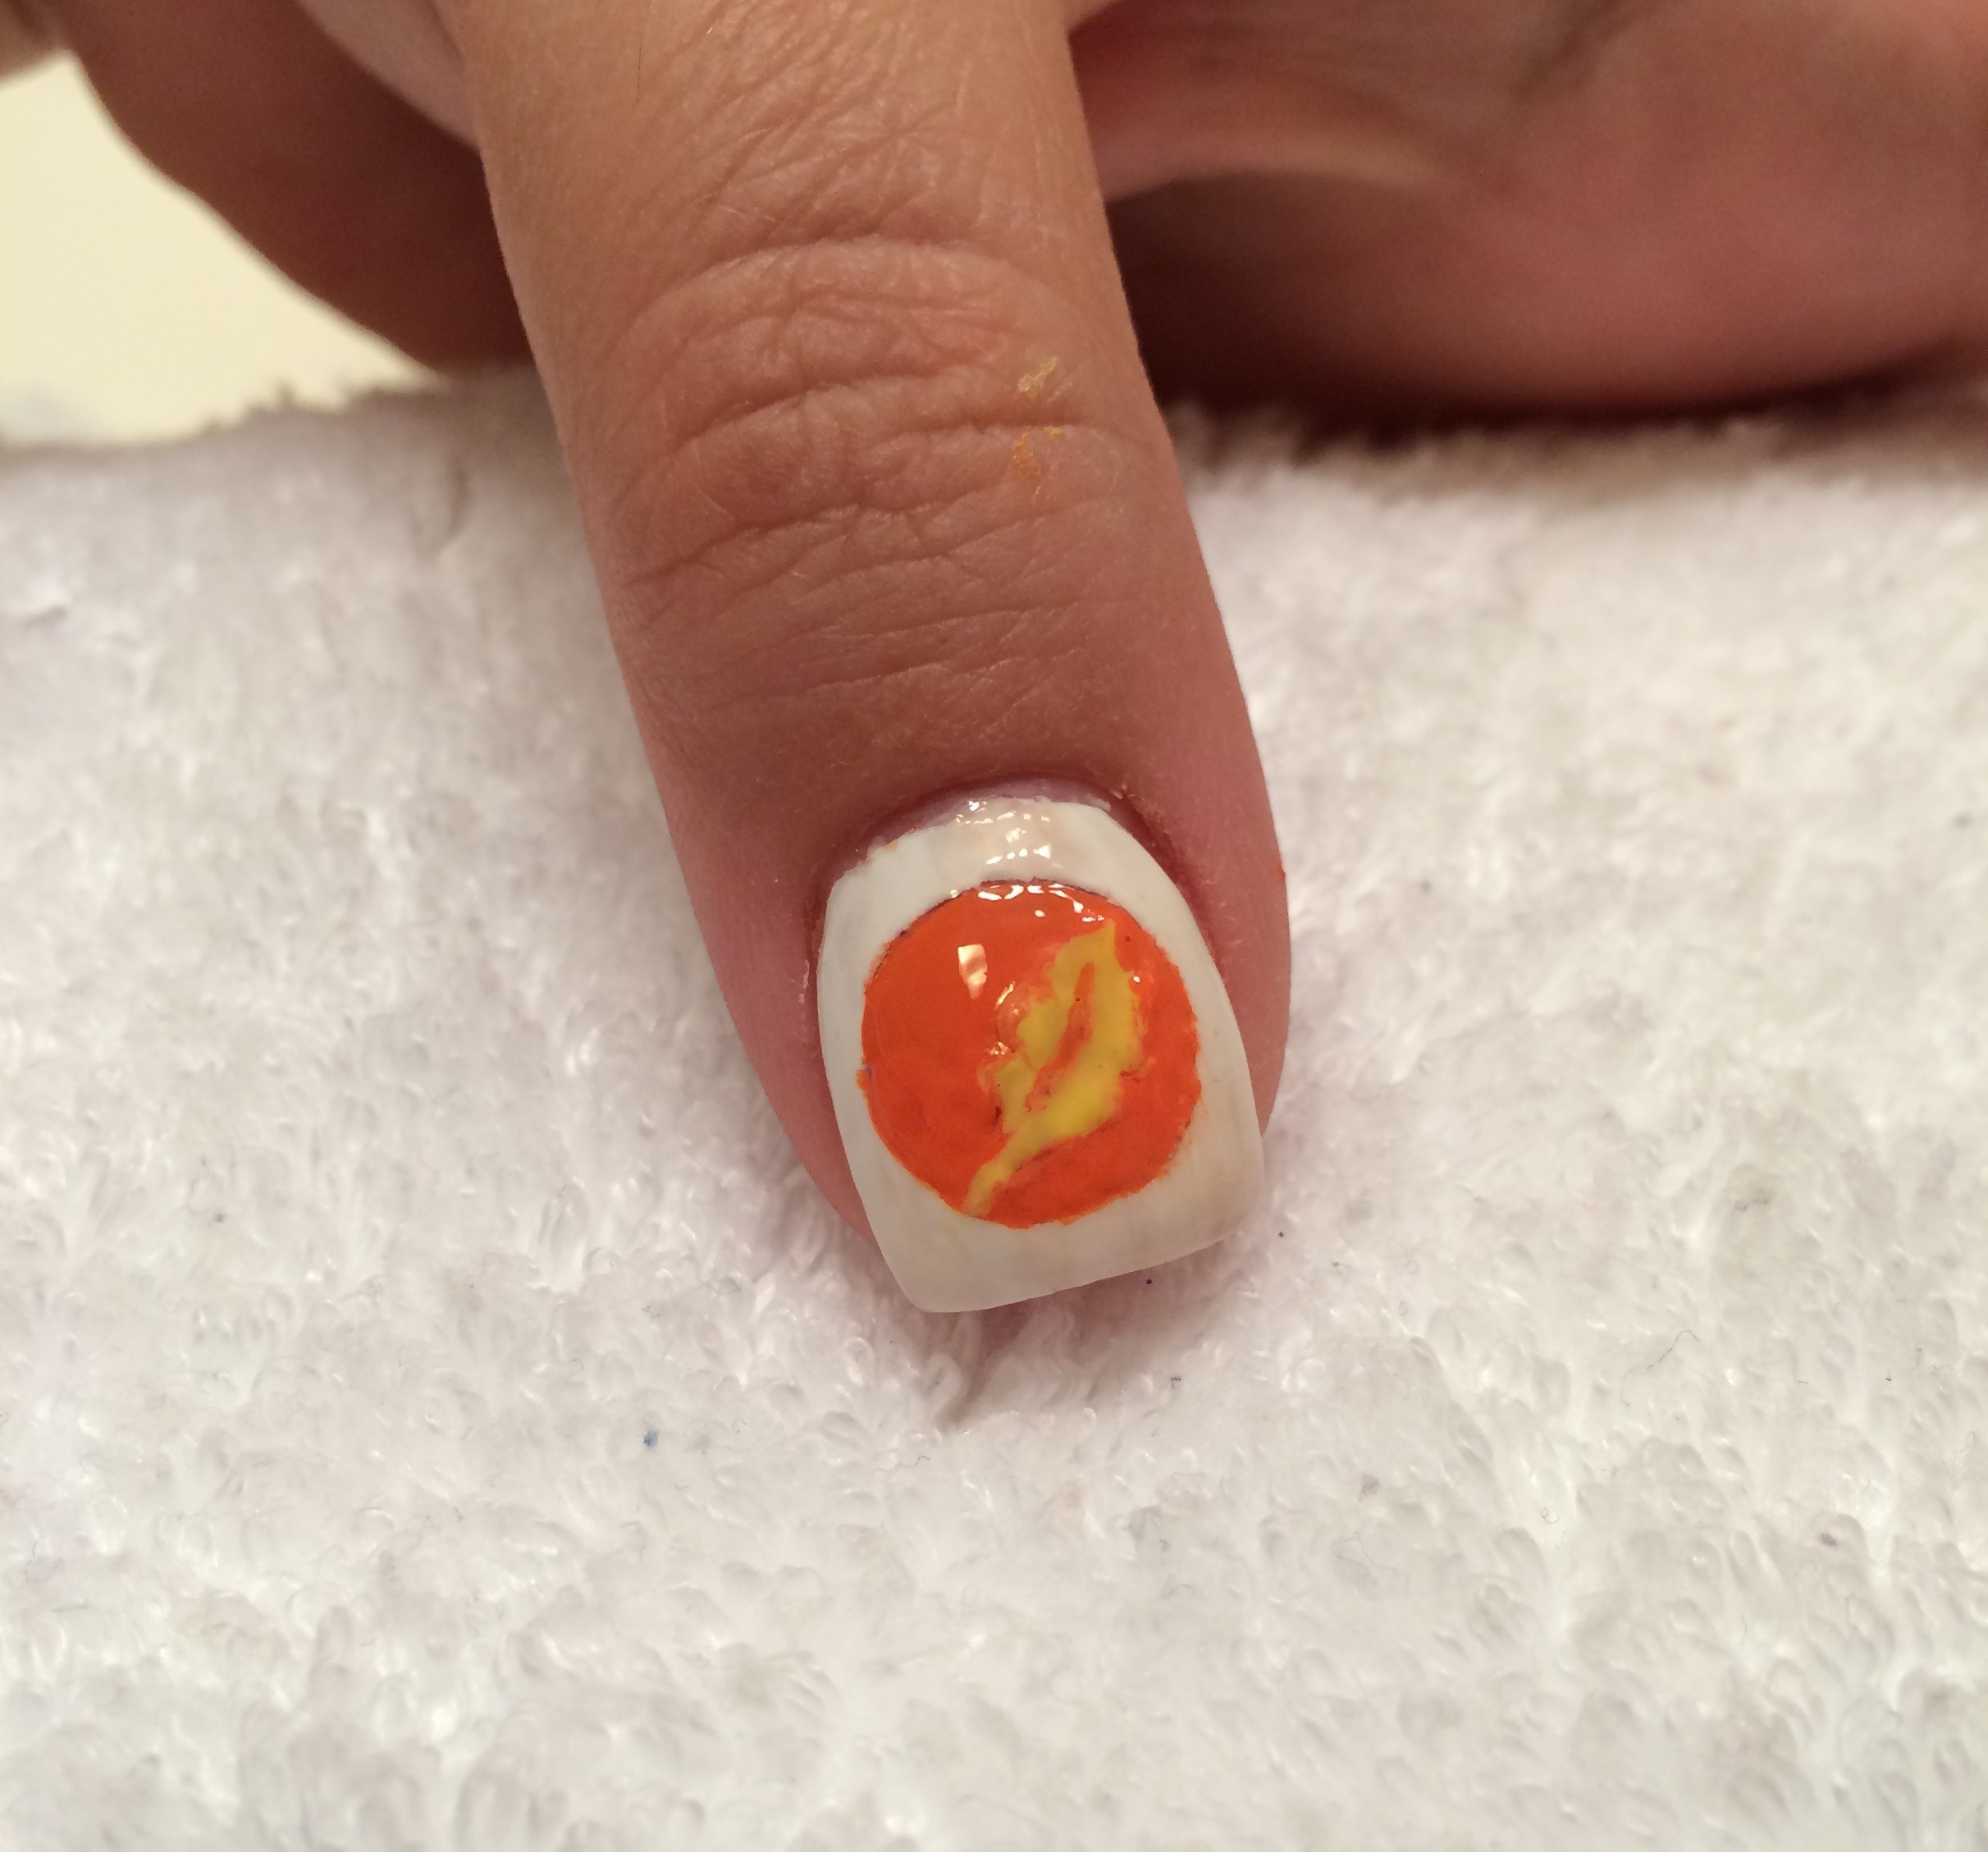
Painting a feather with nail lacquer, on yourself, more challenging than it seems.
To that end, I now offer you the opportunity to wear your love of IGGPPCamp all over your fingertips, and possibly, to win a prize…
If you’ve never tried nail art, then feel free to attempt some of the basic ideas I’ll outline below. Tutorials abound online, so find a technique that fits! Personally, I freehand everything because it seems easier and faster unless I need precise lines, then tape comes in handy!
The challenge is the following: show your IGGPPCamp pride on your fingernails, toenails, or… well, that’s it actually, so pick a set of 10 digits and go!
Some ideas to get you thinking:
Step 1, ish.
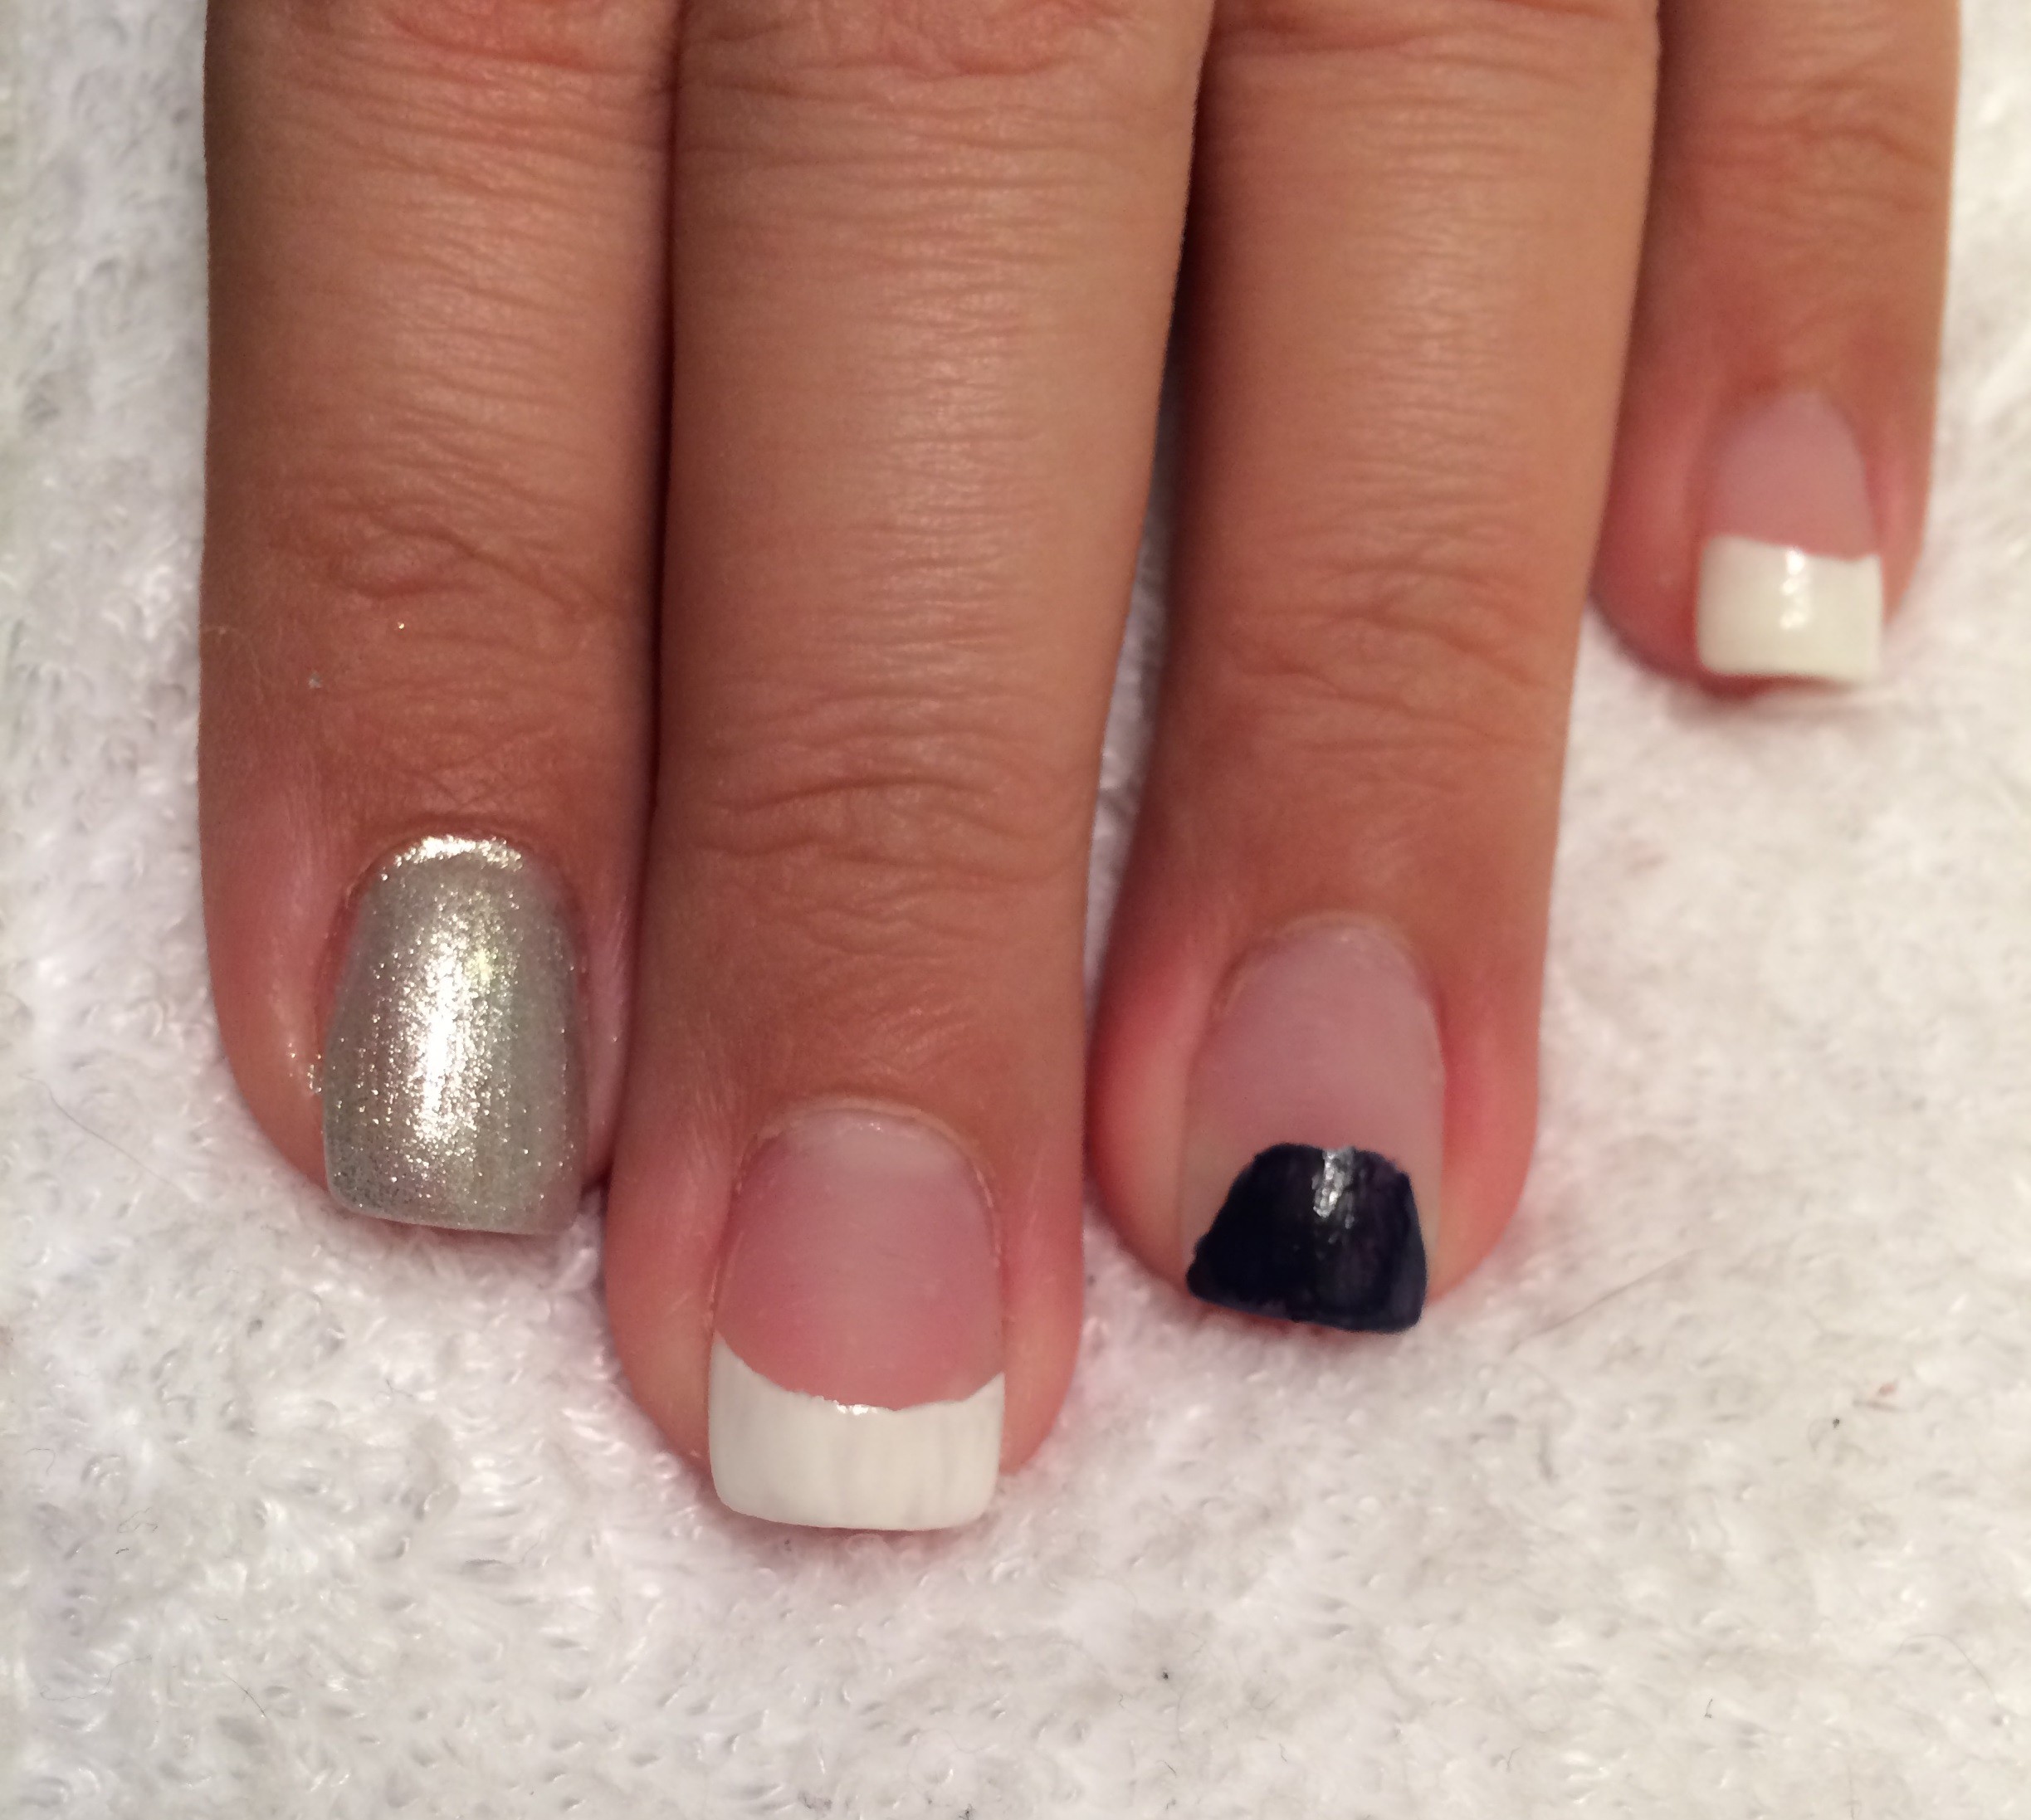
You can start with a basic polish, basic french or a specialized design. French manicures can be done in several ways, but I’ve found it very effective to have just a bit of lacquer on your brush and paint stripes down your nail to get a more natural curve on your smile line. Too much polish? Not enough curve? Dip a q-tip in a bit of polish remover and carefully remove the polish you don’t need. If you are doing a coloured tip on top of a different type of polish, I recommend carefully taping off your smile line before painting the colour you’ll be using at the back of your nail, then remove the tape and paint on your tip colour using the guideline automatically created in the body colour.
Step 2:
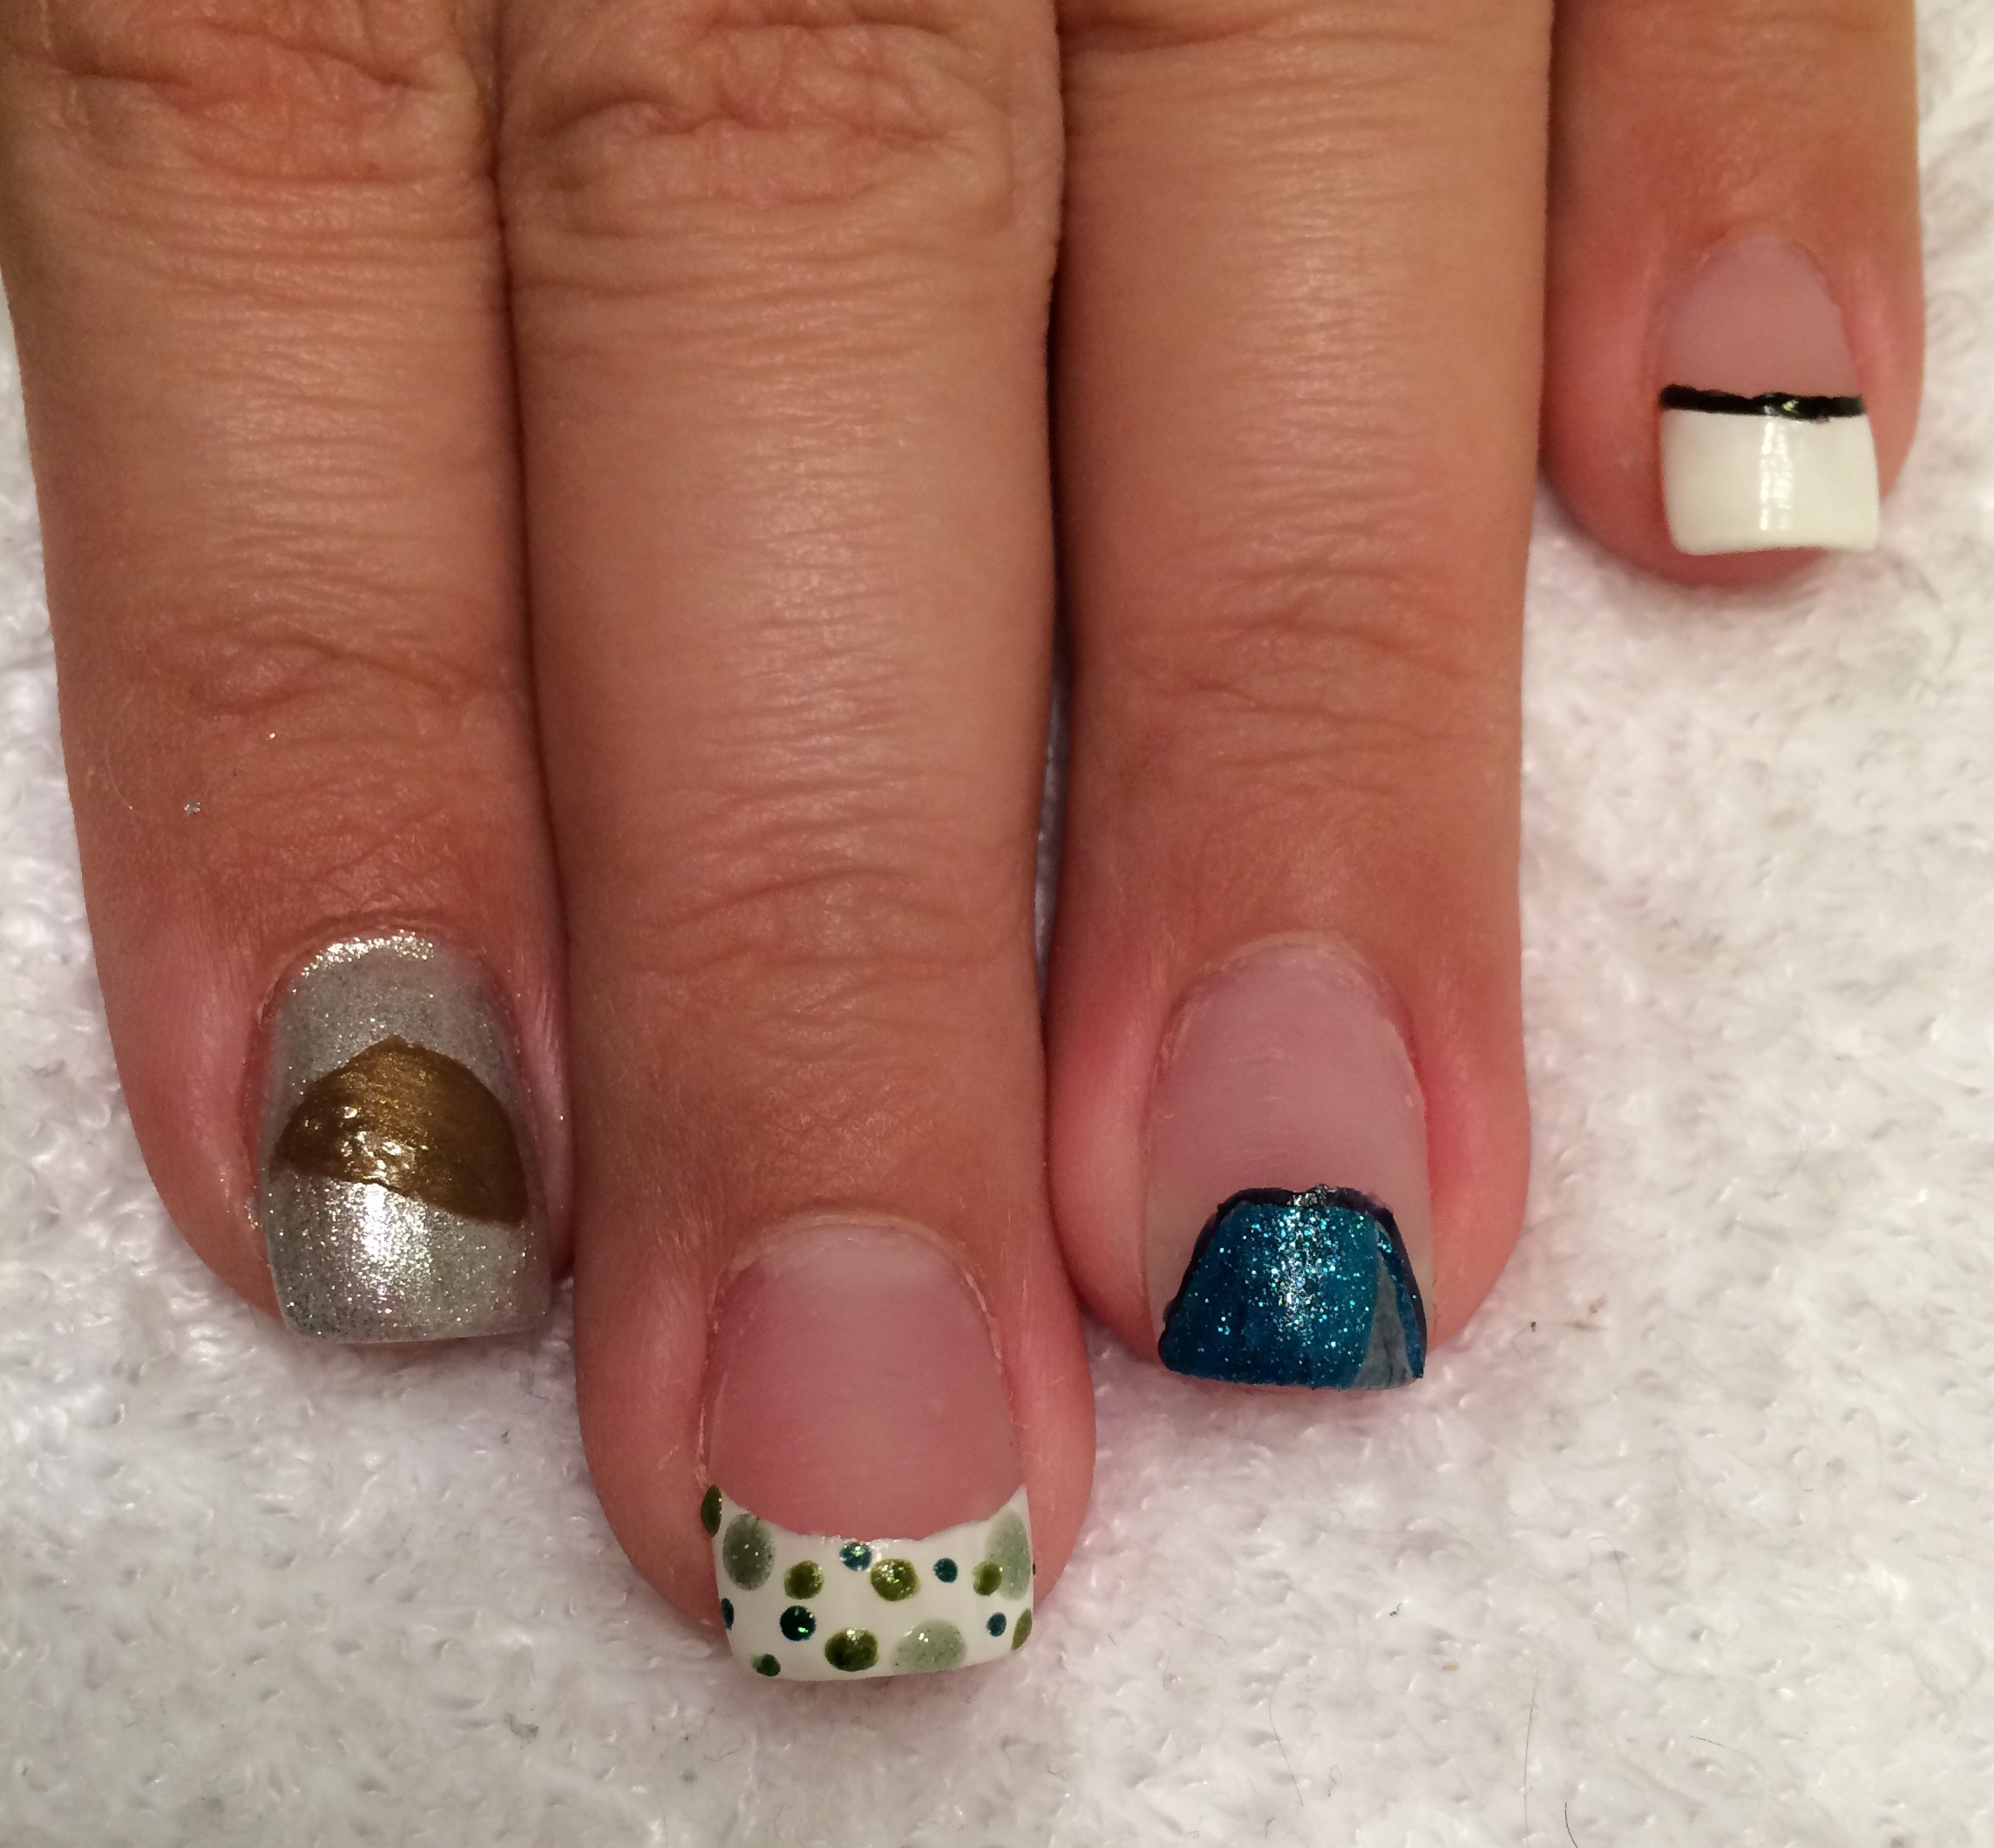
Start to add some basic shapes. I used a pin for all of the dots, the only thing that varied was the amount of polish on the pin. For the tent shape, I just used the polish brush, but I made sure that it was cleaned off and only held the lacquer I would need to make the tent shape.
Step 3:
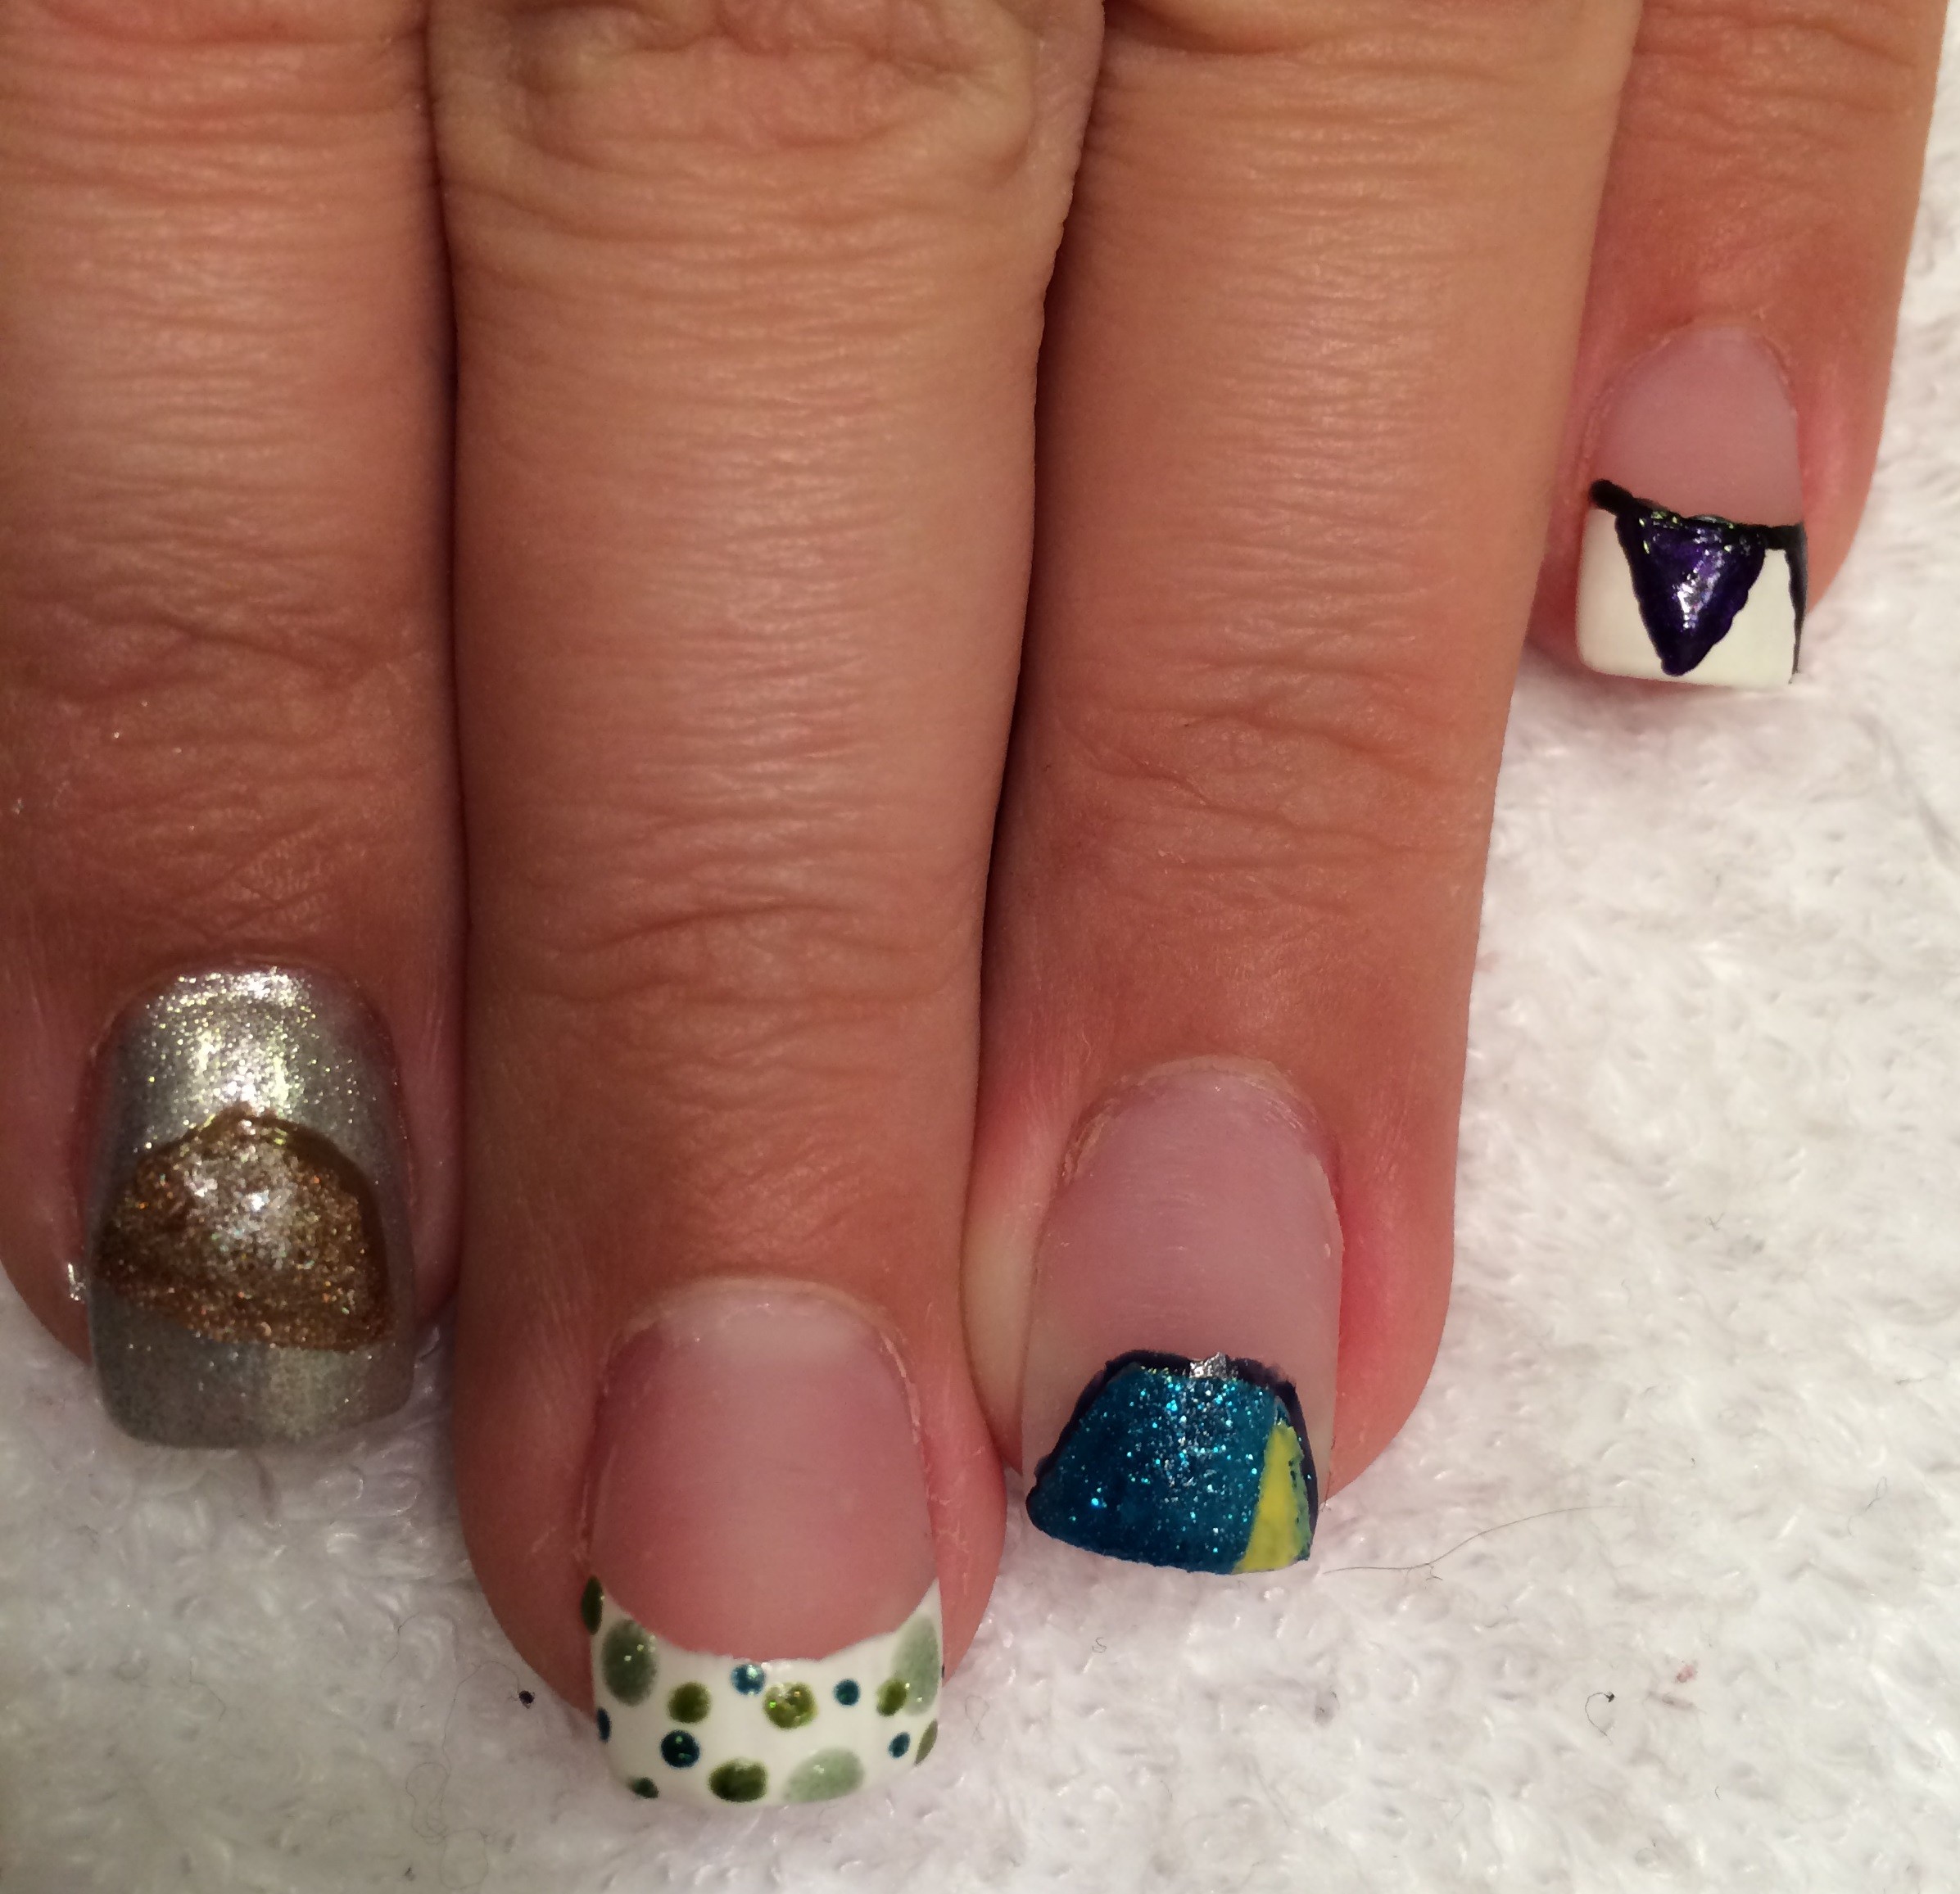
That is a shiny shiny taco I’ve started painting, but that’s ok, no one ever said tacos couldn’t be shiny and sparkly. Because I chose a dark colour for the tent, I decided to highlight the tent opening with a lighter colour. I will combine some basic triangles on my pinky to create a pennant banner.
I should also point out that my nails have a basic gel overlay. If you want a smooth base on your nails try: VERY lightly buffing to remove some shine, then gently exfoliate and oil your cuticles to gently get rid of any dead skin on your nail plate, remove excess oil with a good nail polish remover, then apply an even coat of a 3-free base coat.
Step 4:
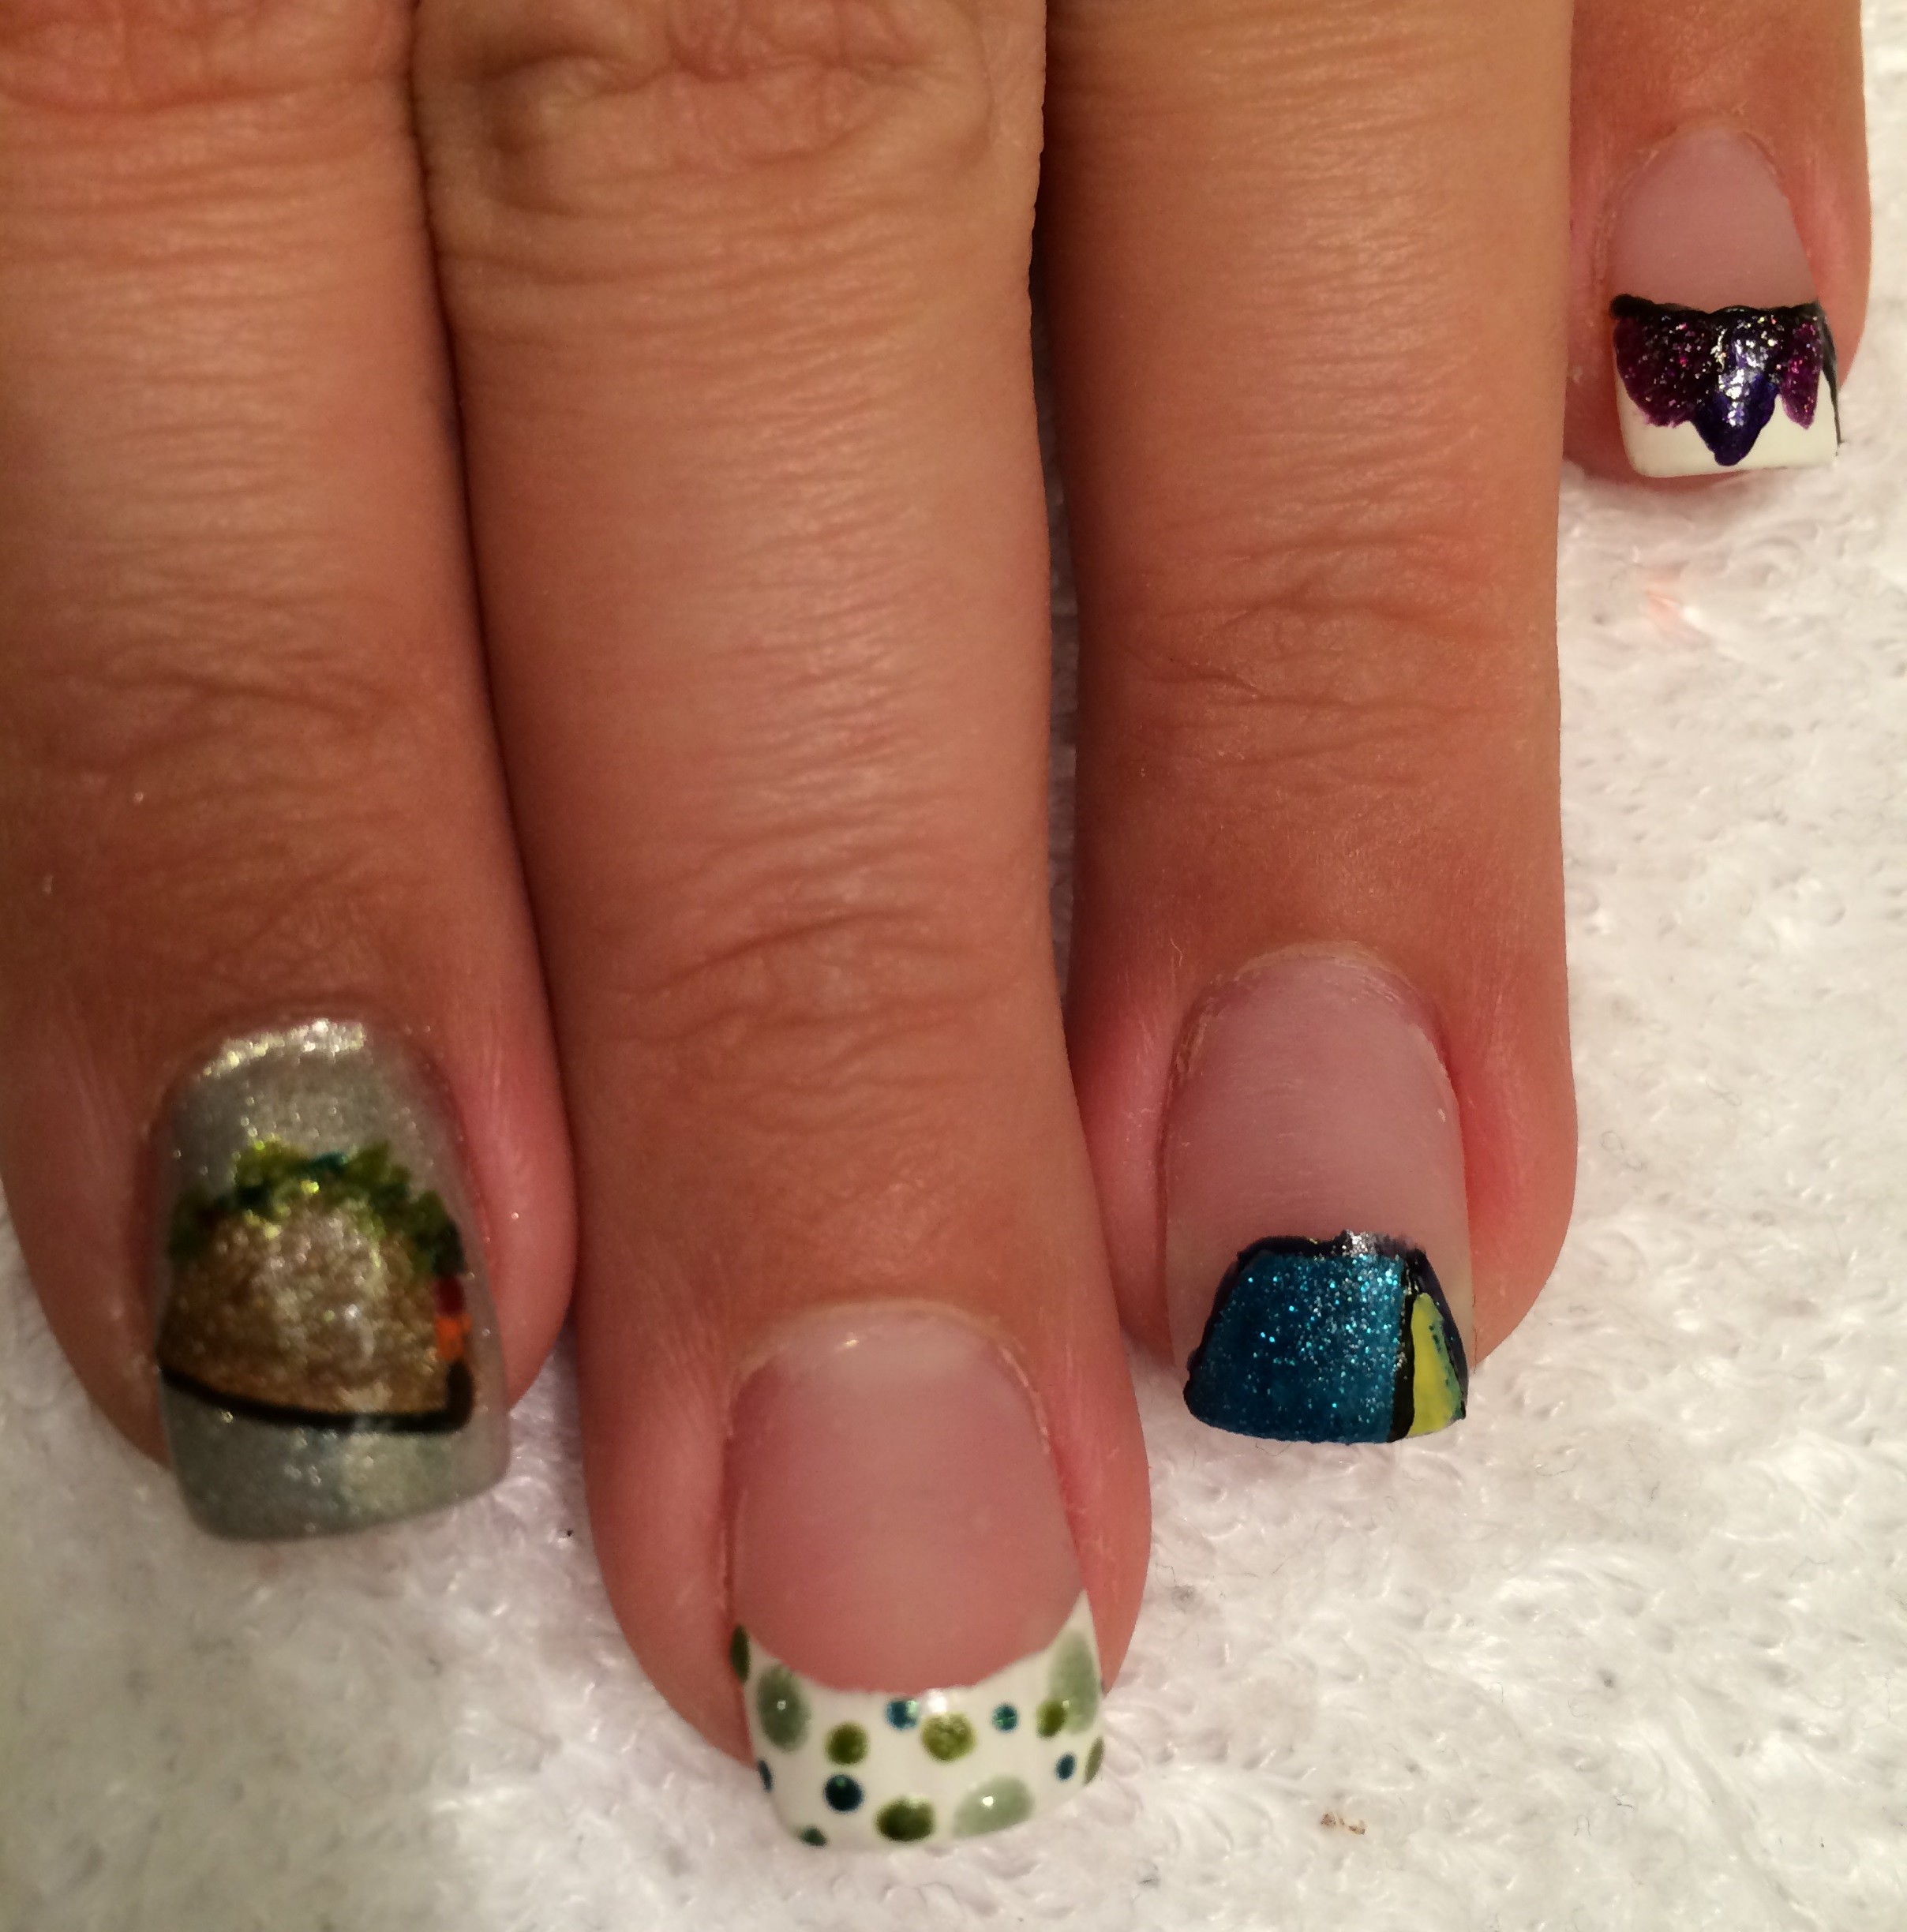
As your lacquer starts to set, go back and begin adding detail. I used the same pin to add ingredients to the taco as i used to create the dots on my middle finger. I do own a set of professional tools, but to even the playing field I wanted to show you that the most basic household item can become a design tool.
For the love of all that is good and right in the world, do yourself a favor at this stage, and use a q-tip, or teeensy piece of a cotton ball or paper towel , dipped in some polish remover to clean up the skin around your fingers. If you’re anything like me when it comes to painting your off-hand, it will look a bit like a lacquer covered squirrel has had a small seizure all over your fingertips. Be a nail art hero and clean that mess off before it dries and becomes a longer lasting addition to your skin.
Finished!

If you’re happy with your art, and you’ve given it a few minutes to set, go back and add a top coat. I used a mattifying top coat on my index finger with the taco, and a regular long lasting top coat on the other nails. Remember that it can take up to 12 hours for your nail lacquer to fully set, so try not to smush your designs before you’ve photographed them!
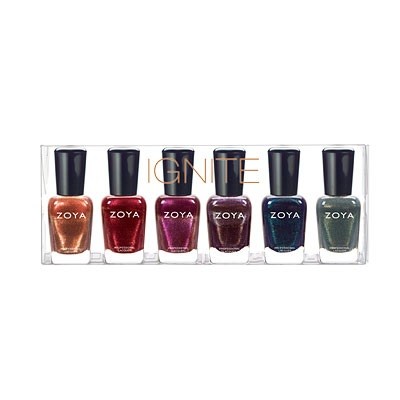
Now go out there and get creative! Up for grabs is one of the fall lacquer collections from Zoya.
The winner will be chosen at random based on participation and tweeting or facebooking us the image of your creation. #igglenailart
Submission deadline for this giveaway goes through to September 9th, 2014.
(please note that delivery of your prize is dependent on when the product is released and shipped from the manufacturer)

I’M IN.
I want to do this, but I have no nails. 🙁
[…] Tacos have been an underlying theme of camp this year so Kimberlee taught us how to rock them on our nails! […]