For this month’s IggleStitch cross stitch project, we are going to cross stitch the dragons from the classic Bubble Bobble arcade game, Bub and Bob! (Did you know they were named that?! I did not know until 5 minutes ago.) Keep reading to learn how!
Did you know that September 12th is considered National Video Games Day in the United States? I don’t need a holiday to give me reason to play video games but I always enjoy getting to see it come up in conversation on social media for a day. Usually, there are references to older games including the games we grew up on. Bubble Bobble is a game I COULD have grown up on but didn’t. Instead, I got introduced to it a few years ago in a barcade (bar+arcade=happy nerds) and immediately loved the two adorable monsters and the addicting game play. For this project, you can do either a traditional cross stitch or go a step further with me and make magnets!
Bubble Bobble Dragon Cross Stitch Supplies
- 14 or 16 count Aida cloth
- Embroidery hoop
- Tapestry needle, size 22-26
- Scissors
- Embroidery floss
- Dark green, light green, white, black, dark blue, light blue
- Access to printer or phone/computer to view pattern
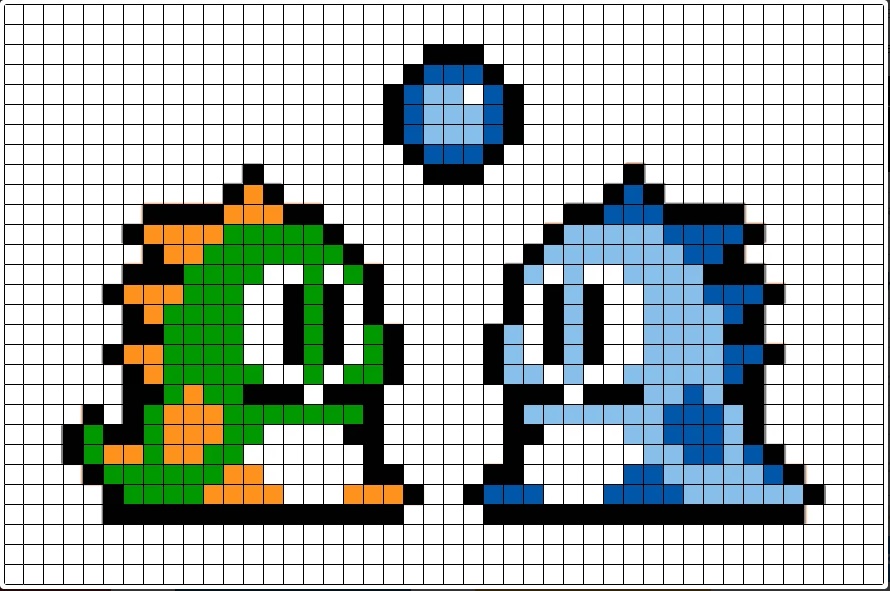
The pattern is quite small and should fit in a 4″x4″ square. You can certainly go bigger, there will just be more white space left over. If you want to review how to cross stitch, check out an old IggleStitch post or check out this YouTube.
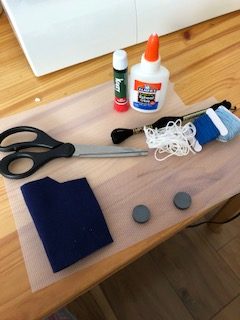
Magnet Supplies
- 14 or 16 count plastic Aida canvas
- Tapestry needle, size 22-26
- Scissors
- Felt
- Super glue
- Magnet
- Embroidery floss
- Dark green, light green, white, black, dark blue, light blue
- Access to printer or phone/computer to view pattern
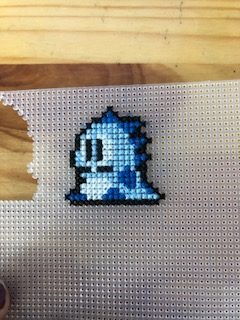
Take the plastic Aida canvas and go a few squares in from the sides to give yourself enough room. I started from the top of Bub’s orange spikes and worked my way around.

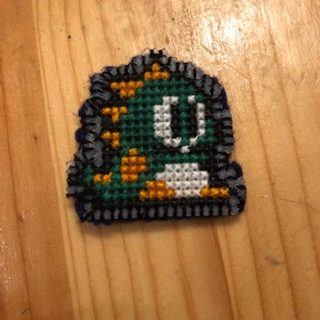
For Bob, I had a better idea of how much room the pattern would take and moved a few squares over to make them.
The next step is to cut them out. Take the scissors and gently cut around the perimeter, leaving a square of space around the pattern.

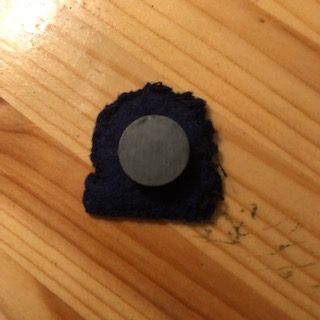
From here, there are two options: felt or no felt. After making Bub and Bob, I prefer the no-felt option. It’s less sturdy but cleaner to look at! To do the felt, cut a close shape around the figure of the cutout. Take the needle and black thread and sew it onto the back of the plastic canvas. Glue the magnet onto the back using super glue (unless you have a weaker magnet, Elmer’s glue will not cut it!).

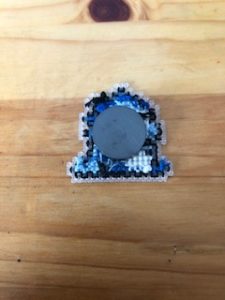
The second option is to forgo the felt. I’ll be doing this in the future, just be warned that the magnet will be a little more flimsy. I used a brush to put a little Elmer’s glue on the back of the cutout to flatten any lose threads before super gluing the magnet on.
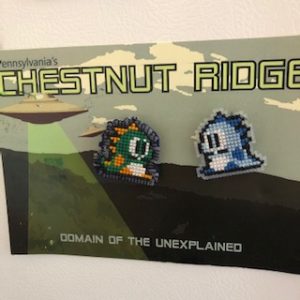
After that, you’re done! Put them on your fridge and enjoy!
Happy stitching!
If you liked this throwback to retro gaming, check out this Pac Man bookmark that was posted last month! When you post on Twitter or Instagram, use the hashtag #IggleStitch and #IgglesCreate to share your cross stitch progress and see how your fellow Iggles are faring! Feel free to tweet at me or message me on Instagram if you have questions or concerns! Follow @IgglesCreate on Twitter for this and other creative activities every month!
What do you think of this month’s pattern? And more importantly, what pattern would you like to see for next month? Comment below with suggestions!


Leave A Comment
You must be logged in to post a comment.