Hey Iggles, it’s time for IGGPPCamp Challenge 5!
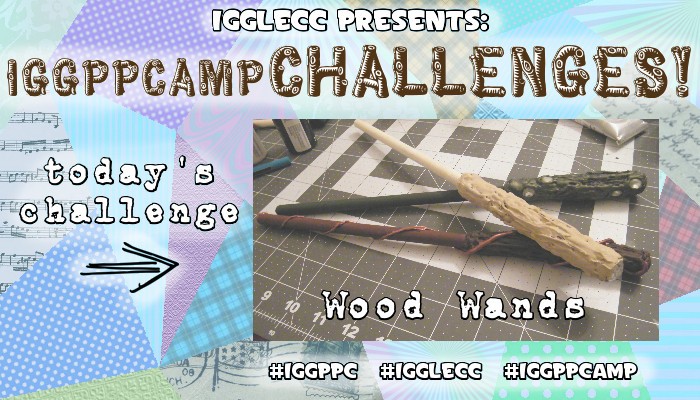
Today we’re making our own wooden wands! Harry Potter fans UNITE!!
Here’s what you’ll need:
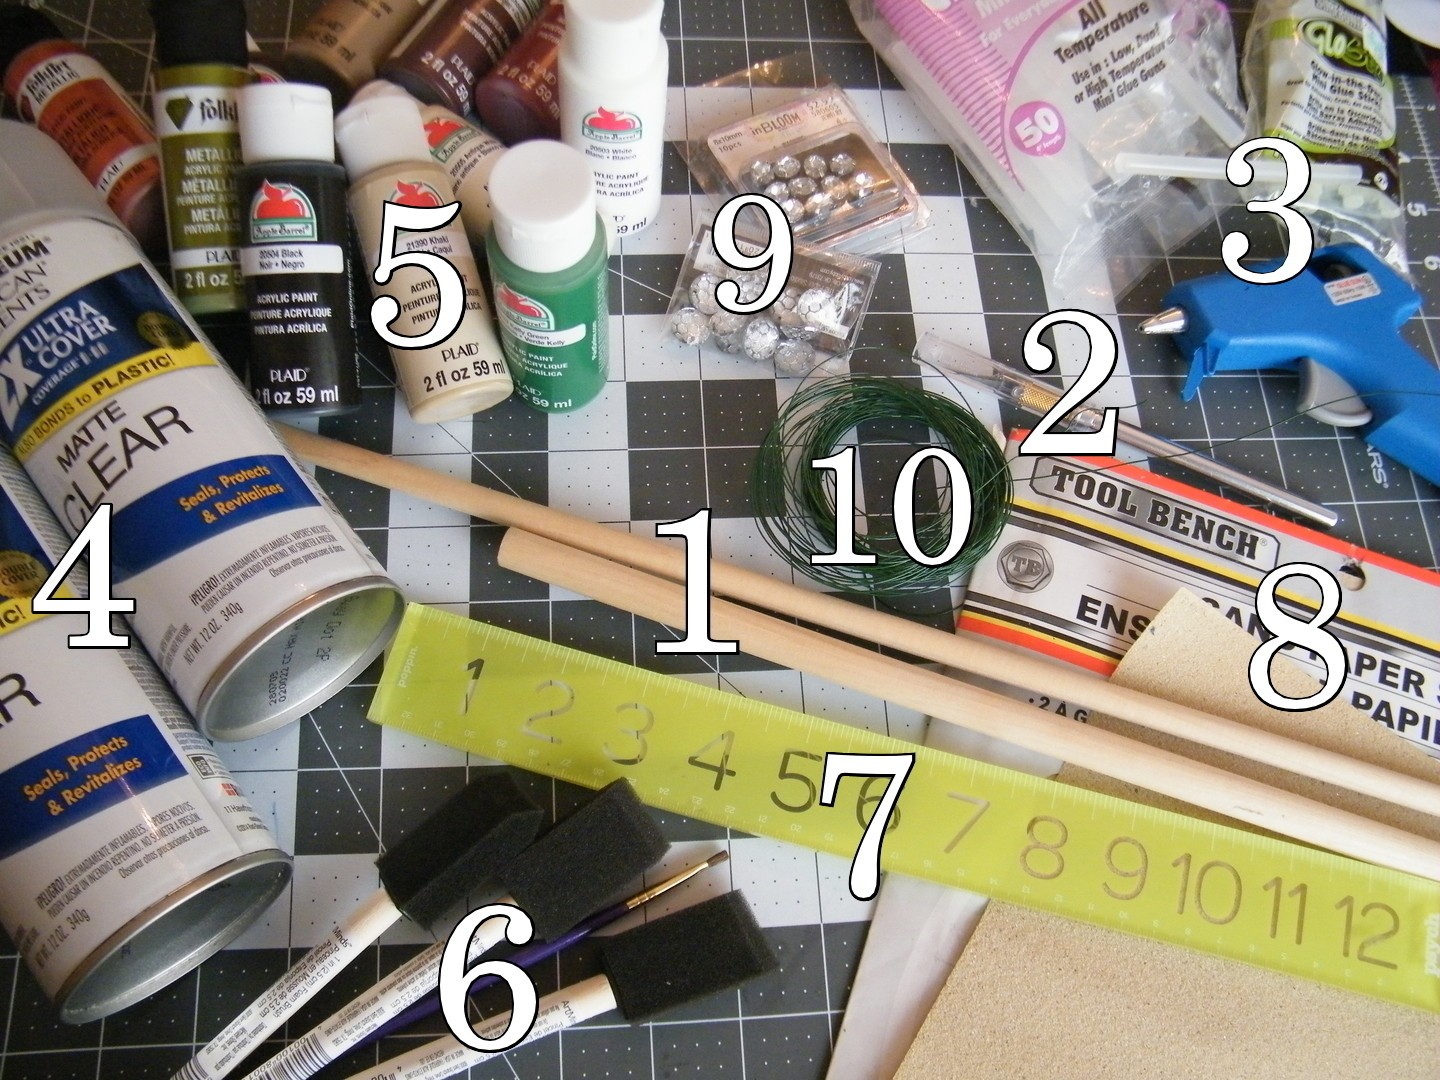
1.) Wooden dowel
2.) Something to cut wooden dowel (Xacto knife not recommended.)
3.) Hot Glue Gun/Glue Sticks
4.) Clear varnish (Clear nail polish will do too)
5.) Paint
6.) Paintbrushes
7.) Ruler
8.) Sandpaper
Optional
9.) Gems/Beads
10.) Wire
**I based this tutorial on one from Instructables.**
A note about dowels… I settled on what I think is 3/8 inch in width. In the supply list, I show a 3/8 and a 1/2… and the 1/2 is too thick for my liking. It is, however, completely up to you. It’s your wand. 🙂
First step! Measure how long you’d like your wand. I chose around 12 inches. I could get three wands out of one dowel that way. Then cut. Yes, I used an Xacto knife to cut mine. It is not recommended. But… here’s some tips on that anyhow.
If you’re more patient than I, you’ll be more successful. The trick is to slice/press the blade in from all sides until you’re about 1/3 through all the way around. Then carefully bend and snap the rest. For my first try, I broke my knife, successfully embedding the tip in to the tip of one wand so it wouldn’t come out, (that tip will always be in that wand. It’s a part of it now.) and splintering the handle of another wand. I learned my lesson for the second go around. Patience.
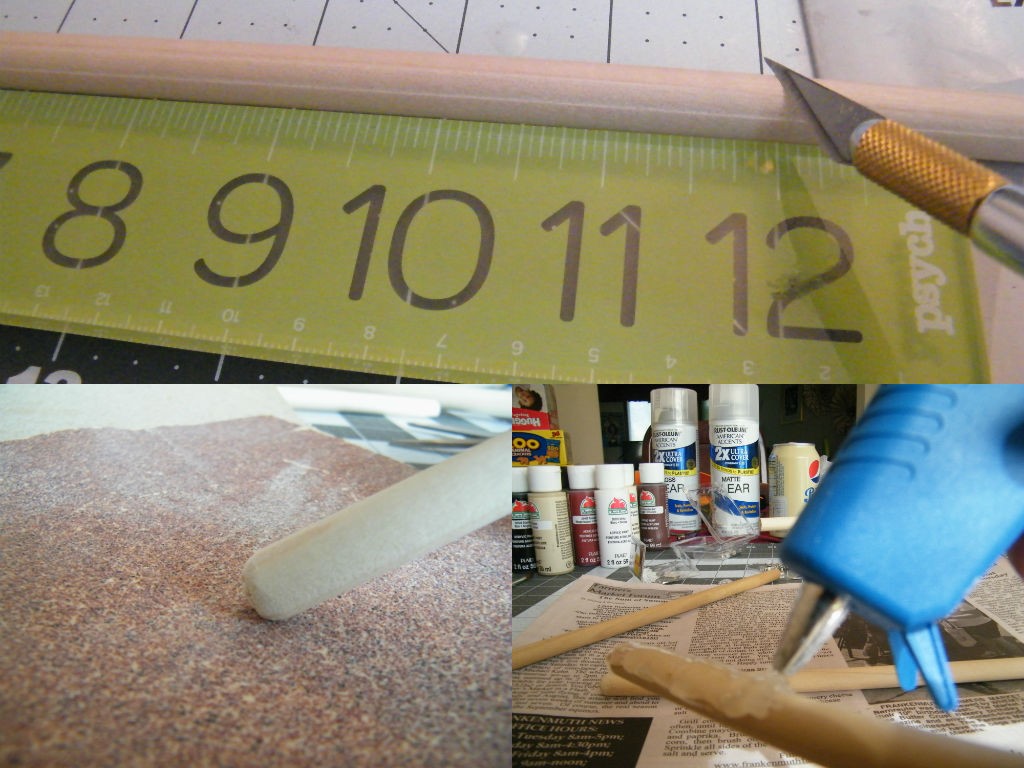
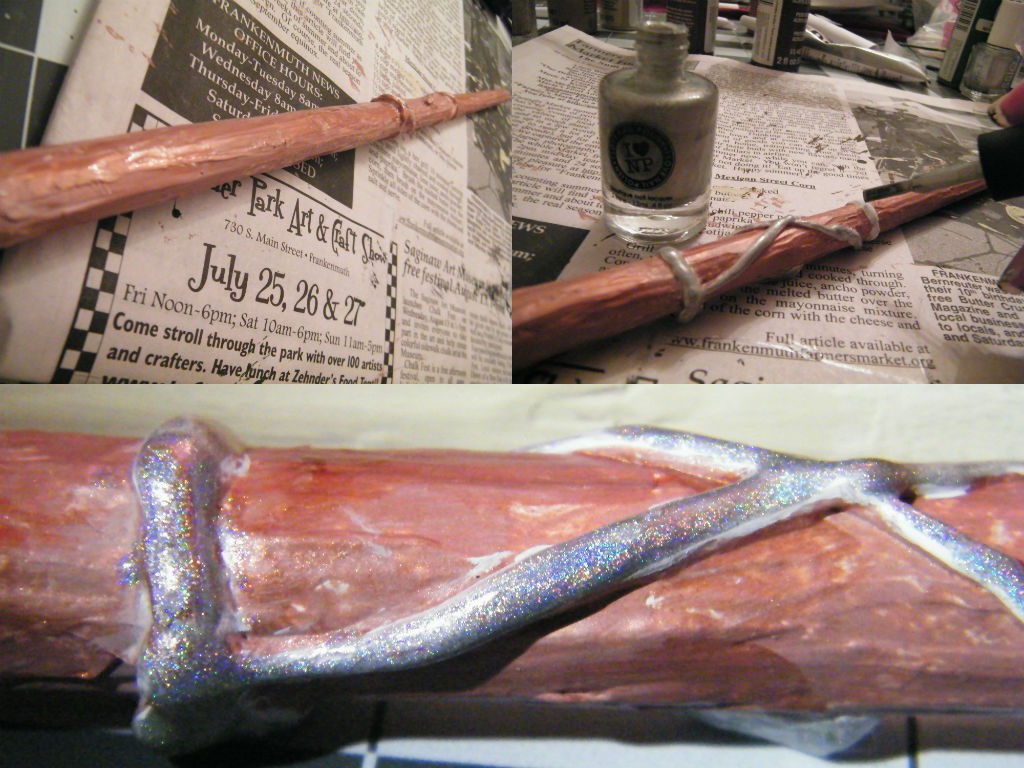
Next you smooth out the tip of your wand on your sandpaper, then you start globbing on the glue to the handle! You’re trying to make a handle with your hot glue, so it’s up to you on how much you put on, or how far down the wand you go. You’ll see examples of handles at the end of this post.
Note! I mentioned above that I splintered the handle part of a wand. Using hot glue to build up the handle helped hide the fact that the wood beneath was splintered and missing. Now I can’t even remember which wand has the broken dowel.
And now on to the optional embellishing! The first picture shows a gem glued to the end of a handle. The second picture shows gems glued to the side of the handle.
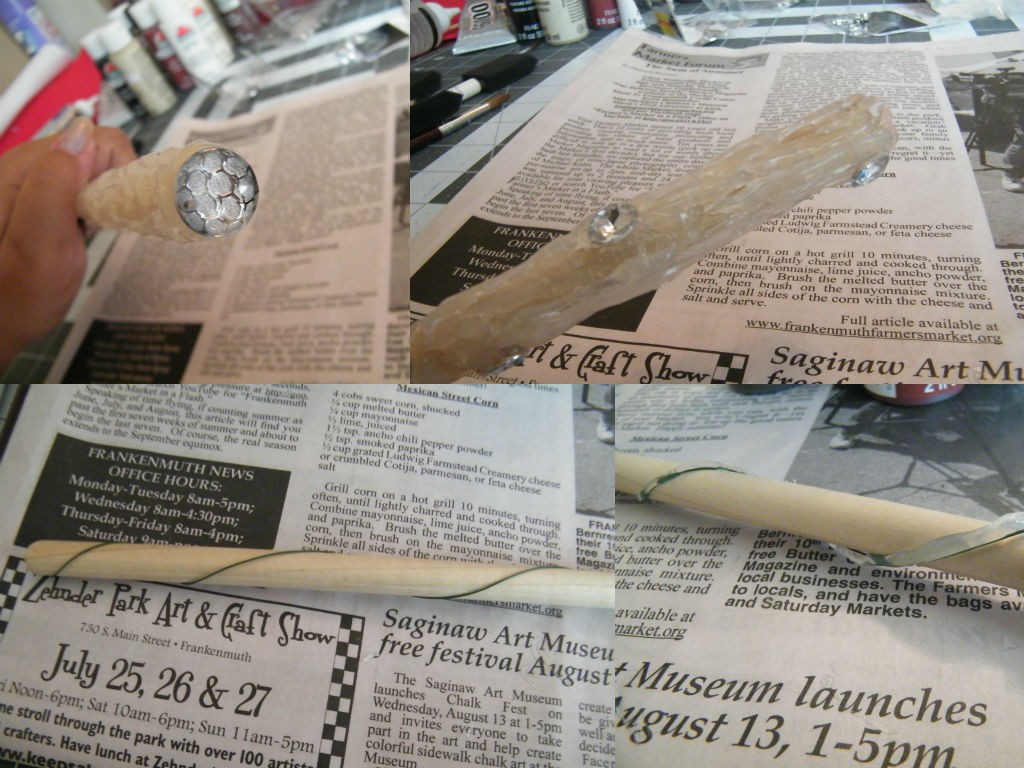
The bottom half of the picture shows wire being used as a swirl guideline. Then you cover over the wire with a line of hot glue. This helps make sure the swirl looks good on the wand.
Next, we start the painting! You’ll want to choose a base color to cover your entire wand in so your final paint job won’t show any unpainted sections. If you’ve got gems on your wand, and you accidentally get some paint on them, a wet cotton swab can take that dried paint real quick. Scraping away with a toothpick works too. After the base coat step I like to spray the wand with a layer of clear coat, but that’s optional.
Next you paint your wand. Mixing colors is your friend. And don’t forget detail colors! I’m personally a fan of a darker handle. It’s all up to you, the possibilities are endless!! Once you’ve finished painting, end with your clear coat. I like using a matte spray, but if you don’t have that on hand, a clear nail polish will work too. Basically, you just need something on your wand to help protect the paint from coming off.
And that’s it!! Now share your glorious wand with the world! I made three.
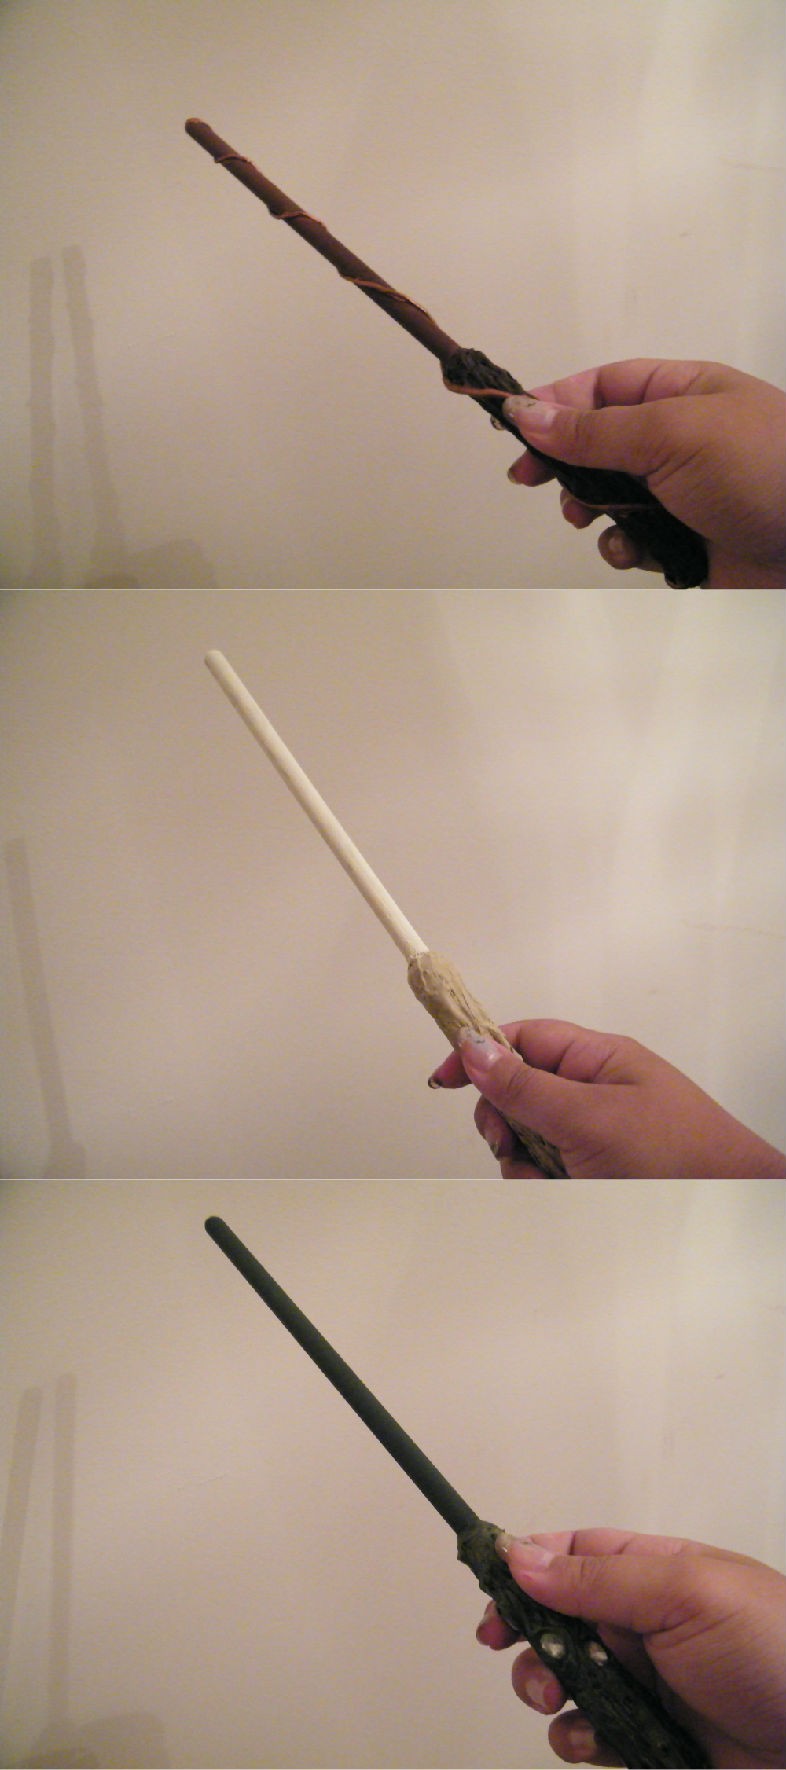
Here’s a couple more shots of my lovely wands.

I personally think the green one is my favorite. Hee.
I hope you’ve enjoyed today’s challenge and that you give it a try yourself! If you do, an achievement awaits!! Enter craftclub5 to get your Camp Challenge Wood Wand achievement, and please don’t forget to share your pics via twitter and hashtags #IGGPPCamp and #IggleCC! You can also post your pics on the forum here.
Can’t do today’s wand tutorial? Stay tuned, because Friday is another wand tutorial. 😀


These are amazing! I can’t wait to make one!
Oh, how fun!!! I never would have thought to use hot glue to build up the designs and then pain over it. Brilliant! I will definitely have to give this a try…maybe a Christmas fairy wand…or something steampunky!
[…] for details and texture. These wands aren’t really designed for the heavy handled style our wooden wands were, but it’s really up to you on how to make […]