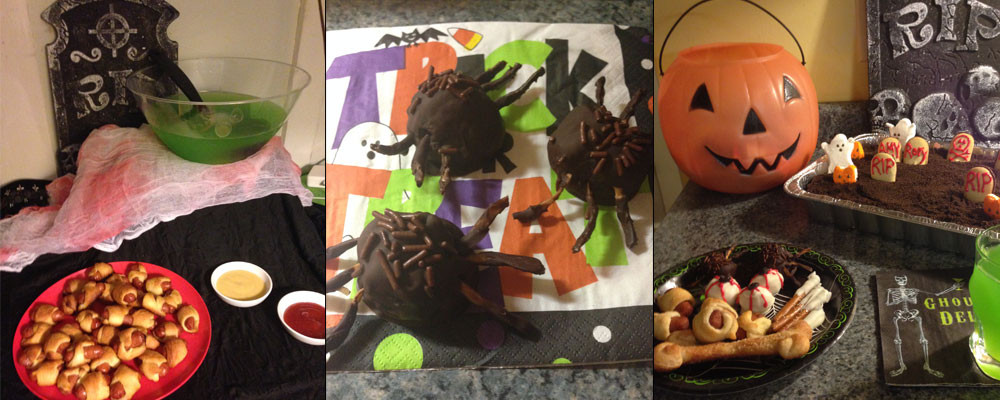
One of the keys to any good Halloween party is the food. While regular party food is great, why should you be the only one who gets dressed up? Jazz up your party snacks with a spooky theme. Join me in making some easy and delicious goodies for your Halloween party.
Chocolate Spiders
If you’re anything like me, you love Oreos…and chocolate…and chocolate covered Oreos. This is a spooky spin on that. To make Chocolate Spiders you’ll need:
- 1 pkg. (8 oz.) Cream Cheese, softened
- 36 Chocolate Cookies (Oreos), finely crushed (about 3 cups)
- 16 oz. chocolate melting bits, dark or milk chocolate (Or you can use chocolate chips melted with 2 tbsp. of vegetable shortening)
- Chow Mein Noodles
- Chocolate Sprinkles
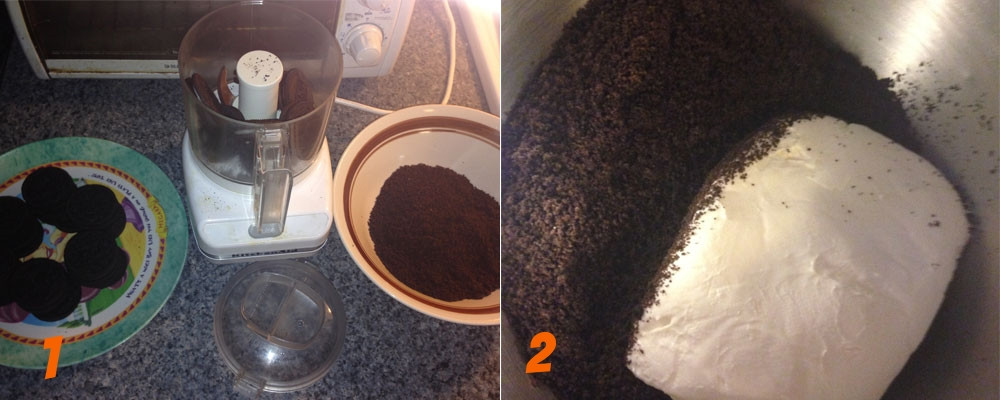
- First you want to crush your Oreos. You can place the cookies in a Ziploc bag and use a rolling pin to crush them. If you want to get a finer crush and you have one, you can use a food processor (ex. 1).
- Next you want to add in your cream cheese. If the cream cheese is still cold, place it in a microwavable bowl and heat it for 30 seconds. You want the cream cheese to soft but not hot. Place it in the mixing bowl and mix until the filling pulls up from the sides and forms a ball (ex. 2).
- I then placed my filling in the fridge to let it firm up a little, so that it would be easier to form the little balls.
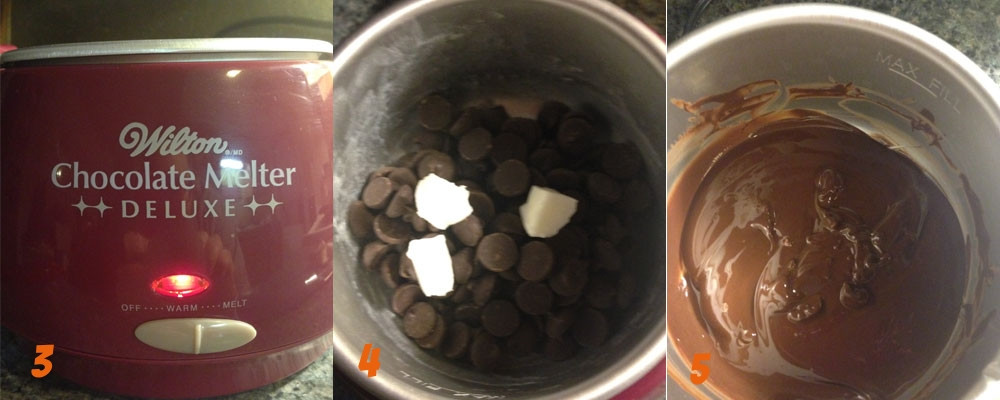
- While that’s happening, I start to melt my chocolate. There are multiple ways to actually melt your chocolate. You can always use the traditional double boiler method. This is two sauce pots nested in each other, the bottom one containing enough water to allow the smaller nested pot to float. Note: It’s important to make sure no water gets into the smaller pot. Water in your chocolate will cause you chocolate to seize up and you won’t be able to dip it. Instead of using the double boiler method, I opted to use a chocolate melter (ex. 3). This way no water comes into play and you won’t run the risk of your chocolate seizing up. Either way you choose, it’s important to keep an eye on your chocolate and make sure you stir it to keep it smooth and to keep it from burning.
- If you are using chocolate wafers that are meant for dipping, you can just put those in the double boiler/melter on their own. If, like me, you are using plain old chocolate chips, you’ll need to add Crisco (shortening) to help the chocolate have a nice smooth finish and to help it not seize up. For a 16 oz. bag of chocolate chips, you want to use 1 tbsp. of shortening (ex. 4). Be sure to stir you chocolate as they are melting so the chocolate doesn’t burn (ex. 5).
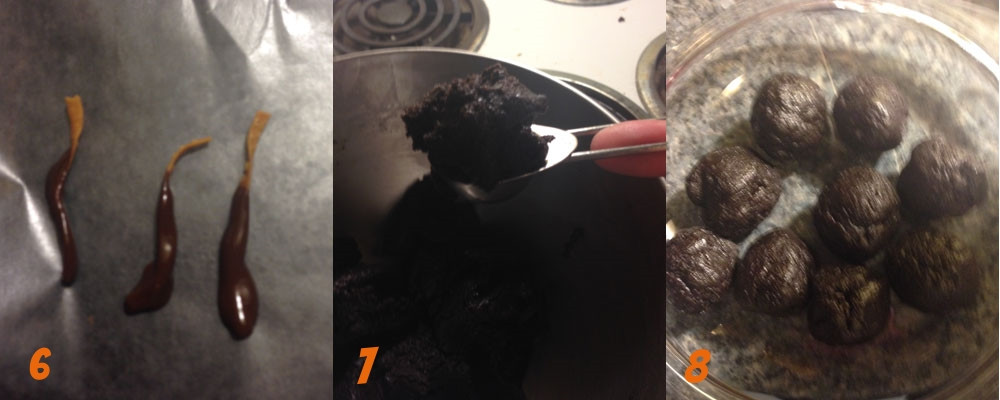
- After you’ve melted your chocolate, take your chow mein noodles and dip them into the chocolate, leaving a small part uncovered. Place the chow mein noodles on a piece of wax paper, on a cookie sheet or tray; metal is preferred (ex. 6). And put them in the fridge to cool. If you want to be anatomically correct, you’ll need 8 legs per truffle, but I found that 6 fit better on a small truffle.
- Take your filling out of the fridge. Using a spoon roll the filling into small 1-inch balls until all of the filling is used up (ex. 7 & 8).
- One by one, put the balls into the chocolate and roll it around using a fork.
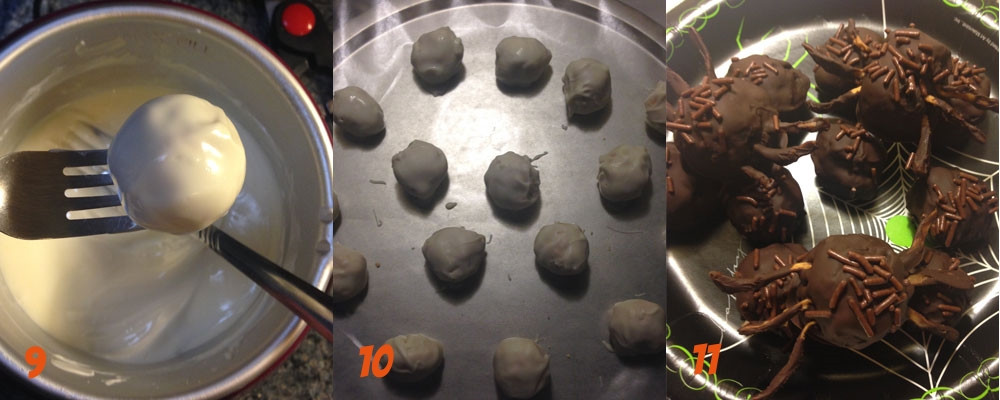
- Once the ball is covered, remove the truffle with two forks to remove the excess chocolate (ex. 9).
- Place the truffle on a piece of wax paper, on a cookie sheet or tray (ex. 10). A metal tray will help the truffles cool quicker.
- Before you put the truffles in the fridge, carefully place the desired amount of legs into the sides of the truffle, with the uncovered part of the leg going into the truffle. Sprinkle a pinch of chocolate sprinkles on top and place them into the fridge to cool (ex. 11). You could also use Mini M&M’s for eyes if you wish.
I learned a few things while making these. One, that while my chow mein noodles are delicious in chow mein, they were a little too delicate for the legs of my truffles. There are La Choy noodles that come in a can at the grocery store that are much sturdier and will hold up much better. Two, patience is necessary in making these truffles. Leave time for the legs to properly chill before trying to put them into the truffles. If you don’t, it gets very messy. Make sure you leave the filling in the fridge long enough for the dough to form round balls. If you don’t, when you are covering them in chocolate, they will begin to lose their shape.
Severed Piggies
These dippable snacks are more commonly known as pigs in a blanket, but around Halloween, their resemblance to chopped off fingers and toes make them a must for any party. You will need:
- 1 can Crescent rolls
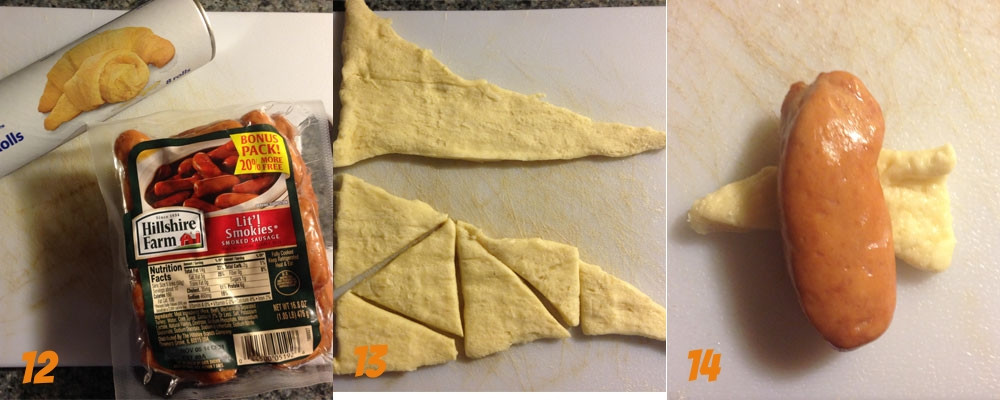
- 1 16 oz. cocktail hot dogs (chicken, turkey, beef, whatever you prefer) (ex. 12)
- Dipping Sauce: Ketchup or Mustard or Honey Mustard
- Preheat your oven to 375 degrees F (190 degrees C).
- Spray some cooking spray on a cookie sheet. You can also use parchment paper, and in that case you don’t need cooking spray.
- Unroll the crescent rolls and separate them from one another.
- Flatten out the rolls and cut into triangles. You will get about 6 mini triangles per crescent roll (ex. 13).
- Holding the triangle the long way, wrap each hot dog in a piece of dough (ex. 14). Make sure to overlap the ends of the dough so that the crescent roll doesn’t fall off.
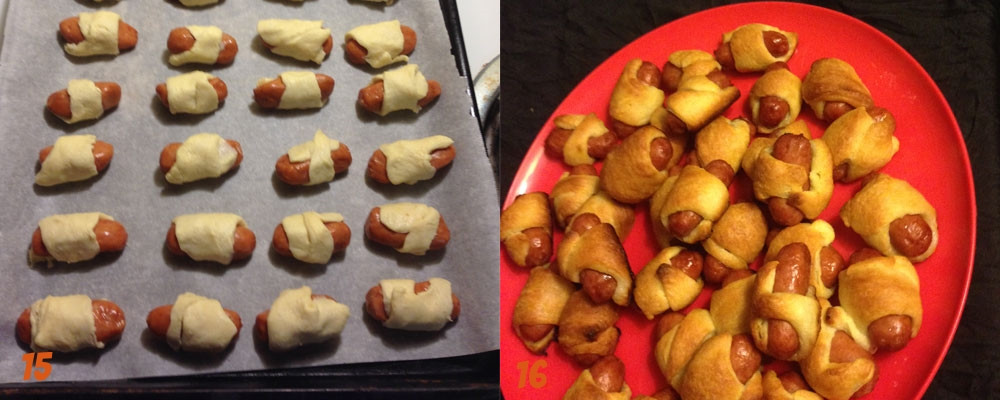
- Place the piggies on the prepared cookie (ex. 15). I can fit about 36 piggies on one cookie sheet.
- Bake for about 15 minutes, until golden. Every oven is different, so if you know that your oven cooks quickly, you’ll want to keep an eye on them.
- Plate them and serve with ketchup, honey mustard, or your favorite dipping sauce (ex. 16)
Peanut Butter Eyeballs
These gory truffles will sure to delight your guests with a sweet tooth for sugar, sugar and more sugar. What you’ll need:
- 1/2 cup smooth peanut butter
- 1 cup sifted powdered sugar
- 8 ounces of white chocolate melting bits (Or you can use white chocolate chips melted with 1 tbsp. of vegetable shortening)
- Red Food Coloring
- Black Icing (small amount for decoration)
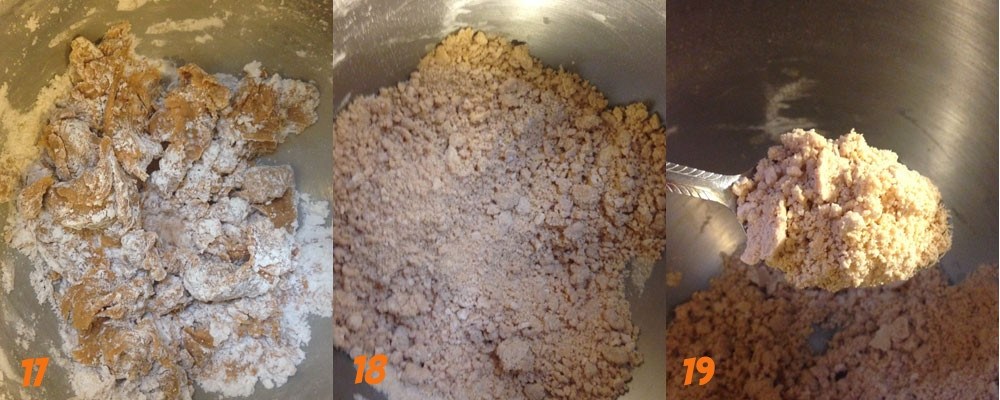
- Mix together the peanut butter and 1 cup sifted powdered sugar, mixing until combined. I separated the powdered sugar into 3 smaller batches to avoid getting covered in sugar (ex. 17). This mixture is dry and looks almost like the texture of Reese’s peanut butter cup (ex. 18 & 19). If you want a smoother center, you can add 3 tablespoons of softened butter or use a natural peanut butter, which is a little oilier in nature.
- Mold into 1-inch balls using your hands and place of to the side.
- As we did with the Chocolate Spiders, use a double boiler or a chocolate melter to melt your white chocolate. Pay extra attention as white chocolate burns much quicker than regular chocolate.
- Dip balls, one at a time, into coating. Let excess coating drip off peanut butter truffles (Ex. 20).
- Place the truffles in the fridge to cool and harden.
- To make the veins on the truffles you can use two different things, food coloring, or red icing. The easier method and the method that give you clearer red lines on your truffle is to use red icing (Ex. 21). My food coloring didn’t stick to my eyeball as well as my original recipe said it should have. This could be because of the chocolate that I used. However, it did create vague red lines on my truffle which still created the bloodshot effect. It also created red droplets, that made my eyeball truffles look like they were covered in blood (Ex. 22).

- Lastly, make small dots of black icing in the middle of the truffle for the pupils.
Graveyard Pie
Graveyard pie is a classic Halloween treat that guests of all ages will enjoy. This can be made on a large scale or in individual portions.
- 1 package of Oreos
- 2 packages of chocolate or chocolate fudge instant pudding mix
- 4 cups milk (do not use fat free as it will not set properly)
- 3/4 container cool whip
- 1 container of cream cheese (melted)
- 1/2 stick butter (melted)
- 3/4 cup sugar
- Gummy Worms
- Rounded Cookies (ex. Milanos or Vienna Fingers)
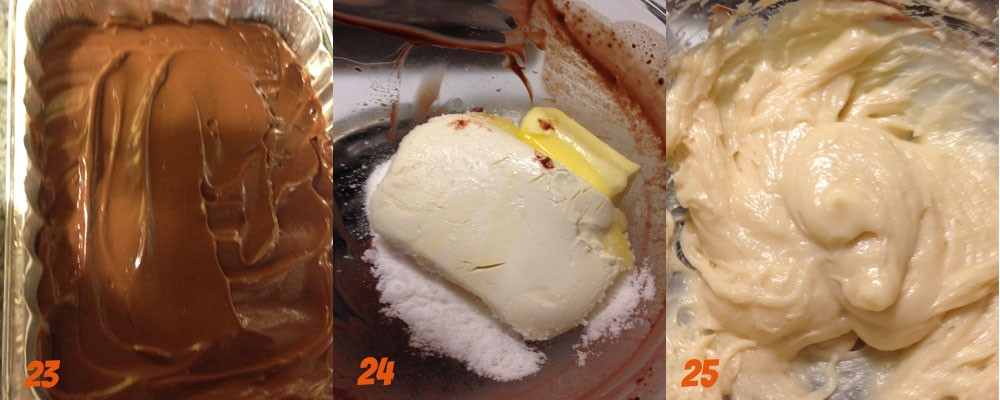
- Prepare the pudding according to the direction on the box. Make both boxes of pudding and set aside. You can do this step the day before, or a few hours earlier to really help the pudding set (Ex. 23).
- Crush about 2 rows of the Oreos. Again, like the chocolate spiders, you can you a Ziploc bag and a rolling pin or you can use a food processor.
- Using a hand mixer, beat the melted butter, melted cream cheese, and sugar in a small bowl (Ex. 24 & 25).
- Combine your chilled pudding and the butter/cream cheese/sugar mixture. Mix well.
- Next fold in your cool whip and mix until completely combined (Ex. 26).
- Pour your pudding/mousse mixture into a 13 by 9 cake pan and even it out (Ex. 27).
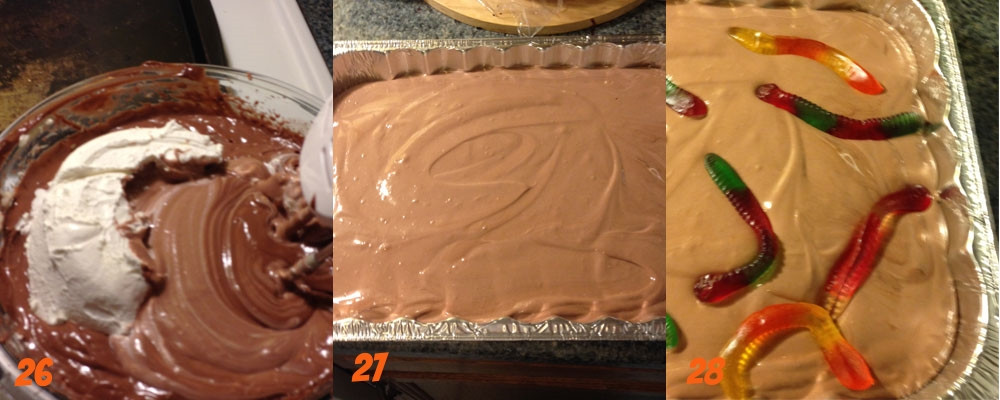
- Place a about 10-12 Gummy Worms (Ex. 28) on top of your pudding and cover with the crushed Oreos (Ex. 29 & 30).
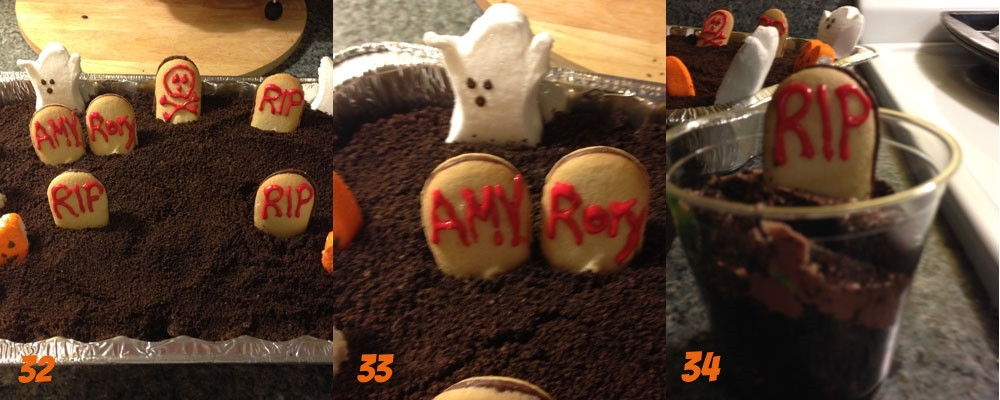
- Take your rounded cookies, and some icing if you have it, and make your gravestones (Ex. 31). My helper, @traceYevidence, chose sayings like RIP, a skull and cross bones, and a tribute to Doctor Who with Amy’s and Rory’s graves.
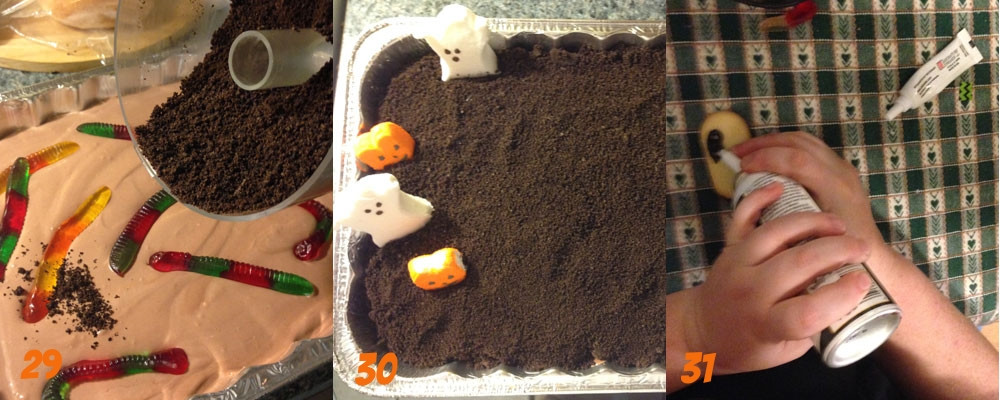
- Place your graves around your graveyard and decorate as you see fit (Ex. 32). I preferred to use marshmallow ghosts and pumpkins. I would also recommend Candy Corn pumpkins if you can find them, or upside down Reese’s cups could look like tree stumps (Ex. 33 & 34).
Salty Bones
The perfect companion to a witches stew, salty bones are easy and quick to make! You’ll need:
- 1 tube of refrigerated breadstick or pizza dough (11-ounce tube makes 12 bones)
- Coarse Salt
- Dipping Sauce: Marinara or Dijon Honey Mustard
- Unroll you breadstick dough and separate the bread sticks. Take about half of the bread sticks and place them, separated out evenly, on an ungreased cookie sheet.
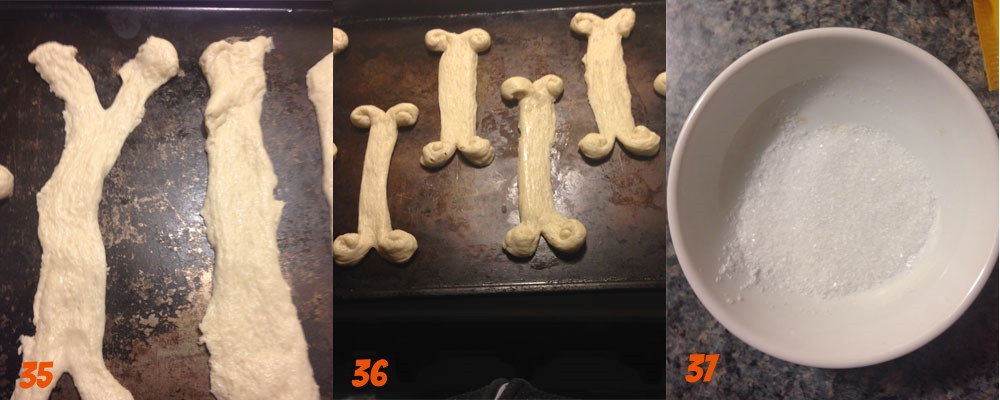
- Using a knife, cut about a 1 1/2-inch slit in the center of each end (Ex. 35).
- Roll or shape the resulting four flaps of dough into knobs that look like the ends of a bone (Ex. 36).
- Place the dough bones on an ungreased baking sheet, spacing them a few inches apart, staggered. I fit about 6 breadsticks on one pan.
- Sprinkle on a little coarse salt (Ex. 37).
- Bake the bones until they are light golden brown, about 12 minutes. Again, if you know that your oven cooks things quickly, set a timer for less than 12 minutes or keep an eye on them.
- Plate and enjoy!
Witches’ Fingers
Chocolate covered pretzels are a perfect snack, sweet and salty! These are especially easy to make if you are also making the peanut butter eyeballs or the chocolate spiders. You’ll need:
- 8 ounce(s) white, milk, or dark chocolate melting bits (Or you can use chocolate chips melted with 1 tbsp. of vegetable shortening)
- 20 pretzel rods
- For the nails: You can use pumpkin seeds or fruit leather or some other sort of candy that resembles a fingernail.
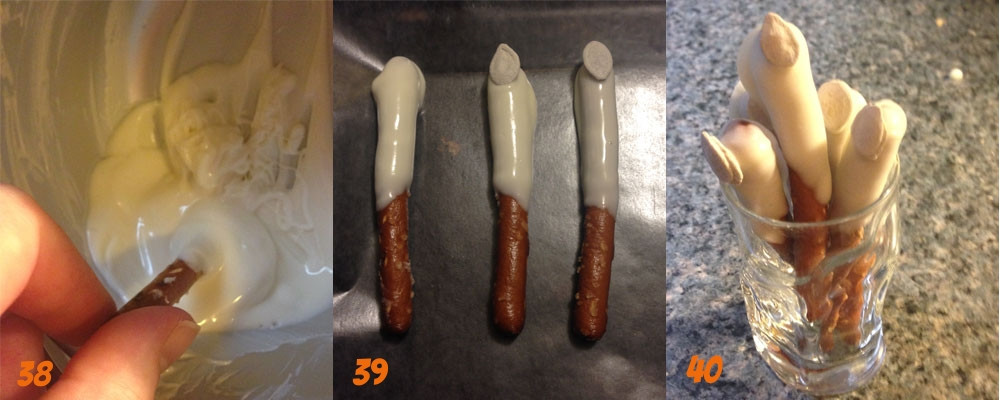
- Using your melted chocolate, dip the pretzel rod and twirl it to ensure that the pretzel is coated all the way around (Ex. 38).
- Place the dipped pretzel onto a piece of waxed paper, on a cookie sheet.
- Before the pretzels have cooled, place a pumpkin seed on the end (Ex. 39).
- Place the pretzels in the fridge to chill (Ex. 40).
Toxic Punch
Last but not least, we need something to drink! I like this recipe for Green Punch. It reminds me of the toxic chemical that gets spilled on Alex Mack in the Secret Life of Alex Mack. It’s very easy to make and tastes really good. It can also be made in advance and taken out when you’re ready. I like to make my punch in a pitcher first, and then transfer it to a punch bowl after. To make the punch you’ll need (Ex. 41):
- 2 cups sugar
- 2 quarts water
- 2 (0.13-ounce) envelopes lemon-lime drink mix (like the little Kool-Aid pouches)
- 1 can frozen lemonade.
- 1 (46-ounce) can pineapple juice
- 1 quart ginger ale (This is a little less than 1 liter)
- For Decoration: Unpowered latex gloves or fake spiders.
- First thing that you’re going to need is the sugar, water, and the lemon-lime drink mix. The sugar and drink mix dissolve much easier if you pour them in first. Stir until the sugar is completely dissolved.
- Then pour in the pineapple juice and the frozen lemonade and stir.
- That’s it! …Until you are ready to serve it. Place the punch into you desired punch bowl and add ice and the ginger ale.
In terms of decoration there are many things you can do. I tried filling unpowdered latex gloves with water and freezing them (Ex. 42). You could also freeze plastic spiders in ice cube trays. I have also seen people place their punch bowl into a larger punch bowl with dry ice in it to create a creepy, foggy look around their punch bowl. .
Note: If you don’t like lemon lime, you can easily make this berry flavored using fruit punch drink mix, some sort of berry juice, frozen pink lemonade, and raspberry ginger ale.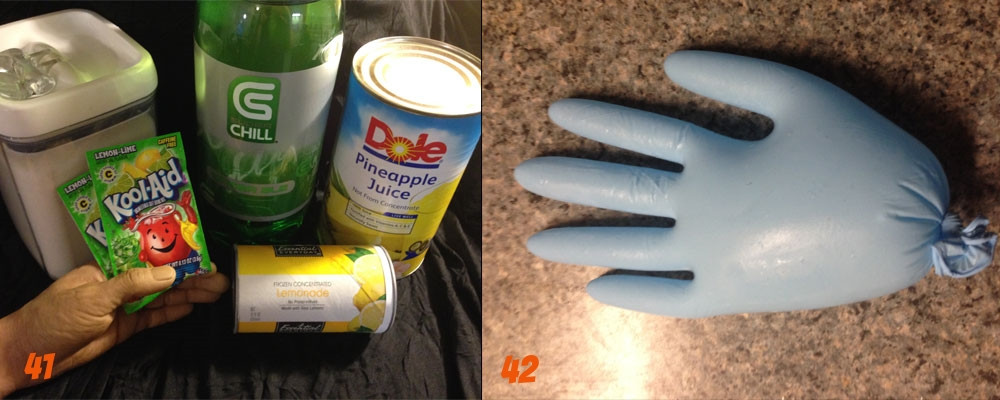
Of course there are many other items you can make. I like to make homemade Chex party mix, but that isn’t particularly festive, so I add a little garlic salt and bake it with a few cloves of garlic (I remove them later) and Voila! You’ve made Vampire Repellant Party Mix. If you are having more of a sit down meal, Monster Mashed Potatoes are always a go to item.
The most important thing to do is to have fun, unlock the achievement with the code chocolatespiders, and always sample your treats!

Severed Piggies are one of my favorite snacks.
All these foods look really yummy! I looove anything chocolate.. even if they’re supposed to resemble the most loathsome creatures ever… ick.. haha
Awe man… made me wish I was hosting a party! Awesome job!
[…] Halloween Party 2014: Frightening Foods – Scary Snacks for Your … […]