
Beetle pinning is a fun and easy way to dip a toe into the world of taxidermy art, and is a relatively affordable hobby to pick up! As aesthetics like dark academia and vulture culture have gained traction online, natural history art such as pinned insects has also gained in popularity. If you want to learn a little more about it (and get a quick beginner’s guide to getting started, this is the place for you!
What is “beetle pinning”?
Beetle pinning is the process of taking a dead beetle (or any other arthropod really) and hydrating it so that you can manipulate the limbs, wings, and other parts into shape, then using straight pins to hold it in a pose until it dries. That’s it!
Traditionally, pinning insects and other arthropods was done by collectors and housed in museum collections. There are standards for pinning different types of species, labeling, and more that have been developed over the decades (link to PDF with example). This is an increasingly important skill as we document species for the future. However, these techniques often involve putting a straight pin directly through the body of the insect, which isn’t ideal for artistic purposes.
A more modern use of the practice is for art and hobbyist collectors. The technique for creating art from insect pinning involves careful manipulation of the appendages and avoids damage to the body so that it can appear in art pieces as a whole specimen. This is a kind of taxidermy art, and is what we’ll be learning how to do!
Sourcing and “Ethical taxidermy” practices
One of the aspects of any art dealing with animal parts that must be considered is ethics. A quick search for “ethical taxidermy” turns up all kinds of blog posts and even a handful of articles about the recent uptick in interest in this old school skill. Personally I find it important to think through what your personal priorities are, and proceed from there.
My own priorities when sourcing animal parts (including beetles) for art:
- Prioritize natural death. For me, this means that the insect (or bones, if I use them in my pieces) must come from animals who died of old age, accident (such as roadkill), or disease.
- Know the source. I mean, really know where it came from, not just the name of the shop. Does the vendor know their source? What is it? Does it align with my natural death priority?
- Pay attention to conservation status. I don’t touch anything that’s endangered or otherwise protected, not only because I’m not comfortable with that, but because it’s usually illegal to do so.
My beetles come from a single vendor who sources from ethically farmed insects that are allowed to live their full life cycles before being collected and preserved. This means my art isn’t having a negative environmental impact (i.e. collecting from the wild and impacting those populations) and isn’t bringing early death to the animals.
Getting started with beetle pinning
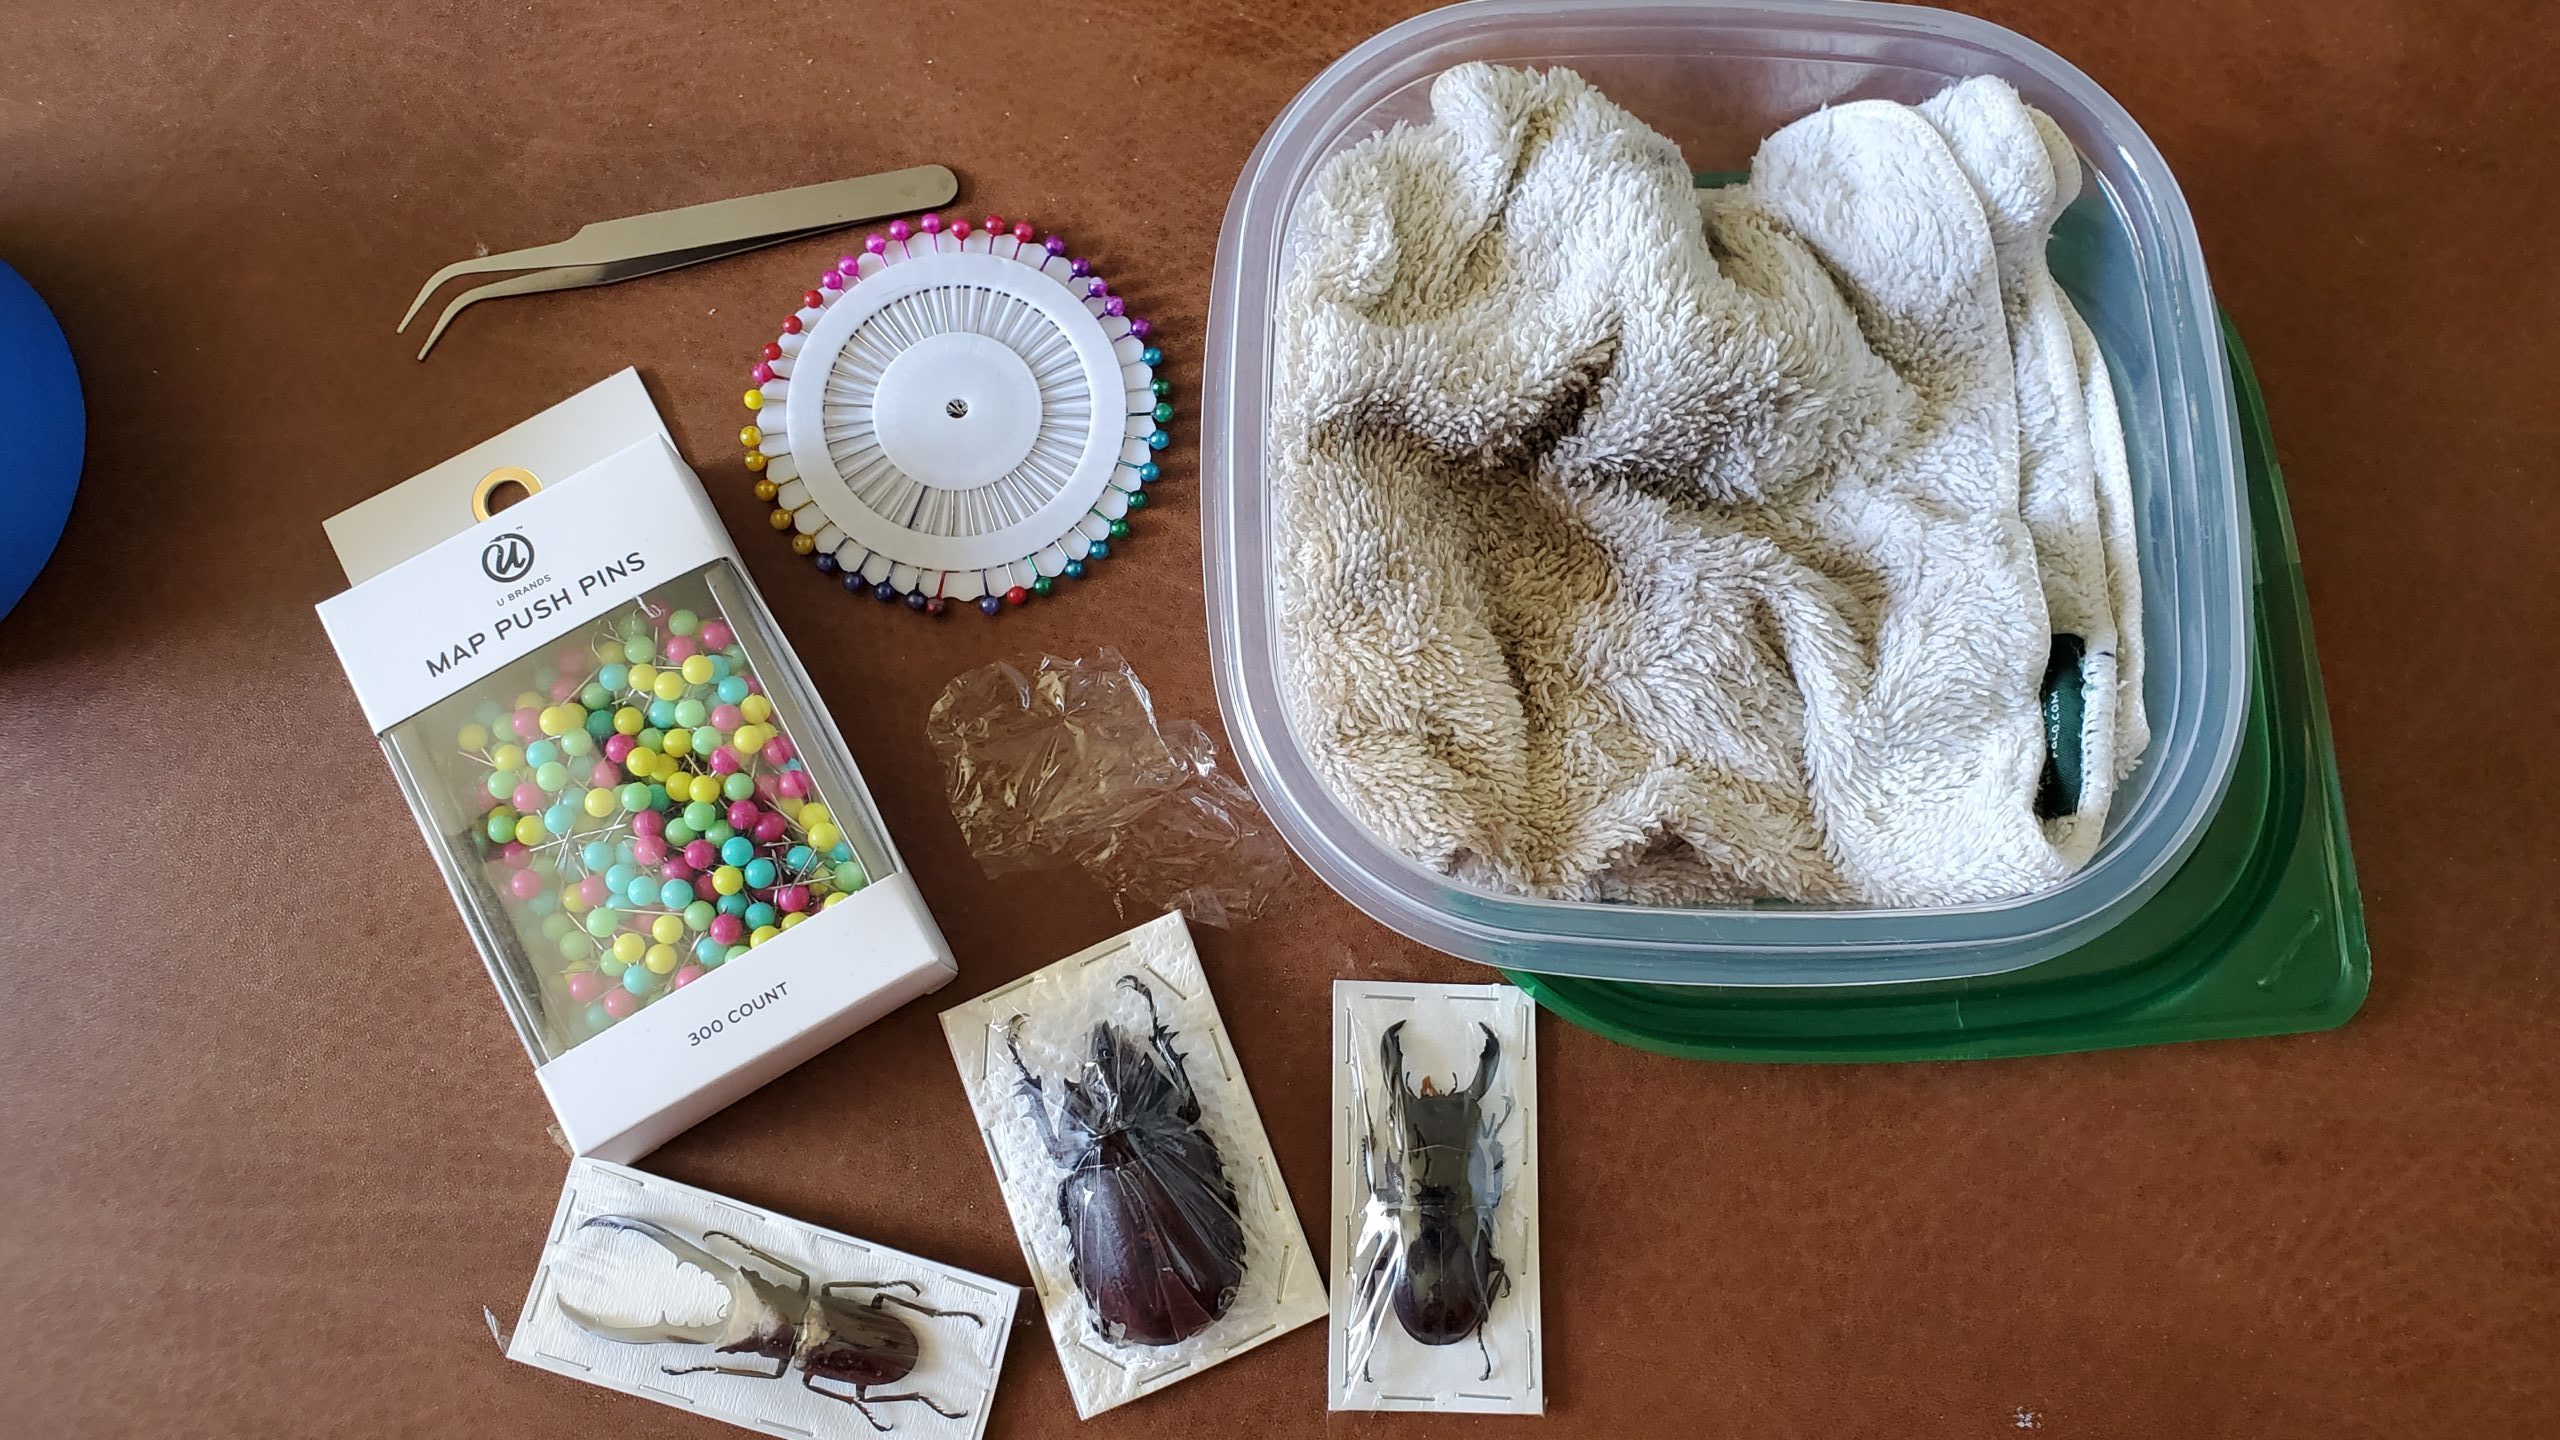
There are just a few supplies you’ll need to get started:
- a container to hydrate your dried beetles (I use a small plastic box with an air tight lid)
- a cloth or paper towels
- small tweezers or forceps
- straight pins
- a block of foam (I use Styrofoam from old packaging)
- vellum or thin clear plastic (I re-use the plastic wrappers from the beetles themselves)
- preserved, dried beetles
Begin by hydrating your beetles. Dampen the cloth or paper towels and place them in the container. Nestle the beetles on top of the damp cloth and seal the lid. That’s it! In 24-48 hours, they should be hydrated enough that their legs, wings, and other appendages will be easy to manipulate!
Note: Size matters! Tiny beetles like june bugs and weevils will be ready in 24 hours, but some of the really large stag beetle species might need up to 72 to hydrate. It’s important not to leave them longer than needed to move, though, as being damp for too long can cause mold to grow even on the best preserved specimen, so be sure you’ve got time to work on them!
Set up your workspace. Once it’s been a day or two, open the container and remove your beetles. I cut mine out of their wrappers carefully because I use the plastic wrap for smoothing wings later in the process. Pull out your pins and line them up on your foam block. You’re ready to go!
Know your beetle body parts. I find it helpful to know the basic body structure of a beetle for this process. Here’s a simple chart:
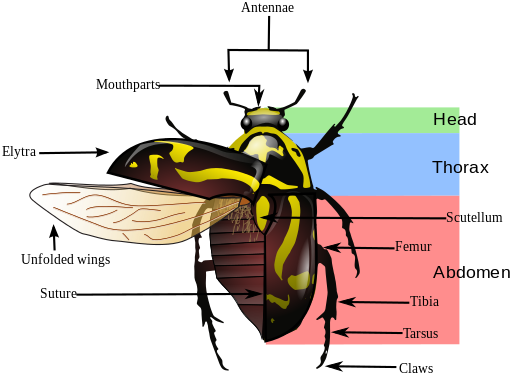
Eupoecila australasiae / Scarabaeidae anatomy
Attributed to wikimedia user Bugboy52.40;
This file is licensed under the Creative Commons Attribution-Share Alike 3.0 Unported license.
Spreading and pinning your beetle
It’s time to start manipulating your beetle specimen. I usually begin with the legs, using the forceps or tweezers to pull them away from the body, and moving them around as much as possible.
Sometimes this requires a little bit of force (not so hard as to break, but don’t be shy either!) but sometimes the legs are already moving smoothly after hydrating. You want the legs to be able to move the way they would in life.
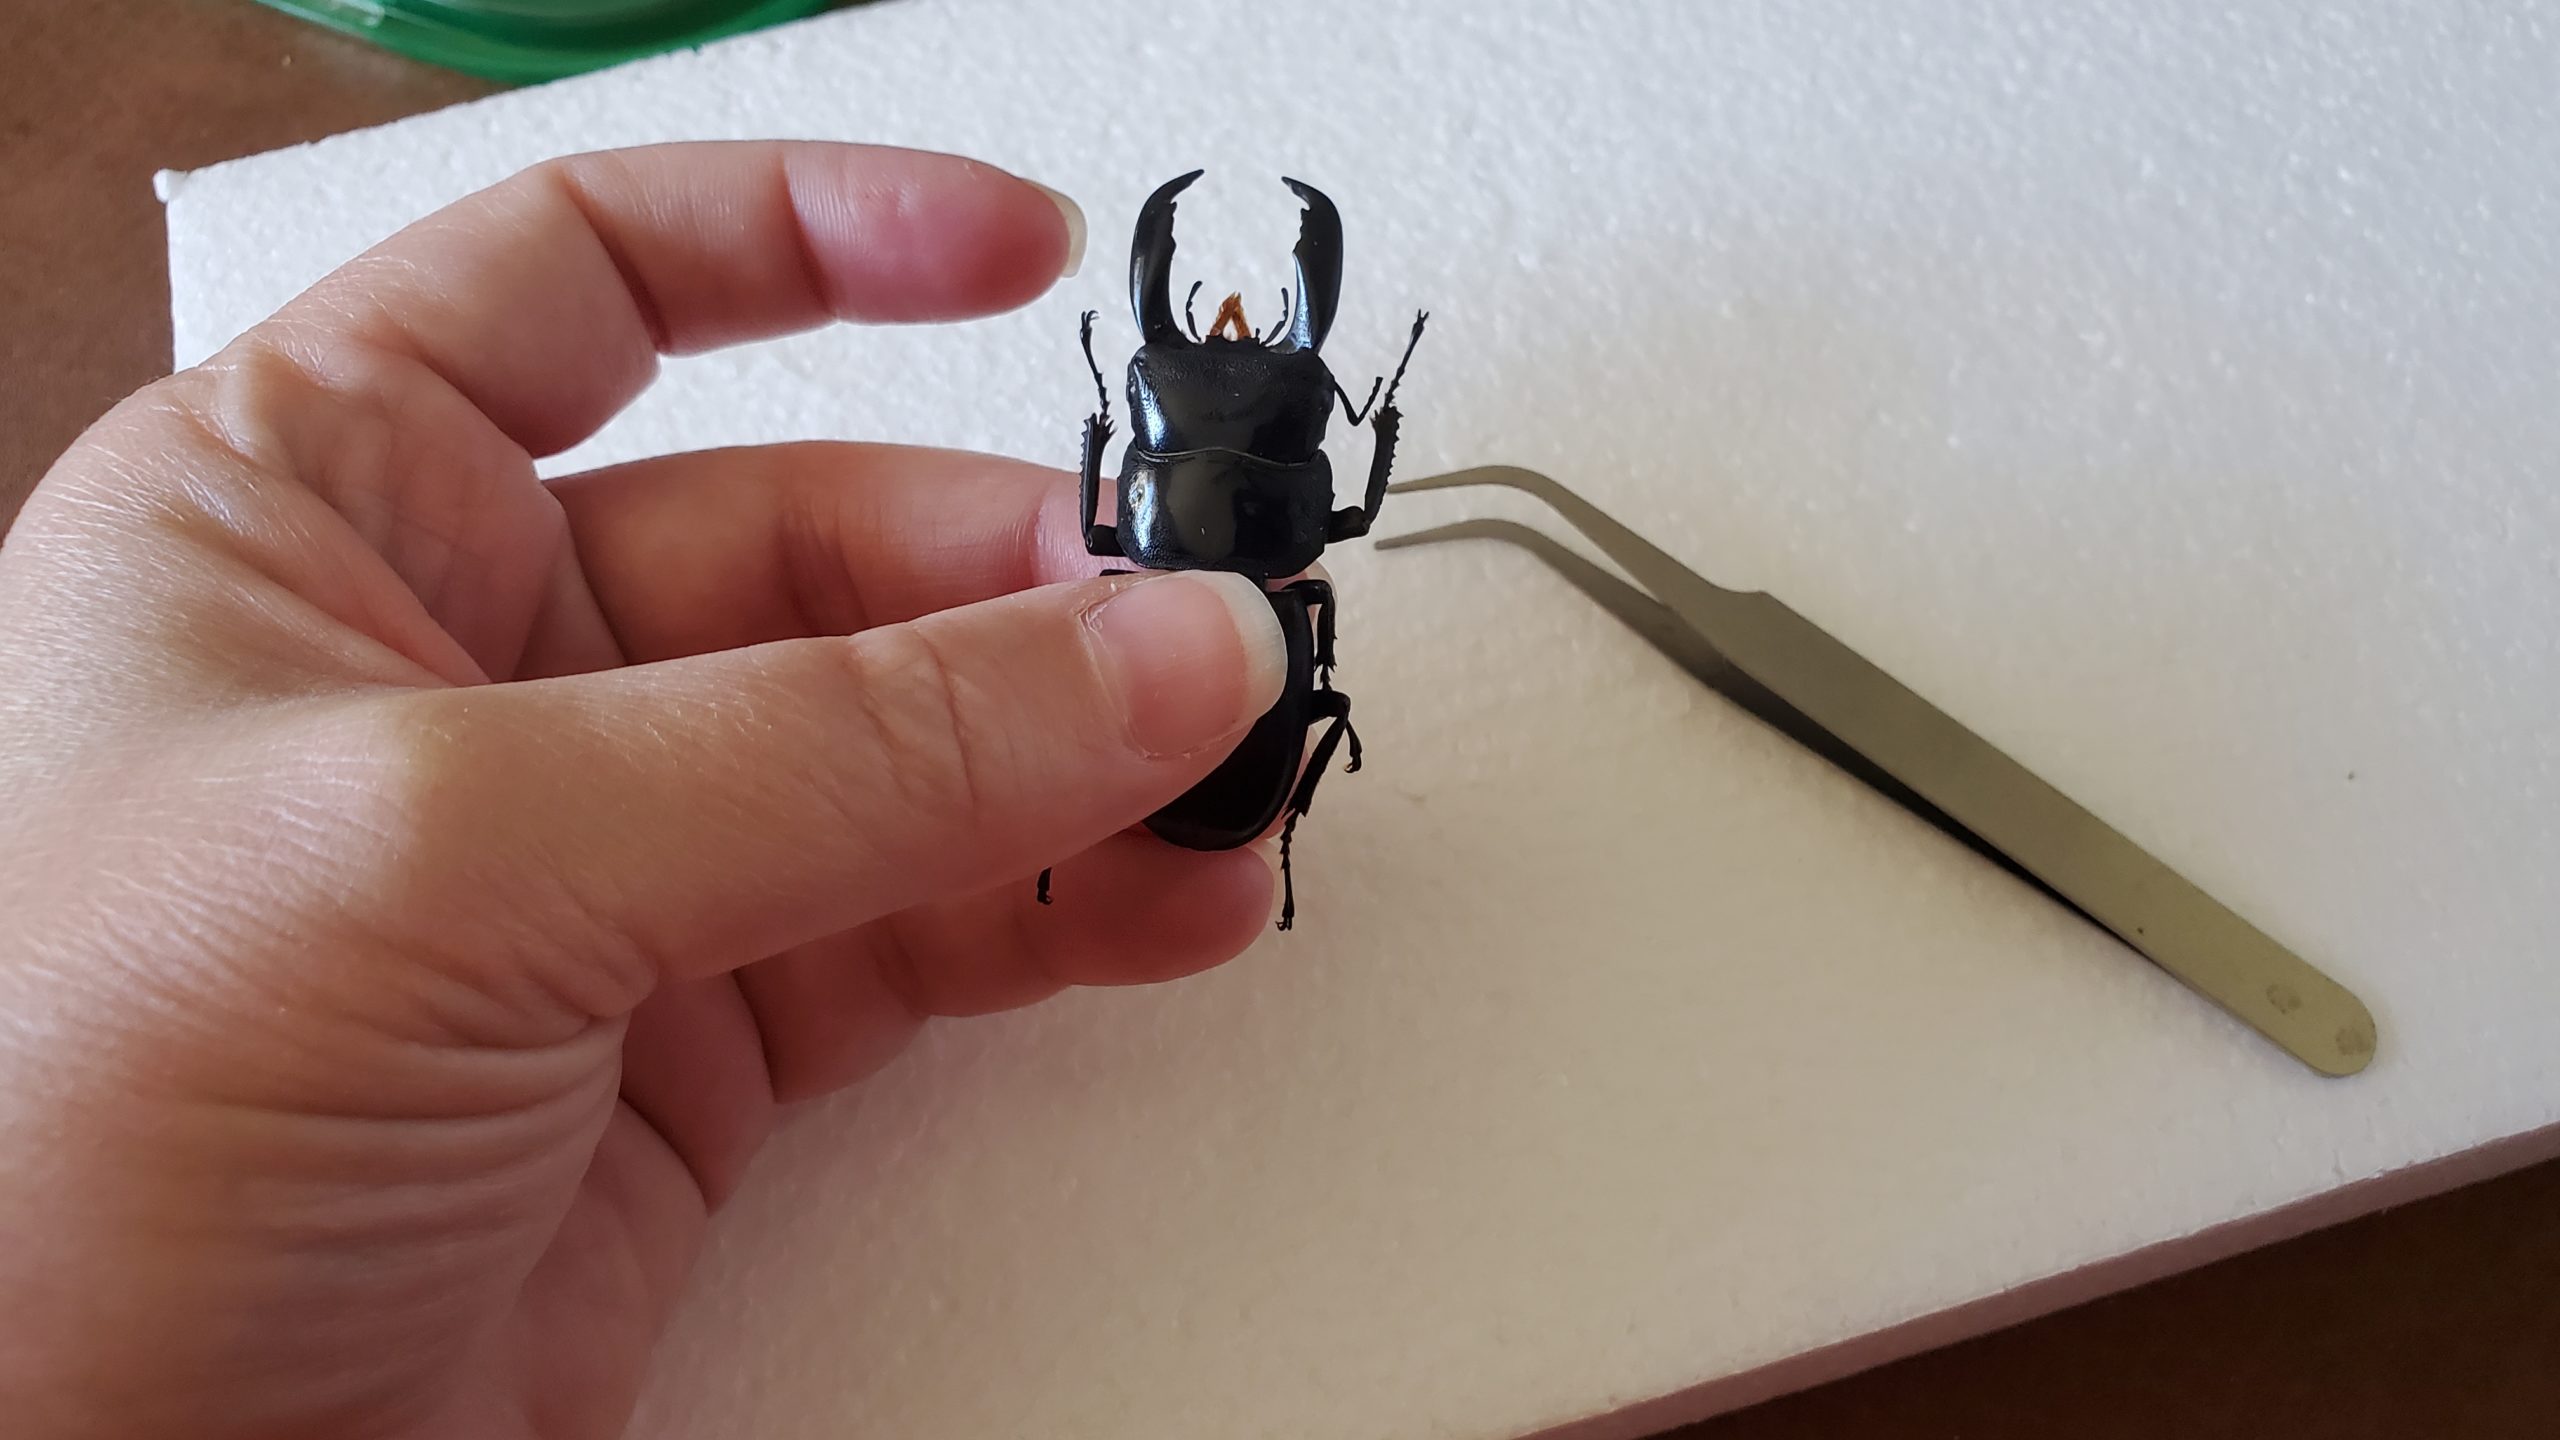
Once the legs are flexible, it’s time to pop open the hard wing covers, called Elytra (see the diagram above). This is the trickiest part of the process, but with a little practice, it isn’t hard. Here’s my technique:
- Hold the beetle by one side of the abdomen with the head pointed downward. Slide your fingernail or tip of the forceps under the Elytra on the side you are not holding, so that you are between the hard outer shell and the rest of the body.
- Securely holding the abdomen, lift the Elytra until it pops; it is almost like popping the hood of a car, with a little resistance until it gives way. You should see the beetle’s wings folded up underneath this structure. The Elytra opens outward on a hinge at the top of the abdomen, just under the thorax.
- Use your fingernail or the forceps to repeat the process for the other Elytra, being careful not to pinch the wings.

When the Elytra are both open, you’re ready to beginning pinning!
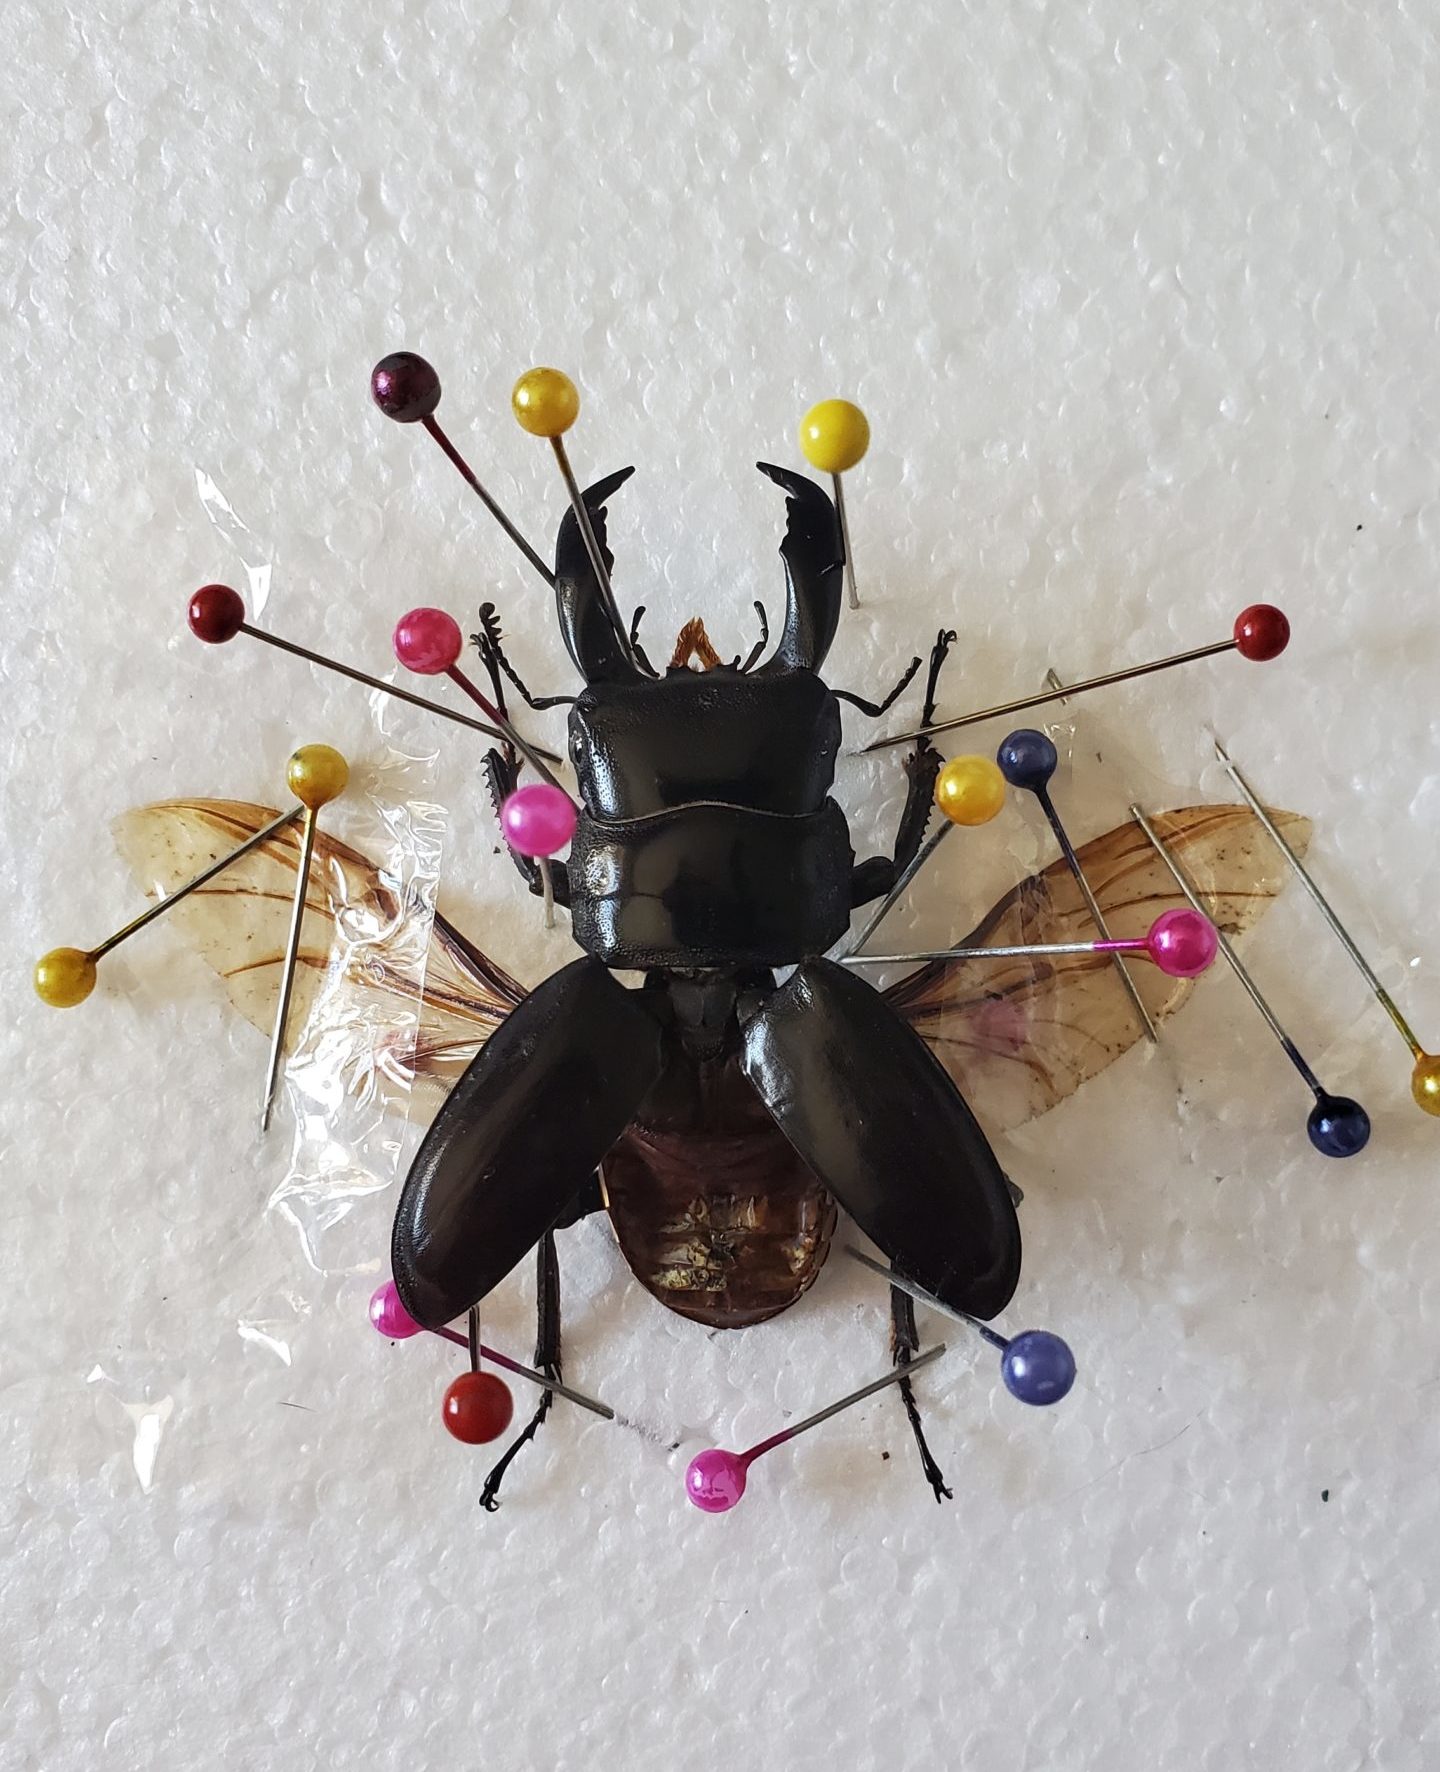
To pin your beetle, place it on the foam block. Use the forceps or tweezers to maneuver the legs into position. The position you choose is a matter of preference, and I base this on how I plan to display the beetle. Sometimes I want it standing up as if walking if I’m doing a terrarium style mount, and sometimes I want it spread in a radiating pattern if I’m placing it in a shadowbox.
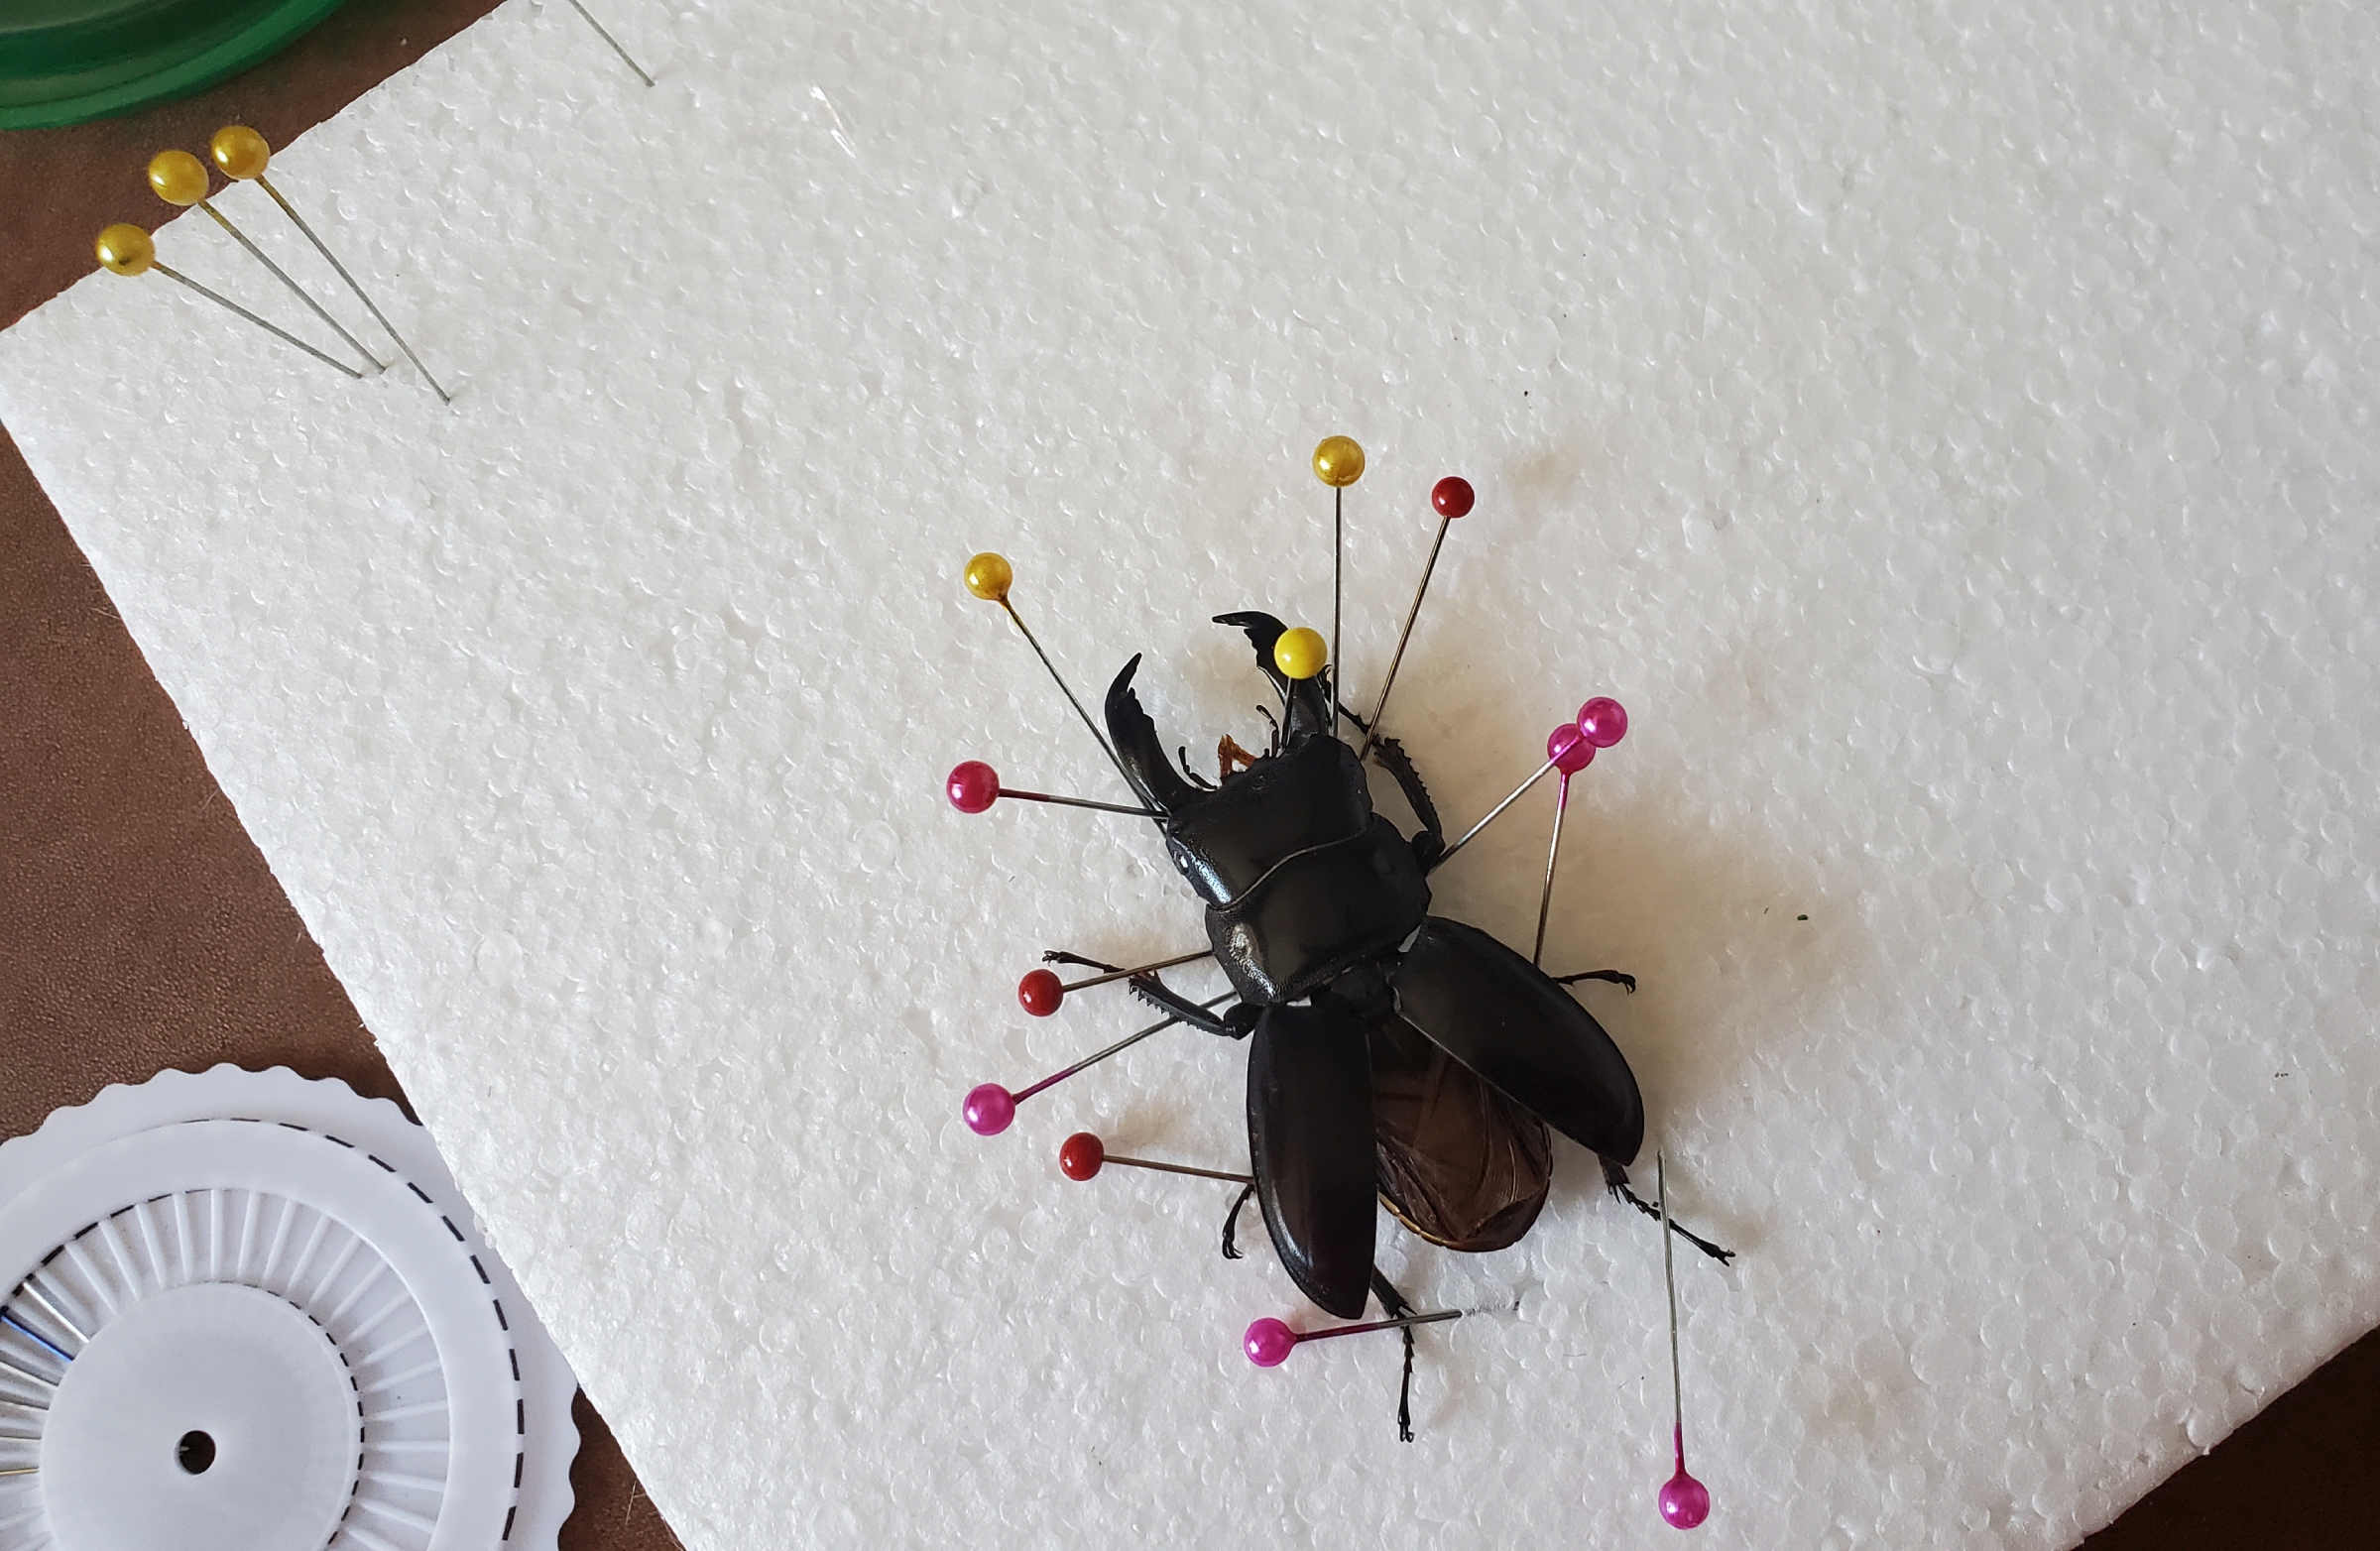
Use straight pins inserted at an angle into the foam to secure the legs in the position you want them to be. You can use additional pins to secure the head or on either side of the body if you need to “brace” it for easier manipulation.
Open the beetle’s wings
Once you’ve got the legs secure, it’s time to open the wings. (Note: sometimes I start pulling the wings out to make sure they will unfold before I begin doing the legs, but it’s best to pin the legs before fully spreading the wings, as they will lay above the legs.)
Using the tweezers or forceps (or your fingers if you prefer), grasp the wings at the central hinge point or place where they fold in half. Gentle pull the wings out to the side under the Elytra until they are fully extended. They should pivot at the point where they connect to the abdomen.
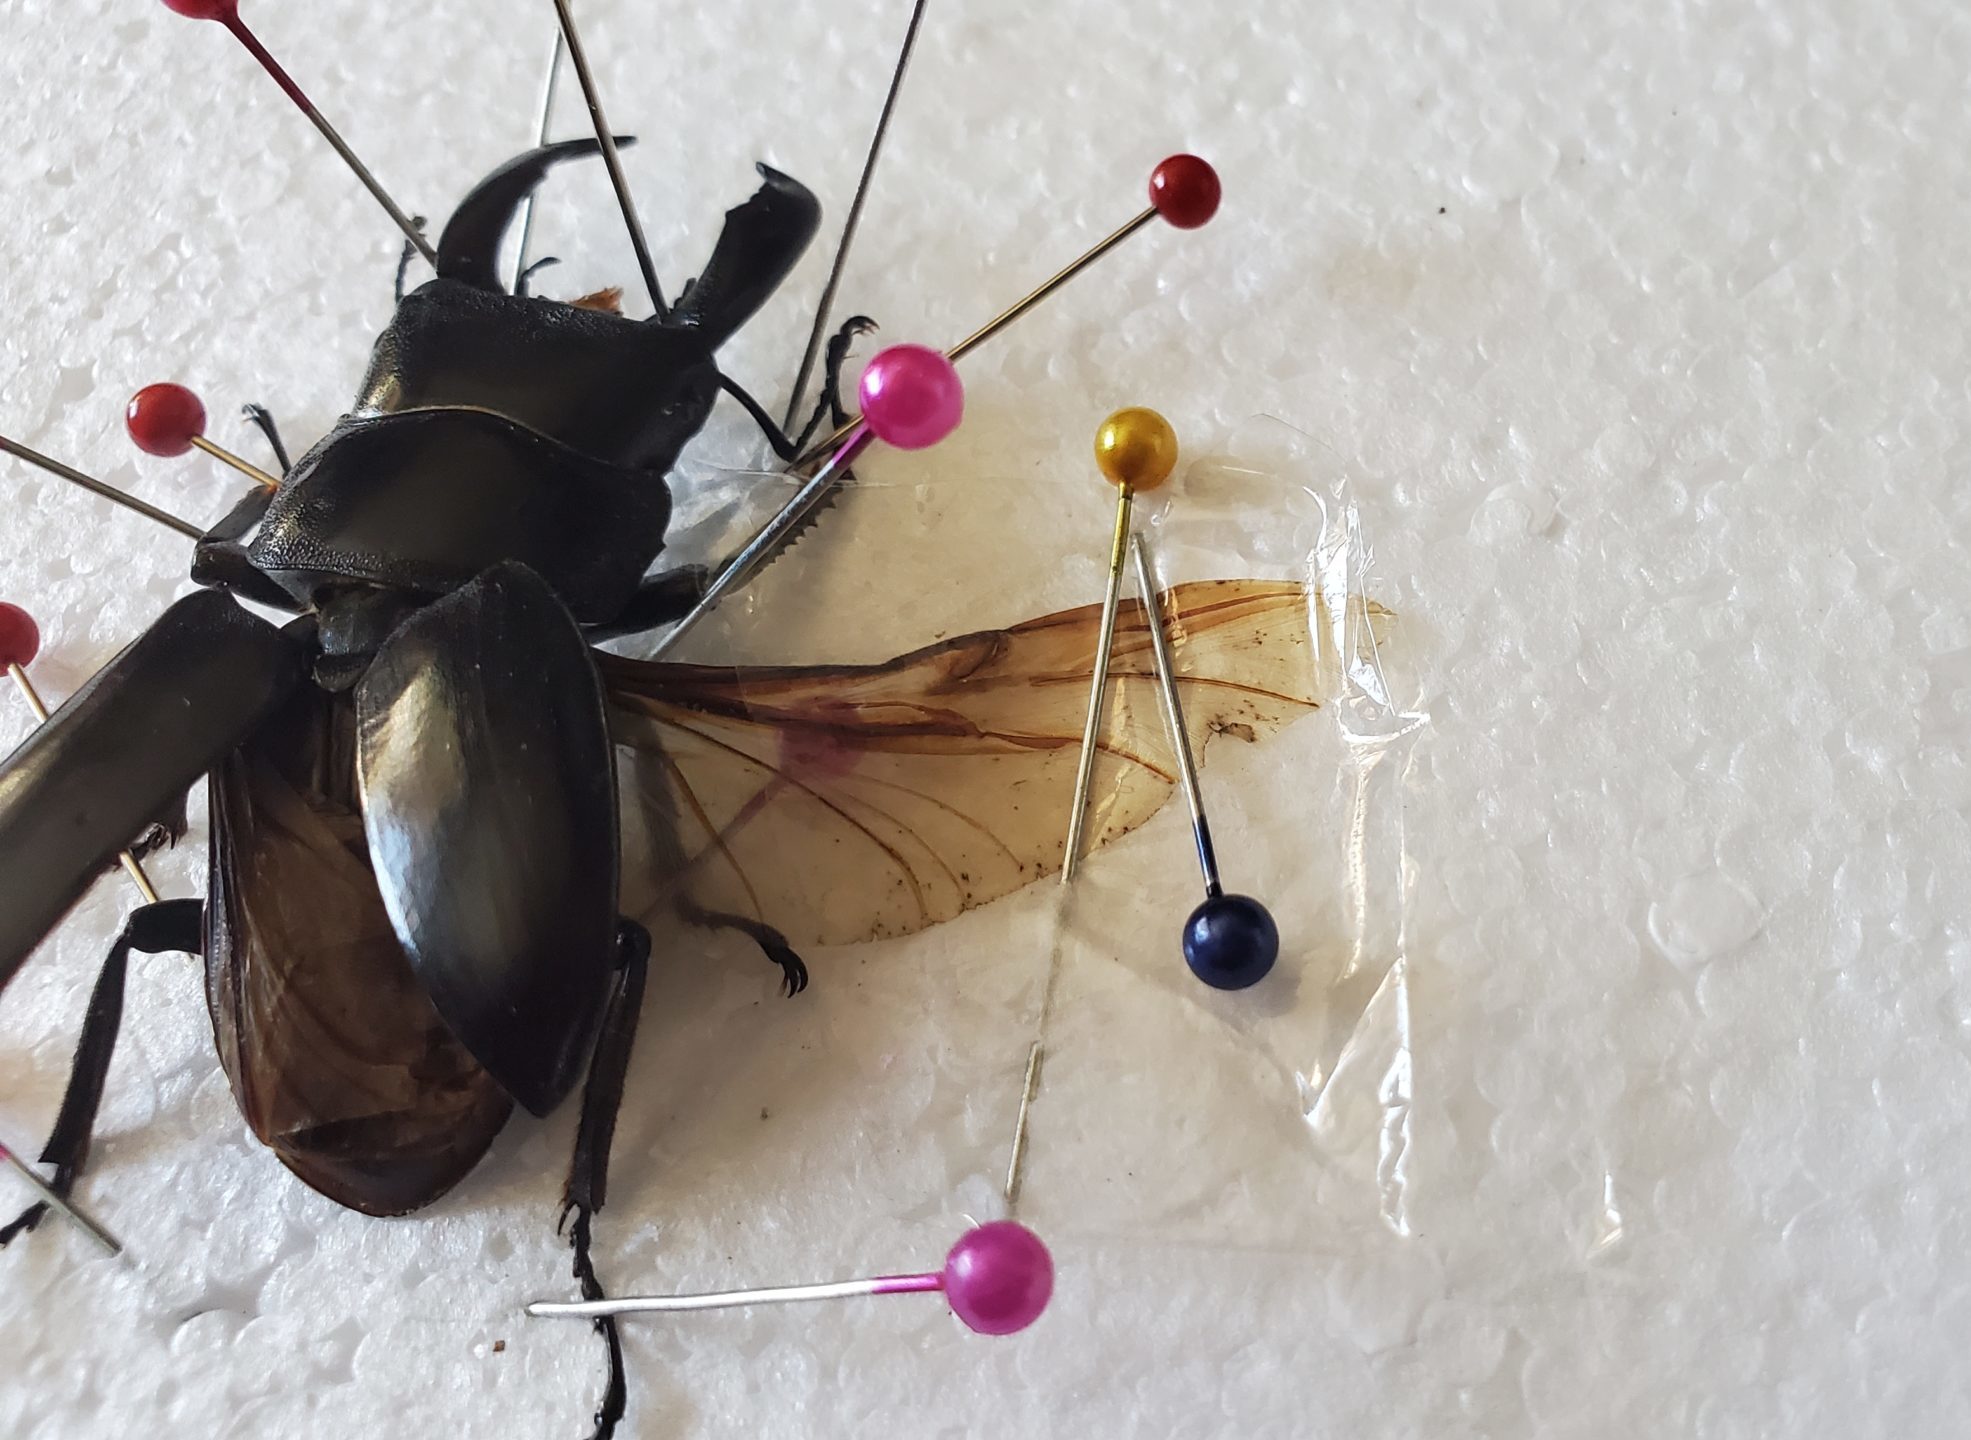
Spread the wings flat. I prefer to pull them more upward so that they actually spread out under the Elytra, but this is a matter of preference. You do you! Make sure the wings are fully extended and can lay flat; you don’t want wrinkles as they can become weak points when dry.
Use the vellum or small plastic wrap pieces to press the wings flat on the foam block. Take 2 or 3 long straight pins and use them to secure the plastic over the wings, being careful not to pierce the wings themselves. Insert the pins at a sharp flat angle into the foam so they lay across the wing. This will hold the wings flat until they are dry.
Drying your beetle
And now the finishing touches: make sure your beetle looks the way you want it to look! Use extra pins to hold it in place if needed, lifting up a leg or nudging a mandible as needed, until you are happy with it.
Let your beetle dry for 24 to 48 hours. Just like hydrating, it takes longer for larger specimens to dry, so give yourself time for that. Once your beetle is fully dry, though, it’s ready for mounting in whatever way you choose! I like to put mine in shadowboxes for easy wall display, or in bell jars with other specimens to create a “scene” as it were.
And that’s it! If you’ve got any questions, feel free to reach out, and happy beetle pinning!
Contributed by Joanna
Joanna is one of the IGGPPC Directors. She is a semi-professional storyteller and dabbling artist with a permanent case of wanderlust. Her hobbies include making whimsical creations like fairy beetles, bad puns, and weird roadside attractions. You can find her on instagram @joannavolavka or joannavolavka.com.

Leave A Comment
You must be logged in to post a comment.