Hiya Iggles! noxy here with today’s IGGPPCamp Challenge! This makes SIX, have you been keeping up? 😀
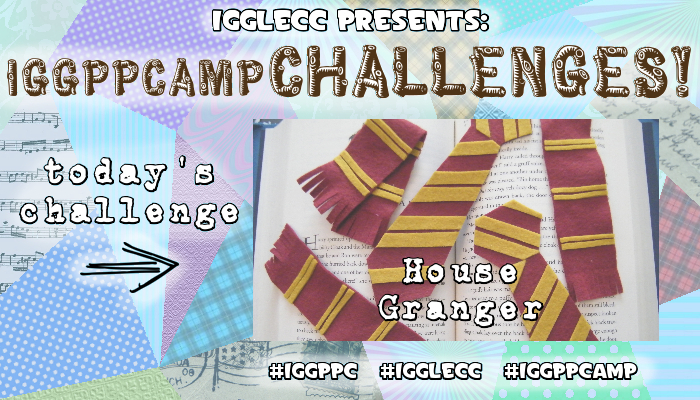
Today’s craft is dedicated to all those House Grangers out there! We’re making some lovely felt bookmarks in the shapes of ties and scarves!
What you’ll need:
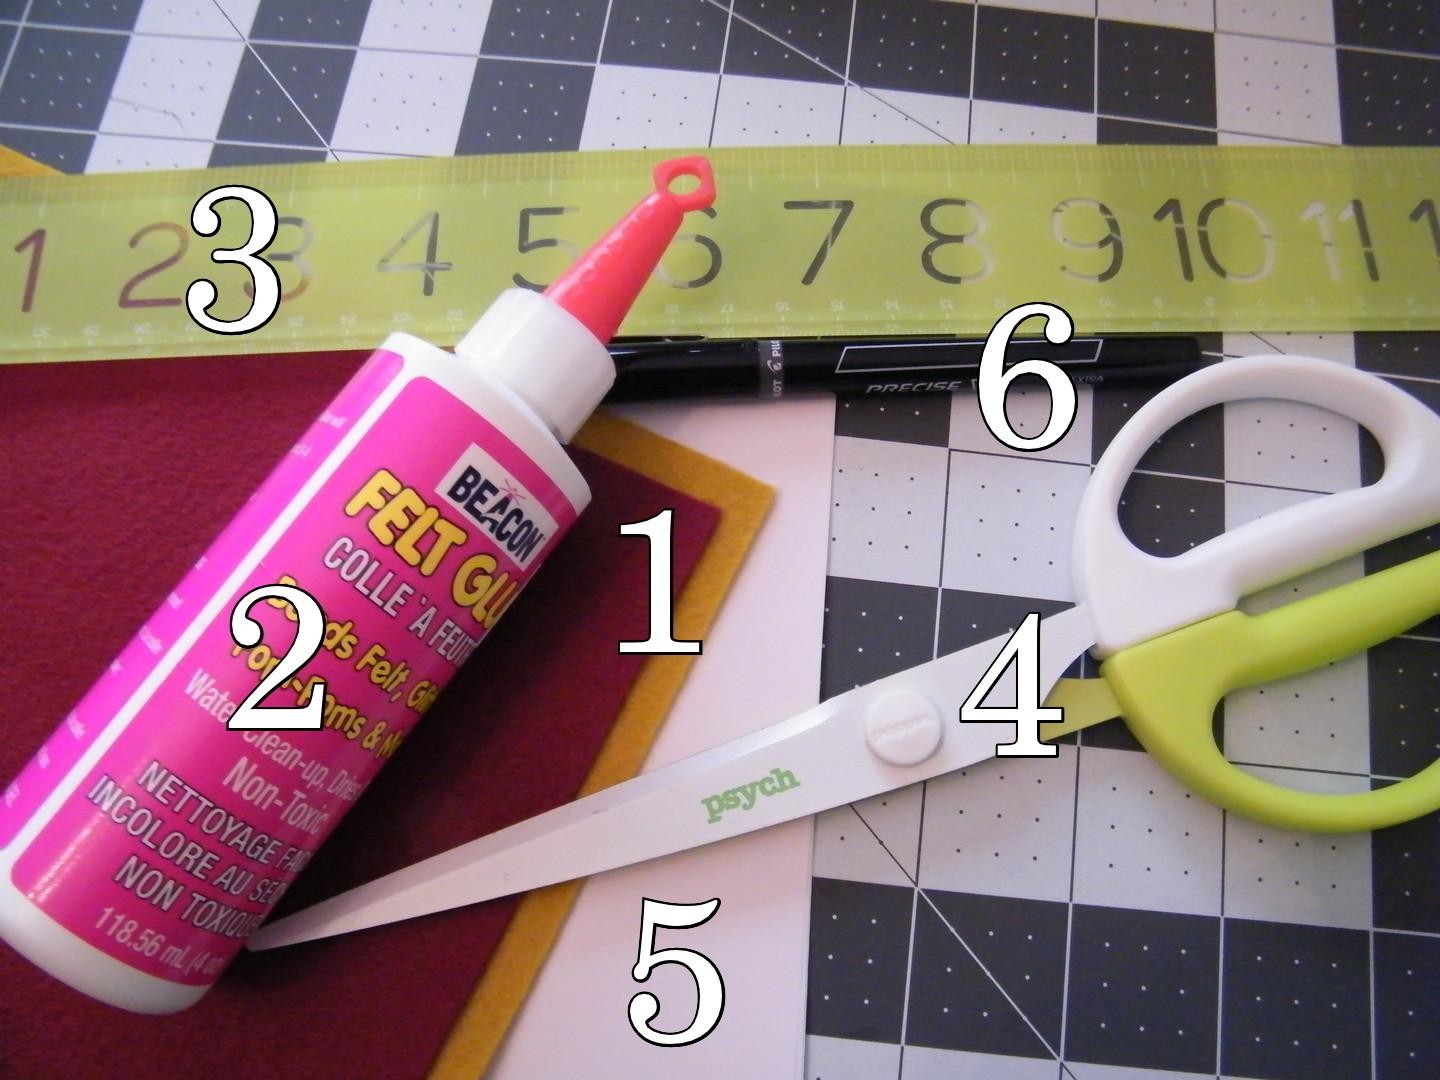
1.) Dark red and gold Felt. (Or other Hogwarts House Colors)
2.) Felt Glue or Craft Glue
3.) Ruler
4.) Scissors
5.) Paper
6.) Pen
Optional: (Not pictured)
7.) Cardboard (Something like a cereal box)
Note on felt: I had difficulty finding an acceptable dark red at a local craft store, so I purchased mine from TheFeltShoppe on etsy. And then I picked a gold there too. The specific color names are Rustic Crimson and Old Gold.
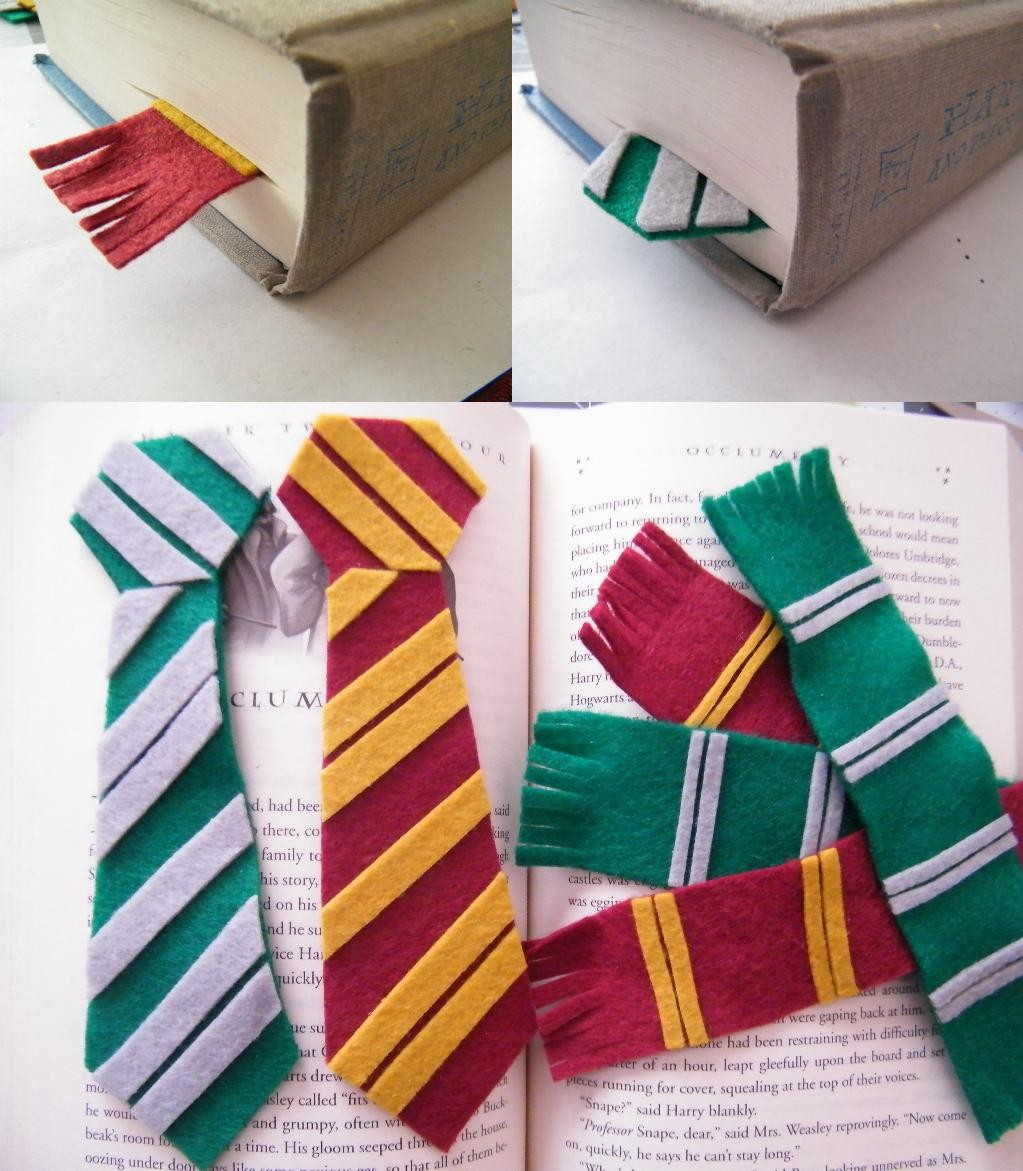
The first thing I did was grab a couple of random bookmarks and a Harry Potter book. I compared the sizes and worked out how big I wanted my bookmarks.
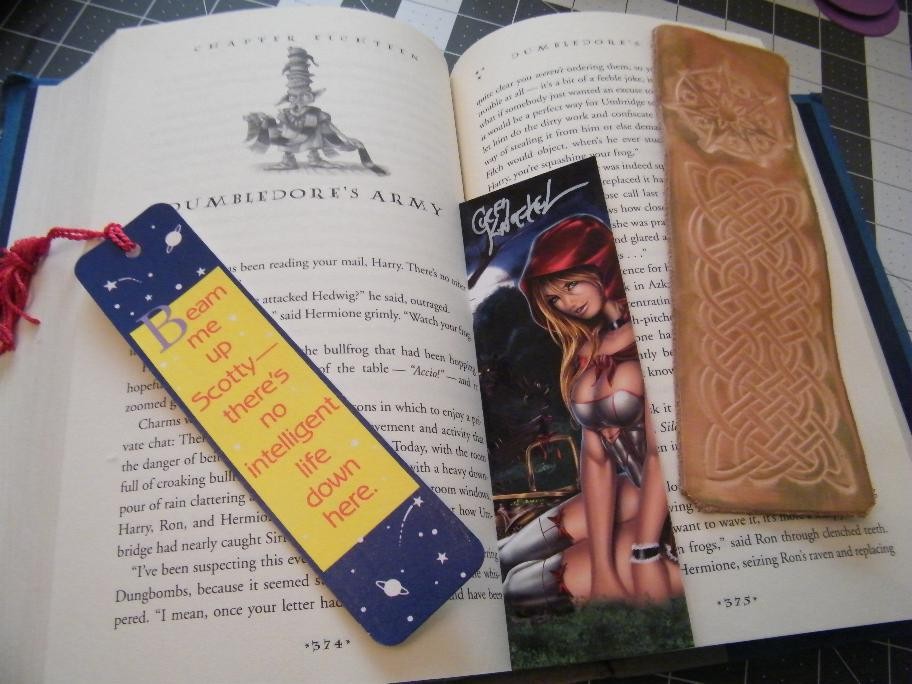
I settled on 7 inches long, but you can use whatever size you’d like.
The scarves…
First was to measure and cut. Again, 7 inches long, and for the scarves I decided on 1 ½ inches in width.

At about ¾ inch on both ends, fold across. The fold is how long the fringe is on the scarves. I eyeballed cutting up the fringe, they average around ½ cm. Stop cutting at the fold, that way you don’t have to leave a mark on your scarf, and the fold will eventually fade away.
Next I cut strips. 8 per scarf, at around ½ cm, and long enough to fit across the scarf. (1 ½ inches) Place them on the scarf before you glue, so you can get your spacing right.
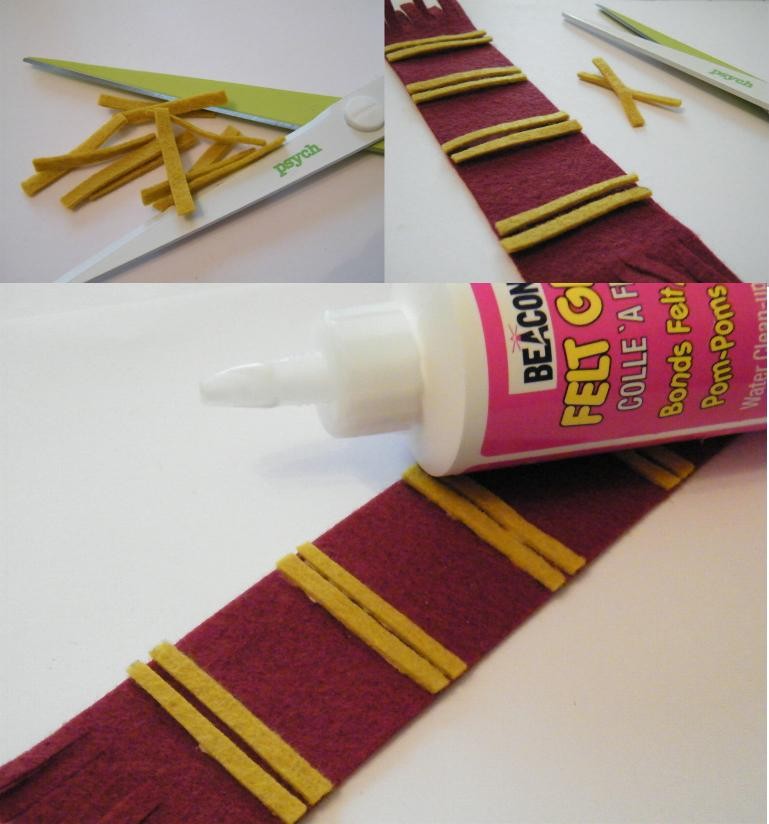
Now glue those suckers down. Whether working with felt glue or craft glue, be sure to apply a generous amount of glue, and don’t push too hard when attaching – otherwise the felt will absorb the glue and the bond won’t be as strong.
That’s all for the scarves! You can either leave them one sided, or add strips to both sides. Just be aware of how thick the bookmark will be inside your book.
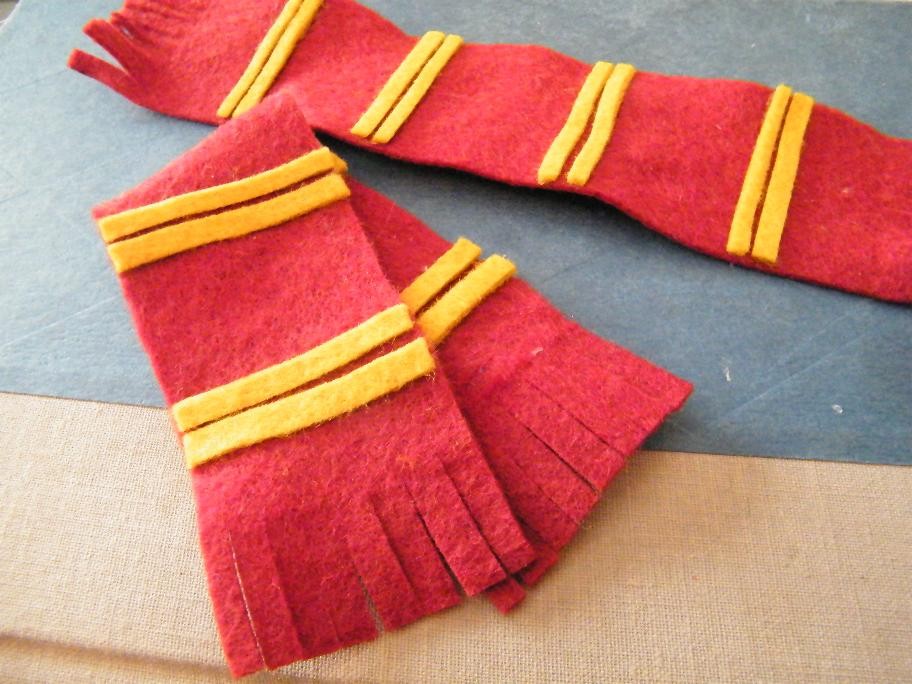
Another suggestion is to give your scarf a tug on some sides, View the parts between the strips as sections. (3 sections) Carefully, hold a side of section 1 with your right finger/thumb, hold the opposite side of section 2 with your left finger/thumb, and tug. Don’t move from section 2, and tug again with your right finger/thumb on section 3. Don’t tug too hard though, because felt is very easy to pull and might rip. This will make it so the scarf doesn’t lie completely flat. (Seen in picture above)
The ties…
To make my tie template, I grabbed a ruler and a pencil. For this tutorial I pulled up MSPaint to draw up approximately what I did. Don’t just print this out and expect it to match up though, because I didn’t draw it in MSPaint exactly. Best if you draw your out own tie.
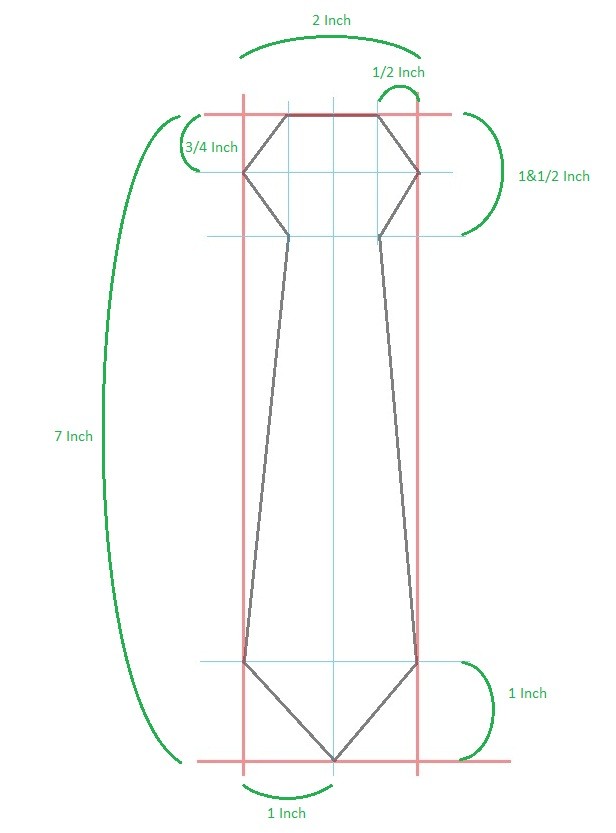
The ties measure 2 inches by 7 inches.
I tried using the paper tie template, but it was a major pain, so I eventually caved and transferred the template to cardboard. The choice is yours.
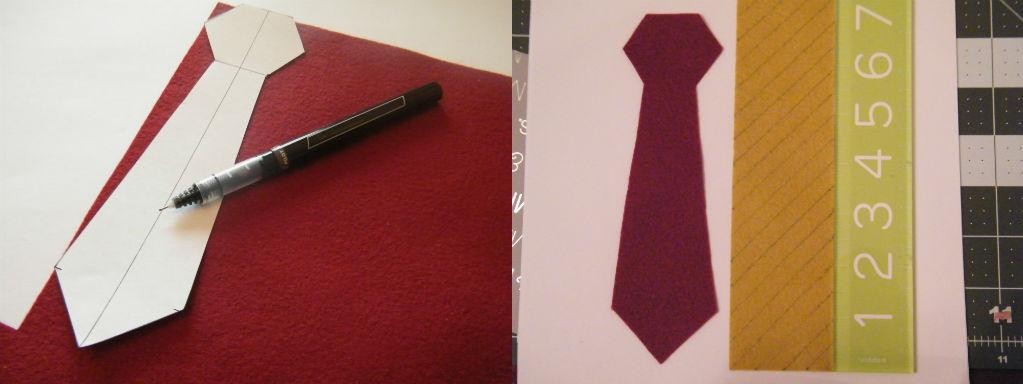
The strips for the tie are about ½ inch wide. I was trying to make the most of my Old Gold felt sheet, (I only bought one) so to do the strips for the tie, I cut a 2 inch by 7 inch piece of felt, then made ½ inch strips all the way up, at the same diagonal as the bottom of the tie.
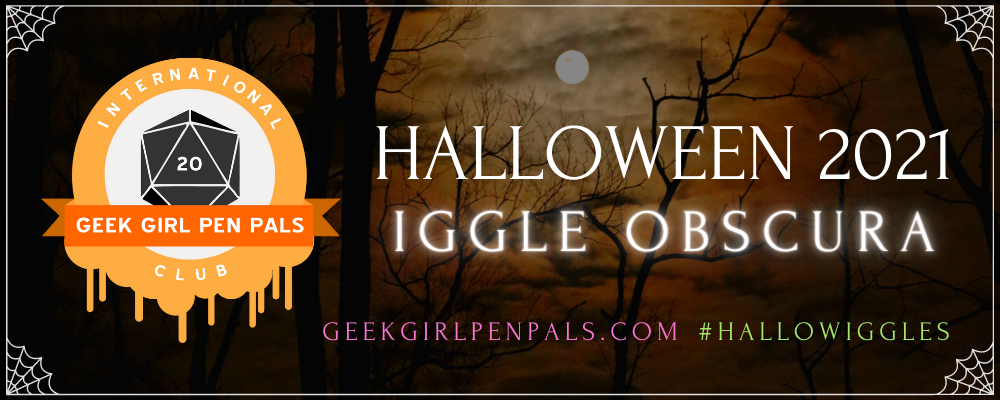
Then I placed the strips and glued. When you look at a Hogwarts tie, the diagonal is usually a certain way, then – because of the knot – the diagonal switches directions. There’s another Hogwarts tie style that you can also use for your bookmark, if you’d rather. I just prefer these.
Again, be sure to place them before you glue to make sure you have your spacing right.
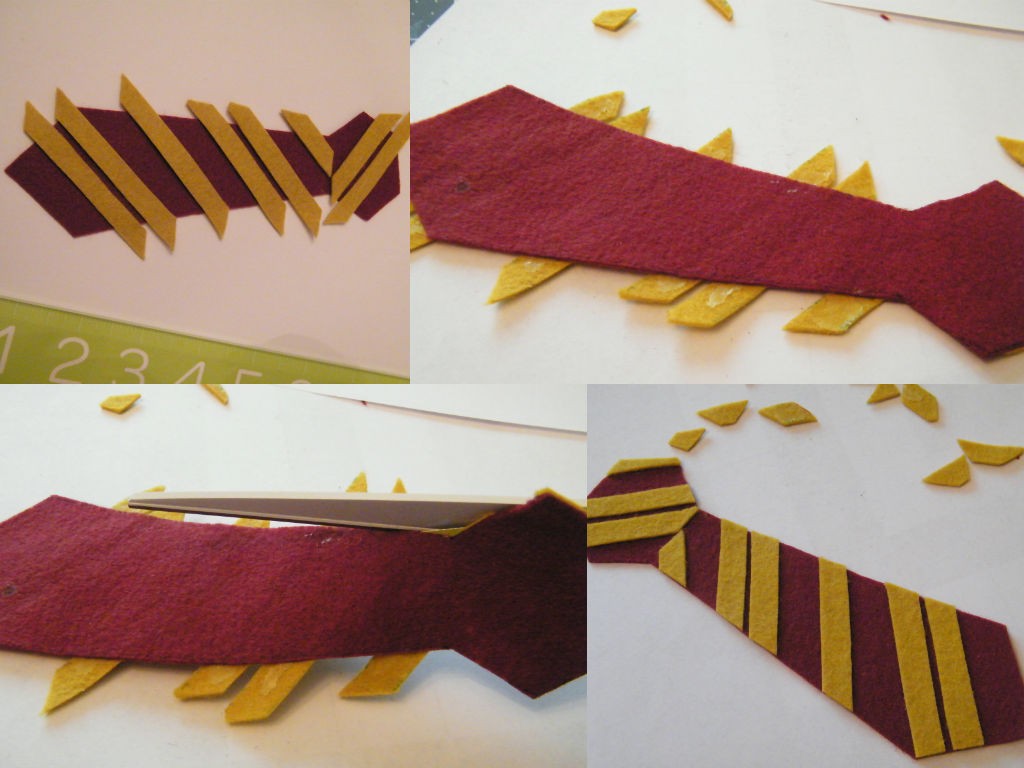
Once the strips are glued down, I flipped the ties over and used the red as the guideline to trim the gold.
And there you have it! Of course, Pottermore sorted me in to Slytherin, so I had to make some Slytherin ties and scarves as well.
You can choose whichever house you’d like to make these scarves or ties. I think they’re adorable and fairly simple to make. 🙂
I hope you’ve enjoyed today’s challenge and that you give it a try yourself! If you do, an achievement awaits!! Enter craftclub6 to get your Camp Challenge Granger achievement, and please don’t forget to share your pics via twitter and hashtags #IGGPPCamp and #IggleCC! You can also post your pics on the forum here.
[…] of our favorite things we’ve seen so far are these adorable DIY Harry Potter bookmarks. The tutorial gives instructions on how to emulate your Hogwarts house in tie or scarf […]