
Want to showcase your favorite constellation? Want to create new ones? Either way, this will let you show them off to all your penpals in postcard form!
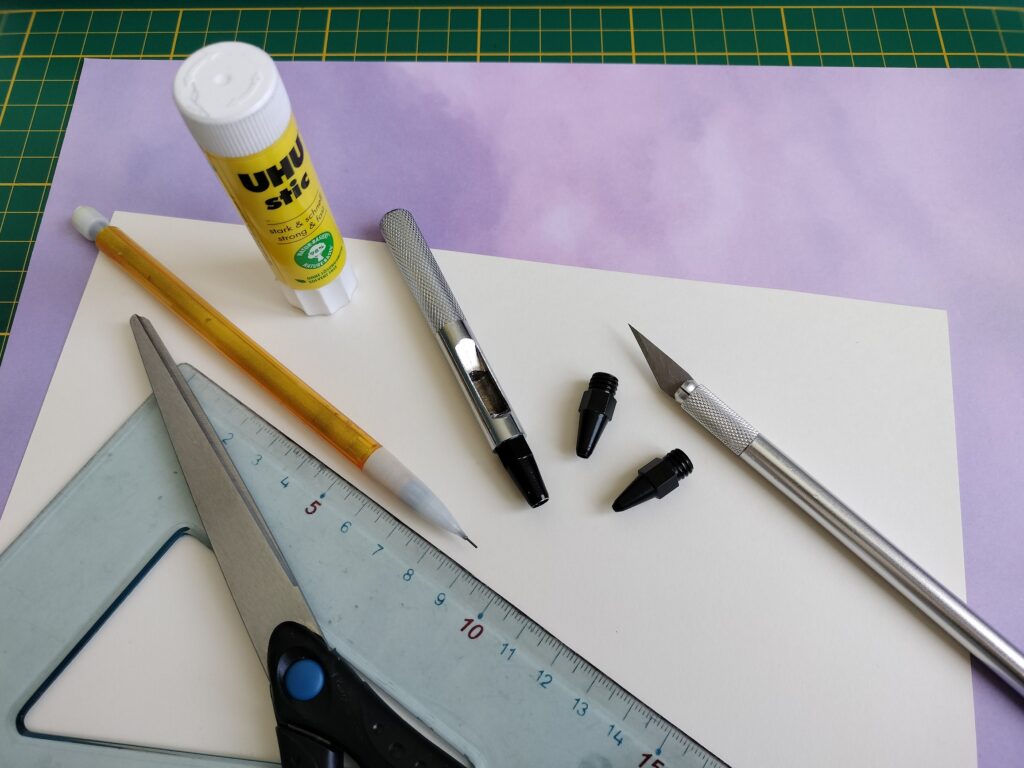
Supplies:
- White or light-colored cardstock
- dark paper (blue or black, textured or plain)
- hole puncher, nails or anything else that can make holes through paper, preferably in different sizes
- scissors
- glue
- a craft knife
- a pen or marker
- Optional: glitter, paint, masking tape, or anything else you might want to add to your card.
Instructions:
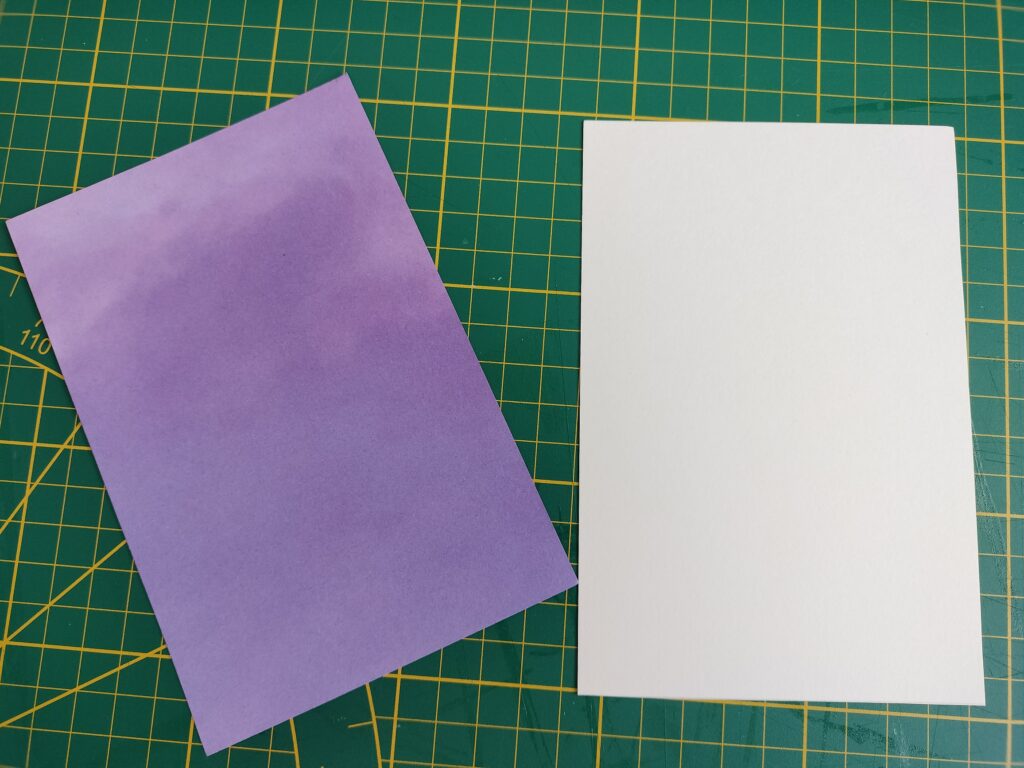
Step 1 – Cut both of your layers in the format you want (I did 10×15 cm. The light-colored layer will be both the back of your postcard and the color your stars will be. The other one will be the night sky, the one you’ll punch holes through. I picked a cloudy purple sky and an off-white bottom layer, but you could go with plain colors or a higher contrast.
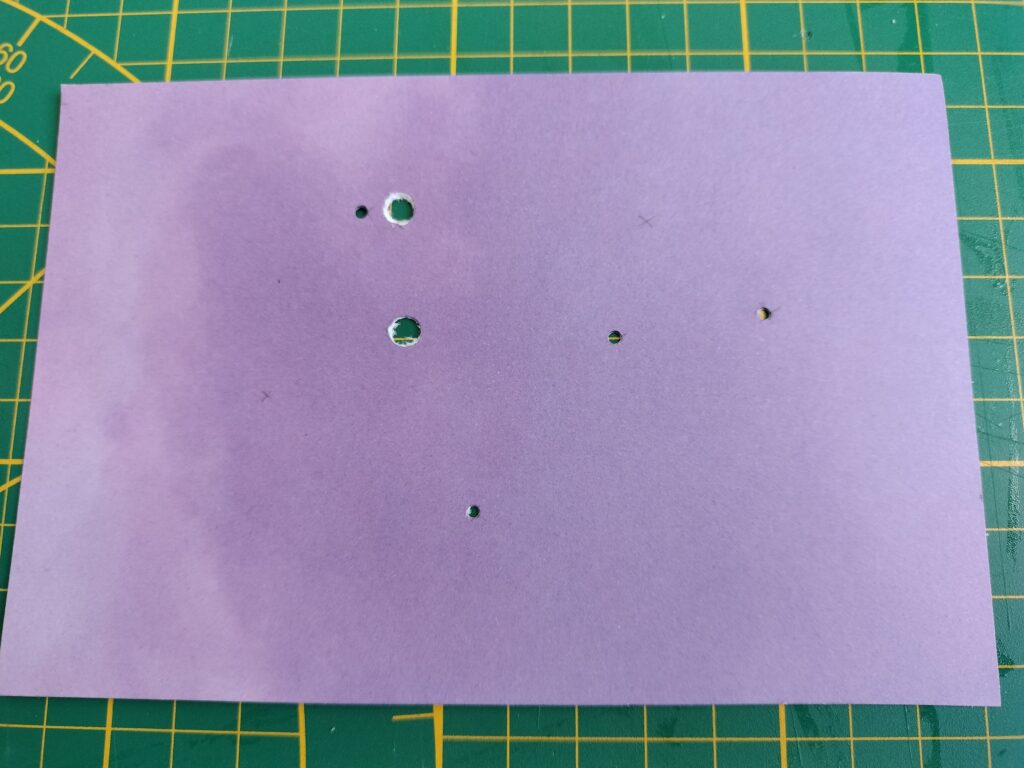
Step 2 – Decide where the stars will be and mark them on the upper layer if you need to. I like to place stars at random and see what shape it creates. Then start punching holes in the upper layer to create the stars. I have a hole puncher with three different (with the bigger one being too big to my taste), but pretty much anything will do as long as the holes are big enough to see the bottom layer through.
Step 3 – To make the constellation’s shape more apparent, you can cut very thin strips of paper between the stars to create lines. Be careful not to completely cut out part of the upper layer! If that does happen, you’ll just have to be more careful once you glue everything together.
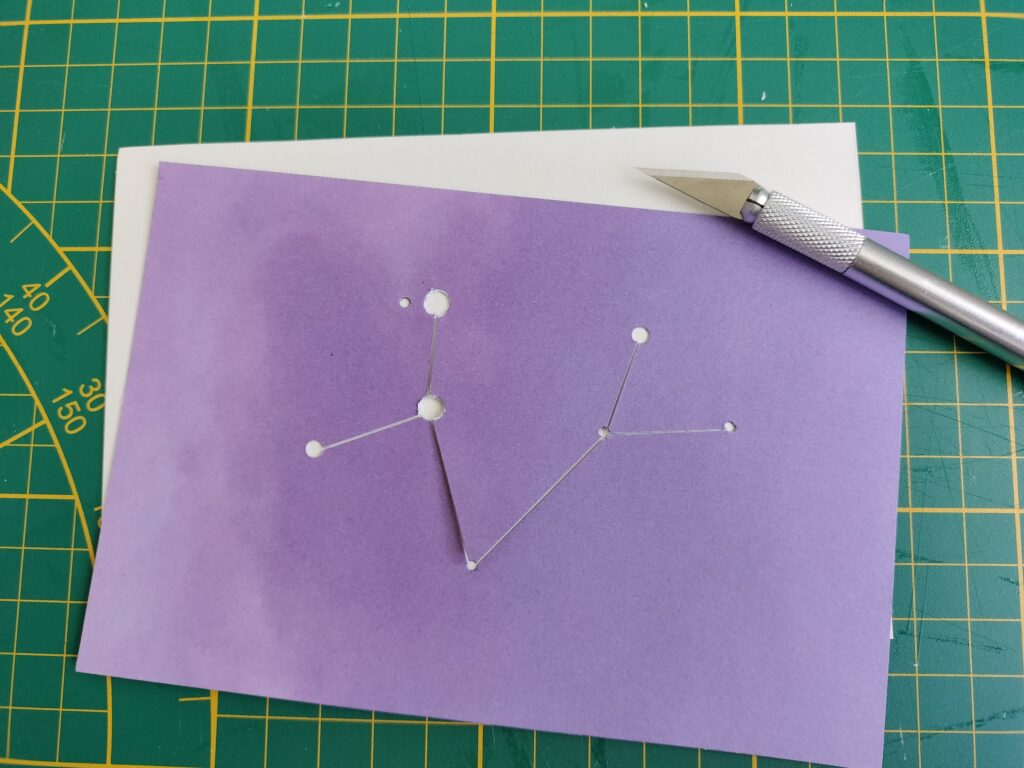
You can add a subtle touch of color to some of the stars with a pencil, coloring on the bottom layer where the star will be. You can also make the whole thing pop by adding some words, glitter, a border… anything that frames your constellation nicely!
Step 4 – glue the upper layer onto the bottom one, cutting the edges a bit if the layers don’t fit together perfectly. I usually wait until I’m done with that to make a “proper” postcard backing with a few lines, and maybe draw a stamp in a corner.
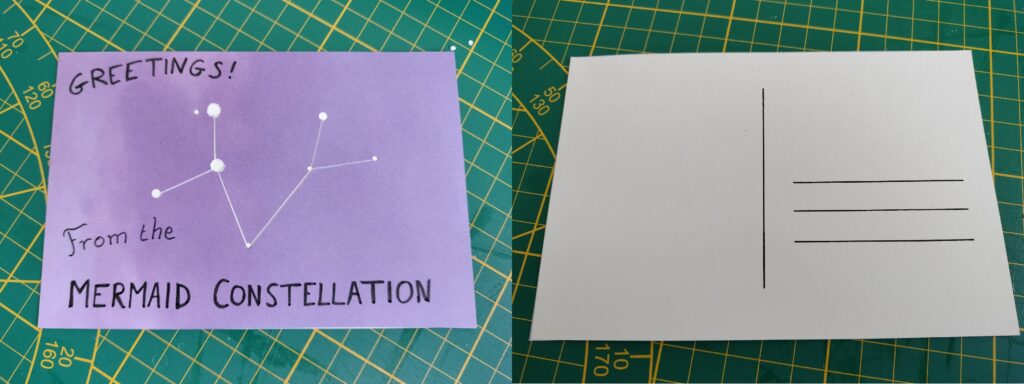
Ta-daaa, now you too can look at the stars no matter the time of day (or night)! Gutter fully optional.
Hosted by: Dale
Lacking the funds to become a proper space pirate, Dale AKA Doc Von Ondine/Camper Harlock has settled for annoying everyone in their vicinity with heavy metal music, garish shirts and increasingly weird questions. If they’re not singing or spouting animal facts, beware: they might be eating your food.
