I love IGGPPCamp and the memories and friends I’ve made here through the years. I also love crafts. That’s why after years of enjoying camp crafts, this year I’ve prepared one for you all: Thread Art! I hope you like it.
Thread Art Shenanigans Supplies:
- 16 st count Aida cloth 15x15cm (vers1) or 23x23cm (vers 2) that’s 6x6inches or 9x9inches.
NOTE: If you’re using another kind of Aida cloth your measurements will be different. That is for the finished product, you may need a bigger cloth depending on your hook size. Do not cut your fabric in a rush. - Embroidery floss or perle cottons in colours of your liking
- A blunt needle (the ones for cross-stitch)
- Scissors
- Watercolours and brushes
- A heat erasable pen, like the frixion ones (optional)
- Small beads, sequins, ribbons, odd pieces of yarn, tiny buttons… (optional)
- Some cardboard, the cereal box kind will work fine (optional)
- A 13cm hoop (that’s the size I’ve used, you can use a bigger or smaller one) to display your craft (optional)
- A bigger hoop to hold the fabric while you work (I’ve used a 15cm one) (optional)
Thread Art Shenanigans Instructions:
Find the centre point of your fabric by folding it in two first vertically, then horizontally. Mark that hole with a bit of spare thread. This point is marked with a blue cross in the design.
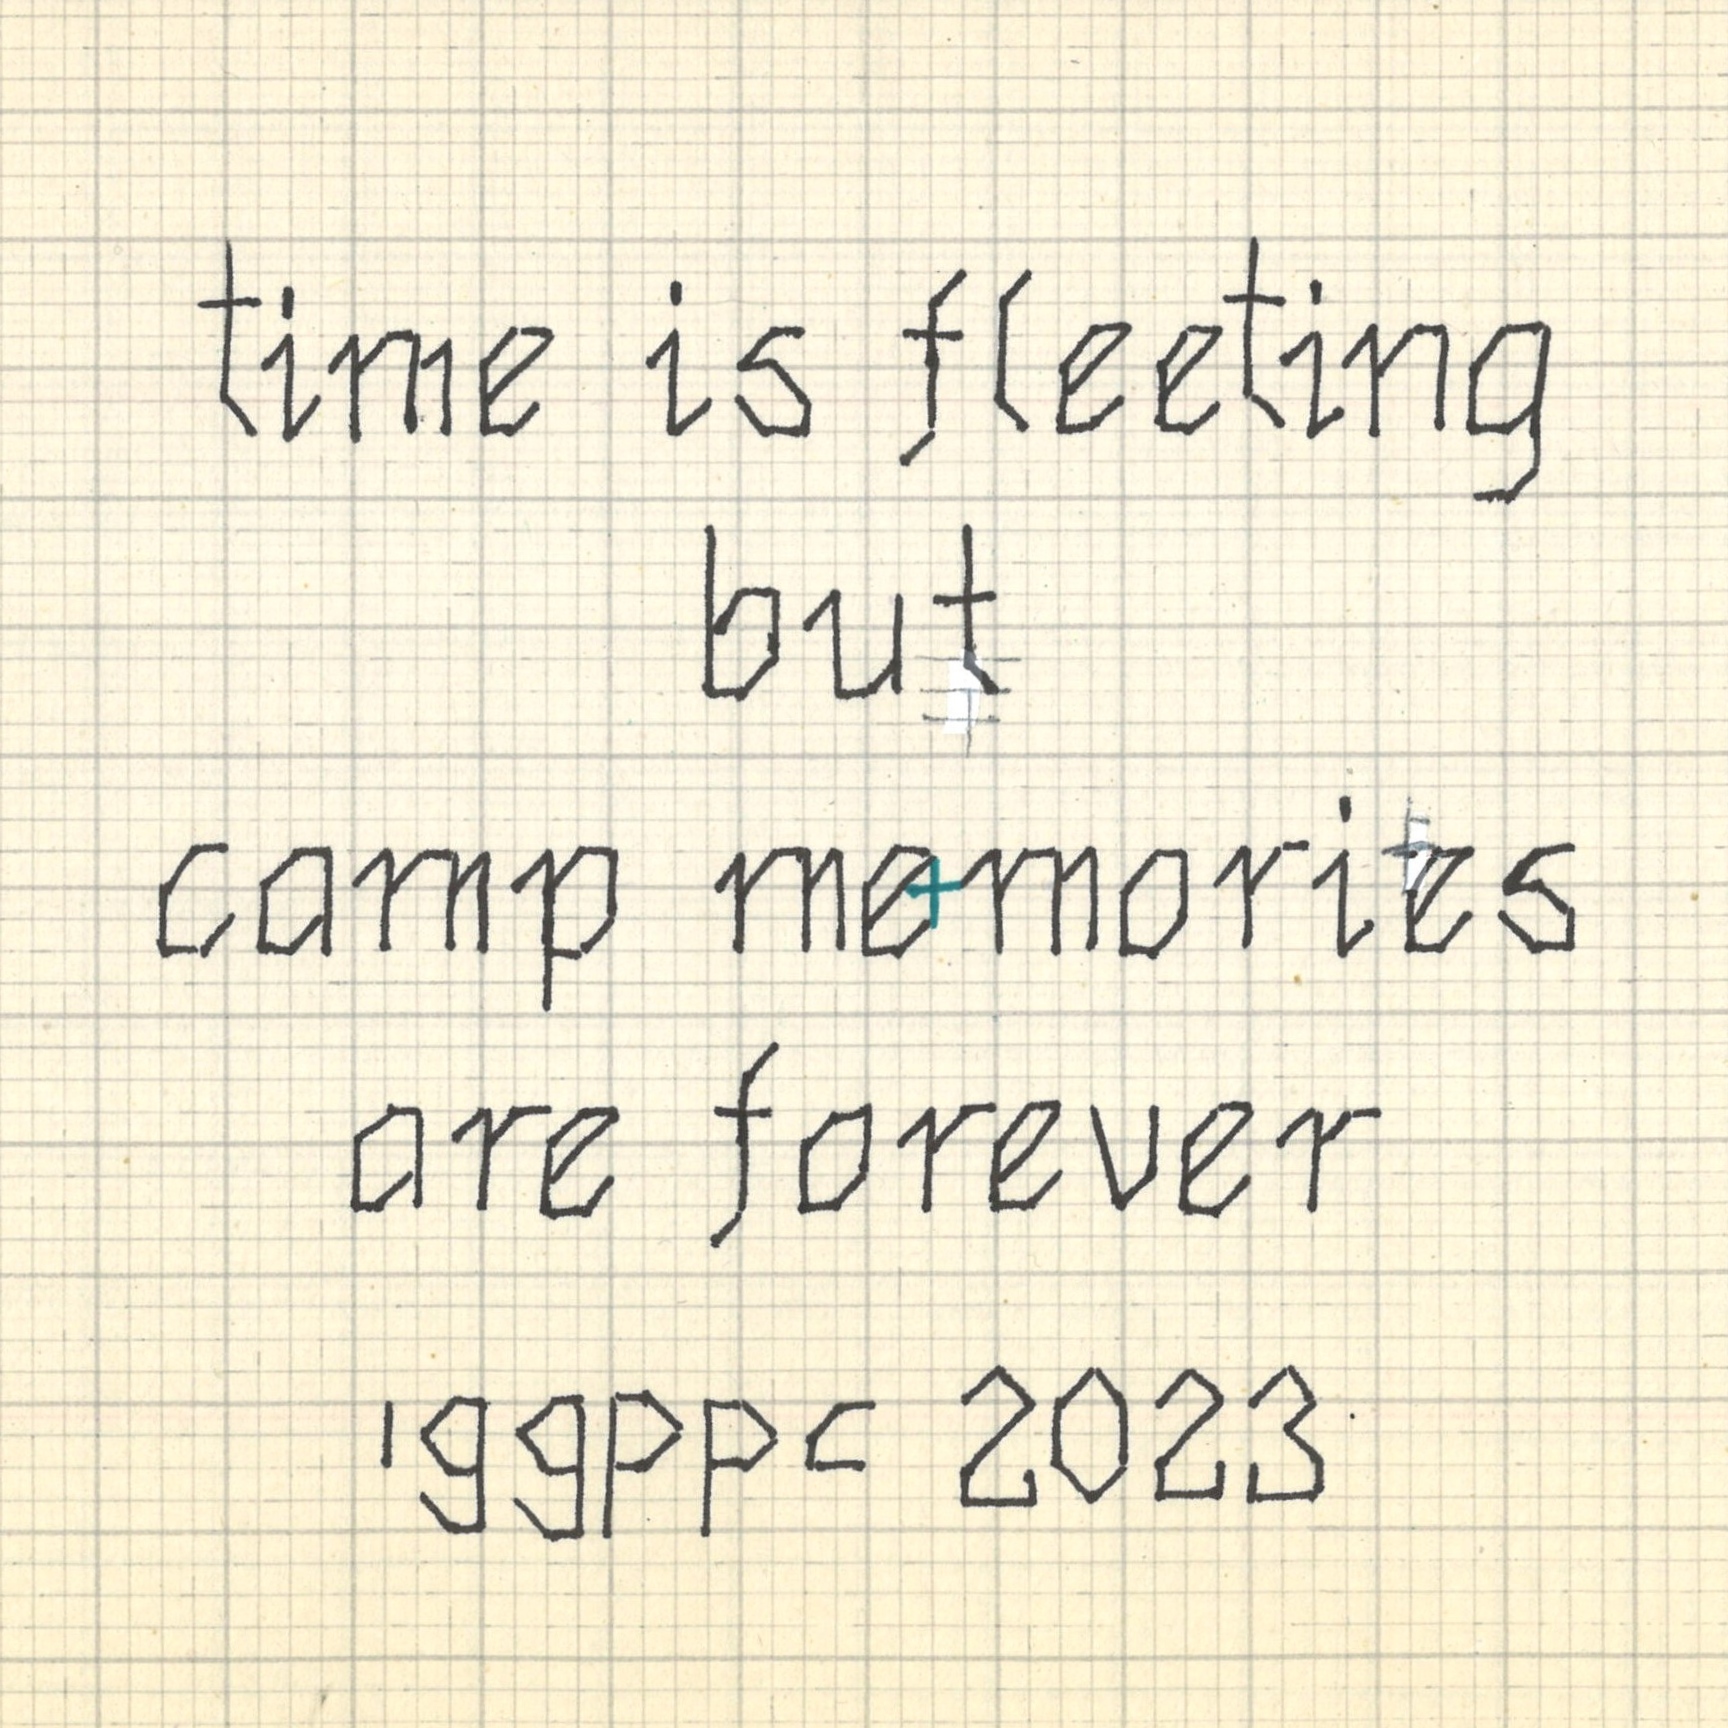
With your thread of choice (better if it’s dark) “write” the words on your fabric. The embroidery stitch used is called back stitch.
Once you’re done stitching, you can stop there OR you can play with your watercolours.
You can do an all over pattern or add colour in a circle around the words. Start by adding water to the area you want to paint. Then add diluted watercolours to that area as you see fit. Just go with the flow and enjoy the process!
If you have too much paint in one spot use a tissue paper to take it out. Don’t dab, just let the paper touch the fabric and capillarity will do the rest.
Let it air dry, or if you’re impatient, use a hairdryer with precaution. Ironing the fabric now is optional but recommended.
You can stop here OR you can add bling to it. Sequins, buttons, ribbons, wee beads, shiny thread…
Do an all-over pattern over your all-over watercolours OR add bling just to your circular painted area. You can also add random cross-stitches or French knots. Let your imagination fly!
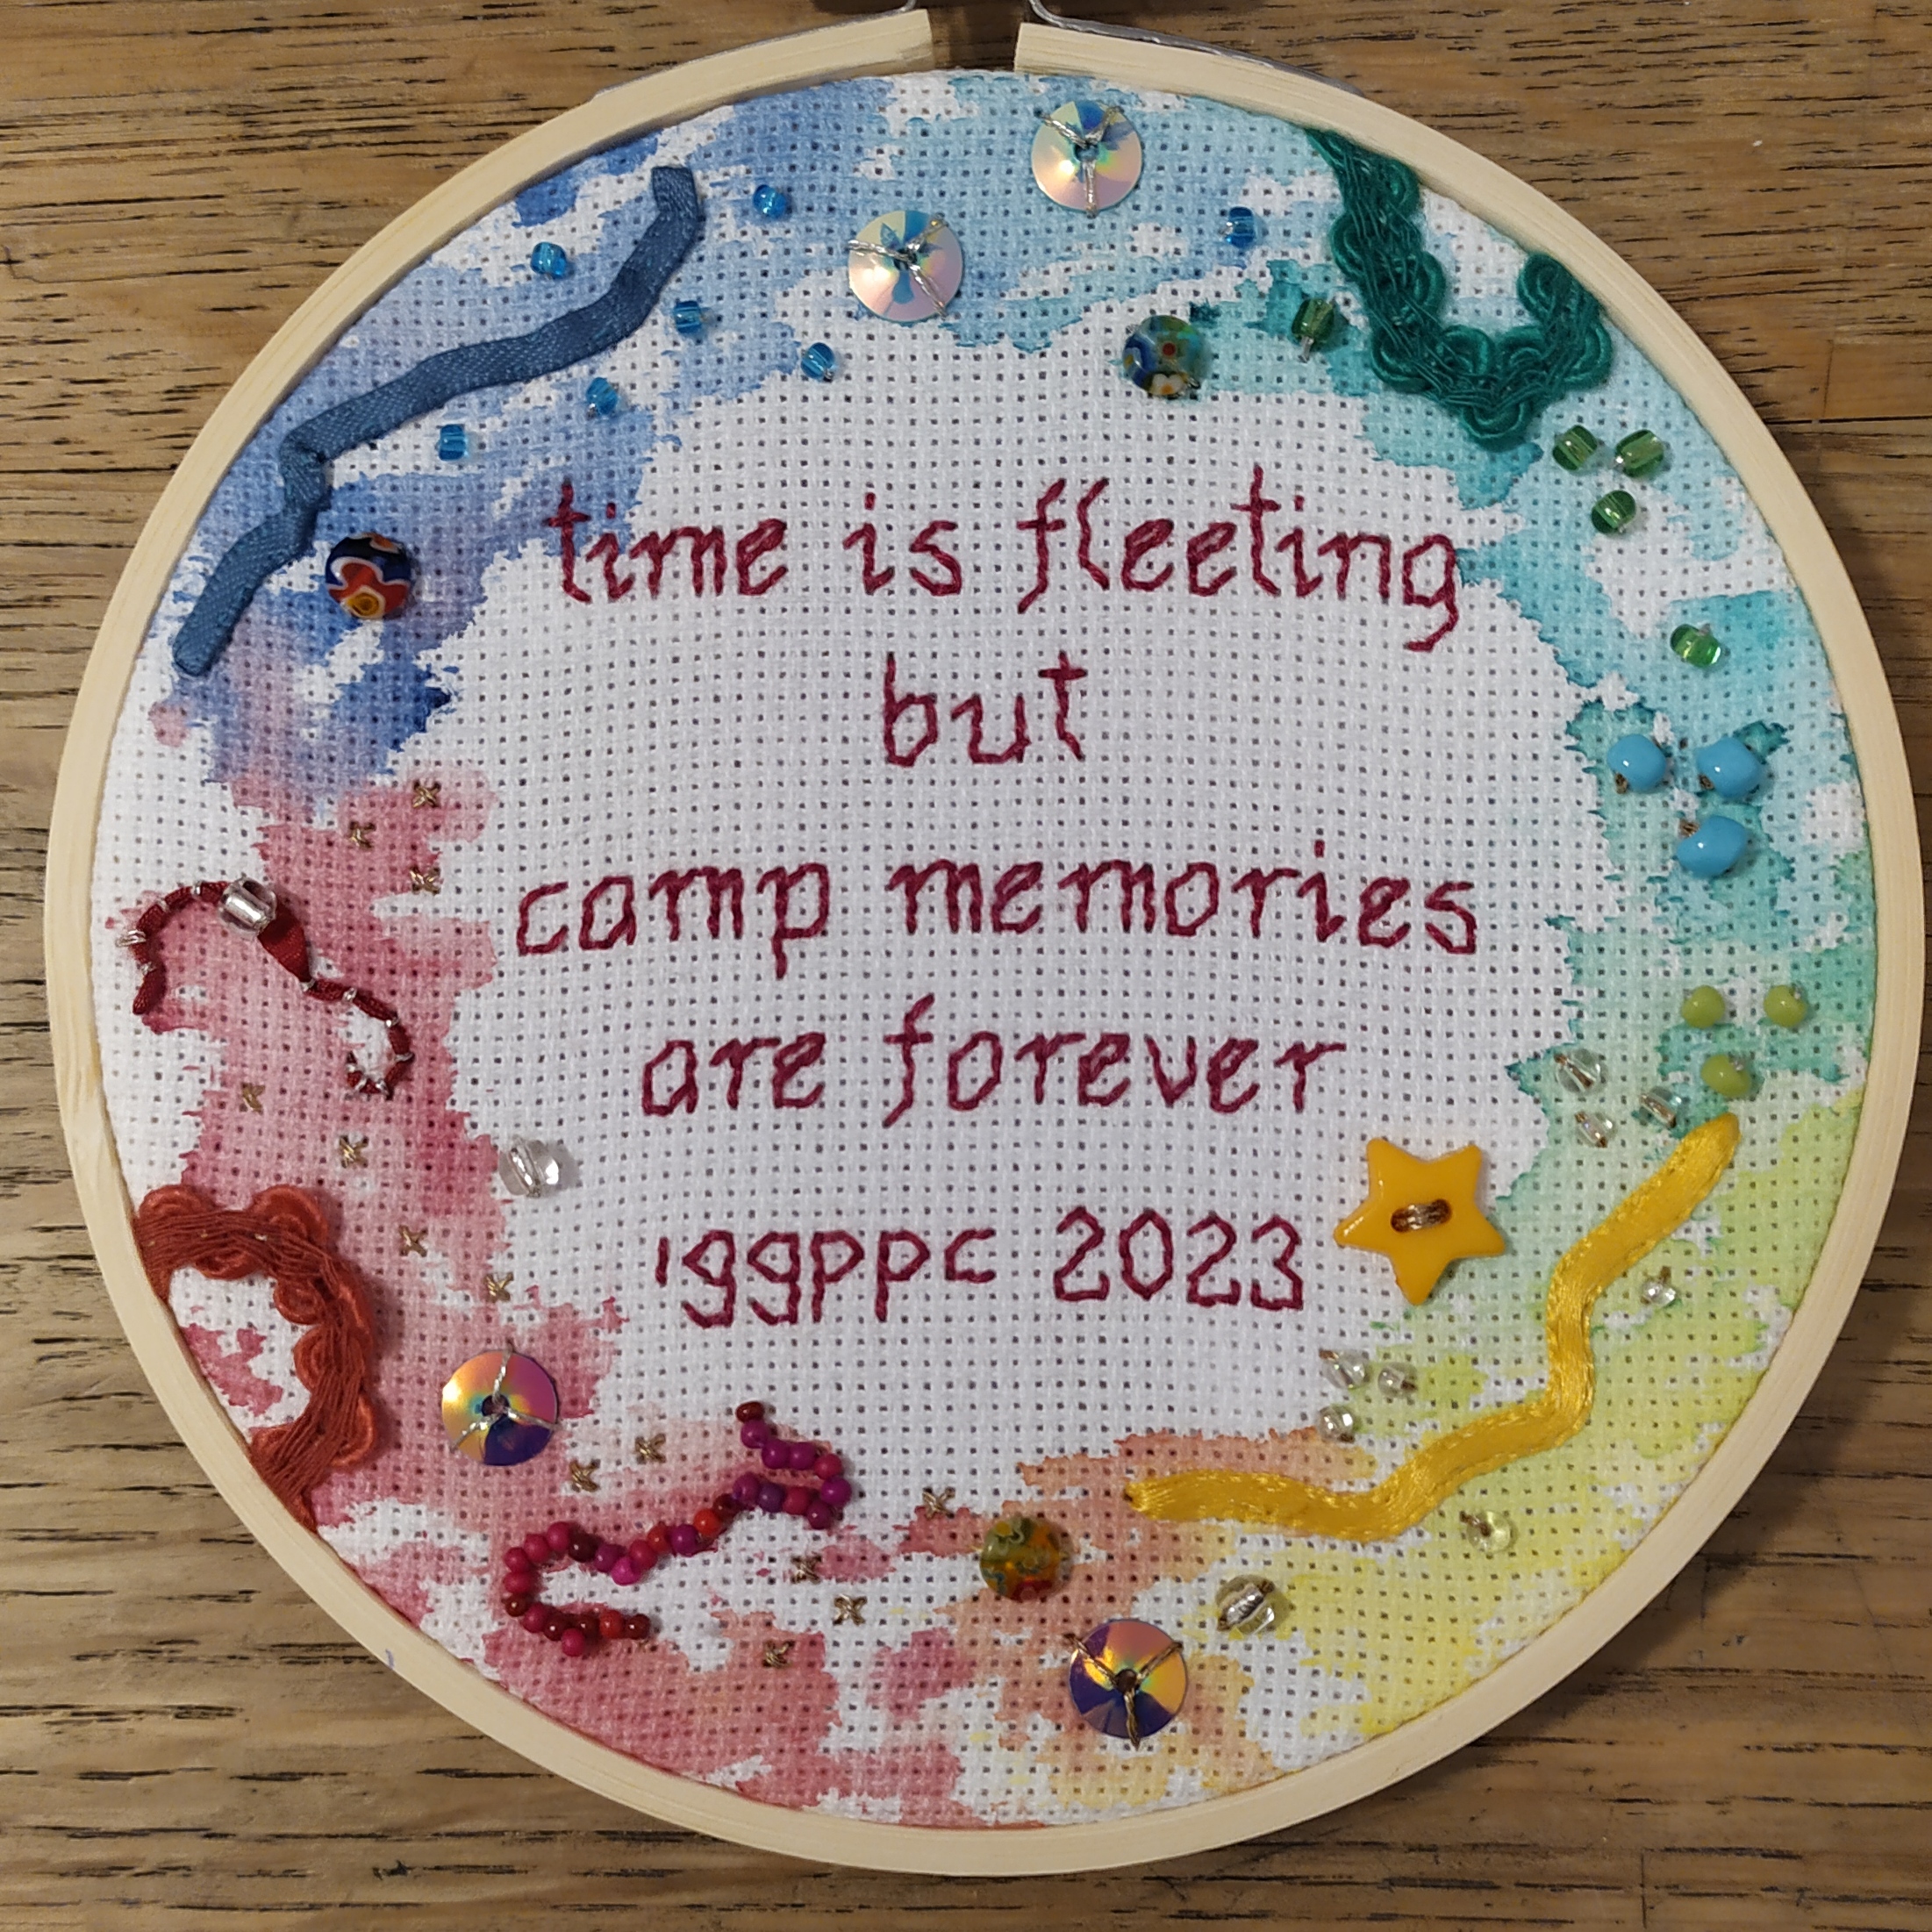
If you want to display it in a hoop, take your heat erasable pen and mark the perimeter of the hoop on the fabric to avoid adding beads etc to the part of the fabric that will go into the hoop.
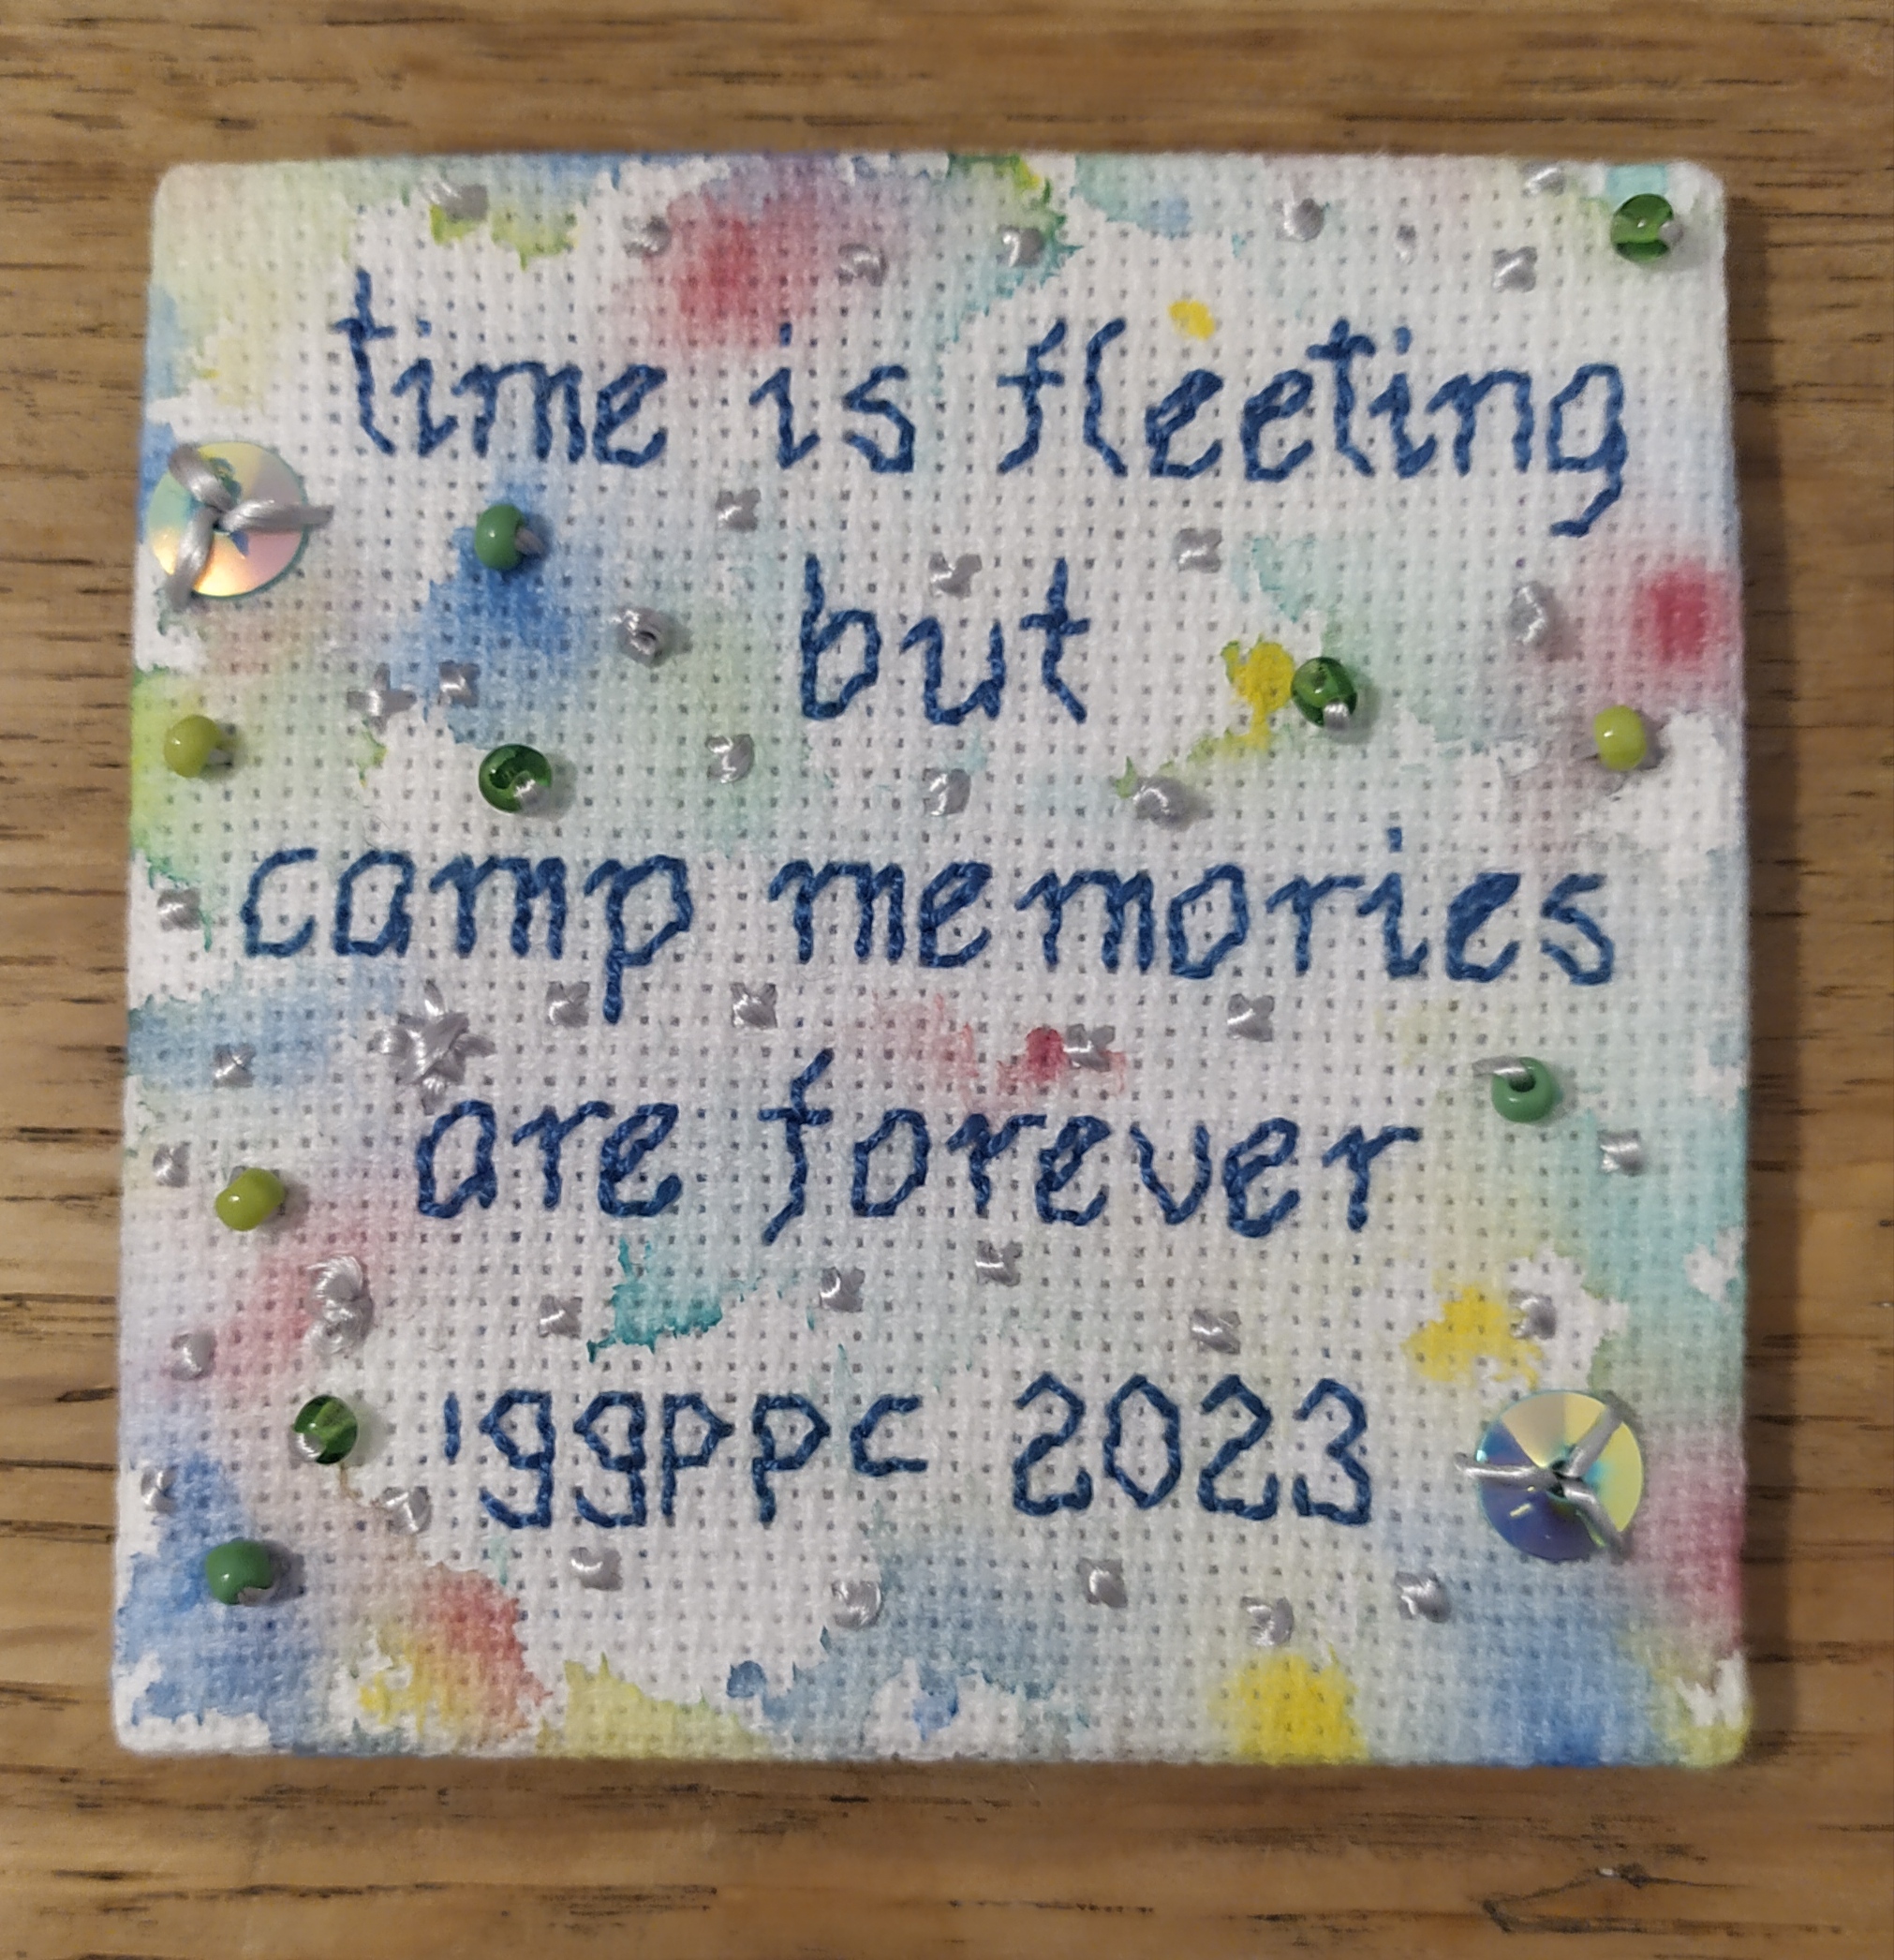
Once you’re happy with the result, stop. Then you can display it in your hoop or turn it into a wee canvas by using cardboard. If your cardboard is not white, glue a piece of white paper to it. This way the piece will look better. I glued two pieces of cardboard together and a white paper on top for mine. (To know the measurements for the cardboard, just measure your finished piece.)
I can’t wait to see your finished projects! These are mine:
Contributed by Judit
Judit (Judd) lives in a wee village called Gimenells in Catalunya (Spain). She’s a daydreamer, treehugger and an eternal student.
She’s also a doll maker, scarfs and hats provider, natural born reader, audiobook addict, greenthumb and a science fiction and fantasy enthusiast. She’s geek and proud.

