
Have you ever looked up at night and played join the dots with the stars? Did you imagine animals? Food? Letters? If your answer is letters, you are in the right place, my friend. Let’s play! (Suggested music to craft along: Astrud Gilberto, Fly me to the moon Foo Fighters, Virginia Moon Jamiroquai, Cosmic girl Muse, Starlight The Killers, Spaceman)
Supplies:
- Black cardboard 2 pieces of 20x20cm or bigger and glue (easier 1) OR a 20x20cm canvas or bigger, black paint and a paintbrush (not that easy 2)
- White yarn/string (1) or very narrow 4mm white ribbon (2)
- Scissors
- A ruler
- Optional: an exacto knife and a cutting board
- Old towel or some other cushy surface to stab on \
- Awl (or sewing needle) . A sturdy and pointy yarn needle
- Wooden hair pin, something pointy and with a bigger girth than your yarn needle
- Sheet of paper
- Pencil
- Eraser
- Some binder clips
- Sello tape OR washi tape
- A string of wee LED fairy lights, battery powered if posssible (the number of LEDs needed depends on your specific project, between 50 and 100)
- Batteries for your lights
Instructions:
Step 1a – If you’re using cardboard. Cut it to size, twice. Glue the two pieces together.
Step 1b – If using canvas, paint it black.
Step 2 – Brainstorm your sentence or word.
Step 3 – On your sheet of paper draw the shape and size of your background. (if you’re using a canvas, your size is only the punchable zone inside the wood structure). Using the fonts and examples provided as a reference, write your sentence/word into the shape on your sheet of paper.
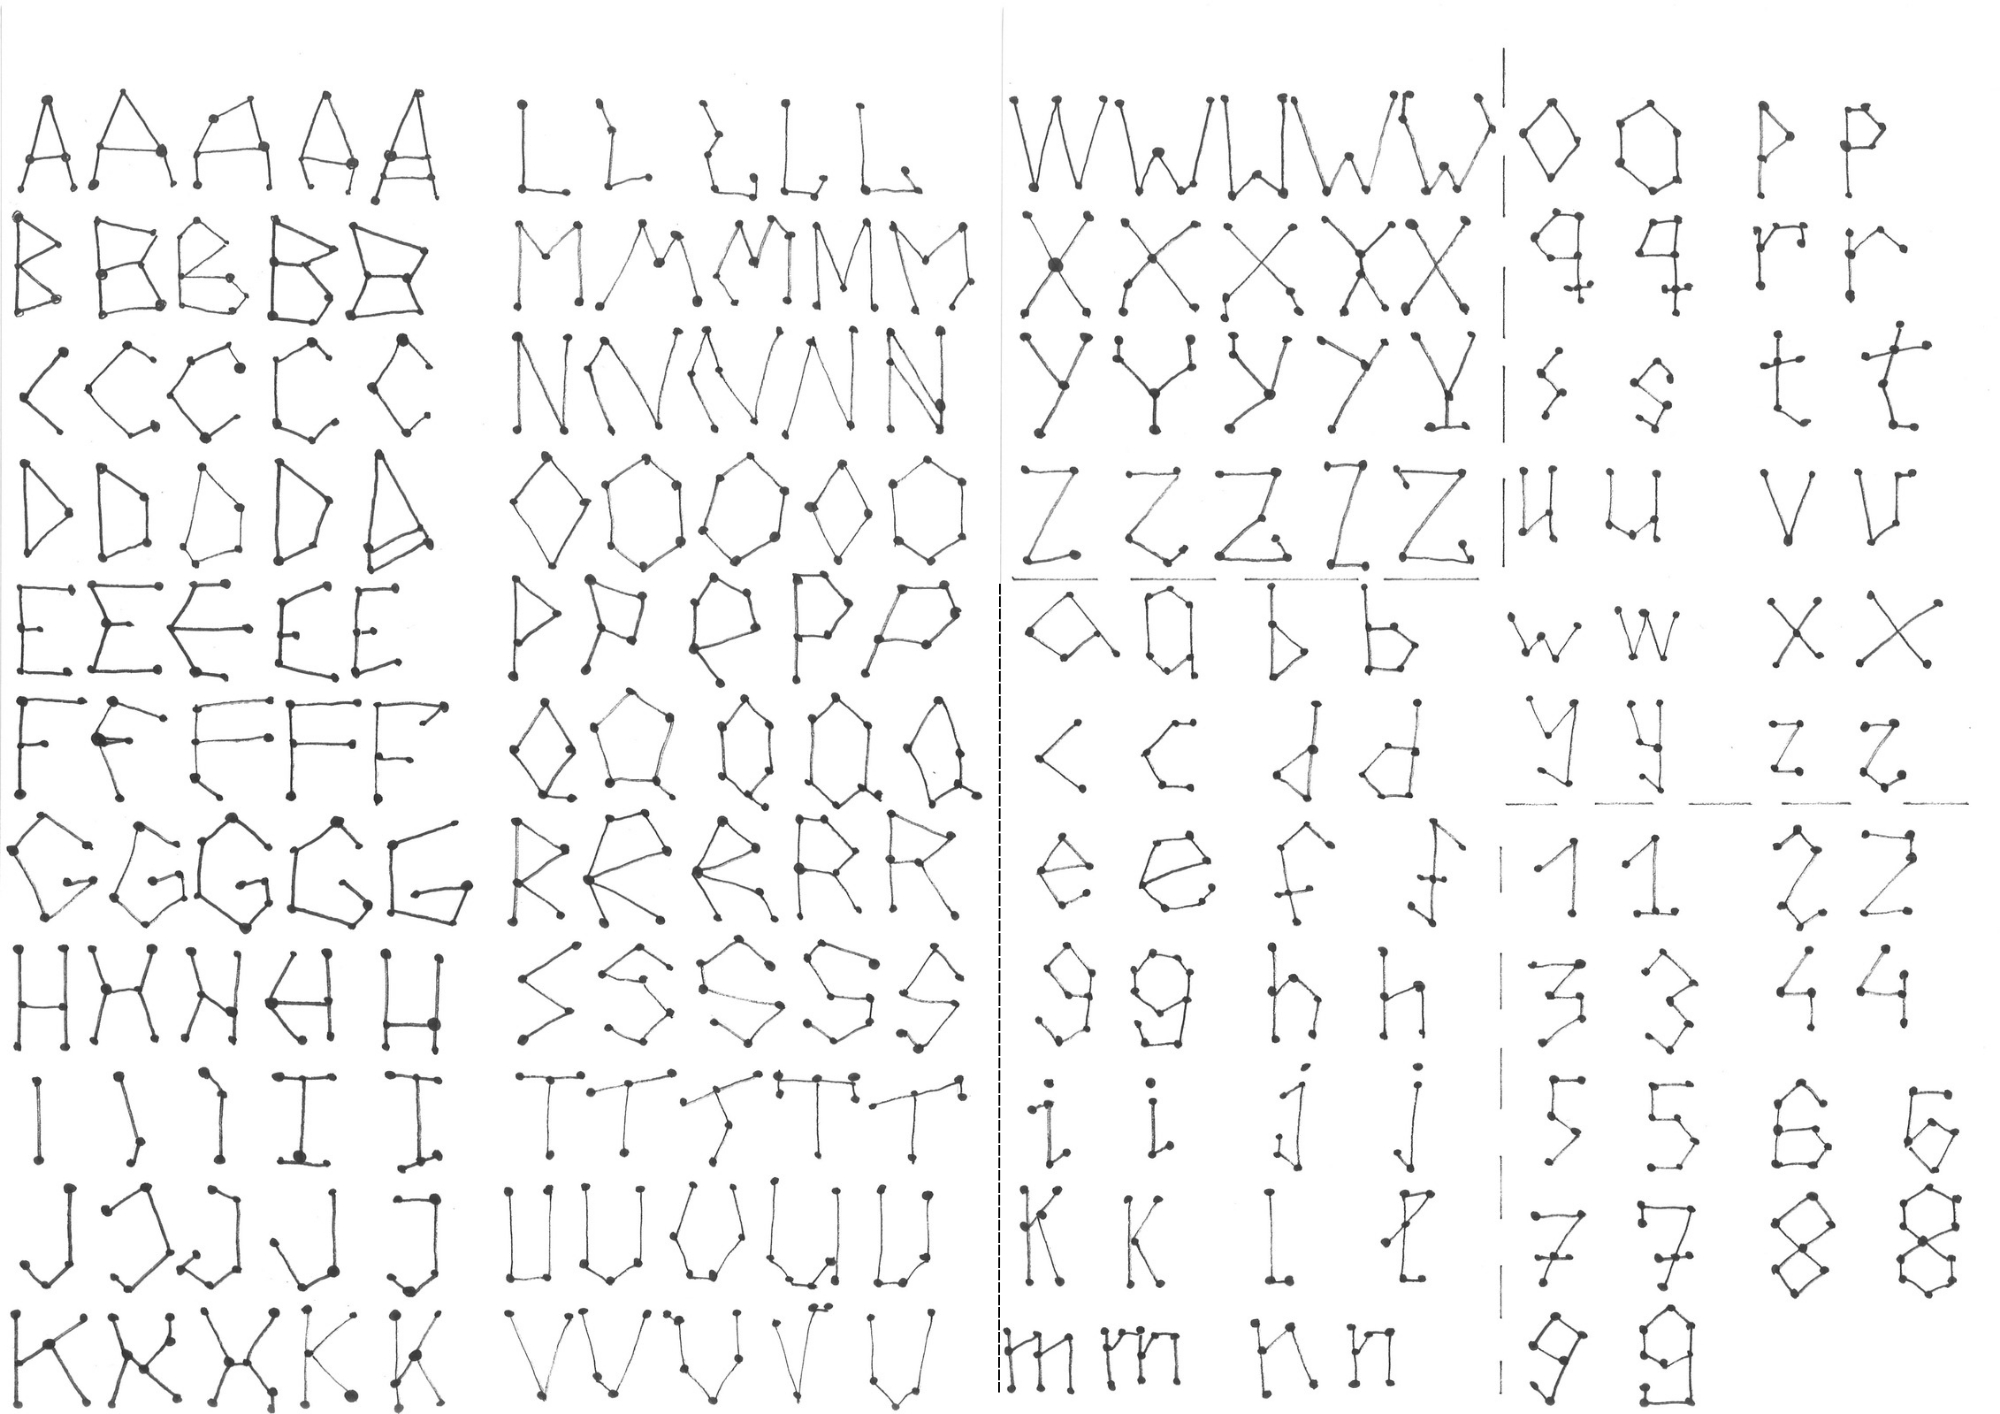
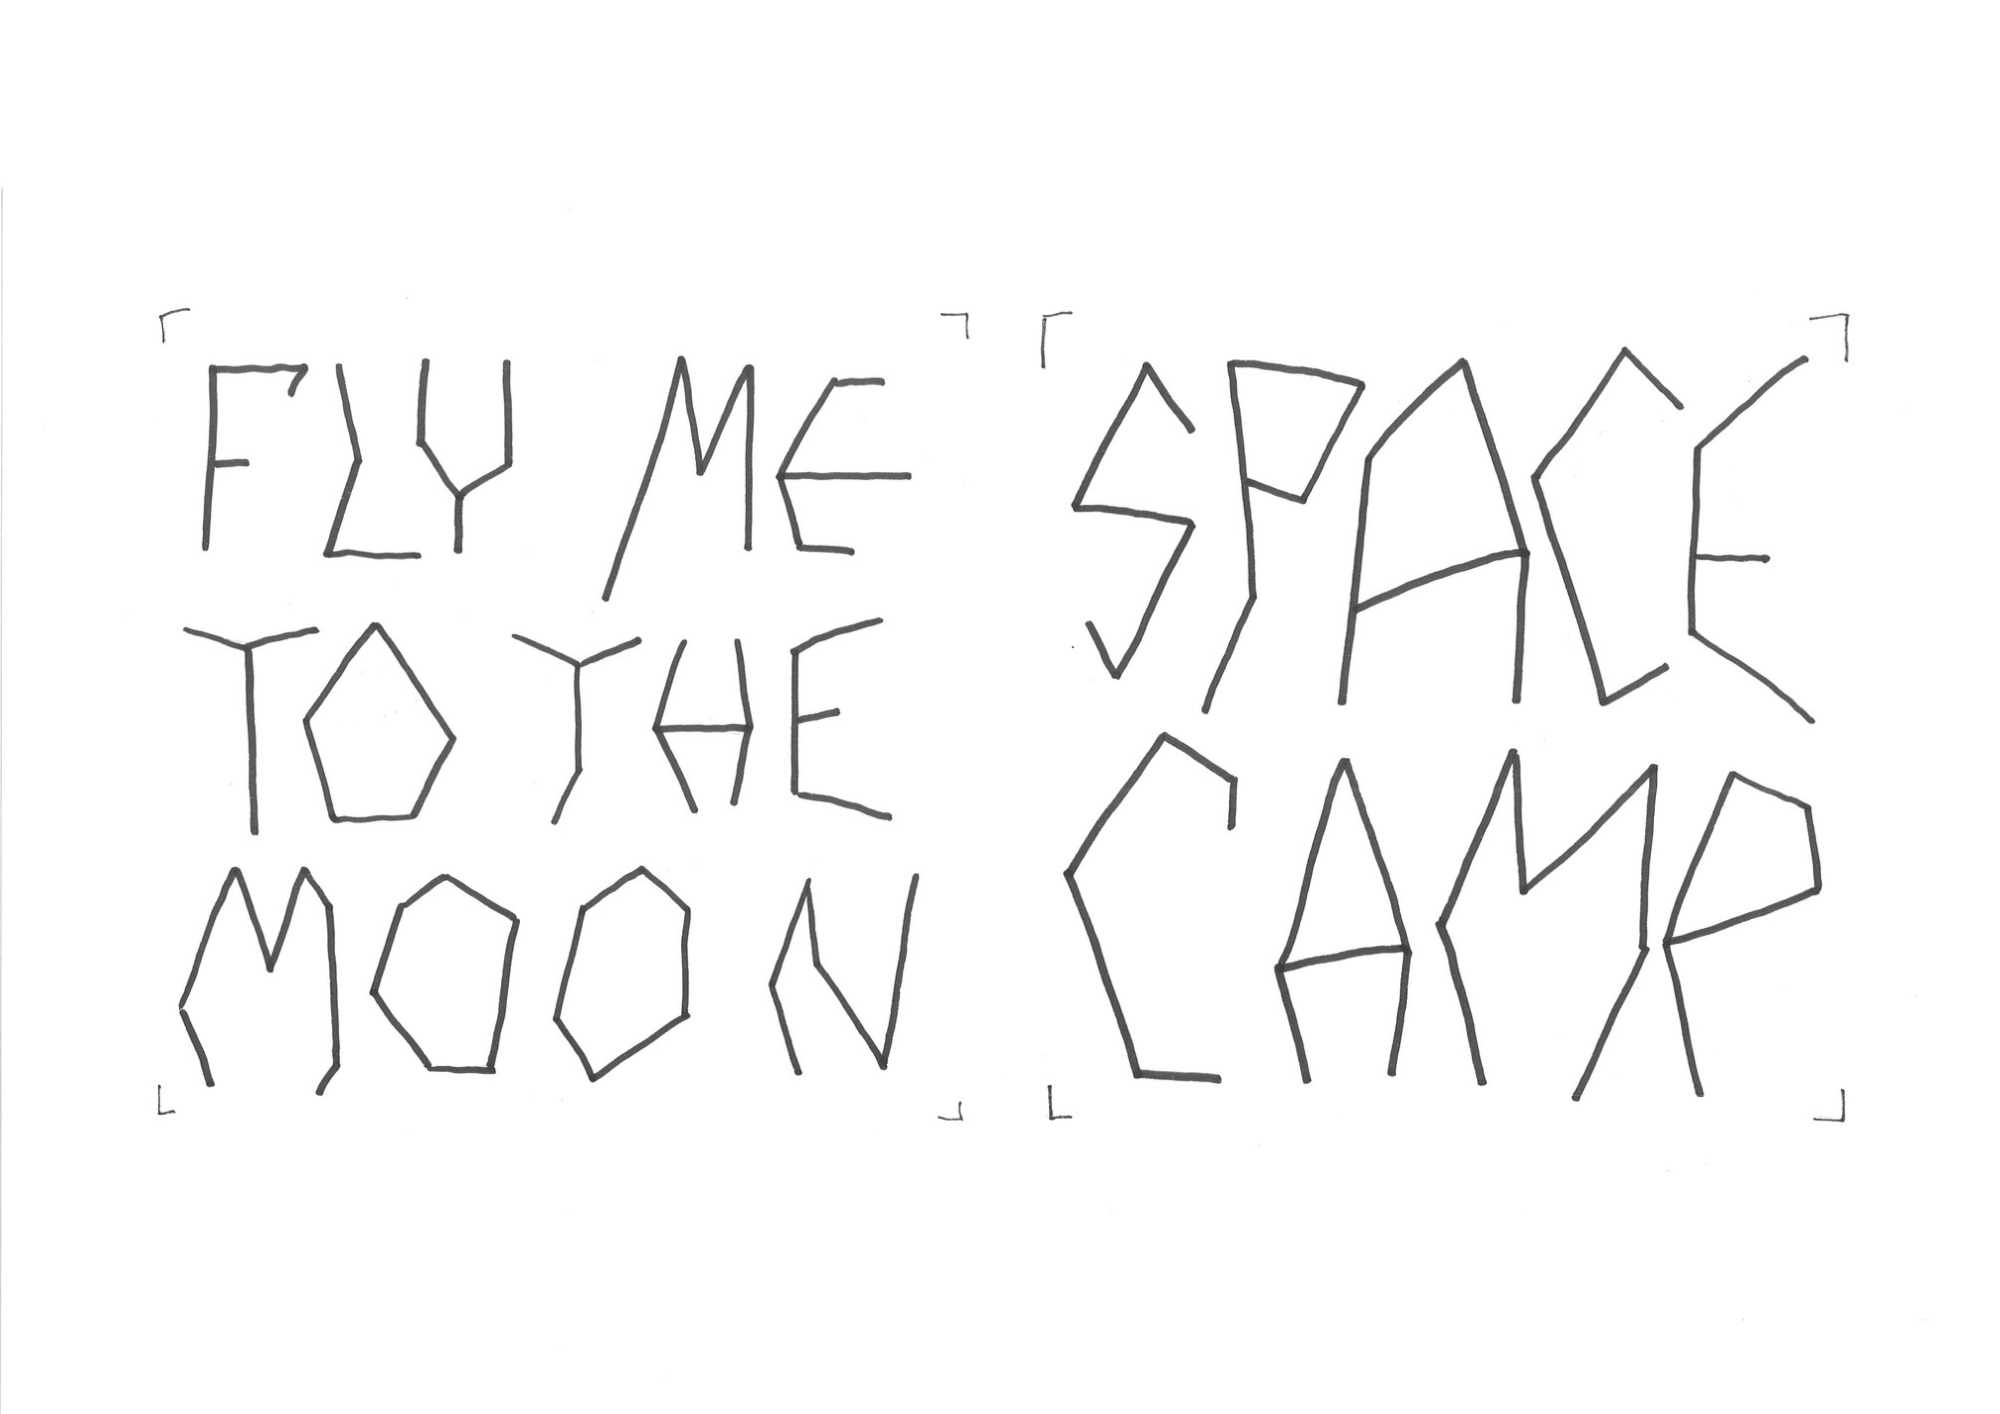
You can use the examples provided if you want to.
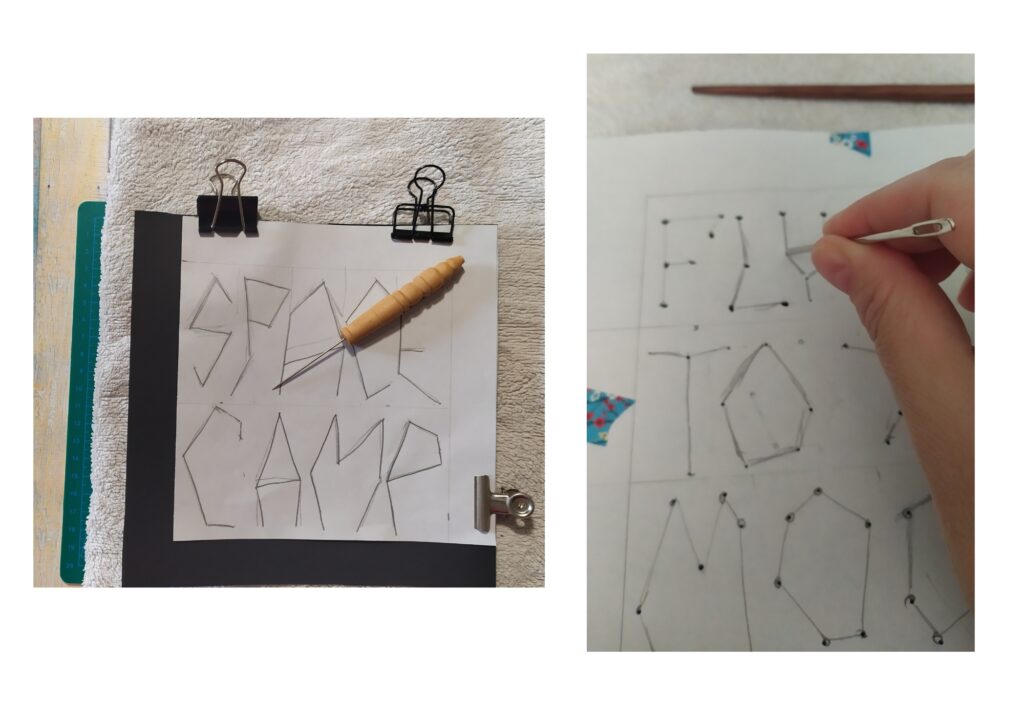
Step 4 – Cut the shape of your background out of the sheet of paper. Secure the paper template to the cardboard/canvas with binder clips/tape. (canvas only) Check if all the dots are in the punchable area.
Step 5 – Place your canvas/cardboard over a folded old towel. Use your awl/small needle to punch every dot in your design.
Step 6 – With your yarn needle, make all the wee holes a bit bigger.
Step 7 – With your hair pin enlarge a bit all the holes again. Be careful not to tear the material.
Step 8 – Separate the canvas/cardboard and the template. Keep the template for reference.
Step 9 – With your yarn needle and your ribbon/yarn start joining to dots that make the letters. Don’t cut big pieces of your working yarn/ribbon. It will fray due to the jagged holes, specially working with canvas. 50cm or less works best.
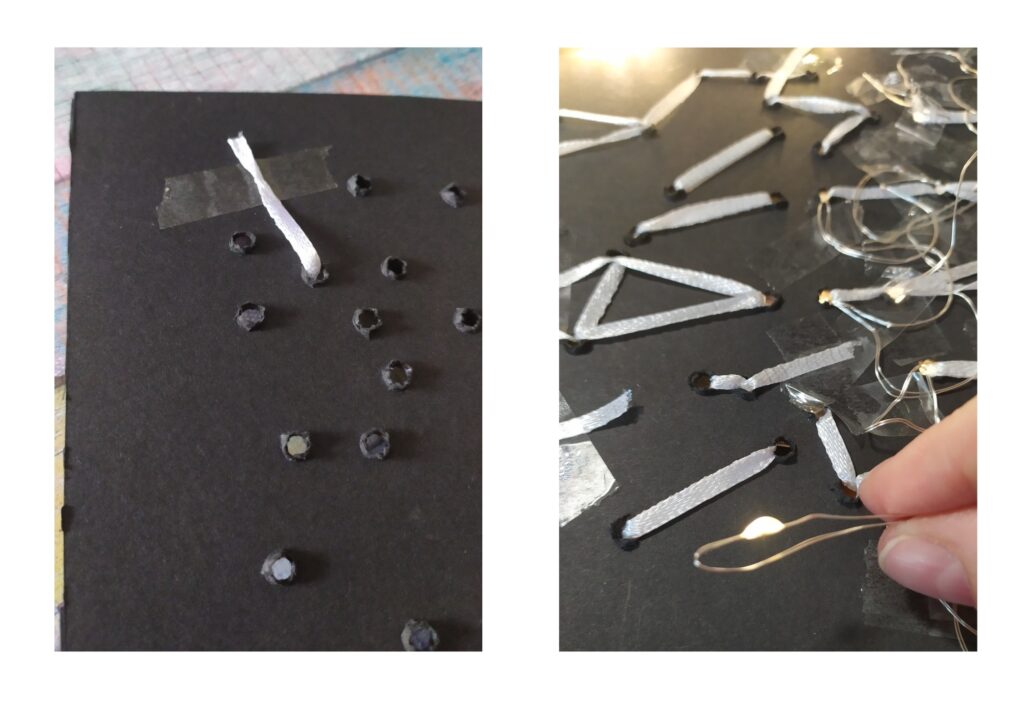
Secure the beginning and the end of your thread on the back side with a piece of tape. Repeat until all your letters are written.
Step 10 – Put the batteries on your fairy lights (it’s more whimsical this way). Make sure there are no knots on your light string. Starting with the end of the string push gently one led light through each hole. Secure the string in place with tape as you go.
Step 11 – Once all the letters have been lightened, tape the remaining leds to the backside of the project. With some spare cardboard make a simple case for the batteries case and tape it to the bottom of the project. It will act as a stand to keep the cardboard upright. To secure the battery case to the canvas, staple a piece of cardboard to the back creating a pocket. Put the battery case inside.
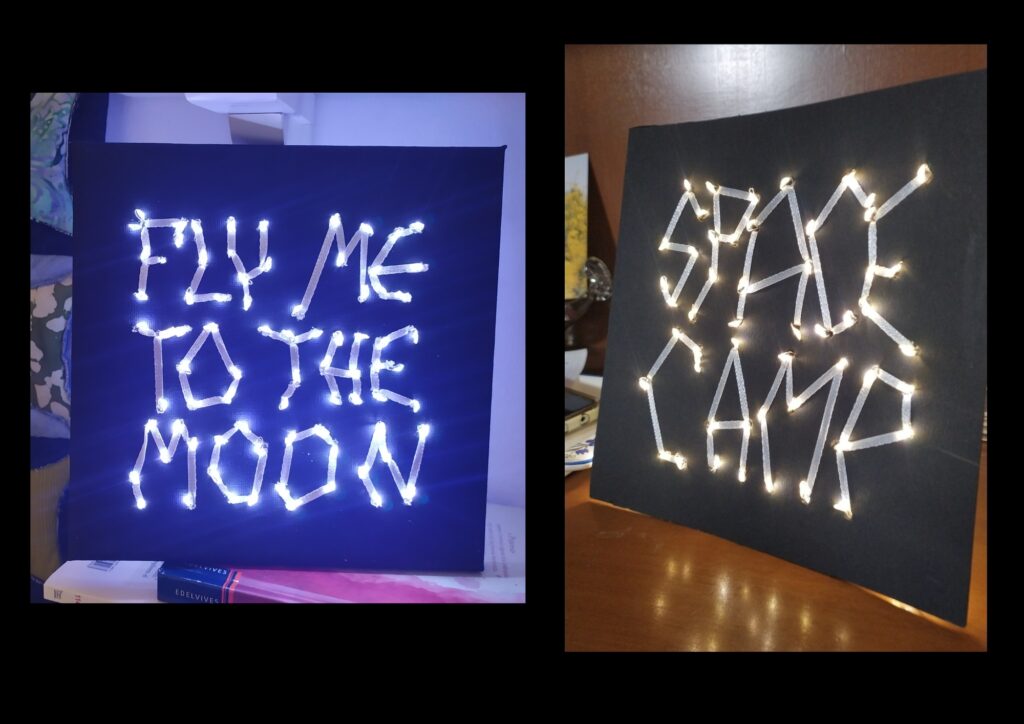
And now enjoy your starry sentence/night light/wordly constellation If you have any doubts, please ask. I’ll be delighted to be of assistance.
Hosted by: Judit
Judit aka Arcadia likes to garden and sometimes hugs and pets trees. She dabbles in all the crafts and reads/watches science fiction and fantasy.
