
If you are looking for the perfect piece of art for your retro-futuristic rocket ship, you have come to the right place! Nothing beats tinfoil as the material of choice for living room astronauts; and that’s what we’ll be using today. I can’t wait to see what you create!
Supplies:
- Piece of Cardboard – the size you pick will be the size of your final project. The larger the cardboard, the more detailed your art can be. The cardboard should easily fit the size of your aluminum foil, unless you want to use more than one piece of foil.
- Pencil
- Hot Glue Gun
- Mod Podge OR Adhesive Spray
- Aluminum Foil
- Permanent Markers in a variety of colors
Instructions:
Step 1 – Select a simple design for your art and draw it on your piece of cardboard with pencil or marker. You will be tracing this design in hot glue, so give yourself SPACE. Details that are too small will not show well. You can use canvas instead of cardboard if you want to avoid the cardboard stripes you see in my photos.

To get real fancy, you can print a design and transfer it to your paper. To do this, tape the paper printed with your design over your cardboard. Poke holes along the printed lines through the paper and into cardboard. When you lift the paper, you should have an outline of your image made by holes.
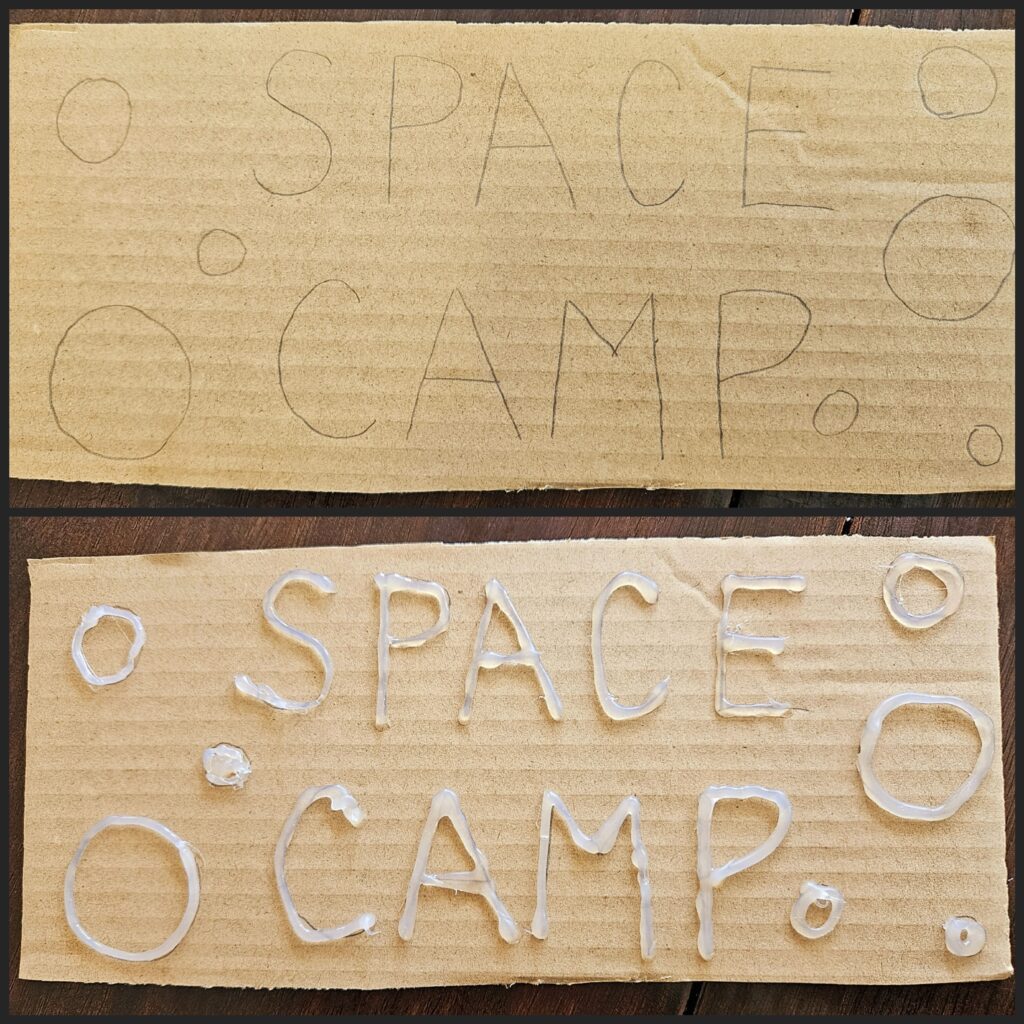
Step 2 – Trace over your design carefully with hot glue. Try to make the lines of glue as even as possible and remove any stringy bits. Let dry completely.
Step 3 – Cover your design with a thin layer Mod Podge or Adhesive Spray. Make sure you get in all the nooks and crannies. Move to step four quickly before your glue dries.

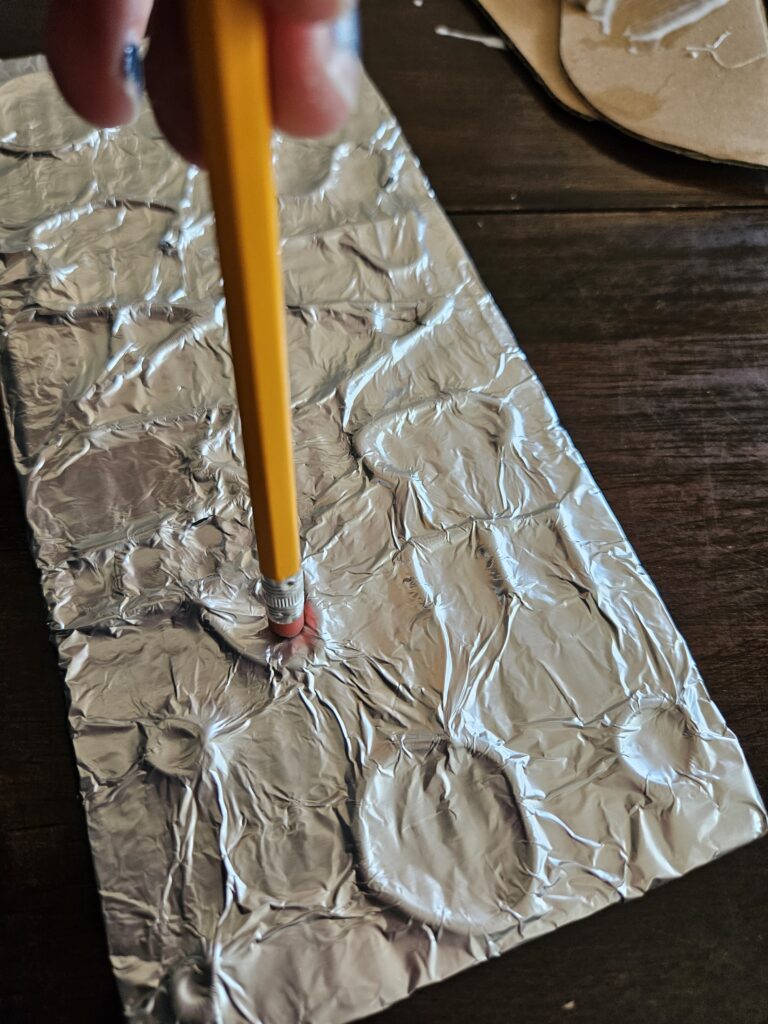
Step 4 – Place a piece of aluminum foil loosely over your design. It should be slightly larger than your cardboard. More than one piece of foil can be used if needed. GENTLY press the foil around your design starting in the middle and working your way out. The foil tears easily, as you can see at the ends of my “C” in “CAMP” so be careful and don’t get the foil too tight! Use your pencil eraser if needed to work in tight spots. Wrap any remaining foil around the back of the cardboard.
Step 5 – After the glue dries, color the recessed parts of your project with permanent marker, leaving the foil showing where it is raised by hot glue. You can use a scrap piece of foil first if you’d like to see how different colors look and blend on this material. Be patient for the glue to dry before coloring if you can. If you color when Mod Podge is still wet you risk poking holes in your foil where there are soft glue puddles.
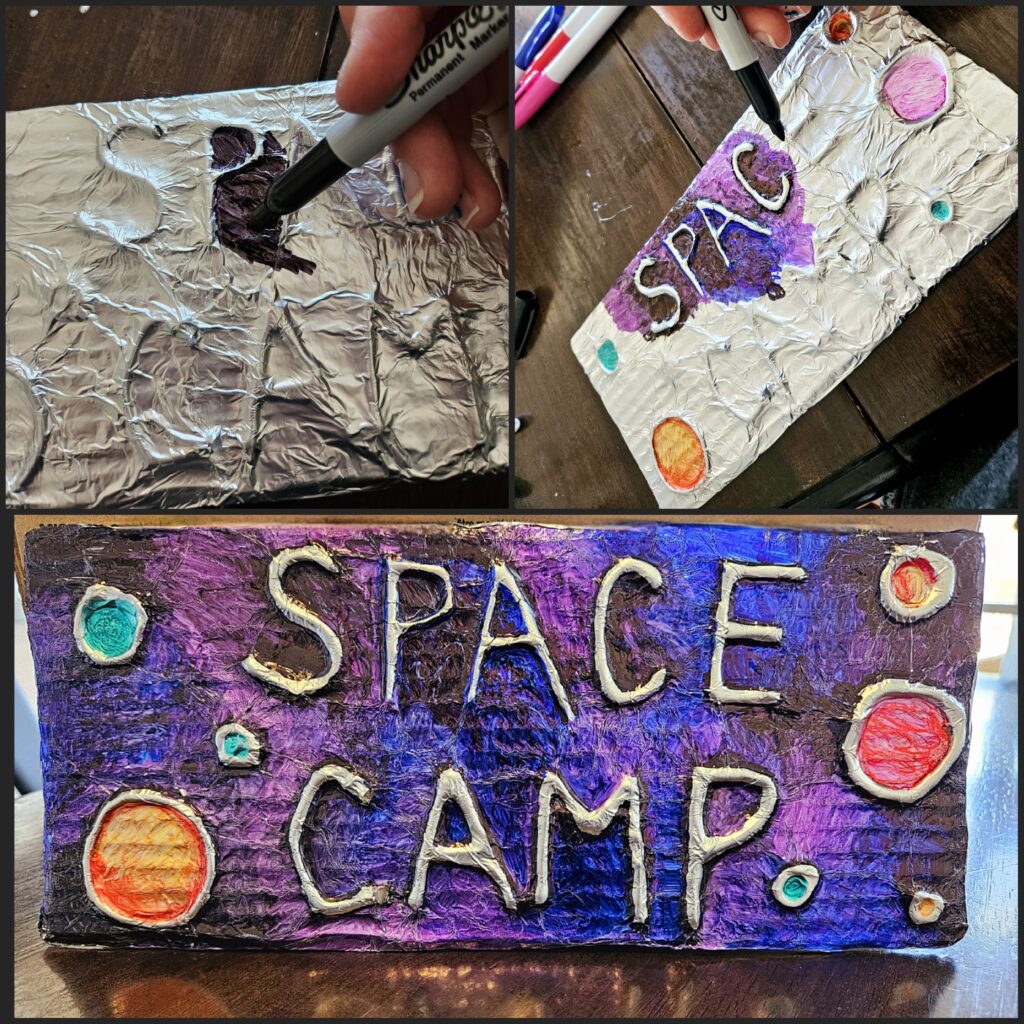
After coloring, your shiny space art is complete. Share pics and be proud!
Hosted by: Beth
Beth, aka PhoenixEmerald, is a slow roasted science nut from the deserts of Arizona. When not advocating for the birth to five crowd, Beth can be found excavating interesting facts, crafting, reading, tarot-ing, puzzling, gaming, traveling, and rock hounding. She is pro-oxford comma and anti-pickles. Can be found on Discord as PhoenixEmerald.
