Iggles! We’re almost done with our 9 IGGPPCamp Challenges! Are you still with me?
Today our craft challenge is dedicated to those in the beautiful House GlaDOS! (ahem-cough-cough) We shall be making a piece of delicious* stuffed felt cake!
*”Delicious” is a lie. Do not eat your stuffed cake. The cake is a lie.
What you’ll need:
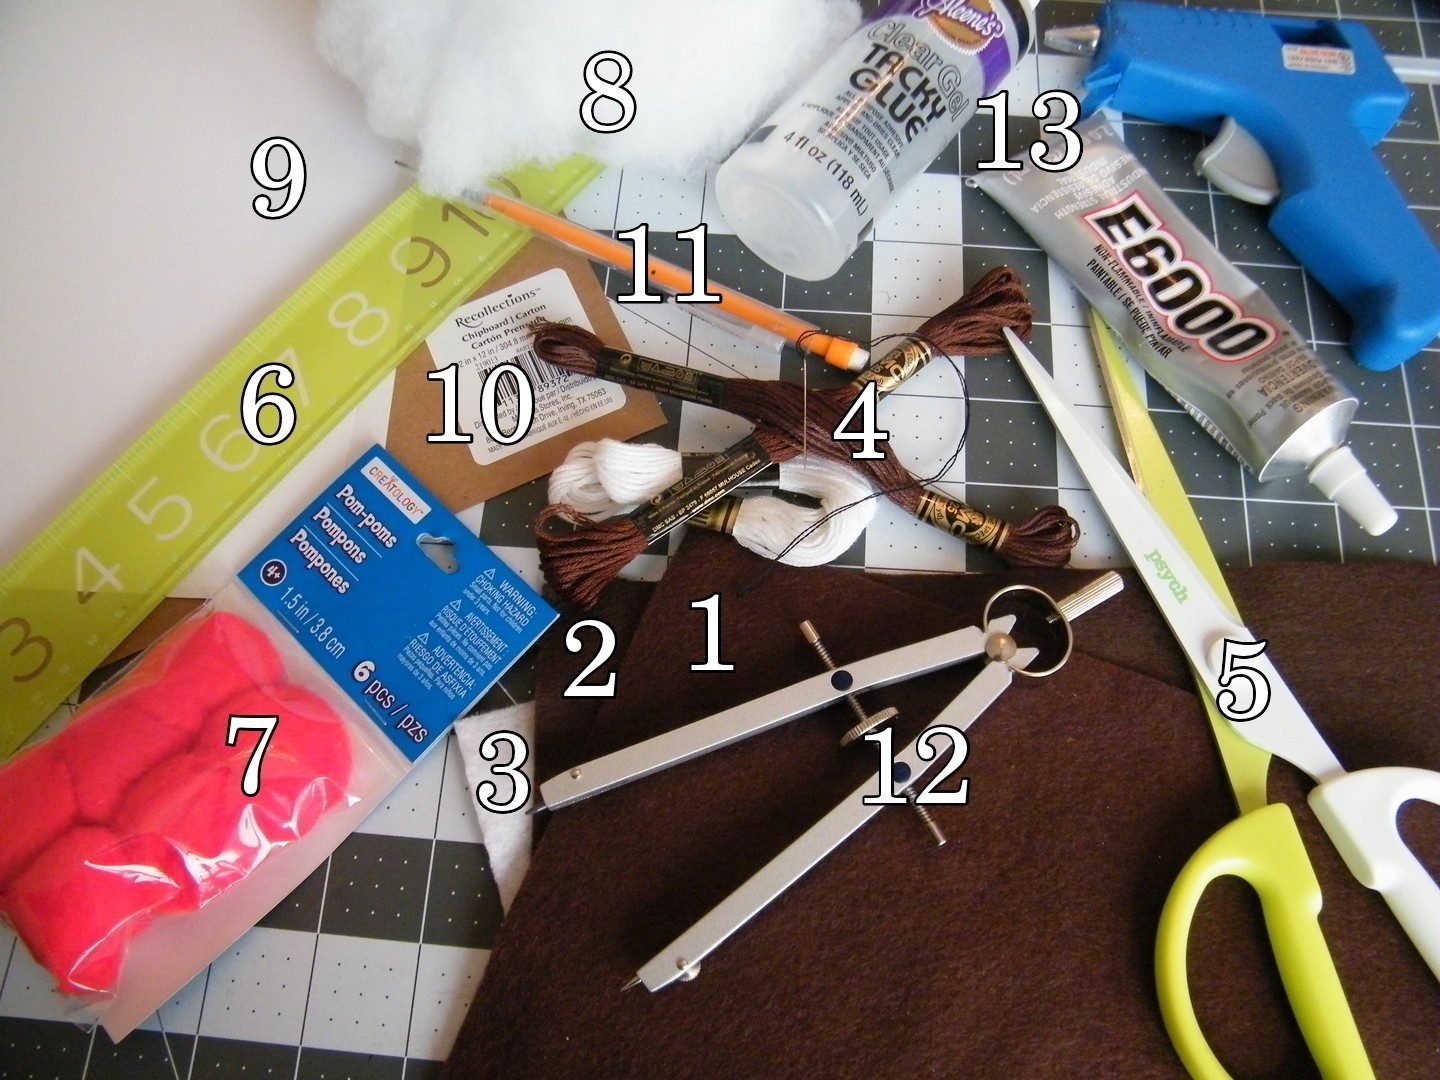
1.) Brown felt (Choose a brown for your “frosting”)
2.) Another brown felt (This is for the “cake “. You can always use the same brown as your frosting if you’d prefer, or you can always make a “vanilla” cake and use a yellow felt.)
3.) White felt (This is for the dollop of whipped cream on top and for the frosting in the middle.)
4.) Needle and thread to match your cake pieces
5.) Scissors
6.) Ruler
7.) Red pom-poms (1 inch pom pom is suggested.)
8.) Stuffing
9.) Paper
10.) Cardboard (like a cereal box, or chipboard)
11.) Pen/pencil, something to write with
12.) A drawing/math compass (or something to draw an 8inch diameter circle and a 3 inch diameter circle.)
Optional:
13.) Glue
This supply list is different than the official craft list, my apologies! The original list needed tweaking.
A note about felt:
“Brown” felts will look different than other browns from other stores, so look around and compare. Below are four different brown felts – two from Hobby Lobby, one from Michaels and one from TheFeltShoppe. (This brown from TheFeltShoppe)
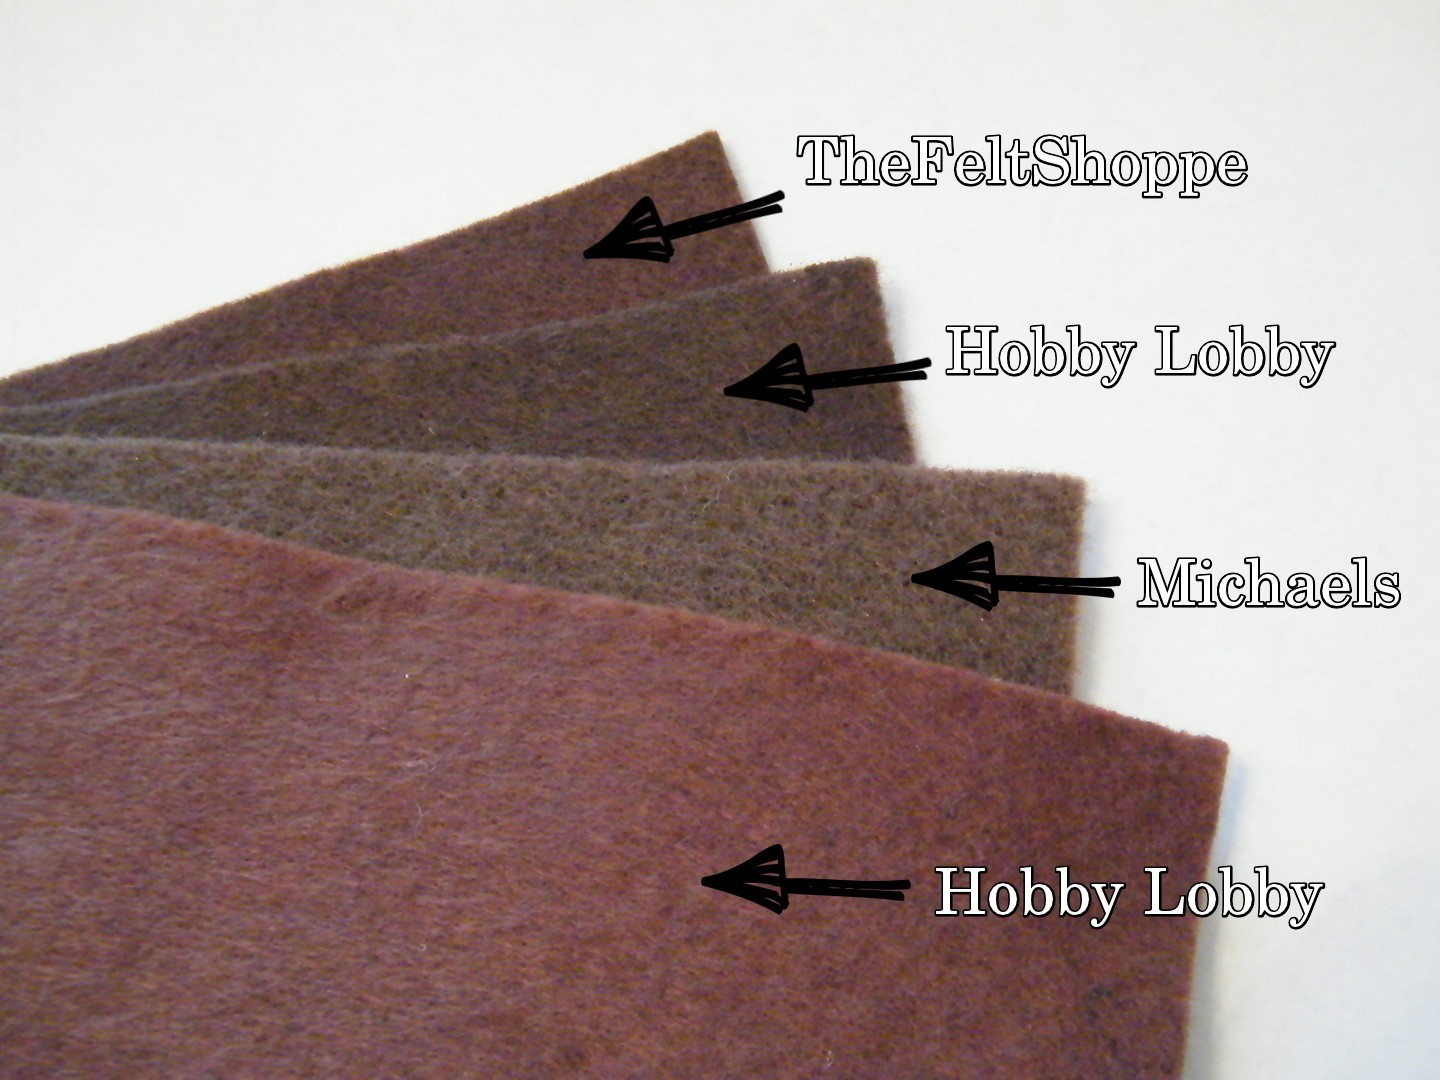
I chose the very top brown for my “cake”, and the next one down for my “frosting”.
On to making our stencils. Use your compass to make an 8 inch diameter circle.
Then fold your circle in half, then half again, and half again. So you have 8 equal pieces of cake. (Now called cakepieces in this tutorial.)
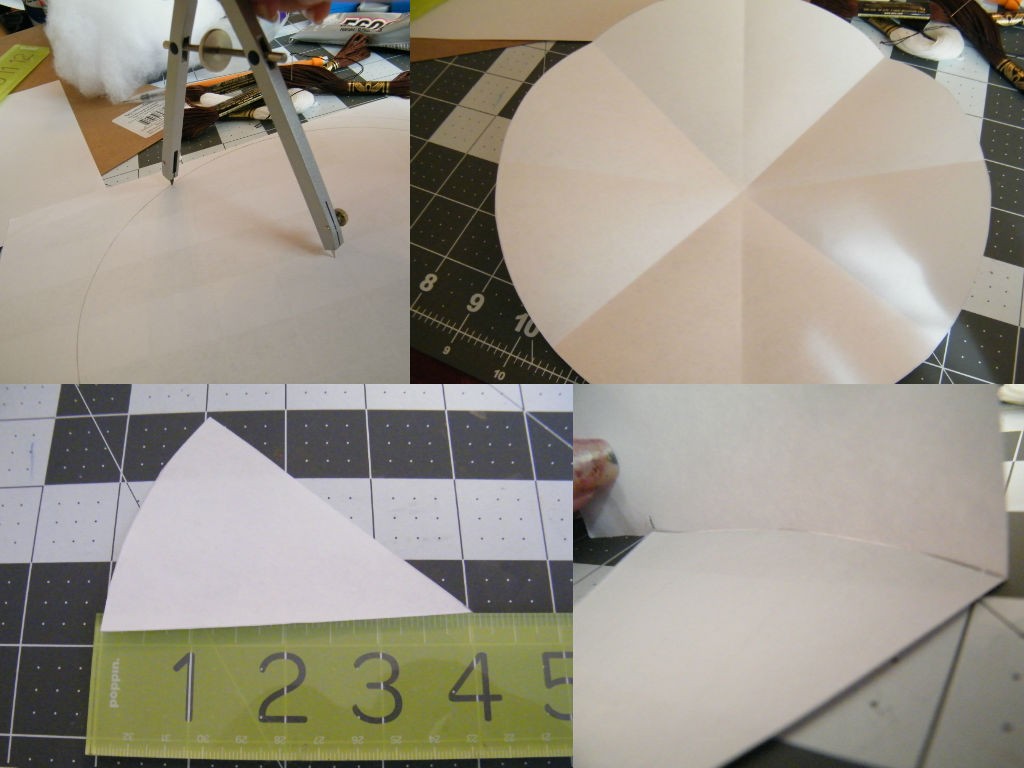
Cut one of these cakepieces out. That will be one of your templates.
You’ll need a template that’s approximately 2 inches by 3 inches. In the last section of the image above, you see me bending a piece of paper around the curve of the cakepiece. That 3 inch rectangle needs to fit that curve. If it doesn’t, adjust.
You’ll also need a rectangle that’s 4 inches by 2 inches and another that’s ½inch by 4 inches.
Here’s the finished paper templates. The first pic shows how many of each piece you’ll need for your cake. I transferred the templates to cardboard. Easier that way. You’ll need an extra cardboard cakepiece. (Or, not if you don’t want to save your cardboard templates for future cakepieces.)
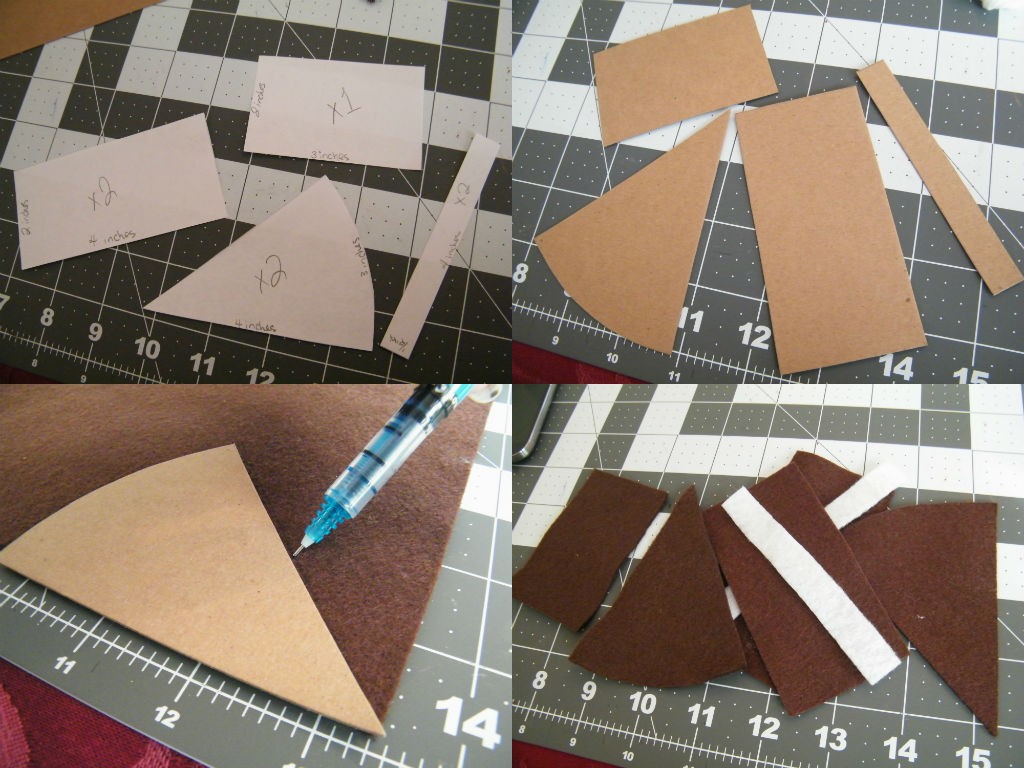
Okay, now here’s how many of what felt you’ll need.
– both 4×2 rectangles in “cake” felt
– one cakepiece in “cake” felt and one in “frosting” felt
– one 3×2 rectangle in “frosting” felt
– both 4x½ rectangles in white felt. (This is actually up to you, a portal cake is traditionally a Black Forest Cake, and most recipes use a whipped cream for the middle. You can always make your’s have chocolate middle, or cherry, or whatever you’d like.)
We’ll start our sewing on the middle pieces. Place your white middles across the center of your 4×2 rectangles, and back stitch your way around the white. Then put both rectangles together, outside in, and back stitch one edge together. (An edge is a side with the middle white attached – as seen in the second image below)
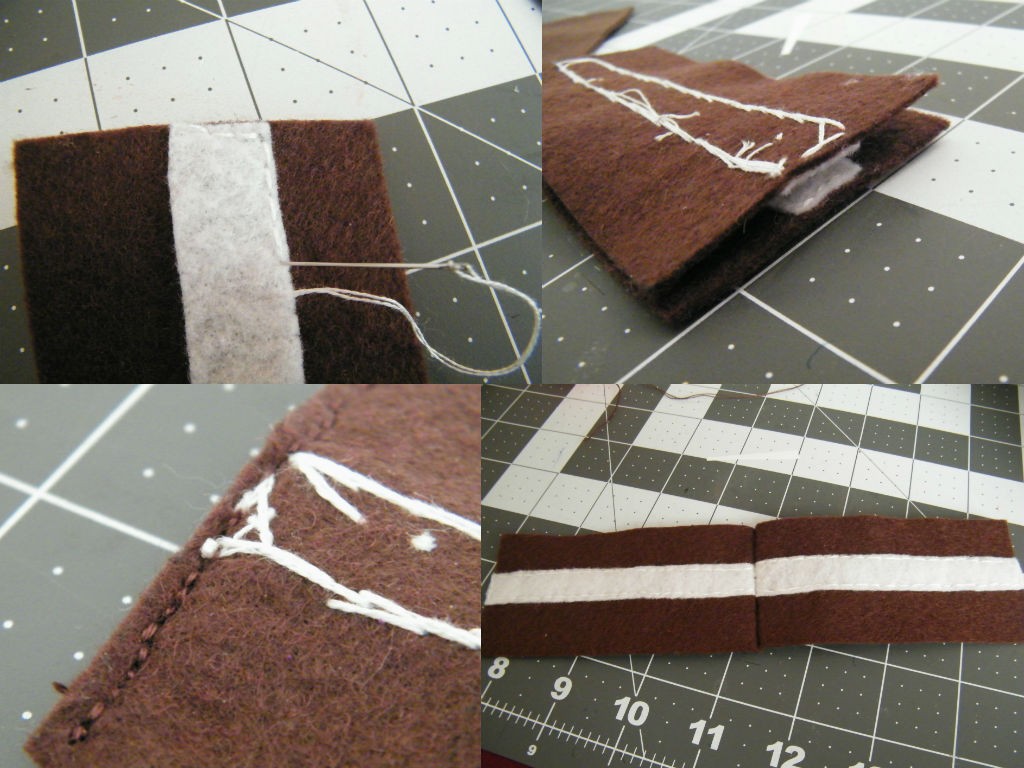
You now have the sides of your cake attached to each other. We’ll call this piece “Yummeh” from now on.
Now take your “cake” felt cakepiece and – starting from one end – blanket stitch it to that Yummeh piece, so that the Yummeh piece is now attached to both sides of the cakepiece.
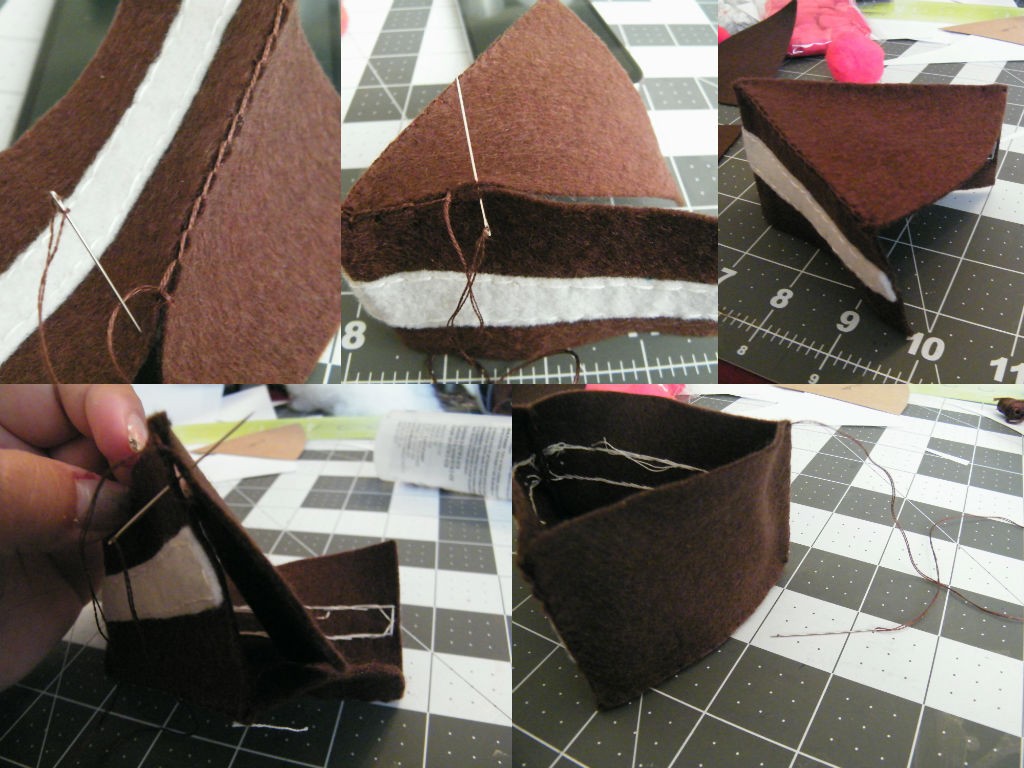
Now take your 3×2 “frosting” felt piece and attach that to the back of your creation with a blanket stitch.
If you haven’t already, flip the creation over so it’s open on top. Insert a cardboard cakepiece in to the bottom to help keep the bottom flat.
Then take your “frosting” felt cakepiece and blanket stitch that to the top sides of your creation, but leave the back open for the time being.
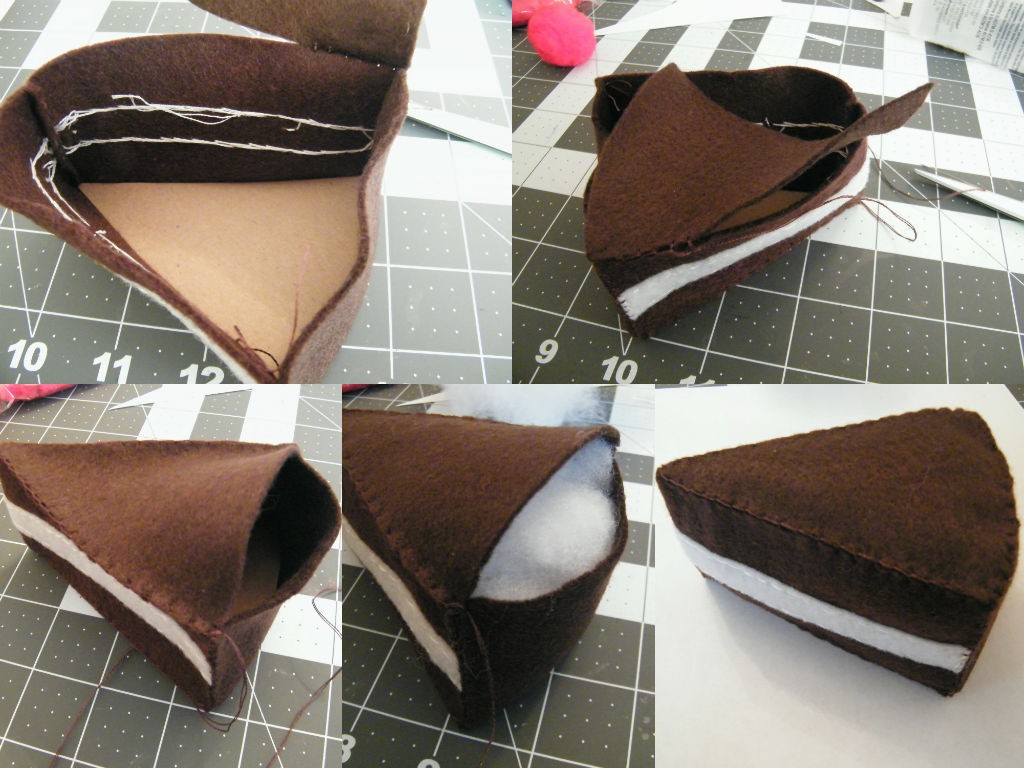
Now you need to stuff your creation. Insert as much or as little fluff as you’d like, then blanket stitch that sucker closed.
If you managed to successfully navigate my crazy instructions, you now have a piece of cake!
Now on to making the template for the dollop of whipped cream.
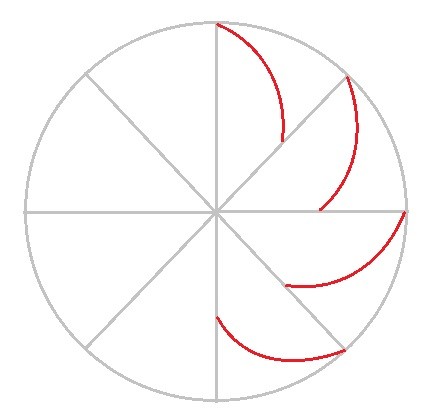
You’ll want a circle that’s 3 inches in diameter. If you’ve got a math compass, go ahead and do a 1 ½ inch circle inside your 3 inch circle. That’s optional, just a guideline. Now cut out that 3 inch circle and fold it in to 8 equal sections again. Draw in those fold lines.

Now, draw curved line from the end of one straight line, to the halfway point of the next straight line. If you’ve got the smaller circle, that’s the halfway point. Then cut out the part I’ve scribbled out. (see finished template in the last section there.)
Here, I’ve illustrated what you’re drawing on to your template, in case I made no sense. The red lines below.
I’ve left my dollop template in paper form, because I didn’t want to have to draw on my white felt. Instead, I put a thin layer of glue on the template, and glued it on to my yarn. Then I cut. Then I peeled off the paper. For those who’ve read my previous tutorials, a thin layer of glue to felt will not make for a strong bond, and so it peeled up easily.
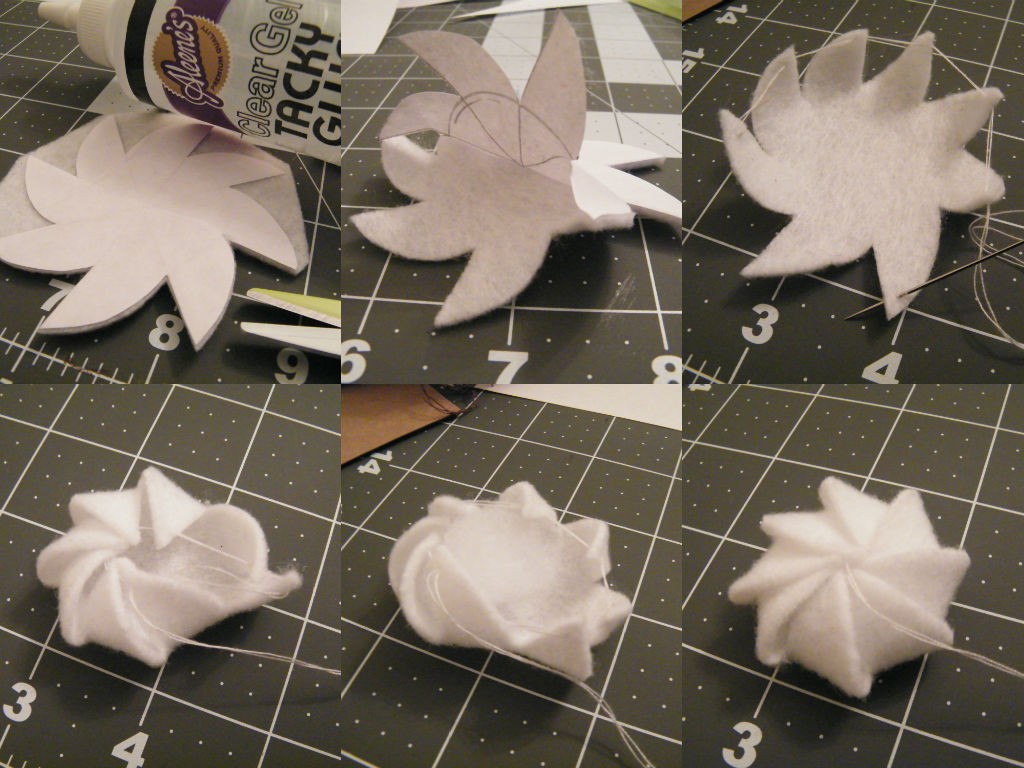
Now grab your needle and sew through each of the tips of the dollop in order – from inside to outside. The tighter you pull the string, the more it comes together. Before you tighten it completely, stick a small ball of stuffing inside. Then pull closed.
Before you get rid of the extra thread, grab a pom pom and attach it to your dollop. You can always just glue it with your optional glue if you’d rather. In my supplies picture, the pom poms shown are 1 ½ inch. I figured out that those were too big!! So I had to run back out and get some 1 inch pom poms, which fit a lot better.
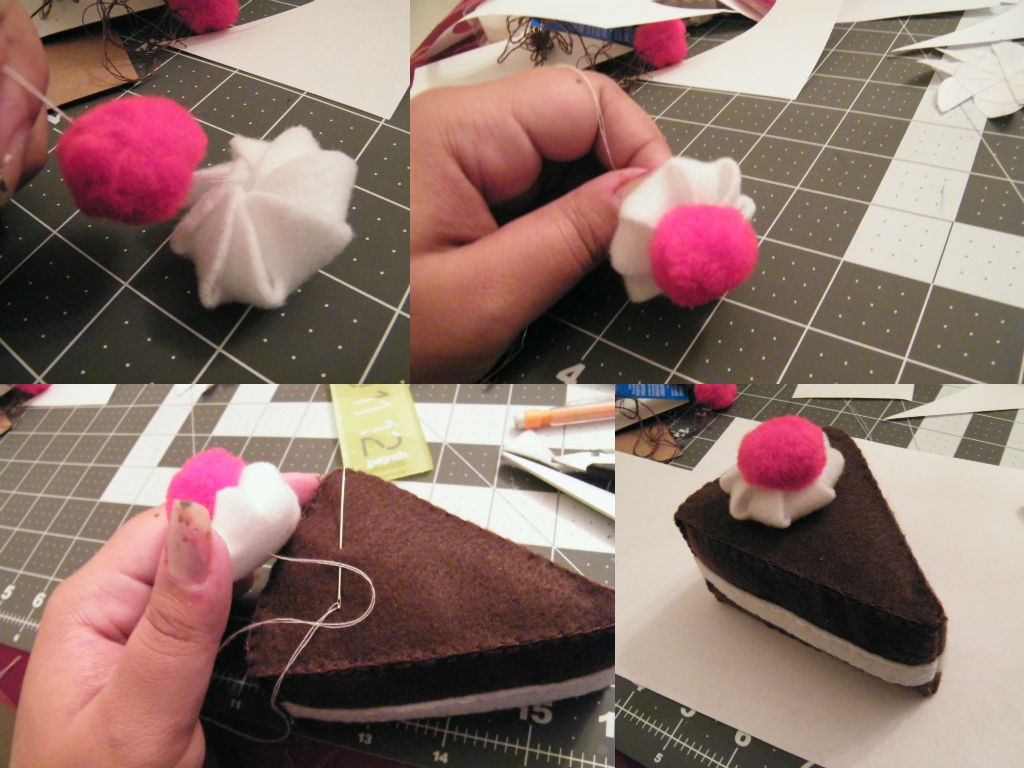
Now attach your cherry dollop to your cake. You can either sew it on or glue it. Your choice. And that’s it!
Here we have my piece of Portal cake on a lovely plate.
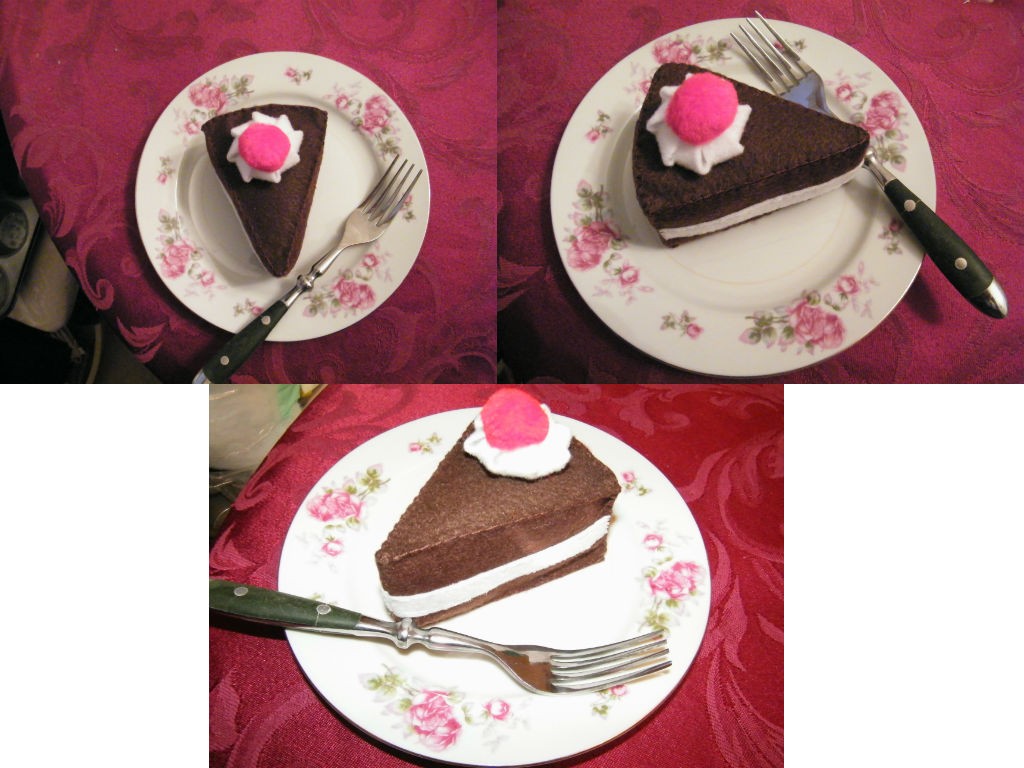
Isn’t it cute?
And here’s some shots with the flash of my phone, you can only barely see the color difference in the chocolate felts, but I like it like that.
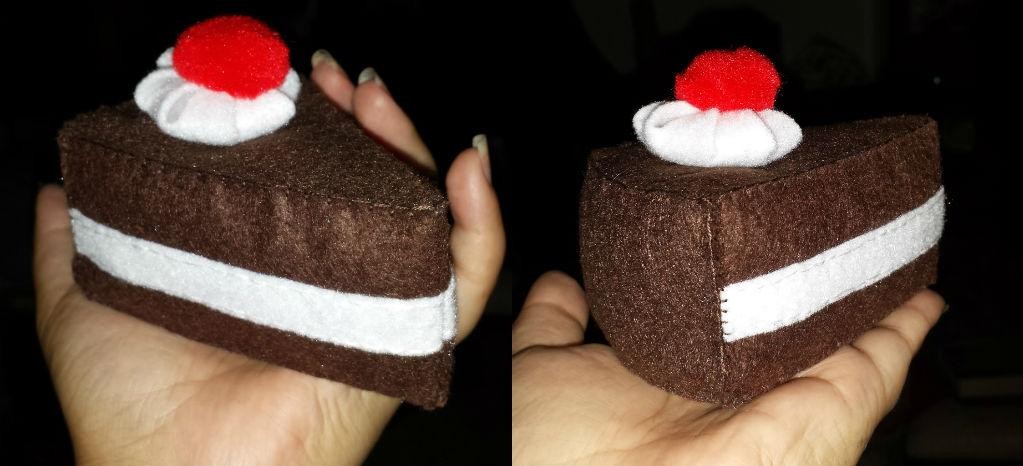
I hope you were able to keep up with my instructions, and if not, I hope the pictures helped some! I feel like I was confusing myself at times. *blushes*
I hope you’ve enjoyed today’s challenge and that you give it a try yourself! If you do, an achievement awaits!! Enter craftclub8 to get your Camp Challenge GlaDOS achievement, and please don’t forget to share your pics via twitter and hashtags #IGGPPCamp and #IggleCC! You can also post your pics on the forum here.
Yaay for House Glados!
This looks yummy!