As All Hallow’s Eve approaches I am extremely excited about Halloween decorations! But man, they get pricey! So I did what comes natural to a crafter – found a way to decorate on budget. I will be showing you how I made this awesomely spooky skull candle holder. With some inexpensive supplies this do it yourself project is quick and easy to put together. Let’s get started!
Supplies Needed
- Three skulls – the ones shown were found at the Dollar Tree
- Terracotta plates – price will depend on the size you buy. Mine were less than $1 each because I got the smaller sized ones.
- Black spray paint – or regular paint with paint brushes, but note that I used spray paint to do mine
- Hot glue gun/glue sticks – you could probably use regular glue or super glue, but I used hot glue for mine
- A cloth or box that you can get paint on – I used an old cardboard box and placed my glued together project inside of it, but you can do what works best for you
- If using spray paint, a face mask is suggested
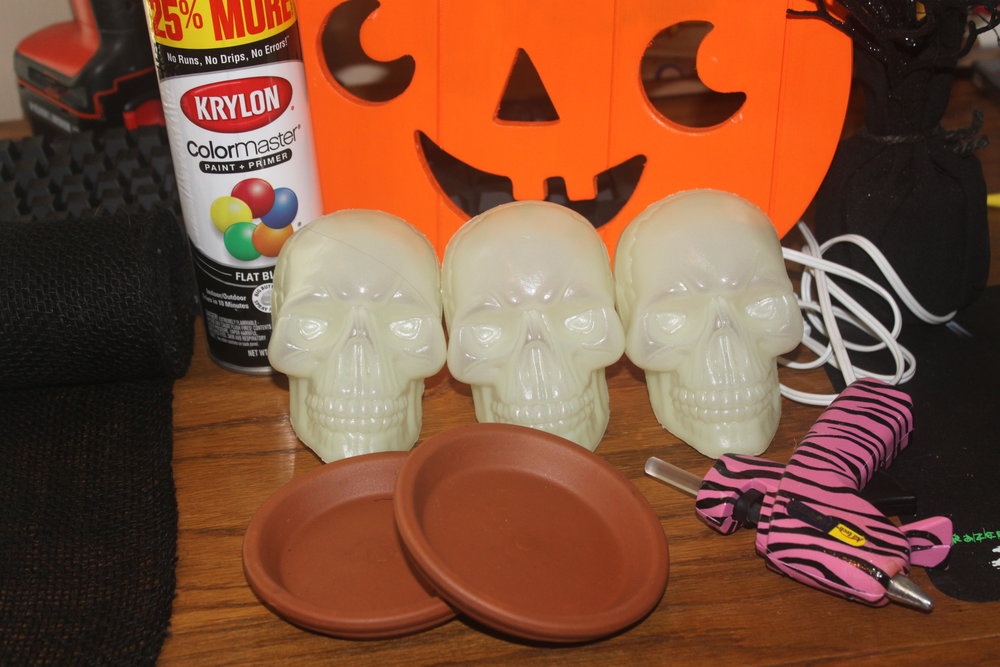
Materials needed: 3 plastic skulls, 2 terracotta plates, glue, and black paint
Step One: arranging the skulls
Now that you have your supplies together, take the skulls and figure out how you would like them arranged. As you can see, I had the middle skull face a different direction than the other two skulls.
Once you’ve figured out how you’d like to stack them, take one of the skulls and a terracotta plate and glue them together. (Please note: in the photo I had the terracotta plate right side up, I ended up pulling it off and flipping it over but I failed to take a new photo. The finished product photos show this change).
Proceed to glue each skull together – followed by the second terracotta plate being glued right side up on top of the last skull. At this point, the project probably looks a bit odd, but don’t worry! The paint will make the project complete!
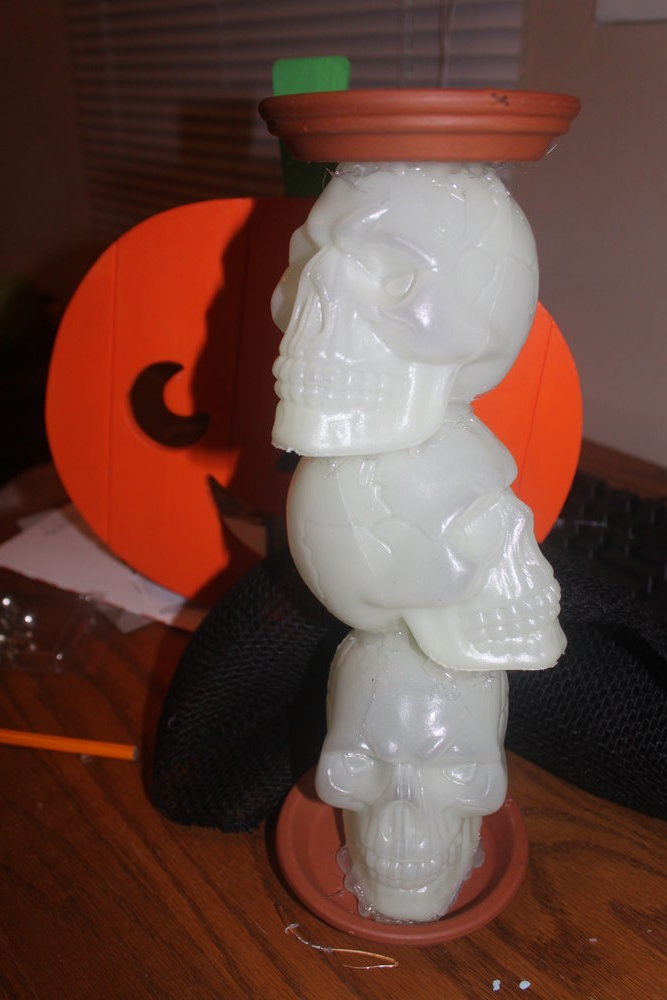
Arrange the pieces how you’d like them and then glue everything together!
Step Two
One the glue is dry you can paint your project! I went outside with my project and a cardboard box I had been using for other painting projects and got to work. Because I was using spray paint I sat the project inside of the box and sprayed away! I would spray the side I could see and then back off for five or so minutes while it dried.
I walked away between sprays to get away from the paint fumes. It took a about 20-30 minutes to get the entire thing coated evenly with paint.
Once the paint is dried, you now have a spooky candle holder for your Halloween decor! Don’t have or use candles? No worries! I currently have a few cute trinkets sitting in mine! I just wouldn’t recommend using anything super heavy – a small candle or a few small, light trinkets would be best!
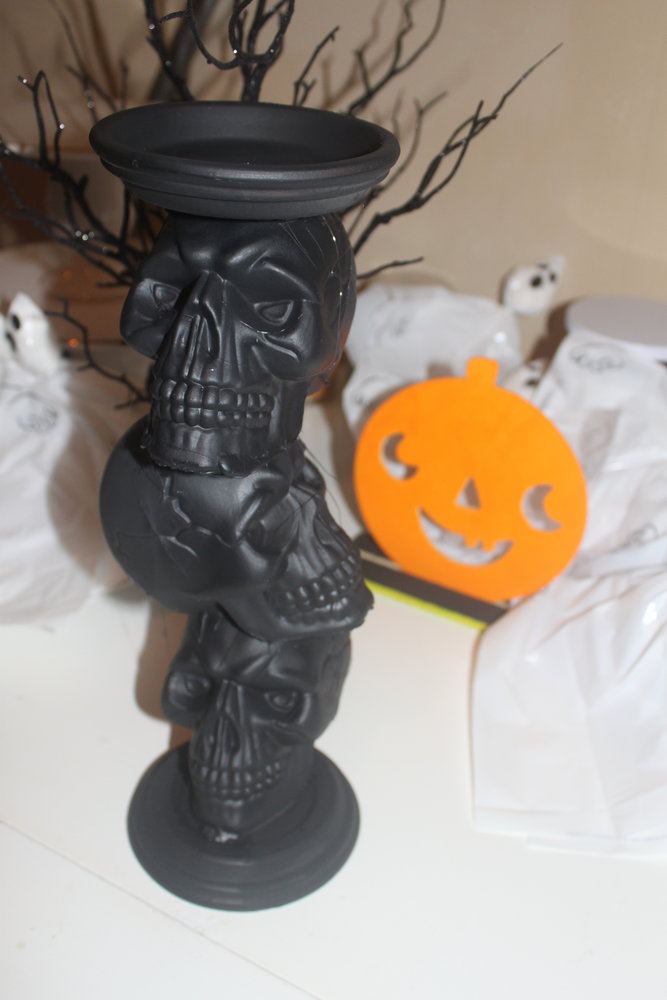
Once you’ve painted your project – you’re done! Enjoy your spooky skull candle holder
Once you’ve finished the project I’d love to see how yours turned out! Tag me on Instagram @the_littlest_liar or on Twitter @thedancingdish! Don’t forget to use #LittlestLiarDIY and #IGGPPC!
Happy crafting!


Leave A Comment
You must be logged in to post a comment.